Pages

Tuesday, 31 May 2016

Centre Step Easel Tardis Card for Tuesday!

My Tardis has been causing a bit of a reaction amongst Stampin' Up! demonstrators around the world!! As a result Friday night and Saturday was very busy on this blog...

So whilst I was packing my Going Places paper stack leftovers away from the month's classes.... my eyes suddenly spotted the 2 paper designs I had left... and I felt inspired to make a card for all the Whovians out there... many of whom I know have started to follow me over the weekend... so hello and welcome to you!!
So without further ado ...as these papers will not be available in a few hours time..... here is my Centre Step Easel Card dressed up with a Tardis in space...

But now I have made this card... I know I can go one better!!! I know the very card... So please feel free to comment on this post and so guilt trip me to making the other card I have in my head... even though the papers will have gone for good by then...
And before I go...a Top Tip for you with the windows of your Tardis... grab your clear Wink of Stella and wink away... they seriously now look rather life like!
Thank you Lynzie for this fabulous Top Tip.....(as she had opened up her new Wink of Stella seconds before she started to make her Tardis... and so it just had to be used immediately!! To such great effect....)

Monday, 30 May 2016

Aqua Winking...and Birthday Blooms

Remember this card... well seeing as it was SO popular both here in the flesh and on Pinterest... I decided to re-make all the cards in the set for my class using the Aqua-painter and the Gold Wink of Stella....
And as I demonstrated the technique at class...a  new expression came to mind...  aqua-winking... lot easier to say than the following....
1. Scribble your Gold Wink of Stella on a clear block (or piece of plastic or ceramic plate or something smooth and slippy...)

2. Pick up your Gold from the block using your Aqua Painter and aqua-wink (watercolour) as required ... note just add a drop of water if you want the colour to be even more subtle!!
3. Go over with your Clear Wink of Stella if you want even more shine...

4. Use Staz On cleaner to clean your clear block when you have finished (as the gold stains!!)
Don't forget to paper tole the flowers too... makes a huge difference to these cards... though unfortunately somewhat too subtle to see on the photos!! So you will have to trust me...

SU! Supplies
Stamps - Birthday Blooms
Inks - Gold Wink of Stella, Always Artichoke, Mint Macaron, Pool Party, Archival/Staz On Black, Versamark & White embossing powder, Gold embossing powder
Tools - Aquapainters, Curvy Corner Trio Punch, Heat Gun
Papers - Birthday Blooms
Embellishments - Gold Bow Clips, Striped Mossy Meadow Cotton Ribbon
Card - Always Artichoke, Pool Party, Hello Honey, Shimmery White, Watercolor Paper, Thin Whisper White

Go here for the lowdown on which white card was used on which card... I am definitely still loving the Shimmery White card best for watercolouring and aqua-winking...

Sunday, 29 May 2016

Beautiful Ride Beetle Gift Card Holder in A Box!

So here is the other version of the explosion box with its tutorial posted yesterday... 
Half my ladies did the boat...and the other half did the Beetle Gift Card Holder....
Everything was the same apart from that centre square... so go here for the main box tutorial (ignoring the For the Boat parts) - and here is the Gift Card holder bit...

1. Cut a piece of 13.2 x 6cm Bermuda Bay cardstock (5 1/4" x 2 1/4")
2. Score PORTRAIT every 1 cm (ie 54321) ( 3/8", 3/4", 1 1/8", 1 1/2", 1 7/8")
3. Concertina fold ( note-valleys on outer and central section)
4 Adhere outer sections on the back .... and about 1.5 cm (1/2") on inside from either side of central section
5. Cut squiggly paper square diagonally
6. Adhere diagonal to outer sections of the gift card holder
7. Trim at ends
8. Adhere to Bermuda Bay Square

Saturday, 28 May 2016

Ahoy There Shine On ... Boat in A Pop Out Box with Tutorial...

Back to another of my All Day projects... I think this was the overall favourite!!
This project was borne from a mixture of my own idea(s) and further inspiration found on the web.... which all came together to form a lovely whole!!
I knew I was going to do a re-sized project (using 12x12 Shine On card) of my  Explosion Box Gift Card Holder (Tutorial & Emerald Envy version here, It's My Party version here)... and I wanted to put a sailing dinghy - or a car - or a bike  - or whatever - for the man each crafter was making for!!

And then I was sent a photo of this fabulous project by Jessica Winter with those immortal words " can we do something like this"... well yes... right up my plan/thoughts street!! The cake quickly becoming that sailing dinghy in my head!!
I then searched for the originator of the project (as I hadn't been sent a link)... and whilst I was looking I happened upon this fabulous project by Doreen... and then all those ideas in my head and on the screen just all pulled together...

Come back tomorrow to see the other version I made for my brother or Dad.... and maybe I should complete that sailing dinghy for hubby too...
And for those of you that love a Tutorial or Two....!

For the Box
1.       Take a 12x12 piece of Kraft cardstock
2.       Score at 4” and 8”
3.       Turn 90 degrees
4.       Score at 4” and 8”
5.       Bone Fold all score lines
6.       Cut 4 corner squares diagonally  (from outside corner to inside square/corner)
7.       Fold & adhere 2 diagonal sections from either side of central section onto the central section
8.       Repeat for opposing side
9.       Do the same for the 2 other central sections but do not glue down totally so as to form the pockets

For the Lid
1.       Cut a 5 7/8” Square of Kraft cardstock
2.       Score at 7/8” on all 4 sides
3.       Dart 2 scorelines on the one side
4.       Repeat for the opposing side
5.       Assemble and adhere the lid on the finished box ( ie the totally decorated box)

Recipe for Decoration
Bermuda Bay Card 9.9cm Square (approx. 3 7/8”) (x10)
Shine On Stripe/Cloud 9.3cm Square (approx. 3 5/8”) (x7)
Shine On Wiggle/Raindrop 9.3cm Square (approx. 3 5/8”) (x3)
Kraft 2.5cm (1”) x 12” (add Washi tape and bow punch to form bow parts)

For the Boat (Beware  - inches conversion not tried and tested!!!)
1.       Die cut 2 Cutie Pie triangles from Kraft cardstock
2.       On one of them, hand punch a small hole for the mast (centrally...about 1/2cm [3/8”] in from straight edge…)

3.       Cut a 16 x 3.5cm piece of Kraft cardstock [6 ¼” x 1 3/8”]
4.    Score LANDSCAPE at 8cm [3 1/8”]
5.       Bone Fold
6.       Hand punch a small hole for the anchor/Bakers Twine

7.       Cut a 22 x 4.5cm piece of Kraft cardstock [8 5/8” x 1 ¾”]
8.    Score LANDSCAPE at 8,16 & 21cm [3 1/8”, 6 ¼” & 8 ¼”]
9.       Score PORTRAIT at 1 cm [3/8”]
10.   Turn 180degrees
11.   Score PORTRAIT at 1 cm [3/8”]
12.   Bone Fold
13.   Dart 1cm [3/8”] section score lines as necessary to form the triangular box (you will know when you get there!!! I produced a template for my ladies to ease the process on the day – this also included a notch to allow for the punched circle for the mast…)
14.   Adhere parts

15. Adhere die cut triangles top and bottom… trapping in some Bakers twine at the peak before assembly)

Stampin’ Up ! Products Used

Stamps - Going Global, Project Life Let's Get Away, Guy Greetings (anchor)
Card & Paper - Shine On Speciality Designer Series Paper, Kraft 12x12 Cardstock, Silver Foil, Bermuda Bay
Dies – Cutie Pie Thinlits
Punches – 2” Circle, 2 3/8” Scallop Circle
Ribbon & Trim – Bohemian Washi Tape, Silver Bakers Twine, Silver Satin Ribbon, Kebab Stick (trimmed for mast)

Friday, 27 May 2016

Tardis for Alice....

Here is the Tardis made by the lovely Heidi for her daughter, Alice... 

She was under strict instruction to make the signage more authentic... but still handmade... no birthday or christmas greetings here... just a white gel pen or navy marker and a steady hand... 

Nice one Heidi.... who now has a very happy and content daughter.... who appreciated her mum's creative talents wholeheartedly! But now I have been given a Dr Who Class Challenge for the summer holidays.... so watch this space...

Want to make your own... go here for the Dapper Denim Birthday version... and/or go here for the original tutorial ( with the Tardis dressed up for Christmas...)


Thursday, 26 May 2016

Going Places Mini Scrapbook Album

Another of the projects from All Day Crafting event last weekend... a 6" flip flap fold mini album using the Going Places paper stack... 
And a few shots of some of the inside pages...
Back with more on this another day... Must dash... 6 Stampin' Up! events in 10 days has somewhat made its mark!!! And breath... 


Wednesday, 25 May 2016

Oh my Word... Join me and Stampin' Up! in June...

Wow... what a promotion for you if you sign up with Stampin' Up! in June... get an extra 2 stamp sets for FREE... 

That could be worth up to £92, depending on which stamps you choose. So you can get up to £222 of product for £99... plus all the business supplies and catalogues too... great deal!!

It’s an even better deal as that’s the same month Stampin' Up! launch the new 2016-17 Annual Catalogue and all those fabulous new stamps inside it...


Quick note: Bundles and kits don't apply!

In the meantime... please do not hesitate to contact me if you want to know more or just have a no-obligation chat about how being a Stampin Up! demonstrator could suit you!! Best thing I ever did... Certainly expanded my creative world! And social... and financial... and I could go on...

Tuesday, 24 May 2016

Happy 80th Birthday Hilda

Oops did I let the cat out of the bag! Couldn't share this card on here before as it had to arrive at it destination first!
Another Square Pop Up Z Fold Card.... but a much prettier version in the Birthday Bouquet papers... as I know these are Hilda's favourite papers...
Hope you liked the card!

Monday, 23 May 2016

And finishing off with new In Colour Peekaboo Peach...

Not what I was actually planning on sharing today... but there appears to be an iCloud photo transfer go slow over here today!! I was plotting on sharing some of the new projects I have been working on for my All Day Event last Saturday... but hey not to be... hopefully from tomorrow...

So group shot today of my Peekaboo Peach projects for the On Stage Telford new In Colour displays... followed by the individual photo and link to the project in the text below... 
Butterfly Basics Swing Easel Card... with link to the card tutorial...
Curvy Keepsake Peach... this little project has caused much excitement "in the flesh"... quite a surprise to me!! 
Extra Large Peekaboo Peach Rose Wonder Card...
P is for Peekaboo Peach Box Frame ( I am still itching to add some googly eyes to this one!!!)

And that as they say... is a wrap.... or is it!!!?


Sunday, 22 May 2016

You guessed it... Sweet Sugarplum new In Colour today....

Last but one round up post... of more projects using the new In Colours for the display at On Stage Telford.... Sweet Sugarplum's turn today...
Almost 12" Box Frame from 4 pieces of A4 card... 
Explosion Bag Mini Book... with link to tutorial...
 
Rose Wonder Extra Large Card
 
Sweet Sugarplum Fairy/Ballerina Box Frame... 

And have to laugh at myself...having just viewed these photos all together- do you get the feeling I like the polka dots and then the stripes in the designer series paper packs!!!? I do like the script one too... honest!!

Saturday, 21 May 2016

New In Colour Flirty Flamingo projects

Another round up post of some of the projects made using the new In Colours for the Display at On Stage Telford...
Extra Large Double Display Card featuring Swirly Bird flowers...
Home Made delish Bakers Box...
Happy Birthday Swirly Bird blobs card!
F is for Flirty Flamingo Box Frame...


Friday, 20 May 2016

New 2016-18 In Color Emerald Envy Projects

Another group shot... featuring Emerald Envy today... plus the individual photos with links to more photos and details in the text line below...

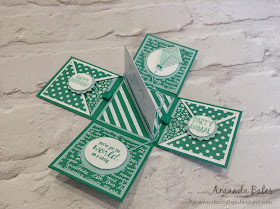
Emerald Kite Gift Card Holder Box (with Tutorial)
Bloomin Emerald Wedding Anniversary Card
Front Door Centre Step Easel Card (with card tutorial linked from the post)
Work of Art Tractor (the card with the most saves and comments on Stampin Connection... proving I am not the only daft one around...)
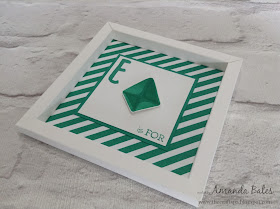
And lastly the E is for Emerald Envy Box Frame

Just realised I didn't explain how I created the Emerald when I posted this... it is just the back of the Swirly Bird kite stamps ( yes the solid part you normally put on the clear block)... and then stuck on upside down to create an emerald....