Couldn't resist a few more Gap Cards for some of my customer thank you cards...
Just changing up the colourway slightly... as the blue of Bermuda Bay is so much more me...
Click here for the Gap Card tutorial...
Products used are Garden Lane papers, Butterfly Wishes, Daisy Lane & Medium Daisy Punch, Healing Hugs, Leaf Punch, Floral Centres and Stitched Rectangle dies...
Pages
▼
Thursday, 31 October 2019
Wednesday, 30 October 2019
Wednesday WOW!!!! Silvery Stars in Your Eyes... #6
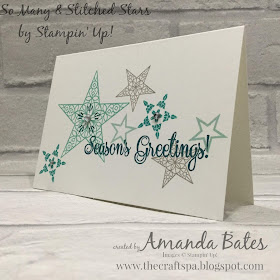
And still simple to create... though the most difficult of my So Many & Stitched Stars series... series one! As yes... this is the last one of the first series...
Spot my snipping of that detailed star flourish again for those corners... 2 corners.. so just in half!
And the gorgeous Greatest Part of Christmas stamp set for the beautiful and large greeting! This is a hostess exclusive set... but please contact me to find out how to get yours if your order is under £150... as there is more than one way!
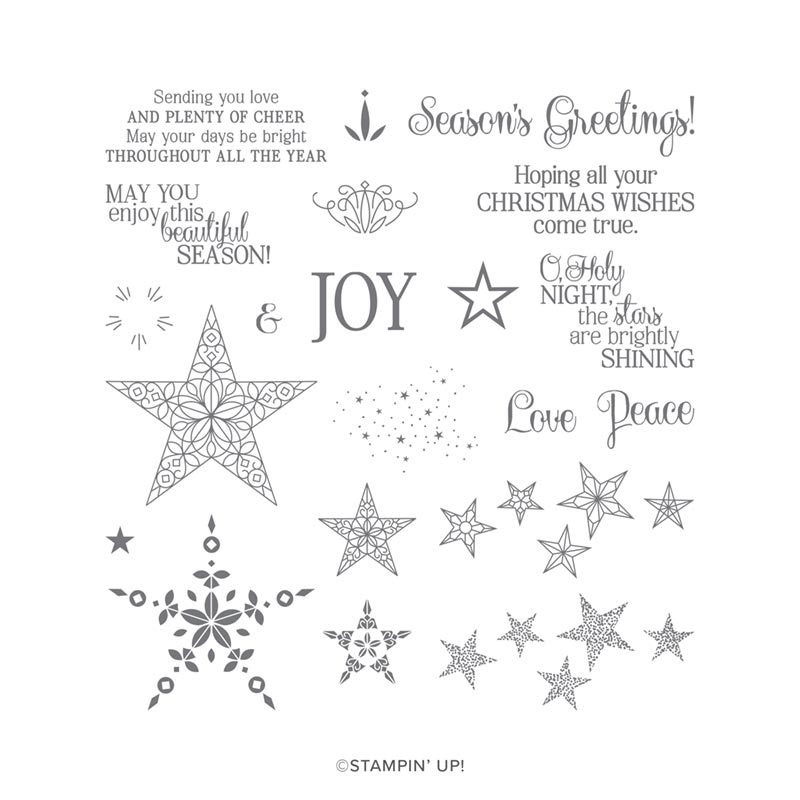
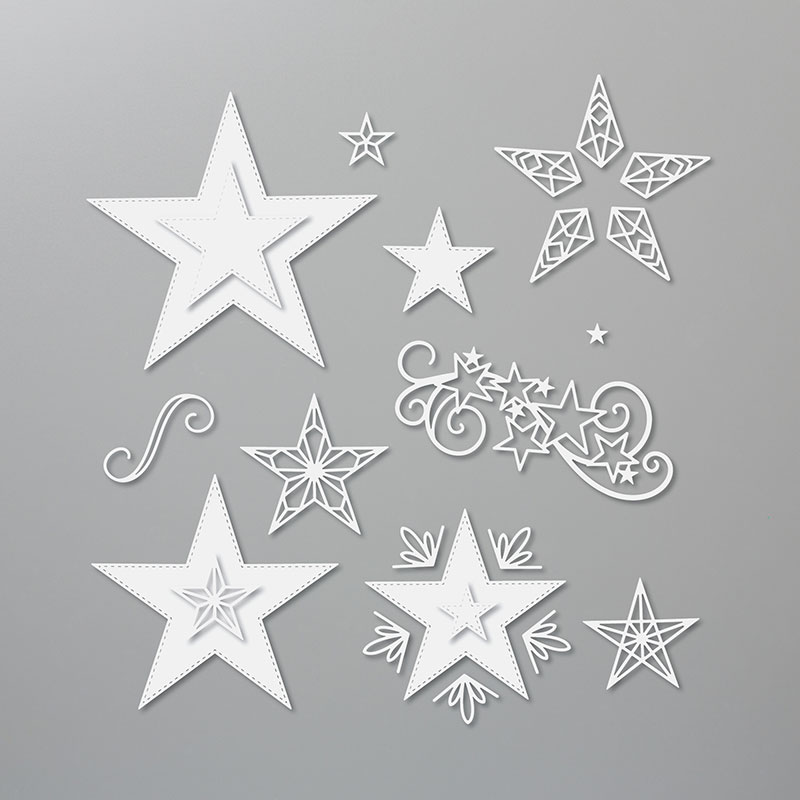
So Many Stars bundle (including Stitched Stars dies)
Stitched Rectangles dies
Cardstock - Thick Whisper White, Pretty Peacock, Coastal Cabana, Silver Foil
Inks - Delicata Silver, Pretty Peacock (marker pen)
Embellishments - Noble Peacock Rhinestones
Tuesday, 29 October 2019
So Many & Simple Star Burst Note Card #5
Just a series of stamping in lots of lovely co-ordinating colours and the card is done... Pretty Peacock, Coastal Cabana, Bermuda Bay, Pool Party and Gray Granite being used here...
So what colours would you like to try?
Stampin Up! Products used
So Many Stars bundle (including Stitched Stars dies)
Whisper White Notecards & Envelopes
Inks - Gray Granite, Coastal Cabana, Pretty Peacock, Bermuda Bay, Pool Party
Embellishments - Rhinestone Gems
Monday, 28 October 2019
Brightly Gleaming Stitched Stars Gap Card
This may seem familiar... but different...
Turn the prepped piece of paper over at a Craft Spa class... and this is what you get... shiny, bright and warm for the season!! Everyone loves this piece of paper!!! Both sides...
And... seeing as I forgot it the first time round... the link for the tutorial for this card is here... just turn it round so that the card is portrait!
Talking of the Brightly Gleaming papers... which are unorderable as demand is so high... More are due in this week (maybe even today) so head on over to the product page in my Online Store by clicking here ... Add to Cart... and a message will pop up asking you to enter your email address to be notified when the stock comes in... and then you can order when that email hits your inbox... but please don't delay...
And whilst you are at it... same goes for the Feels Like Frost papers which you can find by clicking here ...
Click here to see the original Stitched Star Gap Card with further details...
Oh... and anyone else for the Pretty Peacock kit!!?
Edited to Add:- Thank you so much for all your messages checking how I am! So the op went fine on Saturday with no complications... I was back home within 6 hours! And recovery so far so good! I will have to have 1-2 weeks taking it easy (which I will find somewhat difficult!!!) but the bloggio is already organised in advance as they say!!! Fret not!!!!
Sunday, 27 October 2019
So Simple Many Stars Notecard #4
And this has to be the simplest starry make this week... so far!!!
You could definitely knock a few of these out in an hour! Anyone like the challenge?
Stampin Up! Products used
So Many Stars bundle (including Stitched Stars dies)
Whisper White Notecards & Envelopes
Inks - Gray Granite, Coastal Cabana, Pretty Peacock
Embellishments - Rhinestone Gems
Edited to Add:- Thank you so much for all your messages checking how I am! So the op went fine yesterday with no complications... I was back home within 6 hours! And recovery so far so good! I will have to have 1-2 weeks taking it easy (which I will find somewhat difficult!!!) but the bloggio is already organised in advance as they say!!! Fret not!!!!
Saturday, 26 October 2019
Oh so simple Stitched Star #3
White embossed stamped star on Gray Granite... Stitched Star die cut around... finished off with a Noble Peacock Pretty Peacock coloured rhinestone at the centre...
Greeting inked up in Gray Granite.... ink on CHRISTMAS WISHES removed using a Blender Pen... then the Pretty Peacock marker pen used to over ink CHRISTMAS WISHES... and then stamped...
All set on a 10.5cm Square (US equivalent 4 1/4" Square) card blank...
Stampin Up! Products used
So Many Stars bundle (including Stitched Stars dies)
Cardstock - Thick Whisper White, Gray Granite
Inks - Versamark, Gray Granite, Pretty Peacock (marker pen)
Embellishments - Noble Peacock Rhinestones
Friday, 25 October 2019
So Many Stitched Stars in my Eyes #2
Ok... so the So Many Stars stamps and Stitched Stars dies are officially my favourite Bundle in the Autumn Winter Catalogue... and being honest with you... I wasn't even going to buy them!!!
But as they are so great for all year round use... and can be used for virtually every occasion... it did seem rather daft not to get them!!!
And I am SO glad I did... This is like a bumper set of dies and stamps... there are so many... and there is so much that you can do with them!!
So the world is your oyster as they say... (or should that read galaxy or cosmos or something!)
So I have a few starry shares over the next few weeks for you... as once I started I couldn't stop!
Colour combination a combination of everyone's favourite colour in these parts (Pretty Peacock) and colours that weren't already out for classes... as I had to squeeze all my star stamps in just one stamping station! So Gray Granite, Bermuda Bay, Coastal Cabana and Pool Party came to the rescue...
Though I hope to squeeze in some time for some more with other colour combinations now that this weeks classes are out of the way!!
But just keeping it simple for now... this card being a CASE of a CASE of a CASE of a card that I made over 15 years ago (probably with Caroline or Jayne or Debbie) when I first started card making! And one that has never left my mind!! In fact I think the first variant of this was my first hand-made christmas card that I sent out to everyone all those years ago...
But it had to be done... as that stitched aperture for the star is just ... gorgeous!
The "glitter bauble" being just a punched silver glimmer 1" circle popped behind the aperture... Simples!
And if you want more ideas along these lines... just Google (or search on Pinterest) "christmas star card" ... and you will see lots more....
Thursday, 24 October 2019
Christmas Gleaming Ornaments #2 - Tutorial and The Table Light Decoration
So whilst I was making my Christmas Gleaming ornament in the coppers to co-ordinate with my own tree... click here to see that one...
I realised that embossing on foil was a dodgy process... Firstly as it blisters if you don't heat and move quickly enough... and secondly as the glue doesn't dry so quickly... so it makes the assembly of those little baubles much more difficult than it needs to be!!!
So everyone moved onto Real Red and Very Vanilla in my classes... to stunning results... and they all co-ordinated better with their trees too...
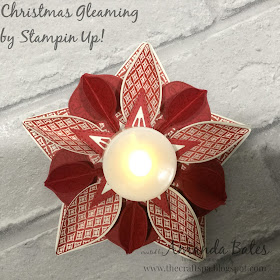
So I had to make a few of my own... as I had had a few other ideas for the use of my ornament ... such as the simple table decoration complete with battery operated tealight you can see here...
And that has given me the chance to provide a photo tutorial too...
Inkup, stamp and punch 15 large and 15 small baubles... plus a 2 1/2" circle and die cut the Stitched Stars...
Score each bauble down the centre and bone fold...and stick three together...
Place a large Stampin Dimensional (3D foam pad) in the centre of the punched circle...
Place and adhere the 5 large trios equally around the circle... just touching the 3D foam pad in the centre
Use your die cut star to eyeball where your smaller baubles need to go...
Place and adhere the 5 smaller bauble trios...
Pop your star on top...
Pop your tea-light on top... You could probably work out a way to stick the tealight onto the star and still be able to operate the switch... but this way works fine too!
Slightly different if you are producing an ornament... or fancy tag! As I have stacked up about 3-4 3D foam pads on top of each other.. and then stuck the star down onto the first 3D pad...
Then the thread gets added... with another plain punched large bauble and punched circle to cover up the back...
And a Metallic Element on the centre to finish...
I realised that embossing on foil was a dodgy process... Firstly as it blisters if you don't heat and move quickly enough... and secondly as the glue doesn't dry so quickly... so it makes the assembly of those little baubles much more difficult than it needs to be!!!
So I had to make a few of my own... as I had had a few other ideas for the use of my ornament ... such as the simple table decoration complete with battery operated tealight you can see here...
And that has given me the chance to provide a photo tutorial too...
Inkup, stamp and punch 15 large and 15 small baubles... plus a 2 1/2" circle and die cut the Stitched Stars...
Score each bauble down the centre and bone fold...and stick three together...
Place a large Stampin Dimensional (3D foam pad) in the centre of the punched circle...
Place and adhere the 5 large trios equally around the circle... just touching the 3D foam pad in the centre
Use your die cut star to eyeball where your smaller baubles need to go...
Place and adhere the 5 smaller bauble trios...
Pop your star on top...
Pop your tea-light on top... You could probably work out a way to stick the tealight onto the star and still be able to operate the switch... but this way works fine too!
Slightly different if you are producing an ornament... or fancy tag! As I have stacked up about 3-4 3D foam pads on top of each other.. and then stuck the star down onto the first 3D pad...
Then the thread gets added... with another plain punched large bauble and punched circle to cover up the back...
And a Metallic Element on the centre to finish...
Tuesday, 22 October 2019
Stampin' Up! 24 hour Flash Sale is on...
Yes you read that right... we have a One Day Flash Sale for you... but it's only for 24 hours... finishing 10.50pm tonight, 23 October...
Click here to see what is on offer with the images... and to shop online...
Or click here or on the image below to see the list format...
This Flash Sale includes a large number stamp sets from the Annual Catalogue... all with a discount of 15%...
And don't forget to enter this months Host Code MGZDUYGK where prompted... as I would love to send you a gift next month ... which will be in the post under separate cover...
Noble Peacock Birthday Concertina Box Card with Tutorial
So I have a tutorial as requested for you today... today's Noble Peacock card being for a birthday... whereas the previous share here was for Christmas (using Brightly Gleaming)
Stampin' Up! are bringing us a One Day Flash Sale starting 11pm UK time tonight... until 10.50pm tomorrow 23 October... 15% off a large range of stamp sets in the Annual Catalogue...
Click on the image below to see all the discounted stamps ... or click here to email me for a full copy if you have not already had an email from me... or the click on the image doesn't work!!!...
And so back to my Tutorial for the Concertina Card in A Box...
Craft Spa Recipe
Paper 4" x 12"; 4" x 10"
Coloured mats - 1 3/4" x 3 1/4" (x 4 each of 2 colours)
Whisper White mats - 1 1/2" x 3" (x8)
Box Lid Bermuda Bay 6 3/8" x 4 7/8"Box Base Bermuda Bay 6 1/4" x 4 3/4"
3/4" Circle Punch
Papers - Noble Peacock Papers, Noble Peacock Foils
Cardstock - Bermuda Bay, Granny Apple Green, Whisper White
Stamps - Butterfly Wishes, Well Said
Dies - Large Letters (retired - Sorry!)
Embossing Folder - Tufted
Craft Spa Tutorial
1. Place 12”paper piece LANDSCAPE on trimmer
2. Score at 2 ½”, 5”, 7 ½” & 10”
3. Place 10”paper piece LANDSCAPE on trimmer
4. Score at 2 ½”, 5”& 7 ½”
5. Bone Fold 12” piece Valley,
Mountain, Valley, Mountain
6. Bone Fold 10” piece Valley,
Mountain, Valley
7. Apply ink to left side/edge of 10”
strip if necessary
The Noble Peacock papers used here have a white core so better to ink up with some Noble Peacock ink – I just placed the edge onto the ink pad… and used a tissue to wipe away any excess ink ( as these papers are foiled so the ink will not sink into any foiled parts!
The Noble Peacock papers used here have a white core so better to ink up with some Noble Peacock ink – I just placed the edge onto the ink pad… and used a tissue to wipe away any excess ink ( as these papers are foiled so the ink will not sink into any foiled parts!
8. Place 12” section to left and 10” section to
right in front of you
9. Adhere 2 together placing the left
hand side of the RH 10” piece over the short width of the LH 12 piece”
10. Score both box
panels at 1” on all 4 sides
11. Bone Fold and
dart on 2 opposing sides
12. Punch larger box
section (ie lid) on 2 longer sides with ¾” circle punch
13. Apply glue and adhere (smaller)
Base Box
14. Apply glue and adhere
(larger) Base Lid whilst on the Base…
15. Adhere sides of
Main Card onto Box Lid and Box Base (my Lid is on the LHS, and Base on the RHS)
16. Decorate as necessary.
I die cut 4 Noble Peacock paper Old Olive letters and 4 Noble Peacock Foil Bermuda Bay letters (which are then embossed using the Tufted embossing folder for a bit of texture!)
I die cut 4 Noble Peacock paper Old Olive letters and 4 Noble Peacock Foil Bermuda Bay letters (which are then embossed using the Tufted embossing folder for a bit of texture!)


