Showing posts with label At Home With You. Show all posts

Friday, 17 August 2018

At Home With You Centre Step Easel Card Tutorial for Fancy Fold Friday

Back to a previously published card and post... for which I didn't post the Tutorial at the time... or even a few days later as planned... when I posted a New Home version... 
And I have already had a few of you ask me this year for a Tutorial... so here it is... the Centre Step Easel Card Tutorial... specifically sized for the At Home door & windows...
Stampin Up Products Used
Seasonal Layers dies (planter from chair die cut on xmas version)
RETIRED Brick Wall embossing folder (floor tiles on front/base section: Sahara Panel 13.5 x 6.5cm - 5 1/4" x 2 1/2"
Front Smoky Slate Panel 13.5 x 2cm (5 1/4" x 3/4"

Go here for an earlier Centre Step Easel Card variant if you need photos to accompany the step by steps... 
Centre Step Easel Card Tutorial (Metric from A4)

1.             Cut PORTRAIT A4 cardstock to 14cm wide
2.             Cut LANDSCAPE A4L panel to 28cm long

3.             PORTRAIT at 4.5cm on Top Bar 
4.             Cut 2.5 to 13cm
5.             PORTRAIT at 9.5cm on Top Bar 
6.             Cut 2.5 to 13cm

7.             LANDSCAPE. With cuts to Left Hand Side…
8.             2.5 cm on Top Bar (LHS) Score  outside(ie top & bottom) sections (ie 0-4.5cm; LIFT; 9.5 to 14cm)
9.             5cm on Top Bar (LHS)  Score  outside sections
10.         13cm on Top Bar (LHS)  Score  outside sections 

11.         LANDSCAPE. With cuts to Left Hand Side…
12.         10.5cm on Top Bar (LHS) Score across middle/central section. (ie 4.5 to 9.5cm)
13.         21cm on Top Bar (LHS) Score across whole card drop (ie 0 to 14cm)

14.         Fold lightly…
Outer Sections – 2.5cm Mountain, 5cm Valley, 13cm Mountain
Middle Section at 10.5cm – Mountain
Whole Section at 21cm – Mountain

Centre Step Easel Card Tutorial (Imperial from US Letter Card)
1.             Cut PORTRAIT 8 ½” x 11” US Letter cardstock to 5 ½” wide

2.             PORTRAIT at 1 3/4” on Top Bar 
3.             Cut 1” to 5 1/8”
4.             PORTRAIT at 3 ¾” on Top Bar 
5.             Cut 1” to 5 1/8”

6.             LANDSCAPE. With cuts to Left Hand Side…
7.             1” on Top Bar (LHS) Score outside(ie top & bottom) sections (ie 0-1 ¾”; LIFT; 3 ¾"-5 1/2”)
8.             2” on Top Bar (LHS) Score  outside sections
9.             5 1/8” on Top Bar (LHS) Score  outside sections

10.         LANDSCAPE. With cuts to Left Hand Side…
11.         4 1/8” on Top Bar (LHS) Score across middle/central section. (ie 1 ¾”- 3 ¾”)
12.         8 ¼” on Top Bar (LHS) Score across whole card drop ( ie 0 to 5 1/2”)
And for those of you loving the Centre Step Easel Card and still having your Hearth & Home (window) dies... here is the version that is a perfect fit with those wonderful (but retired) window dies...
Friday, 8 December 2017

My favourite Detailed Gates Christmas Card!

So I remade my Christmas Gates card that I shared here (with the Tutorial for you...) as I wanted to use the Boxwood Wreaths... and make it a quicker and simpler card in a class with lots of other projects going on...

Though luckily my brain kicked into gear before I attached the Boxwood Wreath as...with all that dimension... it would never have fit in a standard C6 envelope if I had... so the Christmas Around the World papers came out again... and a simple die-cut but flat wreath & bow was added instead...
And of course... luckily the Halloween Night papers are still in the Clearance Rack for us in Europe.. so the brick sheet in there made the gate posts really easy! I have to admit that more on their way to me and that I have bought a lot of these papers since they have been in the Clearance Rack...

Rest of the details are the same as the original ... apart from the Lanterns which are also care of the Christmas Lamppost dies... which are retiring (sniff! I am so gutted!)... but they are reduced in the Year End Sale by nearly £4...
Though the Full Bundle with the co-ordinating Brightly Lit Christmas stamps is still marginally cheaper if you want the stamps too...

And I will dash a few more of these off prior to my Christmas post... quicker to create than they look... and some already prepped and ready to go ...


Friday, 10 November 2017

Detailed Gates Lanterns...

Remember these cards... well it turns out that they aren't just a card after all...

Pop a tealight in with your card and the recipient can have a  beautiful lantern/light display too...
Just remember to wrap washi tape around your tealight to make it look so much more special...
Simples!

Finally back to normal scheduling time today so as to hopefully hit a few fellow demo's blog feed before they dash off to On Stage events around the world this weekend... see you there (in the UK!) and hope you all enjoy!


Friday, 3 November 2017

Detailed Gate U Fold Card Tutorial for Fancy Fold Friday

So back to my Detailed Gates cards... I had an unexpected (and great!) night out on that Friday - so I had to suddenly stop my blog post mid flow...  And then it was a busy weekend! And then a very very busy week - or three!

But here is the card tutorial for you finally... which is slightly resized to fit the gate perfectly... sorry for the delay!

Craft Spa Card Recipe
Main Card - Smoky Slate card 21 x 
8.6cm H (8 1/4" x 3/3/8" H)
Box Sections - Smoky Slate card 12.6 x 2cm H (5" x 3/4"H) & 14.2 x 2cm H (5 3/4" x 3/4" H)
Background Panel - Whisper White Card 14.5 x 8.1cm (5 1/2" x 3 1/8"H) 

Card Directions
1. Large Smoky Slate panel LANDSCAPE (long edge along top). 

2. Score at 2.5cm and 5cm (1" & 2")

3. Turn 180 degrees
4. Score at 2.5 & 5cm (1" & 2")


Where required (ie in the event of inner sections as in the Halloween Gate Card)...

5. Score narrower LANDSCAPE Smoky Slate Box Section panel at 0.8cm (3/8") from each side

6. Score wider LANDSCAPE Smoky Slate Box Section panel at 1.6cm (3/4") from each side

7. Adhere Box Section panels to each other 
8. Make stamped background panel and trim when LANDSCAPE to 2, 10.5 and 2 cm (3/4", 4" & 3/4")

9. Adhere trimmed background elements to 3 inner faces
10. Fold Card as Mountain, Valley, Valley , Mountain
11. Adhere Box Section panels to inside of card (where relevant - none in this card) See photos for steps 15-18 here for more guidance if necessary

12. Assemble the Gate across the Front  section

13. Double stamp the gateposts (above and below each other in opposite directions!) using a Stamp A Ma Jig stamp positioner. Cut out by hand & trim as necessary. 
14. Adhere to sides of card front. Decorate as required.
Please see my Full U Fold Card Tutorial here if you need more guidance and visuals as to what goes where for this type of card fold... and yes it does all fold flat to go in the envelope!

And here are the 3 Gate cards made so far... just click on the photo to go to the relevant post with more details on the decoration... Oh and another one out in my craft space for another day!


Monday, 9 October 2017

Christmas Detailed Gate & Hometown Greetings Card


And finishing off the 3 day series with one for Christmas... with a few extra stamp sets thrown in for good measure!!
And this time I remembered to take a photo off the little scene behind the gates... 
Whisper White panel white embossed with stars from Christmas Pines, trees from Lovely as a Tree and then brayered with Dapper Denim... and I have just realised something else clever about the Sponge Brayers... I don't have to mask the horizon... I have enough control over the brayer to form the horizon myself!

And finished off with a die cut Hometown Greetings church panel... with the lights on this time..!(Wink of Stella & Crushed Curry ink)

Gateposts and lanterns care of Graveyard Gates... which is the coordinating stamp to the Detailed Gate dies used for the gate!
And then I grabbed yet another stamp set & co-ordinating dies! At Home with You... for the trees in pots, the holly garland (door garland snipped at the corners to get a straight run...) and the Classic Label punched greeting...  

And finally finishing off with some tiny 1/8" Real Red Ribbon bows and Rhinestones as baubles on the trees in pots...


Saturday, 30 September 2017

At Stately (or no 10 Downing Street) Home with you!!?

I thought I would give you a laugh for the weekend... this is a At Home With You card that did not quite work out as planned... some different ideas but the final overall execution... well you know... not quite what I had in my head originally!

It quickly got dubbed my Stately Home or no 10 Downing Street card (home of UK Prime Minister for those of you that don't know the address!)... or of course "another Tardis in the making" card... none of which were the original concept...

So I will just point out the details rather than comment on the whole...

Opening door this time as per the original concept of the At Home dies.... love that feature...
White picket fence care of chopped down Adirondack chairs from the Seasonal Layers dies... plus daisies care of one of the At Home With You stamp images...
And the crowning glory... Planter care of the Seasonal Layers Adirondack chair chopped down again ...and flowers from a different At Home With You pot...
So there you have it....  only taken me 4 months or so to share it!!!


Sunday, 24 September 2017

At Home With You New Home Card

Another card that slipped through the share net.... although I did share the Christmas version... 
The 2 cards are very similar... just a Tranquil Tide door on this one.... a sign on the door and different flowers & pots 
More details for the Christmas card can be found by clicking here... 

Friday, 25 August 2017

Petal Garden & Coffee Cafe Kitchen Table Bench Fold Card

Thought I would give you a break from Christmas and the Navy & White color combination today! 

And a quick share today... but a Fancy Fold for you as it is Fancy Fold Friday after all!  So a Bench Fold Card using both Coffee Cafe and Petal Garden papers ...
More details on the card decoration here... and/or click HERE to go and order the tutorial (s)... though please note there isn't a specific Kitchen Table one...
And a quick update on Joe and the knee op! Long day yesterday... huge bandage!!... but all went OK and he seems to be getting about reasonably OK when needs be... and the medication seems to be keeping the pain manageable so far- which was the bit I was most worried about for him... Plus he seems to be enjoying the shouts of Mum or Dad when he needs something!!!!

Tuesday, 13 June 2017

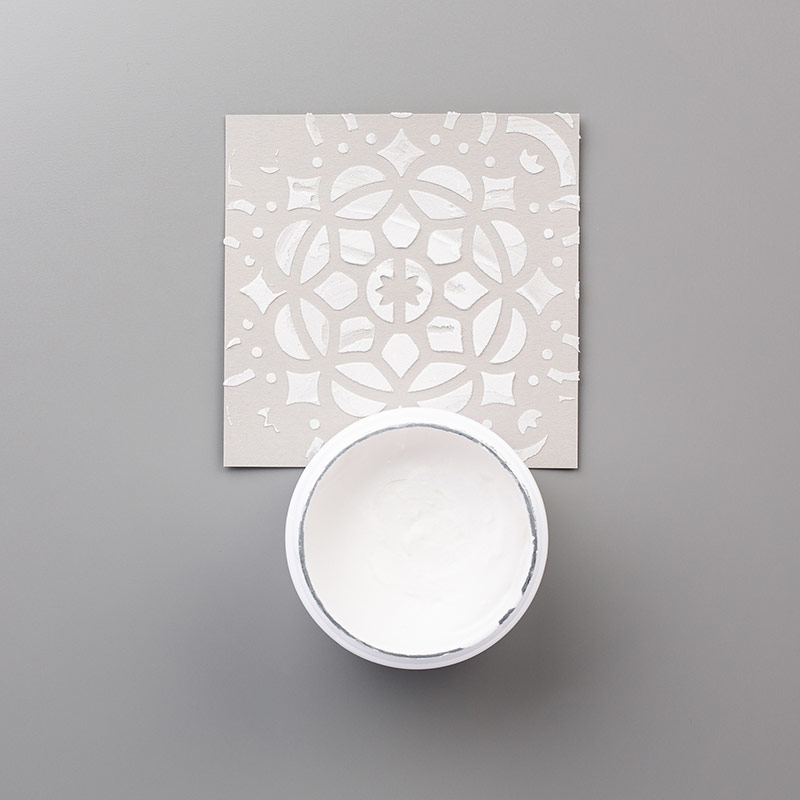
NEW Embossing Paste... and At Home With You...

And so to the last but one of my At Home With You projects... 

I was itching to get the new Embossing Paste into action for some bricks! And to see what the Boxwood Wreath embellishments would add to a project... so it had to be a christmas card...
Kept it simple... as the bricks and the wreath had to take centre stage...

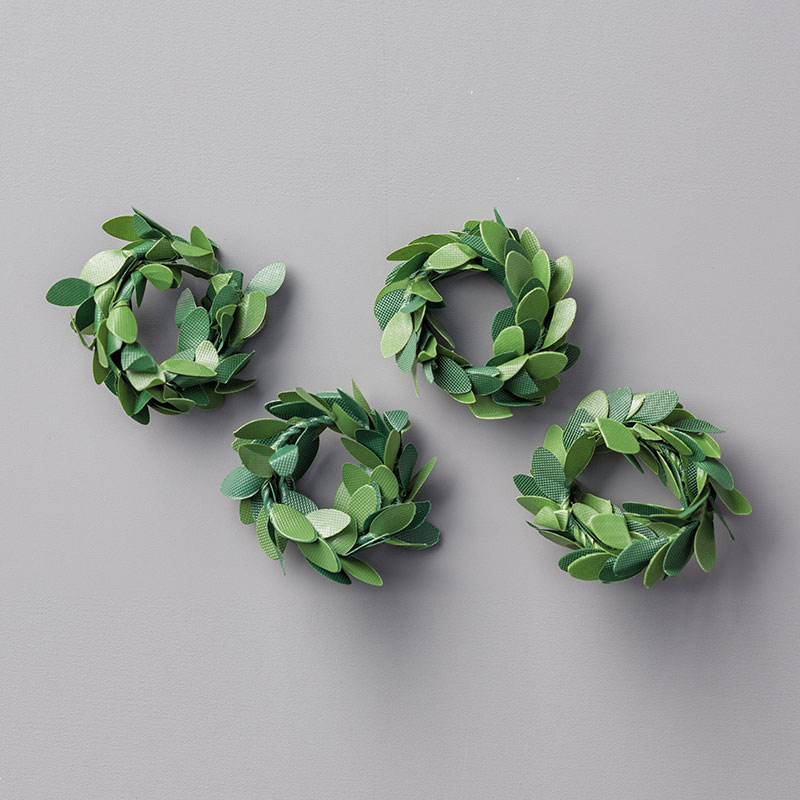
Well the Boxwood Wreaths make dressing your door child's play... I just added a Linen Thread bow and hanger to add rustic charm...
Boxwood Wreaths Embellishments
And I have to say!! I wasn't disappointed... The Embossing Paste is such fun... felt like a bricklayer for half an hour! But I bet they wish bricklaying was as quick!!
So you have a trio of products that make up the whole... which tot up to just £17.25 all in... 

Embossing Paste
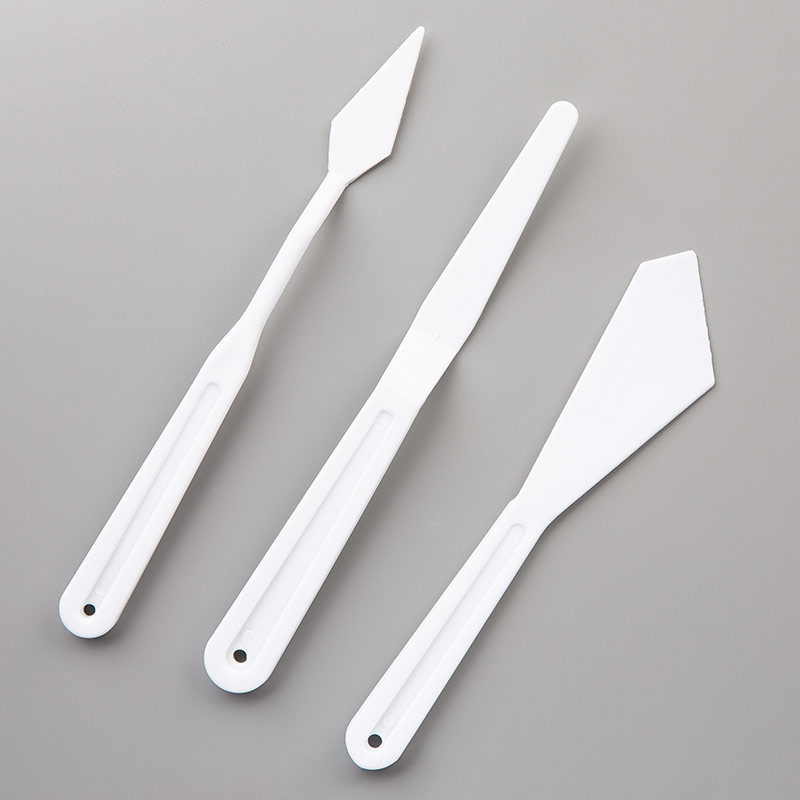
Palette Knives
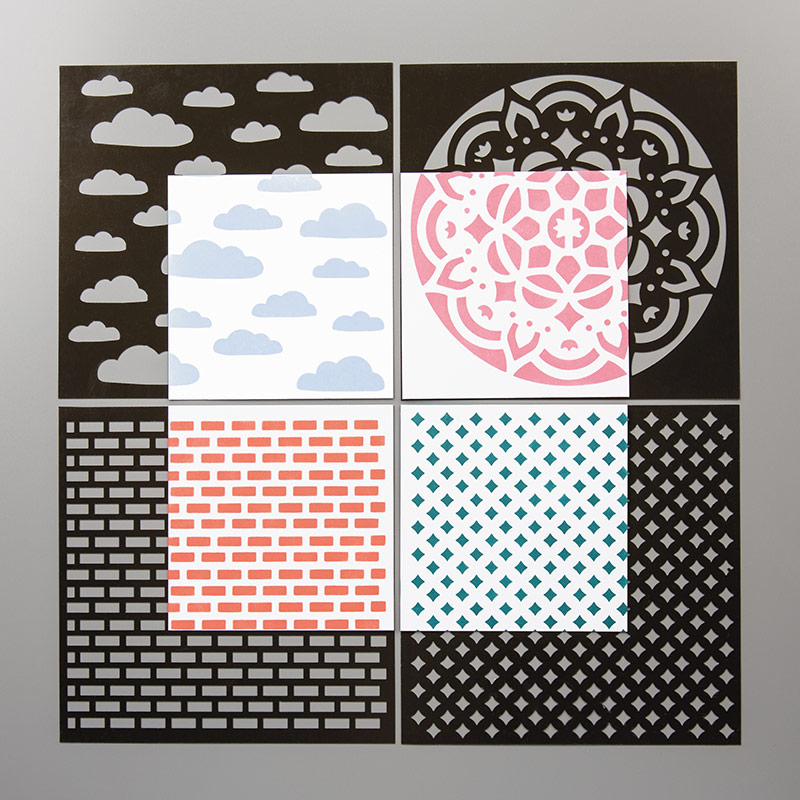
and the Pattern Party Decorative Masks to push it through... Bricks, Clouds, Mandala/Medallion and Diamond shapes! Lots of play factor... 
Pattern Party Decorative Masks
I of course just used the biggest pallete knife... slopped it on... smoothed it down into the holes... this way and that... scraped it off flat... added a bit of paste if I had missed a bit... and repeated the process until I was happy... 

Then left my pasted piece of card to the side to dry.... (which actually ended up as 3 days due to the flu! Though I think an hour or two would do it normally....)

And then it was all ready to add to the front of my card... and wow... it really adds texture and interest! But so simple.... and such fun...

I then went onto play with adding ink to the paste... sponging ink through the template after the paste bricks were dry... and a few other things... but they are for another day! But all worked well... so go on ... just have a play!
And gosh a distant memory has just come flooding back..... we used to make paper bricks!! Soggy newspaper into a metal contraption and apply pressure.... and you ended up with a paper brick to throw onto the fire (once dry!)  Wonder where that contraption has "got filed!" 

Sunday, 11 June 2017

Brick Wall embossed At Home with You

Simple card to share today... but one not to miss if you like a door .... the Tranquil Tide green green door of home!

Showcasing the At Home With You door, 2 of the pots, welcome mat and the lantern... simply set onto a Brick Wall embossed panel (and yes I did ink up the embossing folder with Sahara Sand ink before embossing... best way to get good grout!)
Now I wonder which new product I opened second from my new big box!!!? Just after the Love Today planner...... 
And for those of you waiting for the At Home With You class-in-the-mail details... and anyone else that wishes to register interest by clicking here... I will be back to you shortly... my cold has pretty much forced me to to bed for 2 days!! Yuk! But I hope to be back on it tomorrow.... I just have one last play (with that 2nd item opened from my new stash box!) before I can finalise the cards for the class and get back to you!