Saturday 30 June 2018

There is going to be a Paper Sale... from tomorrow...

A bit of advance warning for you.... as there are lots of lovely promotions running in July.... so this last post gives you the full picture... though don't worry... I will be posting tomorrow with a full run down when Stampin Up release all the information...

In the meantime just click on the links below for more information...
Click here for Sign Up with Stampin Up promotion  - extra 10 free ink pads!
Click here for Stampin Blends and The Craft Spa order promotion & 3month Club for Blends

So back to the Paper Sale... Buy 3 paper packs... and get a fourth one for free... all the papers in this promotion shown in the image below...
So just not the Speciality papers and the new Colour Family 6x6 packs... everything else is included... 

And don't forget to add Host Code 2GJ22QPH when ordering under £150 in the Online Store during July... as I love sending out gifts to my lovely customers!! Value of gift dependent upon size of order...

Friday 29 June 2018

The Stampin Blends markers are ALL in the house... and an offer for you...

Well that should say in the warehouse really...

Note that this is my second post today... just scroll down for my earlier Fancy Fold Friday creative share...

Just quickly popping on to tell you that all of the Stampin Blends alcohol based markers are now available and ready to ship when you order...

And seeing as you have had to wait a while for them... how's about a Special Offer... available uniquely from The Craft Spa... offer available until the end of July...
First of all... you need to know that there are 11 NEW colours and 11 OLD colours to select from... see page 205 in your catalogue... and look for the little pink N symbol to see the NEW colours... or go to the Online Store here to see all the colour combo packs... 

And that a "combo pack" contains one Light and one Dark marker pen in one colour... as they are what you need for the blending properties of these wonderful markers...

Order any 10 combo packs of markers and get an 11th for free (RRP £8.50) ... so for a cost of £90 including postage ...

OR a 3 month Club for the 11 combo packs.... at £36 per month including postage... and you choose which colour combo packs when... 4 packs in month 1 and 2... 3 packs in month 3... And you could then carry on for a 2nd Club if you want them all...

Though don't forget your Color Lifter, and the Bronze and Ivory "skin tone" markers too... and a Memento Black ink pad too.... The Memento pad and Color Lifter really are essentials... you want those first!

And here are the NEW COLOURS for you....
Just click here to contact me if you are interested... and I will send you more details...


Fancy Fold Friday - Accented Blooms Double Z Joy Fold Card

Another version of this easy Fun & Fancy Fold card for you today... click here for the  Large Square Double Z Joy Fold Card Tutorial...
This time featuring the new Accented Blooms image... as the top left flowers look very similar to these pearlescent flowers on the Share What You Love papers... so it just had to be done...
Coloured in using an Aquapainter and ink pads... in co-ordinating Petal Pink, Mint Macaron & Crumb Cake...

Thursday 28 June 2018

3D Thursday... Tutorial for new Lidded Box for Tag Topper Concertina Card

So I came to package my Share What You Love Tag Topper Punch Concertina card that I posted here... and realised a few things...

The Crumb Cake medium envelopes I had used previously are no longer available... though the card would actually fit in a standard C6 envelope... but the sizing is not as perfect...
Not all the ladies coming to the class had an Envelope Punch Board that I had used to create the box envelopes before... But click here for the Tutorial for the Box for the double-folded card version (ie as per the way the card is folded closed here)... OR click here for the 1" deep box for a single folded card version with lots of embellishing... and here for the 3/4" deep box for a single-folded card version (better for UK postage)
I have three ladies that seriously LOVE the Share What You Love Embellishment Kit box as shown below... so that inspired me to make a version but sized specifically for this card... and I think it worked out pretty well...
Though I have to admit that I was going to create a double-sided version...but then I remembered that it was the first box and lid for 2 of them... so I kept it as simple as possible... but this way I can also make 2 from a piece of 12x12... whereas the double-sided version would have meant a full sheet of 12x12 paper for each box...

Now doesn't that just make the most special of cards... and presentation...
Now as you can see I originally made one on a Rich Razzleberry base (as that matched the original inspirational box more...) but I switched to a Crumb Cake base for those girls that don't like their pinks...
And so here is the Tutorial... for my US readers... note that the inches measurements are a literal/nearest conversion from centimetres ... and untested... so I am not sure how "tight" the box & lid will end up...

Craft Spa Recipe
A4 Card Rich Razzleberry OR Crumb Cake 17.5 x 14.5cm (6 7/8" x 5 3/4")
Share What You Love Papers 16.2 x 13.2cm (6 3/8" x 5 1/4")
A4 Thick Whisper White card 10.5 x 14.8cm (US Letter 4 1/4" x 5 1/2")

Craft Spa Tutorial
1. Score cardstock panel at 2 cm (3/4") all round
2. Bone Fold
3. Dart score lines on 2 opposing narrower sides 
4. Fold over 4 corner flaps and apply glue to top face
5. Adhere 4 flaps to sides to form the box/base

6. Score paper panel at 1.2cm (1/2") all round
7. Bone Fold
8. Dart score lines on 2 opposing narrower sides 
9. Fold over 4 corner flaps and apply glue to top face
10. Adhere 4 flaps to sides WHILST ON THE BASE to form the lid

11. Die cut the 2 Whisper White ovals
13. Ink up & stamp Rich Razzleberry greeting
14. Adhere to each other and to lid

Wednesday 27 June 2018

Wednesday WOW! Now this is a great offer...


WOW! Now this is an amazing offer....
If you've been thinking about becoming a Demonstrator... (and no, you don't have to demonstrate or do anything unless you want to!!) then this July might just be the month for you!
If you join our group of papercrafting enthusiasts in July… not only do you get to pick £130 product from the current catalogue… but... also an additional whole colour family pack of new style inkpads (RRP £63) for FREE… for just £99 including postage… 
So that is a total of £193 product... plus the business extras for free too (such as catalogues and order forms)
And then you get to be a Demonstrator until the end of January… to take advantage of all the benefits and see if it's a fit for you! In the meantime… no pressure, no hassle, just FREE and discounted crafty stuff! For you... and maybe a few friends too... 
You can read more information about becoming a Demonstrator HERE  but if you have any questions, just click here & ask me … I'll be very happy to answer and help... even if it is just about picking the optimum Starter Kit for that £99 for you!! 
And no pressure, I promise... 
And last but not least... Don't forget to come back Sunday, 1st July.... with your product list... and click here to get started... 

And the smaller print for you ... Promotion Dates: 1–31 July 2018
Details
  • Free assortment of Classic Stampin’ Pads available only to new demonstrators who submit applications within promotion dates.
  • Each Stampin’ Pad Family is an assortment of 10 coordinating ink pads from one of the following colour collections: Brights, Neutrals, Regals, Subtles, and 2017–2020 In Colors.
  • The 2017–2020 In Color Classic Stampin’ Pads bundle (item 150289) is exclusive to this promotion and includes all colours in both the 2017–2019 In Colors as well as those as the 2018–2020 In Colors.
  • The Neutrals assortment does not include the three Basic colours: Basic Black, Very Vanilla, and Whisper White.
  • New demonstrators who submit their Independent Demonstrator Agreement (IDA) before 1 July or after 31 July will not be eligible for this promotion.
  • Order Deadlines
  • Phone: 31 July 2018; 17:50 (CET) / 4:50 p.m. (GMT)
  • OEX/Online: 31 July, 2018; 23:50 (CET) / 10:50 p.m. (GMT)

Product Videos - Sitting Pretty, Lined Alphabet & Big Plans

Just sharing the last trio of Stampin Up product videos from the 2018-19 Annual Catalogue... as the videos - coupled with the product details - have proven rather popular over the last few weeks...

Sitting Pretty... really love the bench and crazy paving in this bundle...
Click here for the Product Video...
Or on the product image below for the full product details...
Sitting Pretty Photopolymer Bundle
And here are a few projects for you too... 
Sitting Pretty Photopolymer Bundle

Lined Alphabet...
Click here for the Product Video...
Or on the product image below for the full product details...
Lined Alphabet Photopolymer Bundle
And here are a few projects for you too...
Lined Alphabet Photopolymer Bundle

Big Plans Planner Kit...
Click here for the Product Video...
Or on the product image below for the full product details... Refill available too
Big Plans Planner Kit
And here is the Planner in use ... very efficient and pretty way to plan your life... I can see a few of these been gifted later on this year...
Big Plans Planner Kit

Tuesday 26 June 2018

Tuesday Tutorial - Large Gift Bag from 2 sheets of 12x12 paper

Coming quickly back to the 
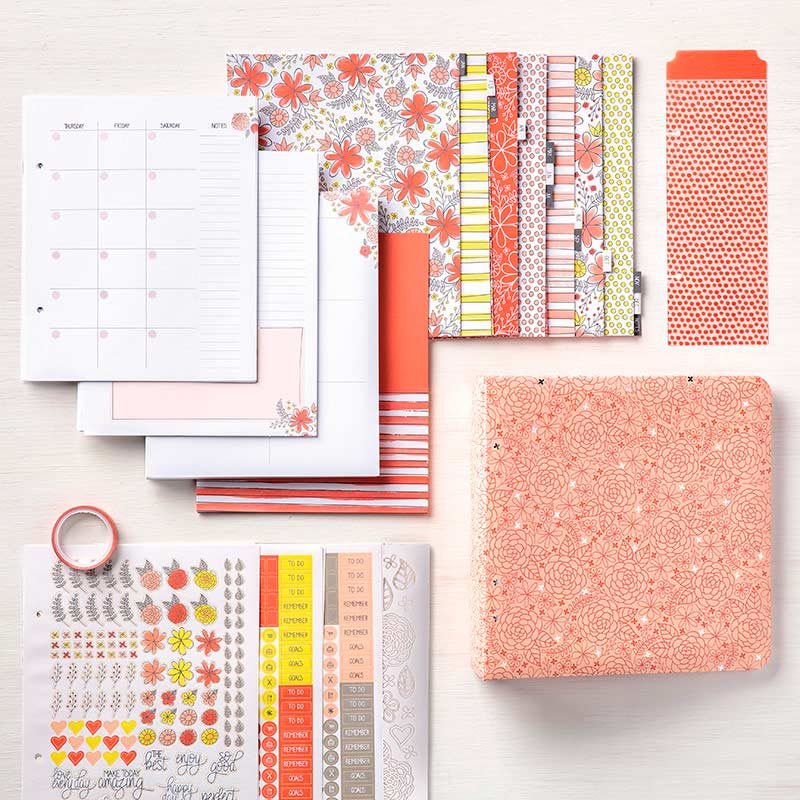
really large lovely bag I shared here last week... as my lovely crafty friends have been busy making their own over at my place... so I now have some more using different Share What You Love papers to share with you...

Plus a step by step Tutorial for you too... as well as a link to a Video Tutorial here that was created and shared by my lovely Stampin Up upline (aka mummy), Julie Kettlewell...
But first... the original credit must be given to the lovely ex-Stampin Up-demonstrator, Caroline Hallett... so much so... that this bag was even named the "Hallett Bag"...

But unfortunately Caroline closed down her Stampin Up blog and all its tutorials when she moved onto crafty pastures new... so luckily Julie shot her video tutorial... so that we can all continue to create this lovely bag... as it is one that has been on my To Do list for quite a few years...
You will need 2 pieces of the same pattern of 12x12 paper to create the bag...

Craft Spa Tutorial
REMEMBER THAT YOU NEED TO DO THE SAME ON BOTH 2 PIECES OF PAPER....

1. Place the paper in front of you.. with the pattern in the direction that you want it on the final bag...
2. Turn the paper 90 degrees...
3. Place on the trimmer & line up at 11 1/4" on the Top Bar and chop off the 3/4" strip as your handle

4. Place PORTRAIT on the trimmer (check 11 1/4" along the top)
5. Score at 1 1/4" & 10"
6. Fold over one of these "edges" to form the top of the bag...
     NOTE- Think about the pattern direction of the main bag side and foldover section...
7. Adhere this Top edge

8. Place LANDSCAPE on the trimmer (check 12" along the top)
9. Score at 1/2", 1 1/4" & 2" (NOTE - do score from the same side on both pieces)

10. Fold over & Bone Fold...
       Bottom = Mountain Fold
       Sides = Mountain/Valley/Mountain
11. Cut off slim 1/2" bottom outer section
12. Dart up sides of left and right hand score lines to create a base tab

13. Apply Tear n Tape down long thin 1/2" side tab/section
14. Remove some of protective tape top and bottom so that protective tape folded out...
15. Place down onto flat side of other piece of paper and line up...
16. Pull out rest of protective strip & adhere
17. Repeat for other side

18 . Apply glue onto bottom tab
19. Fold over one bottom edge and stick to glue...
      NOTE that the bottom sections don't each totally cover the whole depth of the bag... nature of the design..
20. Tape onto the other bottom edge, remove part of protective strip... and fold over to stick (put your hand into your bag to be able to apply some pressure!)

21. Apply tape about 2 1/2" from either side on the top edge of the bag
       NOTE this is different to the 1 1/4" used on my original bag and in Julies video... but the "stresses" were too much... so this way is easier and more robust!!
22. Adhere handles

23. Decorate as required
I used the Large die cut Label from the Share What You Love Embellishment Kit... plus a 9.9 x 6cm piece of card... corner rounded & and tag hole punched with the Detailed Trio Punch... with a simple stamped Oval from the Detailed With Love stamp set... tied onto a handle with 12" of Bakers Twine... and finished off with a bow from 13" of ribbon


Monday 25 June 2018

Share What You Love... Double Z Joy Fold Card in the nude...

This one may seem familiar... but I was asked what this card looked like but without the water-colouring of the embossed flowers front panel... aka in the nude...
And luckily I can oblige... as I had taken the before-photos!
So details as per this card here... though click here for a quicklink to my Large Square Double Z Joy Fold Tutorial..

Sunday 24 June 2018

Big Shot Embossing Mats product video and details...

I have been asked a few questions about the Big Shot Embossing Mats... so thought I would quickly share a round up of the information available...

So what do they do!  Your favorite Framelits, Thinlits, and Edgelits dies can do more when paired with the Embossing Mats. 

Use with dies that have decorative ejection holes for additional embossing. Or use with cutting dies to emboss instead of cut. Just brilliant in my book!

Includes Impressions Pad, thin silicone rubber mat, and thick silicone rubber mat.
Size:
* Impressions pad: 8-7/8" x 5-5/7" x 1/8" (22.5 x 14.5 x 0.3 cm)
* Silicone mats: 7-3/8" x 5-3/4" (18.7 x 14.6 cm)


Click on the product image below to go straight to the product video... where all is revealed about using them...
Big Shot Embossing Mats
And just £14...

Saturday 23 June 2018

Memories & More...

This one is especially for Jane... as requested...

So here is a round up of the new catalogue Memories & More offerings... You know the ones... the cards for photo pocket scrapbooking... where you just pop photos and cards in various sized pockets in a page... add a few words to log the moments (or jog the memory at a later date!)... and put in a small or large album... or alternatively... use the card designs to pop onto a card and send as a greeting card...

First up... click here for the "show the cards" and some example pages in the Stampin Up video by Tanner...

Second up... the On Stage Display Boards...  just click on the board photo to go to the product details... and remember that these all co-ordinate with a suite or kit...

First board... as you may have not spotted these... there are now some Card Blank & Envelope packs sized especially for the Memories & More cards... card making has never been so easy!! Large size here... and small size here...
Best Route... Full Suite here... 
Tea Room... Full Suite here... 
Big Plans... matching Planner Kit here...
And I hadn't spotted this until just now... but here is a complete Delightfully Detailed Supplies Set including a small album, page protectors and journalling pens...  
Delightfully Detailed Memories & More Album Supplies Set
Sorry that I am still out of sync... but I will get back to my norm soon... 

Friday 22 June 2018

Share What You Love... Double Z Joy Fold Card...

One of my fully opening Large Square Double Z Joy Fold cards using the Share What You Love papers... for which you will find the Tutorial here... 

This has been an incredibly popular and CASED card since I designed it about a year ago... so if you want videos instead of (or as well as) written instructions... just go and search "Double Z Joy Fold Card" on You Tube... and you will have many videos to choose from... though do check for the fully opening version... as there are even more of the non fully opening version I designed a year earlier... 
The front white panel is embossed with the lovely Floral embossing folder... and then the embossed face coloured in using an Aquapainter and ink off the lid of the ink-pads (squeeze until you have a little puddle on the lid) in Mint Macaron, Tranquil Tide, Old Olive, Crumb Cake, Petal Pink &amp & Calypso Coral.
And finished off with a couple of greetings from the new "best all rounder greeting set" Itty Bitty Greetings... available in clear and wood mount.... 
Itty Bitty Greetings Clear-Mount Stamp Set

Thursday 21 June 2018

Share What You Love Large Gift Bag for 3D Thursday

So this is a 3D project I have been meaning to try for years... and so glad that I finally have... thank you Caroline if you are still reading the bloggio...
Take 2 pieces of 12x12 paper and create something very special ... and large... for gifting beautifully...

Hope you can get an idea of the size with the shot below...
Sorry for my very quick share today... but this is one that I will be back to soon with more details for you...

And even more sorry that my scheduling went wrong...so this got posted at 7pm instead of 7 am... Oops!

Wednesday 20 June 2018

New Catalogue Bundles Round Up...

Whilst I wrote my Top 10 Bundles post for Monday... I suddenly remembered all the Stampin Up! On Stage Display Boards I had photoed back in April... and that I hadn't shared these with you... so now I will... as I think these are the best way to get an overview of a particular group of products... and one of the main reasons I love the Stampin Up On Stage events...

The next one is in November, so ... just thinking out loud... if you joined my team in July... then you would definitely be able to join me!! As it is good for the soul ... & crafty life... and lots of other things too... Please don't hesitate to contact me for further information... as it is an opportunity with something for everyone... whether just for the 20% discount on your own crafty purchases... or whether you want to "live a full on crafty life" like me!! As it can be recommended!!

Ok.. Ok... back to today's post... Bundles a Plenty...

21 of them.. though there are 33 bundles in total... All with 10% off the combined total when you buy co-ordinating stamps and accessories (usually punches or dies) together...