Sunday 27 November 2011

Christmas Polar Party MERRY PENGUINS card

Oh how cute are these penguins..... and the polar bear is gorgeous too....

I saw this card on In Love With Stamping by the very talented fellow SU! demo Margaret - and just had to CASE ( with my own twists...)  as it took my breath away.....

So here is a simple A6L card using Varsity Alphabet, Polar Party & Teeny Tiny Wishes stamp sets in Real Red, Basic Black - along with 2 of the new In Colors - Island Indigo and Pool Party. I just love this colour combination for a bright, fresh and fun Christmas combination.

The only problem now is that my son wants me to make this card for all of his friends!!! Good job I love stamping and a bit of colouring then....... now how will it look using the word JOY or COOL.....

Saturday 19 November 2011

Un-Convention Challenge Gift Set - Tag and Top Note Box

There is a suite of challenges been organised on In Love With Stamping for those of us demos not in Disneyland, Paris sharing in the annual European Stampin Up! Convention at the moment..... The first challenge was to create a gift set... so with Christmas in mind.... I created a tag and a Top Note box containing 4 decorated tea - light candles.

I have used the PINES & POINSETTIAS stamp set in both of these projects.  This is a stamp set that I cannot stop using ( and it didn't appeal to me at all to start with!! But I am so glad that I bought it!!) There is also the label frame from the WELCOME CHRISTMAS stamp set on top of the box.

The Two Tags die was used to create the Tag and the Top Note die to create the box lid and base. I have also used the Holly Berry Speciality Papers and some of the new Chocolate Chip Scalloped ribbon.  There is also double embossing used on the Tag using the Square Lattice embossing folder  - and then the oval frame embossing folder.

The candles were decorated by wrapping a strip of paper around the side and by stamping an image on tissue paper and then punching out using the 1 3/8" circle punch and the circle hand punch in the centre for the wick to go through ( TIP - make sure you use some scrap paper behind so that the punches can work!!) These discs were than laid on the candle and I used a heat gun to melt the wax into the paper. Very clever and  GREAT FUN!!! ( oh and I can just see a bit of Sticky Strip clinging to right hand front candle in the photo - how annoying!!!)


Next challenge - Repetition - I know exactly what I want to do  - but time and light for any photo has failed me for today. Back to the challenges tomorrow afternoon I hope!!!

Thursday 6 October 2011

Forever Young stamp set

As demos in September  - we get to pre-order some of the new stamp sets and other products that are to be released on 1st October in the new catalogue . This year I have had great fun just trying things out with my new stamps instead of everything I make being just for classes ( aka workouts at The Craft Spa!!).....

So for today  - here are a few of my favourites using the new Forever Young stamp set - I just love the tree image - but I have lots of ideas for the clock and the frame and silhouettes too....... these are images that suit so many occasions.........

The card above is a Centre Step card which we did in our workout earlier this week ( as it is my favourite!!) - but I tweaked the dimensions to fit the silhouette frames and so that it would fit in a 6" envelope.

And a couple of very clean simple (CAS) cards....
In the first one ... the blossom in the tree is made from the debris of the new Lace Ribbon Border punch ... which I used for the decorative strip at the bottom  - along with a white Signo gel pen for the centres of the flowers.....

And the girl on the swing has been coloured in with marker pens... very carefully... before inking up the rest of the stamp in Old Olive for the leaves and then an Early Espresso marker pen for the trunk and boughs.


And in this simple silhouettes card you can see the wonderful new scalloped polka dot ribbon (YUM!!)  - as well as the new Parlor Prints background stamp - which I also used on my first Centre Step card ( but it is a bit easier to see here!)


And I couldn't post about Forever Young without posting a fellow demos' Michelle's Centre Step card that I was delighted to receive in a card swap that was organised between 15 SU! demos on In Love With Stamping last week.

This card is a total WOW in the flesh so I hope that this photo does it justice!!

You can also hop around a new catty blog hop if you visit Michelle's blog.....  lots of wonderful projects and talent in this hop!!


And for my next post.... that will be the brand new wonderful Pennant Punch... and the fabulous Pennant Parade stamp set that co-ordinates with it!! And don't forget I have a special offer on the Pennant punch & Pennant Parade stamps!!

And don't worry..... it will not be 5 months until my next post like it was for my last one!!!! Oops!! Sorry!! But happy to be back........

Saturday 1 October 2011

Today is the launch day of this years catalogue..... lots of lovely new stamps; papers; dies; punches and co-ordinating FABRIC too...... as well as the 5 gorgeous new In-Colors.......  Please find the on-line link by clicking the catalogue cover picture to the top left of my blog or you can get a hard copy from me for just £3 ( £4 posted)

And a new catalogue isn't a new catalogue without some offers from me at The Craft Spa....... so I have attached my October offers to hopefully save you some money on some must-haves.......  Do check out how a few of you can get 30% off those markers......    I am planning to place orders next Tuesday (4th Oct) and then 1st November .....  These prices are all based upon collection from me at The Craft Spa in Great Ouseburn . Postage will be added just at cost should goods need to be posted on.
 
There is also a very special offer from Stampin' Up! for those of you that are wanting to join the Stampin' Up! family....... get all the new In-Color ink pads and cardstock ( RRP £27.95 ) as well for free if you join in October. ( so £280+ of product for just £119)   Link to details here......  In-Colors for Free to New Demos  
 
Please do not hesitate to contact me should you need a catalogue, or any further information on anything or to place an order.
 
PS Check out that Pennant Punch ( pg 119) and the co-ordinating stamp set Pennant Parade (pg 37) - this year's must have.... and on the offer sheet too.....
 
PPS Lots of projects using the new stamps & punches coming soon to this blog - there are some fabulous new stamp sets for you to enjoy.....

Friday 22 April 2011

BIg Shot Workout - Chupa Chup Daisy & Watering Can

Just when you all thought my immaturity was over with the Easter Bunny box..... I just had to make a lollipop daisy!!! 

We made Lollipop flowers with oval punches last  year at Bev's workshop and I also made lots for my son's birthday party last year for a treasure hunt in the woods!!

But look at these made just using the SU! Daisies #2 die and the Square Lattice embossing folder... I am in heaven ( as I have always been a daisy fan since I first got into papercrafting!!)  I don't think that this photo can truly show the difference when you emboss these daisies - suddenly they really come to life!!!

I also thought these might be an alternative idea for some as a simple Easter treat.  (though don't worry friends & family..... you will always get chocolate from me!!)

And we also made a watering can for the daisy to go in..... this is made from the Mini Milk Carton die. This die is so clever... not only does it score the lines for a milk carton... but also has the lines to form a spout... The butterflies are all made using just the one pass of the Beautiful Wings Embosslit die.  This die is amazing - not only does it cut the shapes but it embosses at the same time - fantastic - and there are 4 to choose from..... 

And here is the more grown up version of the daisy.... as chosen by most to make... don't know if that was because it is more grown-up.... or because they all sat there with a lollipop in there mouth!!! So many sweet tooths in one room....! 
If these Big Shot projects interest you  - do remember to check out my Big Shot specials - there is something there for every one/ budget!! And I will be holding another Big Shot class next month too ....

Saturday 16 April 2011

Top Note Die Easter Bunny Bag

So I am supposed to be making projects for my next class for Big Shot projects on Monday- but I seem to be STILL getting carried away with Easter Bunnies.

I saw these cute projects by Cristena yesterday...Bunny Bags and immediately stopped doing the pretty flowers I was doing - and did this instead!! This will be handed over to my father for Easter.... as he doesn't like chocolates - so the mint imperials will suit him better.... And thanks Cristena for sharing you great project and for diverting me SO well!!!

Most of the details are the same as on my earlier Easter Bunny Scallop Envelope Box  post including the owl punch waistcoat as the teeth - though this time the Top Note die was used for the head part - along with the Wide Oval punch for the main ears and the 1 1/4" circle punch for the cheeks; small heart punch for the nose and 1/2" Circle and Itty Bitty Punch trio Circle punch for the eyes ( and the toes)

And so now back to the Flower dies and what I am supposed to be doing!!

Thursday 14 April 2011

Easter Bunny Punch Art Box - or the Owl & Ornament Punch meet the Easter Bunny!!

I have finally finished the Easter Bunny Box I have been talking about in classes for weeks!! So guess what you will be making next week in our first Big Shot Workout class!!  It fits LOADS of chocolate in!!!

This project is an amalgam of many inspirations I have picked up whilst blog hopping over the last 2 years with a few little additions of my own.......

So where shall I start..... OK at the top - so the head......  the main head part is punched using the Ornament punch; the eyes , nose and teeth using the Owl Punch ( yes the goofy bunny teeth are the waistcoat part!! I just couldn't resist.....) and the cheeks using the 3/4" Circle punch.. And finally the floppy ears using the Large and Small Oval punches.

The box is made using 4 Scallop Envelopes cut using the Scallop Envelope Die. You can see the tutorial by the very talented Jane at Whoopsie Daisy to make this box here. Scallop-Envelope-bigz-die-box.  I have added the 2 largest circles from the Circles #2 die as the body and the back of the head. The front of the box is stamped using the Easter Wishes stamp from the new free Level 2 hostess set Something to Celebrate in the mini catalogue.

And the feet are the Wide Oval punch with a small Pink Pirouette oval and the smaller circles again from the Owl punch.

And I will finish this post with links to the inspirations I have picked up from blogland. These ladies are also so talented - and well worthwhile taking a bit of time off to visit & investigate their blogs.....Firstly the idea of an Easter Bunny box using the Scallop Envelope Box - I first saw this on Sandi MacIver's blog last year ( here little-bunny-box ) and have been itching to make my own ever since!! And the Ornament punch head shape, cheek structure and the start of some floppy ears are inspired by Mercedes Weber ( here Hop-Inspired-Bunny ) - I just took the floppy bit of the ears a bit further.....

Friday 8 April 2011

Greenhouse Gala Workout - Circle Easel Card

So here is the last card for next week's classes. I just HAD to use my new BIG SHOT!! So it just has to be a Circle Easel Card as we all really like these in classes!! Though this has to be the brightest one we have ever done!!


So I have used the newly available Scallop Circle die from SU! This is in our new mini catalogue which came out on 1st April. Just press the link at the top left of my blog top go to straight to a copy.  I have embossed the flower image with white embossing powder on Daffodil Delight cardstock. The Happy Birthday greeting is from thre Party This Way stamp set. The punches for the greeting are the Word Window combined with the Modern Label. I also used the Modern Label punch to add a Pumpkin Pie tab to the top right of the stamped image. All finished off with some of the gorgeous Daffodil Delight Satin Ribbon.

And guess what I am off to do next.... start lots of projects using my new BIG SHOT!!! The classes in the week after next are the first part of a series of Big Shot classes I am running over the next few months - I have 100s of ideas of things I want to make with my Big Shot stash - so the hardest part will be deciding what to do first.... guess there will be some late night crafting sessions next week.....

And oh - the first 2 Big Shot classes are free to anyone buying a Big Shot through me...... including purchases made under the Big Shot Starter Kit offer detailed above. You can either come here OR get  the prepped kit & instructions etc for use at home. So that's another £20 's worth - so hey that effectively gives you a BIG SHOT for £35....... what are you waiting for !!!!???

Thursday 7 April 2011

Greenhouse Gala Mainly Cards Workout

Here are some of the projects we will be doing in next weeks' classes. I have 2 spaces on both Monday night and Tuesday morning if anyone local can make it after all.  I will also have a couple of kits all prepped, made up and ready for assembly if anyone has the stamps and fancies having a go at home at their own pace..... Just click EMAIL ME at the top right of this page to contact me...... Classes or Kits cost just £10.

We will be making a boxed bag with 4 different 4" Thank You cards all made using the 
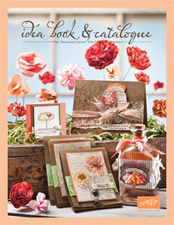
Greenhouse Gala Designer Series Paper and the Ornate Flowers stamp set. These cards have all been inspired by swaps I have received from fellow Stampin' Up! demonstrators and that my class-comers have expressed a particular interest in making for themselves - so I have a few people to mention and to thank for their inspiration...... I think that most of these swaps were from SU! Convention last November. As you will see - these cards all bear a similarity in layout although the original inspirations have been made by totally differemt people!!

For those of you that don't know.....  we Stampin' Up! demonstrators love to swap our ideas and use every "getting together opportunity" to make lots of cards etc and swap with each other...... As the SU! motto goes it really is all about "create, inspire, share"  - so we do!!!

The Box in a Bag is a tutorial by Diana Gibbs on the SplitCoastStampers web site ( Link here SCS Box in A Bag) - though I have altered the dimensions to suit the size of my cards.

And now for more pictures of the cards and the people I have to thank for such beautiful swap cards.....

This first card also uses the Elegant Thank You stamp ( available as an individual stamp) which sits perfectly over the small ornate blossom image. Oh and a large pearl.....

This card is inspired by one made by Margaret Rose (aka ayorkshirestamper) a whole year ago when last year's Mini Catalogue came out. It has sat splendidly on my display board ever since!!!  - earning the well deserved oohs and aahs all year!!


The second card also uses the So Many Thanks stamp ( also available as an individual stamp) and 3 small pearls.... what would I do without the multi size SU! packs of pearls.....   
This card was inspired by a Convention swap from Rebecca Chivers ( aka craftybecs ) - again it just had to be made after 5 months of oohs and aahs.....

And the third card.  This also uses the Thank You Kindly stamp set - which is a gorgeous set of 4 Thank You greetings. 

Thanks go to Cate ( aka blueangelcrafts - whose actual swap card is linked here) for her swap card last November.

And last but not least..... the fourth card again uses a sentiment from the Thank You Kindly stamp set. I have also used the new Textured Impressions Square Lattice embossing folder which magically turns any paper or card  into a faux fabric effect. Stunning!! And very tactile. Bet my ladies want to texturise everything in site next week!!! 

Thanks go to Anthea Goodman ( aka stampin-divas ) for her swap card last November.
.

Saturday 2 April 2011

Blog Hop - SU! UK Demos celebrate the new Mini

For those of you already hopping around..... Hello and welcome to Amanda's little blog aka The Craft Spa. You should have come here from Jane's Blog- Cheshire Design House - aren't her projects just wonderful!!

And for those of you starting here...... Hello and welcome to our Blog Hop to showcase the wonderful new products in the Stampin' Up 2011 Mini Catalogue. A number of us have got ourselves organised via the fantastic UK stampin enthusiasts web site - inlovewithstamping- and so here are a feast of projects as you go from one blog to another..... so thanks Erika for getting us organised!!!

So here a  few projects I have made during March using some of the new products...  First up is a card using the new Manhattan Flowers embossing folder perfect for weddings, anniversaries, birthdays - or indeed anything..... not only is this very "classy" but the embossing is so deep...it is just amazing.... I hope that you can get an idea of the effect in this photo.

I have kept this simple... so as not to overshadow the embossing pattern. So just a simple colour palette of Whisper White, Baja Breeze and Basic Black and use of the Ornate Flowers and Heard from the Heart stamp sets.

My second project is a Gift Card Holder Explosion Box showcasing the Fun Flowers die. Oh this die is a LOT of fun as it produces some fabulous flowers.... more of which are to come another day! The thread through the button is actually just a sliver of cardstock threaded through and tied into a knot.... I have seen this done by many in blogland....but it works a lot better than I thought it would!!!


This is a project we made as part of my Nursery Suite papers and Quick Accents classes run during March.  I have designed a number of explosion boxes and mini books during February and March - and got the idea in my head that a resizing and an extra insert would enable me to put a gift card in.... and it worked like a dream......

And that is it from me.... so thank you for visiting and..... next you are going to Sandra's Wonderful Blog  - check out these fantastic projects......

Friday 1 April 2011

Here it is! Stampin' Up! New Mini Catalogue for 2011

Not only does the 1st April bring April Fool's Day..... but the much more exciting release of the Stampin' Up! Mini Catalogue with more new SU! products that will be with us until 30 September........ Just press the picture on the top left of my blog and you will be taken straight to it!!

Over the next few days I will be posting many projects using some of the new products - including a blog hop tomorrow Sat 2nd April at 10 am GMT amongst many of our talented UK Stampin' Up! demonstrators .

And the launch of a new mini just wouldn't be the same without a few Specials for orders during April. These are from me at The Craft Spa - not Stampin' Up.... Please see my new Specials pages at the top for further details - but I have 5 main types of offer for you......
  • Fancy a Big Shot for £55 ??? See my Big Shot Starter Pack Special
  • get exclusive Stampin Up dies etc for up to 15% off.  See my Big Shot Die Pack Deals
  • £25 co-ordinated paper packs with 12x12 papers; buttons, cardstock; ribbons & inkpads -AND you can also add the co-ordinating stamps at 25% off. See my Mini Catty Specials.
  • Buy the stamp set and get 30% off the co-ordinating punch. See my Mini Catty Specials.
  • Share all the new mini goodies from just £14 (need 8 to share!). See my Mini Catty Specials.
As those of you that know me.... I am in embossing folder, dies and buttons heaven....... And check out those Embosslits too - they are amazing.... wonder what I did before without them ...... I am SO HAPPY that these Big Shot goodies have finally come over the pond... I just need loads of you to buy them now.... and then we can have loads more come October with the new 2011-12 Idea Book & Catalogue...... Yes I am a I WANT IT ALL sort of a girl!!!

So what you should particularly check out...my top faves are.....
1.  All the dies of course!!! But particularly the Top Note, Fun Flowers , Little Leaves, Circles - and of course the Embosslits..... And the Big Shot to use them!!!! LOL!!!
2. Embossing Folders - 2 favourites being Manhattan Flowers and Square Lattice ( very clever techniques using this one!! Watch this space...)
3. Four Frames and the Decorative Label Punch - first it was the SU! circles, then last year the ovals... and now these!!!!  Absolutely wonderful !!
4. Big Designer Buttons - oh WOW!!! These are SO big.  Most being 1". And such wonderful colours too..
5. And ahh!! The Springtime Vintage suite - where were these papers when I was doing a Papercrafting course 4 years ago with Cath Kidston as my Designer inspiration... Think Cath Kidston... Think Laura Ashley.... Be in Vintage Chic heaven..... I may have to get that portfolio out and remake all those wonderful cards using these......

Hope that the mini has something in for you that excites me as much as I am!!! And if so - tell me what by adding a comment below.....

Just press the EMAIL ME link at the top right of my blog to contact me for orders or for further details on any of my specials.

Thursday 31 March 2011

Nursery Suite & the Baby Girl Mini Scrapbook Page & Fancy Cover


So this is the other project we did in the Class with the Baby Boy Flap Mini Book.   Apart from the Fancy Flower Punch flower - this is a CASED project of the one to the right  ... but with a story....  and with no-one (or two!!) to attribute it to - so please let me know if you know/are the originator of this - so I can not only credit you properly - but thank you too!!

I first saw this on the Display boards at the Stampin' Up! Convention in November last year - and it just took my heart away!! It certainly inspired me to buy all my ladies a set of Nursery Suite papers and Quick Accents .... but then I couldn't find a photo of the project that I thought I had taken at Convention.

So I set too designing another project using this wonderful 12x12 Scalloped Circle piece of paper... and I got really excited about my new idea... and I had even almost finished the sample for class.... and then it was Stampin' Up's regional training event in Leeds.... and Lo and Behold - what was on the Display table but the same project I had seen back in November.... so a quick photo later.... and my class stayed as per the original plan..... one day I will finish my other circular paper project that I was so pleased with ... and post it here.... so watch this space......

Please see details of The Baby Boy Mini Book posted earlier for details on the tutorial for this project. 

Nursery Suite & the Baby Boy Flap Mini Book!

So another project using the Nursery Suite papers and Quick Accent stickers.  This is an update of another favourite project of mine - namely the Flap Book of the  Newsprint mini-books. I loved this simple little book then... but I absolutely adore it now.....  I knew I wanted to do another of these books as soon as I saw this gorgeous fancy scalloped edge piece of 12x12 paper - I wasn't sure it would work ( ie line up OK...) but it SO did.....

This flap book is orienteered the other way round to the original. That is to say, it opens with a top flap rather than the original's book page format. And I added punched 1" circles down the right hand side to visually pull it together when the book is closed.... a little thing that made a HUGE difference..... 

And here are a couple more pictures to show you the inside of the book - this piece of paper is amazing!!! And you get 2 in a full pack......


Edited to Add:  I have had quite a bit of contact about the details for this.....   If anyone else would like the tutorial ...I can provide by email for £2.50 ... payable via Paypal....  ( sorry no proper Paypal/order button as yet... that is my next blog project!!)  The tutorial will also contain the Scrapbook Page & Fancy Cover due to be posted soon!!

Please just press the Email Me button at the top right of this page and I will get back to you.....

Nursery Suite & Easter Bunny Punch Art

March has been full of 3 classes' worth of projects using the Stampin' Up! Nursery Suite papers and Quick Accents stickers. These have been wonderful to use for Easter & Mothers Day projects as well as the more obvious baby projects.

So I have a number of quick posts for you - showing some of the projects we have made in the month. Some of the projects can't be posted until 1st April in any case.... as I was naughty and couldn't resist using some of my new stash from the Mini Catalogue which is due out tomorrow, 1st April...... Come back tomorrow to see the new Mini Catalogue and more projects using my new goodies.... and then there is is a BLOG HOP tooo on Saturday 2nd April at 10am...

So first up is an updated version of my Ferrero Rocher Treat Holder for Easter.... with the prettiest Easter Bunny ever....   I was lucky to get a gorgeous swap from Joanne of a super cute punch art bear ( which you can see here.....  Joanne's Bear ) at our SU! training day in Leeds at the beginning of the month- which inspired me to make the Easter Bunny you see here.  Joanne is a very talented fellow demonstrator - we ALWAYS like each others stuff - don't we Jo !!!!!

This box is soon to be filled with Mini Eggs for Molly for her Easter Treat ......yummmm!! Hope she will like it!?

Friday 25 February 2011

Dovecote & Moving House GIft

And now for something completely different - and a labour of love for 2 very special people..... namely my parents!! They moved house this week... after nearly 50 years in the same house!!!

My mother has always wanted a white wood dovecote - so this is what I made instead of the more usual Good Luck in Your New Home Card..... They were both chuffed to bits!!!! Though unfortunately she still wants a wooden one.... which will prove slightly more expensive!!

The template for the birdhouse part is one of Adela Rossol's templates - and is called Home Tweet Home. As soon as I saw this template I knew a dovecote was soon going to be made.....  You can find Adelas' fabulous templates here. http://creationsbyar.com/.

The rest is using Stampin' Up products. The doves are created using  the Bird Punch. The ledges for the doves to stand on with the 1" circle punch scored in half. The scalloped edge under the birdhouse is using the Scallop Edge Punch. The base is created using the Petal Card Punch and the Scallop Square Punch. 

You can't really see them on the photos....but note the detail on the birdhouse to resemble slats of wood - just simple scoring after I had cut the template out.....

Tuesday 15 February 2011

Team Meet Swaps Jan 2011

I am delighted to share the Craft Therapists team swaps from our January meeting. The theme was anything using Sale A Bration stamp sets or cards suitable for Valentine/ Love . The girls made some gorgeous cards as you can see here........


First up is Carol' s card using the SAB Sweet Summer stamp set - this was inpired by a card by fellow SU! demo and friend Monica Gale


And then Beverley's card using the I {Heart} Hearts stamp set. 

And this is Lisa's card using the Punch Potpourri hostess stamp set.

And this is Sally's card also using the Punch Potpourri stamp set. More details can be found on Sally's blog.... Valentine Card on Sally's Blog - girliepink


And finally Kaz's card also using the I {Heart} Hearts stamp set 


Oh apart from my little Ferrero Rocher Treat Holder using the SAB Punch Bunch stamp set - very simple way of giving people chocolate!!!

Monday 14 February 2011

Happy Valentines Day

Just a quick posting with 3 projects made for my boys!

Firstly my son's favourite... and that was before he discovered it was also full of chocolate!! ( which has now all gone - good job I took a photo of this before he got his hands on it!!!) This was inspired by a project here - Family Fun Rock Candy though I made up a little box rather than just wrapping a chocolate bar. Anyone would think that I have a thing about iPods looking at this blog!!

Then a couple of cards we have done in classes......
The first one is using the Celebrations DSP which is the paper being used for all my February classes - and the I Love Hearts & Tiny Tags stamp sets .

The mount for the Modern Label punched greeting is done using 2 black punched modern labels; cutting one in half lengthways and one in half widthways & then sticking them to the back of the punched greeting. So simple and works a treat!

And the central section is cased from a beautiful swap card from Convention last year by Fiona Duthie who is linked here - Fiona's Convention General Swap cards   Having looked at Fiona's blog I love all her swap cards...... and would very happily have swapped with her quite a few times!!!! She is a very talented lady!

The second card is a Centre Step card and is made using the fabulous Love You Much stamp set and another of the chocolate hearts - now also gone!!

Thursday 10 February 2011

Vintage Vogue Love Letters Treat Bag

Just a  very quick post to share the gorgeous treat bag made by Sally (girliepink) who is in our Craft Therapists team.


http://girliepink.blogspot.com/2011/02/vintage-vogue-and-love-letter-paper.html

Sally was lucky enough to win the raffle in our Team meeting last Saturday - and so I am delighted to see her goodies being put to such good use straightaway.

I have lots to post from our team meeting as we made a card and a treat bag using the Sale A Bration Sweet Summer and Bliss stamp sets - which are proving SO popular...... Only 3 more weeks to get your hands on them!! Free when you spend £45.

We also swapped some gorgeous cards - which are also coming up soon!! It is lovely to be amongst such a talented bunch!!

Just need to get my 6x6 scrapbook pages finished for my class on Saturday - and then I will be back on the blog!! Having never done any scrapbooking before I can't believe that I have done a progressive page as my first ever page - and now I am doing some simple 6x6 pages- and I am loving them........ I think I have discovered a new passion!!!!

Monday 31 January 2011

Elegant Soiree & Hopeful Thoughts Sympathy & Get Well Cards

Here are 2 of the cards we have made in January classes.

Both use the Hopeful Thoughts stamp set which proved to be VERY popular - as well as the Elegant Soiree DSPs again. 

I purposely kept these really simple - apart from making everyone use the thin end of the markers on the very tips of the branches of the trees!! Not so easy but well worth it..... but do remember to switch back to the thick end asap... or you will be there all day!!!


Elegant Soiree Tri Shutter Album

So here is the Tri Shutter Album we made in classes during January.

I used the Elegant Soiree DSP along with the smallest and largest of the Paper Daisies ( 4 sizes x 10 each in a pack - scrummy!!) and the wonderful flourish and butterfly stamps from the SAB Bliss set - along with the SAB So Happy For You stamp set for the wording and the SAB Punch Bunch set for the rivet on the large daisy.   I really have found these 4 SAB sets so wonderful to mix and match - I already know I can't do without them!! 

The main album is in Baja Breeze cardstock with mats of Early Espresso on the front and Soft Suede or Very Vanilla on the inside  - all tied off with the GORGEOUS Early Espresso  1 1/4" striped grosgrain ribbon. ( By the way - I still have some shares left of the 11 colours in this ribbon - £11 for 11colours x 1yd - including P&P)


Here are some pictures of the inside - though I have to say that these do not do the album justice ( as anyone knows that has tried to photo a Tri Shutter Album.....) Again I have used the SAB Bliss stamp set to add a feature to the area that was blank for photos. Though then everyone admitted that it was going to stop them putting a photo over the top!!!

Sunday 30 January 2011

Elegant Soiree DSP & SAB Punch Bunch Ferrero Rocher Treat Holder

Edited to Add 30 March 2011:    I just had to do an Easter version too.... see here...Easter Bunny Treat Holder.......  perfect for Mini eggs, Ferrero Rocher or indeed anything chocolate.... yum!!!

During January I have been busy designing projects for classes using the Elegant Soiree Designer Series Paper ( or DSP for short!!) So I have lots of projects to show you using Elegant Soiree DSP and the 2011 Sale A Bration (SAB for short!!) stamp sets....

Remember that these stamp sets are exclusively available only until 28 Feb and are free when you spend £45 on SU! products. And they are just wonderful..... they work with each other so well and give you great flexibility in images, styles and wording......


So the first project I have to show you is the Ferrero Rocher Treat Holder. This uses 2 stamps from the SAB Punch Bunch stamp set - inked up in Soft Suede and Baja Breeze on Very Vanilla cardstock. The rivet is punched out using a 1" Circle Punch and the For You scallop using the Scallop Circle Punch.

This project holds 3 Ferrero Rochers and stands beautifully as a table setting decoration. I used the Treat Box Card tutorial on Split Coast Stampers ( Link here........  Treat Box Card Tutorial on SCS ) - though I altered the sizes to fit the Ferrero Rochers and I didn't create any front flap to the right - just leaving that portion to fold over/doubled so as to give the holder rigidity to stand up above the box instead of to the right as per the original tutorial.

A small piece of striped 1 1/4" grosgrain ribbon in Marina Mist finished off the holder.

Next post will be my Elegant Soiree Tri Shutter Album - this album was a very popular project in my classes last year - and as soon as I saw these papers - I knew I had to do another one using the Elegant Soiree papers ...... but the SAB Bliss set just took it to another level - with lots of oohs and aahs as a result!!!!  You will see........

Saturday 29 January 2011

SU! Petal Card Punch - Little Treat Bags - Tutorial

We had our first Craft Therapists team meeting of the year last week and I challenged myself to come up with a new use for a SU! punch;  a new technique and to use a stamp from at least 3 of the 4 free Sale A Bration stamp sets...... So no mean treat there.....

And this little treat bag is what I came up with!!! - suitably sized for the smallest of chocolate "bars".....  I absolutely love it....but hey I am biased..... though everyone else was WOWed by it too!!!

So here is the low down on how this was made....!!
  • I punched 4 pieces from Baja Breeze cardstock using the Petal Card Punch to make the bag sides & the box in between.
  • I folded over a tab on 2 of the pieces ( to make the little bag shape) I then stamped the SAB Sweet Summer floral spray at random in Chocolate Chip ink
  • Then a New Technique......that I will call the White Magic Technique.... 
    I coloured in the flowers, leaves & berries using the Uniball Signo white gel pen ( my most used pen in the world!!). I then allowed it to dry and went over the leaves with an Old Olive marker pen and the berries with a Pretty in Pink marker - so so pretty!!! And I think very chinoiserie ( is that a  proper word???)
  • I then inked up & stamped on Very Vanilla cardstock....
    The rivet greeting from the SAB Punch Bunch set in Chocolate Chip. ( then punched out as 1" circle)
    The flower from the SAB Punch Bunch set For You scallop tag stamp in Baja Breeze & Chocolate Chip
  • The Twill Tape for the bag handle was also stamped using Chocolate Chip ink with a greeting from the SAB Happy For You stamp set and the Sweet Summer floral spray stamp.
    The leaves and berries were also coloured in using the Old Olive & Pretty in Pink marker pens.
    TOP TIP: use a bit of Snail adhesive to temporarily adhere the ribbon to a flat surface before you attempt stamping the greeting - easier to get the word straight when fabric is held straight in the first place!!! 
  • Then a little box to hold the mini treat...
    I snipped off a flap off each of the other 2 Petal Card Punch pieces and glued the other 3 flaps together as 2 sides and a bottom - to make a little 3 sided box.
    TOP TIP: make yourself a simple little box guide to really help this glue/assembly bit - cut a 2" x 3 1/4" piece of cadstock ; with panel landscape - score at 2"; 1 1/2"; 2 1/2" and 3". Adhere using small tab side.
  • I then glued the 2 bag sides onto the box front & back ( with the unstamped tab to the base)
  • I finished the bag off with the twill tape adhered using Sticky Strip from the bottom, up one side, looped over to form the handle and then back down the other side & onto the bottom. 
  • I then covered the twill tape ends on the bottom with one of the tabs I had snipped off before