Friday 30 June 2017

Fresh Florals & Phrases Double Z Joy Fold Card


Quick share of another A6 Double Z Joy Fold card today... as well... have to admit this week is one of those weeks! Particularly with son and heir having just finished his A levels... Lots of things not been to my plan... but hey... it is his time to have a great week celebrating!
So moving onto the Powder Pink papers in the Fresh Florals papers that co-ordinate with our new lovely In Colors... and using the also co-ordinating Floral Phrases  stamp set...

Floral Phrases Clear-Mount Stamp Set
Simply decorated card... with the ease of the final dressing using the Itty Bitty Bow and the Black Mini Sequin trim to the bottom left... I would highly recommend both of these!

And here is a link to the Tutorial for this actual card.... though the eagle eyed may spot that I actually made a mistake... as it was supposed to be the fully opening version for which the tutorial was shared here... I recommend the latter.... 
And for my US readers... never fear... the US card version tutorials are coming very very soon... I can only blame my son's somewhat unexpected daily celebrations (and resultant mum taxi service!! Disadvantage of living in the countryside!)

Thursday 29 June 2017

Last Whole Lot of Lovely card...

Very quick post today... with the seventh and last card of the set made from the Whole Lot of Lovely Quarterly Training kit... 

Just scroll back if you need to check what I used... though the flower spray on this one is fussy cut from the same paper pattern as used in the centre panel...
Really nice set of papers to work with... think a full pack may just fall onto my next order!

And here is the CAS card duo round up picture.... other card featured and the details shared here...

Wednesday 28 June 2017

A CUTE Whole Lot of Lovely Trio!

Love these little A7 cards... so much so I had to create 3 with my Whole Lot of Lovely paper leftovers!... I think you can safely say I don't have a lot left from my 6x6 training kit....

So what is an A7 card... well half an A6 one in size... so 4 cards from one sheet of A4... what is not to love!
(1) Pick up a piece of A4 card
(2) Cut in half  PORTRAIT (short edge along top) at 10.5cm
(3) Cut in half  LANDSCAPE (long edge along top) at 14.8cm (so you now have a 14.8 x 10.5cm panel!)
(4) Score in half (LANDSCAPE) at 7.4cm
(5) Repeat until you have 4 cards!
So cute!

And for my US readers... that is the equivalent of half your A2 card! Is there such a thing?
Wording on this last one from the fabulous Colorful Seasons ... lots more on that set another day!

Decoration using the co-ordinating Lots of Love stamp set, Shimmer Pear Pizzazz ribbon and Gold Mini Sequin Trim

Tuesday 27 June 2017

Floral Statements meets Whole Lot of Lovely #3

So I got back home after Quarterly Training and realised that - whilst there with the Lots of Love stamps in front of me - I hadn't stamped enough flowers to decorate my other Whole Lot of Lovely card ideas!

But Floral Statements came to the rescue as it co-ordinates really well... and it was out ready and waiting!
And a Tuesday Tip for you! The HELLO is first stamped on a white panel but then the paper panel ends up covering part of that image... so...

The image is stamped again... and then the letter H and flower & leaves and the letters LO and flower & leaves are coloured, fussy cut and 3D'd over the main image to achieve the whole seamless image! Now if you don't like fussy cutting... don't attempt this! But if you do... now you know!
Now for anyone trying to contact me today... the electricity is off  (whilst new telegraph poles go in the village) and so no wifi! So I will be back to you later on... but just use the telephone if it is really urgent! Though I may just give up and go out....

Monday 26 June 2017

Whole Lot of Lovely #2 - U Fold Card

Following on from yesterday's post I have another card made on the spot with the Whole Lot of Lovely kit we were given at Quarterly Team Training...

So the U Fold card was in my brain on the day having just presented Julie with such a card for her Stampin' Up! 9th year birthday (which I did forget to photo!) ... and then quickly helped her make one up for her crafty session the following day...
But I had to laugh as I remembered the dimensions slightly wrong when making this one.... luckily you can't really tell... but anyways you can click here for the Tutorial with the correct dimensions for a C6 envelope... the front bar being the simple 5.5 x 3cm version...
Not much to say about the decoration... the cardstock and stamping is all Pear Pizzazz.... the flowers are fussy cut from the papers and the ribbon is the new Pear Pizzazz Shimmer ribbon... 
And an update on my efforts for the Birthday Wishes Challenge... 100 birthday cards finished and ready to send to Stampin' Up! for distribution to the Ronald Mac Donald houses... 

And I have to add... what a card making marathon this month... I have made nearly 250 cards in total... no wonder I had run out of Thick Whisper White!!!

Sunday 25 June 2017

Whole Lot of Lovely #1 - Double Z Joy Fold Card

So we had Quarterly Training last week... and we were given a little unexpected challenge....

Julie handed us a bagged kit of Whole Lot of Lovely papers, co-ordinating cardstock & embellishments and the Lots of Love stamps and ink were placed in the centre of the table... one of the ideas being that we should be on the receiving end of a class situation where everything needs to be shared amongst everyone in the room....
But we had to design our own cards on the spot too... you should have seen our faces!!!

But you can never stop a group of demonstrators from being creative... and everyone made some gorgeous projects... Though we were all uncommonly polite and tidy with the stamps and inks!!!
So this is the first of my Whole Lot of Lovely makes... another fully opening A6 Double Z Joy Fold card as the tutorial was in my brain at the time!! Click here for the Tutorial to make one for yourself...

Quick share today as I am a woman on a mission... 100 cards to make today for the Stampin' Up! UK 10000 Birthday Wishes card challenge for Ronald MacDonald Houses. Read more about this weekend's challenge here....

Saturday 24 June 2017

Floral Statements Duo

A simple but lovely little duo for you today...

So the new Floral Statements set has just the 2 big stamps... HELLO and THANKS... intertwined with flowers... and they do simply do what the name says... make a statement with flowers...
Floral Statements Clear-Mount Stamp Set
First up.... THANKS... and the cabbage rose....
Stamped in Archival Black to get it as black as can be... then coloured in with Berry Burst and Pear Pizzazz markers... simples...
Then moving onto HELLO... and the old fashioned rose... or christmas rose... (or for me generally... Mock Orange or Philadelphus as my garden is full of its lovely smell at the moment) or actually... it is amazing how many plants it could be!!
Again stamped with Black Archival ink... and coloured in with Pear Pizzazz and Powder Pink marker pens... then the Aqua-painter pulled out to colour in the flower centres and shadows with Berry Burst... 

Finding the shadow areas is easy... as the artist has cross-hatched it all for us!! In fact this stamp set is really simple, quick and easy to say the words when we need to... highly recommended if you like your flowers....
And look... "wonky matting"... maybe a first on here.... but there was actually a good reason!!! I had stamped the image at an angle... so instead of getting a new white panel & stamping again... I thought what the heck... stick the word on straight but the mat at an angle... and it looks alright... and different for a change.... but I am going to giggle at all the "wonky matters/stampers!" in the future...


Friday 23 June 2017

The other A6 Double Z Joy Fold Card with Tutorial

Just realised I hadn't shared the details (or indeed it seems... even a card!) of the fully opening A6 Double Z Joy Fold Card in landscape orientation which we made in classes back in early May....

This is an update to the "not-fully-opening A6 version of the card" for which the tutorial was shared here back in April... which has proven very popular... but it was so worthy of this tweak!!
So I have re-made one with the new 
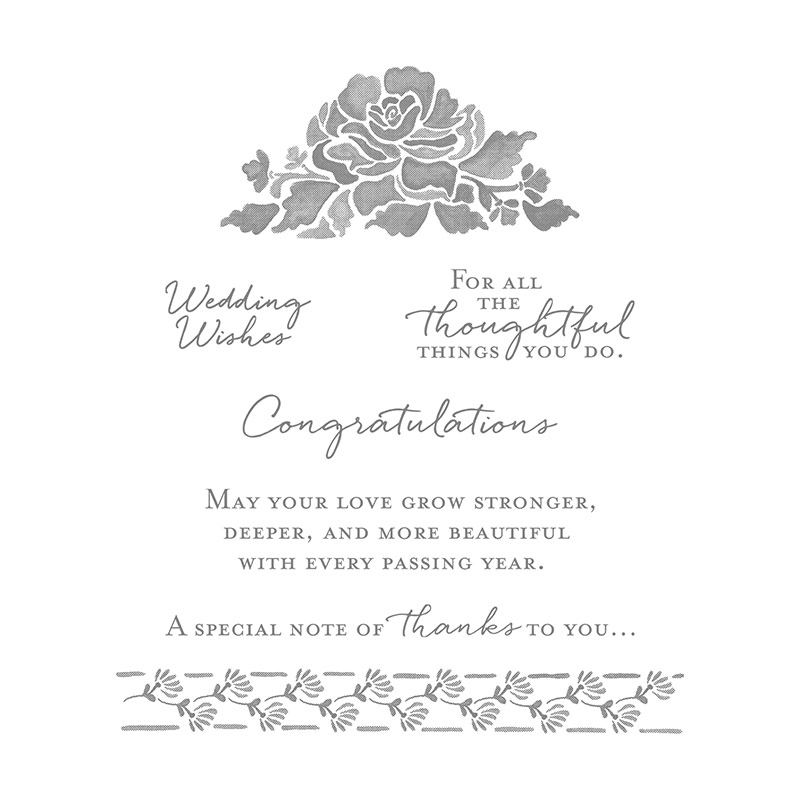
Floral Statements stamps and the Powder Pink Fresh Florals papers in the 2017-19 In Colors... and seeing as it is Fancy Fold Friday (again!)... here it is with the tutorial so you have something new for the weekend!!!

And for my US readers... click here for the A2 card fold tutorial from US letter cardstock...

Oh and click here for the A6 portrait orientation one with tutorial from A4 that I posted earlier this week.... or click here for the A2 portrait one from US Letter cardstock...
Craft Spa Recipe
A4 Card Thick Whisper White 10.5cm x A4L (ie 29.8cm)
A4 Card Basic Black 26.1 x 7cm H
A4 Whisper White 10.8 x 6.5cm H; 6.9 x 6.5cm H
Papers - Front 6.9 x 10cm H; Back 14.3 x 10cm H; Inside 6.9 x 6.5cm H
Craft Spa Directions
1. Score Thick Whisper White LANDSCAPE panel at 14.8 & 7.4cm
2. Z Bone Fold. Valley for halfway/centre... Peak for quarter-way
3. Score Basic Black LANDSCAPE panel at 
14.8 & 7.4cm
4. Z Bone Fold. Peak halfway-ish (front) fold... Valley for Quarter-ish (back) fold
5. Adhere papers


Now to sticking the two Z Fold parts. Think about what needs to go where!!! Otherwise you will just stick your whole card together and it won't open after all!! Suggest a dry run with no glue the first time... then it should all become obvious... So...

6. Adhere back section of smaller Z Fold onto back face of main card - make sure the left/inside valley fold of the smaller Z section panel is behind your 
front/central peak fold of the main card/larger Z section  ie slip the smaller Z in behind the larger Z panel central fold as you stick it down/line it all off on the front... 

7. Adhere front part of smaller Z Fold onto main card front (think about where NOT to put your glue!?)

8. Decorate as desired

Other SU! Products Used
Stamps - Floral Statements; Confetti Celebration
Papers - Fresh Florals
Inks - Powder Pink, Tranquil Tide, Archival Black, Berry Burst & Aqua-painter
Marker Pens - Powder Pink, Tranquil Tide, Smoky Slate
Embellishments - In Color Bitty Bows, Black Mini Sequin Trim

Thursday 22 June 2017

Lemon Lime Twist & Background Bits

A summery day scene.... featuring the new hostess set Background Bits 
Background Bits Clear-Mount Stamp Set
With 3 of the birds from High Tide... 
High Tide Photopolymer Stamp Set
Sponging & swooshing inks for the "marbled" sky on glossy A4 cardstock again which all my ladies are loving doing! (mixing Soft Sky, Pool Party & Dapper Denim for the sky with Lemon Lime Twist for the ground)

And spot the extra script over the ground area (in Pear Pizzazz) - love this stamp in the Background Bits for adding a bit of texture and interest....
And lots of new projects to photo tomorrow.... been a busy little Amanda!!!

Wednesday 21 June 2017

Simply Decorated Tissue Box for Julie...

So when I sent this card to my fellow team member and friend, Julie Wade 2 weeks ago... I was told that I owed her a box of tissues! So never one to shirk from my duties... I had to oblige... and I searched for the largest box that I could find... but I couldn't resist a quick decorative treatment before I handed them over at our Quarterly Training on Monday...

Stamping and punching of the label care of the new Label Me Pretty bundle (with Pretty Label punch) plus the 1 3/8" and 1 1/4" Circle Punches...
Label Me Pretty Clear-Mount Bundle
The top opening made using Lots of Labels dies... which I was so glad I remembered as they were perfect for this job... and for a few others I have planned over the next few weeks...
Lots Of Labels Framelits Dies
And the rest was just cutting and sticking of paper... Measure your top and sides. Take off 1/4" (or 1/2cm aka 5mm) off each of the measurements and cut paper to suit... and then just stick it on... 

So for my record (as I will be making one of these again quite soon!)... My box was 9" Wide by 4 1/2" Deep x 2 3/4" High... so I cut my papers as follows...
- one x 8 3/4" x 4 1/4" for the top
- two x 8 3/4" x 2 1/2" for front & back
- two x 4 1/4" x 2 1/2" for the sides
And... apologies for sharing something made out of retired Floral Boutique papers... but the largest tissue box I could find was blue... so these papers had to be used... as co-ordination is very important to me!!

And now I am trying to find tissue boxes in the new In Colors (or white!) so I can use my lovely co-ordinating Fresh Florals papers (which do of course include these same patterns as in these Night of Navy Floral Boutique papers)

And lastly.... did these get used at training... oh yes! By more than one of us actually.... And are they still... oh yes! I have reason to believe that our lovely 💖Julie 💖may need some more soon....  Who knew when we signed up as demonstrators ... that a bit of stamping and sharing what we love could lead to such emotional highs and joys.... 

Tuesday 20 June 2017

Thanks A Latte Coffee Cup for Team Training

I couldn't resist making these little treat holders for my Quarterly Team Training swap yesterday... together they are like a little coffee cup army! Ready for action... and SO cute!

The hardest thing being finding something coffee related to pop in them... but these little Diablo sweets came to the rescue
The little holder box is straightforward... and seeing as it is Tuesday for Tips, Techniques or Tutorials..... 

1. Cut a 2 3/4" x 2 1/4" piece of cardstock
2. Score LANDSCAPE at 3/4" and 2" 
3. Turn 90 degrees 
4. Score PORTRAIT at 3/4" and 1 1/2"
5. Cut up 2 score-lines on 2 wider opposing sides
6. Glue on 4 corner tabs
7. Adhere tabs to outside of wider sides 
8. Adhere a coffee cup to the long sides

And I have made a few extras.... ready to go out as order thank yous this month...
Other Stampin' Up! Supplies
Stamps - Coffee Cafe (also available as a Bundle)
Dies - Coffee Cups (also available as a Bundle)
Paper - Coffee Break
A4 cardstock Crumb Cake


Monday 19 June 2017

Coffee Cups anyone?

 
 A quick and simple card showcasing the Coffee Break papers & Coffee Cups dies... with just a little bit of stamping using the Coffee Cafe stamps...

Not quite as much stamping as intended... as my class was set up and I had totally run out of clear blocks... but  this goes to prove that the Coffee Cups dies work with or without the outline stamping... and this way is definitely faster...
Spot the crimped effect on the Life Happens label... so cool... all in the cut and scores of one die!
And I had to laugh at the coffee stained papers... every person in last week's class asked me where the stamps were!!?? So much for giving them papers!!! Though they are right in that the Timeless Textures stamp set does have a great coffee stain stamp....
Timeless Textures Wood-Mount Stamp Set
So a lovely bundle and suite this one! I knew that it would be very popular with some of my coffee-mad friends.... but it has quite surprised me at how much I like it... and I know that I will get a lot of use out of it... but more on that another day!
Coffee Break