Yes you read that right... 3 Z Fold cards from one piece of A4 cardstock... quick & simple but a card loved by all who travel here! Whether physically for my classes... or virtually via the blog...
But before I start... don't forget that the Retiring List will be published at 8pm tonight...
So I decided to make these as my swap card for the Stampin Up! On Stage event held yesterday... I wouldn't usually think about doing a fancy fold card for a swap card... but SU! asked us for full cards instead of card fronts... and this one is seriously simple enough... and as you score for 3 cards at a time.... they are fast... so I went for it...
I made the cards in 4 of the 2017-19 In Colors... as funnily enough there were no Tranquil Tide papers left in my Fresh Florals pack!! And I have to admit that I had forgotten how nice these papers are...
Here is my box of swaps before I started swapping!!
And thank you to all of you that swapped with me on Saturday... I have some beautiful new samples to share with my team and customers... and lots of new inspiration for up and coming classes... and here is the tutorial as promised...
Craft Spa Recipe
In Color/Thick Whisper White A4 Cardstock
Fresh Florals Papers - Front 4.5 x 9.4cm; Back 9.4cm Square
Inside Panel 4.5 x 9.4cm (not necessary when using White card for the blank)
Other SU! Products
Ribbon - In Colors 1/2" Finely Woven Ribbon
Dies - Stitched Shapes 2nd largest square
Stamps - Better Together
Again apologies to my US readers... as this tutorial/card is sized specifically from/for A4 card stock... so it wouldn't make sense with your US Letter sized card...
Tutorial.... Blink and you will miss it!!
1. Place A4 card PORTRAIT on trimmer
2. Trim to 19.8cm wide
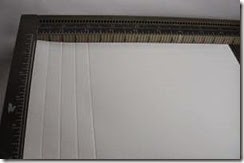
3. Score PORTRAIT at 4.95* & 9.9cm
(And an extra TIP... this card folds so much better if you score on either side of the cardstock... so I actually scored on the wrong side at 9.9cm...and then turned the piece of card over onto the right side and scored at 4.95cm)
4. Place LANDSCAPE on trimmer
5. Cut down to 3 x 9.9cm card blanks
6. Bone Fold as Mountain then Valley (ie starting from the left)
7. Adhere papers & die cut greeting
8. Tie a bow and adhere
Don't like lining up at 1/2mm*... then go here and use this 9.8cm square card version tutorial... and to do 3 in 1 you would need to cut the portrait A4 card down to 19.6cm wide, score as directed... and then place the card LANDSCAPE on your trimmer and cut your 3 card blanks down to 3 x 9.8cm
Showing posts with label Fresh Florals. Show all posts
Sunday, 8 April 2018
Sunday, 17 December 2017
Floral Statements Duo
Edited to Add... the Clearance Rack has just been updated... more details on today's post here...
First up ... just white embossing on Crumb Cake... with white craft ink coloring on the flowers then Aqua Painter water-coloured over with Tranquil Tide, Pink Pirouette and Berry Burst... Matted onto white... set on a Crumb Cake card...
Second up ... the same... but plus Crumb Cake sponged Fresh Florals Designer Paper... set on a Tranquil Tide card blank...
Friday, 14 July 2017
Flower Shop Small Square Double Z Joy Fold Card with Tutorial
Here is my favourite of the Double Z Fold cards... so you may see a few of these over time... and seeing as it is Fancy Fold Friday... another tutorial for you!
I used the Fresh Florals papers in Tranquil Tide, Flower Shop stamps with co-ordinating Pansy Punch, Stitched Framelits dies and One Big Meaning greeting stamps... just click on the highlighted links if you want to look at those products on-line...
And as I made quite a few of these ... as I had a batch of Thank You cards to make... you can see the effects of different combinations of card panels and papers!!
Craft Spa Directions (A4)
1. Score large Pool Party/Thick Whisper White LANDSCAPE panel at 5.25 & 10.5cm (US 2 1/8" & 4 1/4")
2. Z Bone Fold. Valley for halfway/centre... Peak for quarter-way
3. Score small Pool Party/Tranquil Tide LANDSCAPE panel at 5.25 & 10.5 cm (US 2 1/8" & 4 1/4")
4. Z Bone Fold. Peak halfway-ish (front) fold... Valley for Quarter-ish (back) fold
5. Adhere papers
Now to sticking the two Z Fold parts. Think about what needs to go where!!! Otherwise you will just stick your whole card together and it won't open after all!! Suggest a dry run with no glue the first time... then it should all become obvious... though I have added some photos of how I do it!
6. Adhere back section of smaller Z Fold onto back face of main card. Close the small Z Fold with the square/front face at the top and the Z folds behind... Apply glue to back/narrower face..
I used the Fresh Florals papers in Tranquil Tide, Flower Shop stamps with co-ordinating Pansy Punch, Stitched Framelits dies and One Big Meaning greeting stamps... just click on the highlighted links if you want to look at those products on-line...
And as I made quite a few of these ... as I had a batch of Thank You cards to make... you can see the effects of different combinations of card panels and papers!!
Larger white panel with smaller Pool Party...
Larger & smaller Pool Party ...
Larger Pool Party & smaller Tranquil Tide...
And now for the Tutorial... with some added step by step photos of the gluing steps for those of you that want them...
Note: black type for centimetres using A4 cardstock & blue type for inches using US 8 1/2" x 11" cardstock...
Craft Spa Recipe (A4)
A4 Pool Party/Thick Whisper White 21 x 10.5cm
A4 Pool Party/Tranquil Tide 17.5 x 7cm
A4 Whisper White Front Stitched Framelit Square/6.5cm Square; Small Centre 4.7 x 6.5cm
Paper Left Front 4.7 x 10cm
Paper Right Back 10 cm Square
Paper Small Back 4.7 x 6.5cm
Craft Spa Recipe (US)
US Letter Card Pool Party/Thick Whisper White 8 1/2" x 4 1/4"
US Pool Party/Tranquil Tide 7" x 2 3/4"
US Whisper White Card Front Stitched Framelit/2 1/2" Square; Small Centre 1 7/8" x 2 1/2"
Paper Left Front 1 7/8" x 4"
Paper Right Back 4" Square
Paper Small Back 1 7/8" x 2 1/2"
1. Score large Pool Party/Thick Whisper White LANDSCAPE panel at 5.25 & 10.5cm (US 2 1/8" & 4 1/4")
2. Z Bone Fold. Valley for halfway/centre... Peak for quarter-way
3. Score small Pool Party/Tranquil Tide LANDSCAPE panel at 5.25 & 10.5 cm (US 2 1/8" & 4 1/4")
4. Z Bone Fold. Peak halfway-ish (front) fold... Valley for Quarter-ish (back) fold
5. Adhere papers
Now to sticking the two Z Fold parts. Think about what needs to go where!!! Otherwise you will just stick your whole card together and it won't open after all!! Suggest a dry run with no glue the first time... then it should all become obvious... though I have added some photos of how I do it!
6. Adhere back section of smaller Z Fold onto back face of main card. Close the small Z Fold with the square/front face at the top and the Z folds behind... Apply glue to back/narrower face..
7. Eyeball the small Z Fold square/front face centrally onto the back panel... and stick...
8. Open out the smaller Z Fold off to the right & close the front folds of the main card
9. Adhere front part of smaller Z Fold onto main card front (think about where NOT to put your glue... I use my fingers to guide me where I have put the pen in the photo...
10. Decorate as desired... and yes this is a full opening version (and there is no partial-opening version!)
Wednesday, 12 July 2017
Flower Shop & Fresh Florals U Fold Card
Another U Fold (aka Bridge Fold aka Centre Box Fold) card... click here for the tutorial... this one using the 3cm high front panel again...
Using Fresh Florals papers, Flower Shop & Pansy Punch, Happy Birthday die, Silver Glimmer Paper and Clear Faceted Gems - and the new 2 1/4" Circle Punch...
Happy Birthday die cut and then snipped into 2 to form a long thin greeting instead of the short fat as it comes version .... aqua-painted Tranquil Tide on white for the Happy.... and Silver Glimmer for the Birthday...
Simples...
And it all folds flat for putting into your standard C6 envelope...
Monday, 10 July 2017
Embossed & Aqua-painted Floral Statements
Again on Crumb Cake... but heat embossing the image this time... and using softer pinks for the flowers... pretty!
So first the image was heat embossed in white... then Craft Whisper White was aqua-painted over all the flowers and leaves... followed by colouring the flowers with the Powder Pink marker pen... then aqua-painting Berry Burst at the tips and shadows and Tranquil Tide for the leaves...
Finished off with a very careful " wiping" away off the ink from the white embossed surfaces...
Matted onto a thin border panel of Whisper White... then onto a Fresh Florals paper panel brayered in Crumb Cake ink... and mounted onto a Tranquil Tide card blank...
Friday, 7 July 2017
Colorful Seasons Small Square Shadow Box Frame card
Gosh it is years since I made one of my Box Frame cards but I was asked to "show and tell" in one of last month's classes... and even though the class was all prepped and ready to go ... I was very happy to oblige with a simple additional make...
Really simply decorated as can be... using Colorful Seasons and Big on Birthdays
And as it is Fancy Fold Friday... and because I used 1/2" instead of 1cm. for the scoring of the sections... here is a tutorial for you... Note that the steps/photos in this tutorial show I now glue these projects...
And click here for the centimetre version that ends up at a larger 13cm square with 1cm sections... or here for the inches version at 5 1/4" square with 3/8" sections ... with my older method of gluing showing!!
Shadow Box Frame Card Tutorial – 11 cm (approx 4 1/4" Square) with 1/2" Box Sides and Top
Craft Spa Recipe
Box Frame - Thick Whisper White cardstock 21cm (8 1/4") square
Front Cover - Thick Whisper White cardstock 12.2 x 10.8 cm (4 13/16" x 4 1/4")
Mats - Cardstock 8 cm Square; Paper 7.5cm Square
Craft Spa Directions
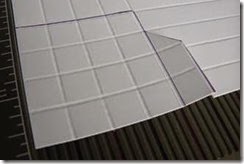
2. Make an “extra short score” at 2 1/2" & 5 3/4" from top to 2nd score-line down. (note my photo is only from the bottom up to the 2nd scoreline as that way you can see the score line!!!)
3. Turn 180 degrees (so you are working on the opposing side) and repeat (2)
4. Cut up the extra short score lines and diagonally across to the 3rd score line at each corner
5. Cut out the “16-part” squares at each corner

6. Bone fold all score-lines
7. Recommend sticking any paper/photo in first before assembling if
you want as an edge to edge back!
Assemble straight sides first.
8. Apply glue onto outer sections. (I use Tombow multi purpose glue and
have only used Sticky Strip so you can see glue placement in the photos!)
9. Line up outer edge to inner score-line at that side & press
down flat to stick.
10. Now your box section should pop up … nice and square and
straight!!
11. Repeat for other straight edge
Now onto the 2 notched ends ….
12. Apply Glue Dot (or Tear & Tape) onto back of 4 diagonal
sections
13. Repeat process for the 2 straight sides BUT…. apply your Tombow to
the base not the outer section you are about to roll up...less messy that
way!
14. Fold the outer edge down as before & glue into place with the
diagonal sides up & over the square/box side sections to get the
mitres/diagonals
15. Repeat for the other notched side.

And there you have it…one 1/2" section Shadow Box Frame from an A4 Wide (ie 21cm - 8 1/4") Square of card with perfect mitred corners!
Ends up as a 11cm (c. 4 1/4") Square box frame card.
And to finish it off as a card with a front cover so that it opens and closes – add the 12.2 x 10.8 cm (4 13/16" x 4 1/4") Whisper White panel scored at 1/2" LANDSCAPE (ie with long side at top) - to the left hand side.
Subscribe to:
Posts (Atom)