Thursday 30 June 2016

Butterfly Basics Notecards

Carrying on the Butterfly Basics series .... 

But before I start... remember today is the last day that you can sign up with Stampin Up! and get the extra 2 stamp sets for free in your starter kit... so if you want up to £222 crafting supplies for £99 ... don't delay... go here and sign up now.... your big box of crafting goodies would be with you next week... 

Want the new large alphabet dies? Go here and sign up now.... you can have the co-ordinating Letters For You stamps for free too! Plus another £41 of goods. Plus another stamp set for free... All for just £99.

Ok... Back to the cards... These are the ones where you grab a pack of Whisper White notecards and envelopes...spend a therapeutic 45 mins stamping with your Butterfly Basics & die cutting away with your Butterflies dies ... and end up with 20 cards ready to go... we like that!
And an apology for my ladies at the class today... I couldn't find my notecards & envelopes... hence why these were not included in the class! Oops... 
And whilst you are there... don't forget to stamp your envelopes! Card shown below here...


Wednesday 29 June 2016

Embossed Butterfly Basics

 
Another few Butterfly Basics cards. First ones teamed with the Brick Wall embossing folder for the background.

First one purely clean and simple
Second one  - wall slightly grunged with the aid of a sponge and Sahara Sand ink... 
Butterflies watercoloured again using the Aquapainter, Pool Party and Mint Macaron ink. With the body in Tip Top Taupe ink on the more grunged...
And another few ideas... next one using the Fluttering embossing folder

And the last one with a couple of layered die cut butterflies using the Butterflies and the Bold Butterfly dies, the new stripy Mint Macaron ribbon and the new Classic Label punch for the Thoughtful Banners greeting 
You will notice that I have a shortened Classic Label here.... Go here for 9 ideas on using the Classic Label Punch...

Again these cards may seem recognisable. They are a remake of the Watercolor Wings cards I made here... and here... and a more fancy Tunnel Card one made here... 


Tuesday 28 June 2016

More Super CAS Butterfly Basics

Thought I had better keep these Butterfly Basics samples all together... particularly as each one was demoed on the day of the class ... so I did end up making quite a lot of variants as I just had to finish them off...... 

These three are all the same apart from the addition of the butterflies and the Tip Top Taupe greeting used...

First up using the small punched butterfly from Butterfly Basics in Rich Razzleberry, Sweet Sugarplum and Pink Pirouette. Along with the greeting from the hostess Time of Year stamp set..

Next up, Rich Razzleberry stamped and die cut butterfly (again Butterfly Basics & Butterflies dies) Wording from the Butterfly Basics set too...
And lastly... new Stylised Birthday greeting stamp and Bold Butterfly die cut butterfly. 

Interestingly I missed this greeting stamp in the new catalogue... luckily a few of my ladies pointed out the error in my ways!!! Bit of a go to stamp for me now.....
And a Tuesday Tip for you.... this last butterfly is die cut and then just watercoloured using the Aquapainter in Pool Party on the body and wings and then Mint Macaron on the tips of the wings... great inky fun! I then added a few Rhinestones Basics Jewels for a splash of shine on the wings and body....


Monday 27 June 2016

CAS Butterfly Basics

Keeping it simple for a Beginners Class I taught the other week... using Butterfly Basics stamps and Bold Butterfly dies...

Background care of a baby wipe picking ink off the Pool Party ink pad lid and swooshing across Whisper White card... Mint Macaron leaves, Sahara Sand honeycomb, Tip Top Taupe postmark on both cards. 

Rich Razzleberry wording and top small butterfly, Sweet Sugarplum small butterfly and die cut white butterfly aquapainted with Sweet Sugarplum & Rich Razzleberry on the right...
Pool Party dashed border, Tip Top Taupe greeting and diecut white butterfly on the right hand side card.
And as my display of the set of cards was SO popular... we will be making these (amongst others) again this Wednesday... couple of spaces left.... but if you let me know today so I can prep...

Sunday 26 June 2016

Baby Bear Dress Up in a Shadowbox Frame

Don't fancy a Small Square Pop Up Z Fold card to display your dressed up bears... well here is an alternative for you...
Pop them in a Shadow Box Frame instead... card or home decor...you decide...
Now the eagle eyed amongst you will have realised that I am re-purposing previous projects here.... 

And that the following two don't work so well!!!
But sorry... time was not on my side to re-make these 2 box frames.... but you can have a laugh...!

Want a go at this shadowbox frame yourself... Here are the tutorials... Metric here ... Imperial(inches) here

And a groupshot... 


Saturday 25 June 2016

Friday 24 June 2016

Scallop Tag Topper Concertina Card Tutorial

Another couple of versions of the Tag Topper Concertina Card for you today...and seeing as it is Fancy Fold Friday... the recipe and metric/imperial (inches) tutorial(s) for you...
This is a remake of a fabulous card produced by Julie Kettlewell for our Quarterly Training over 2 years ago... but one that I have re-made a few times... as it is such a fabulous and special card and always causes a real WOW... Though I have to admit they do always look better in the flesh than on a photo... a card this long is difficult to photo!!

Metric Recipe
Paper 12x12 Floral Bouquet  x 1 piece
Card Sahara Sand 5.5 x 9cm (x10)
Card Whisper White 5 x 8.5cm (x10)
Ribbon x 24"

Imperial (inches) Recipe
Mmm...2 ways to do this.... Firstly the exact same dimensions (so scoring every 2 9/16") ... and then the easier version!! (every 2 1/2") Oh I am going for the easier version! It will look more or less the same!!
Paper 12x12 Floral Bouquet  x 1 piece
Card Sahara Sand 2 1/4" x 3 3/4" (x10)
Card Whisper White 2" x 3 1/2"(x10)
Ribbon x 24"

Tutorial
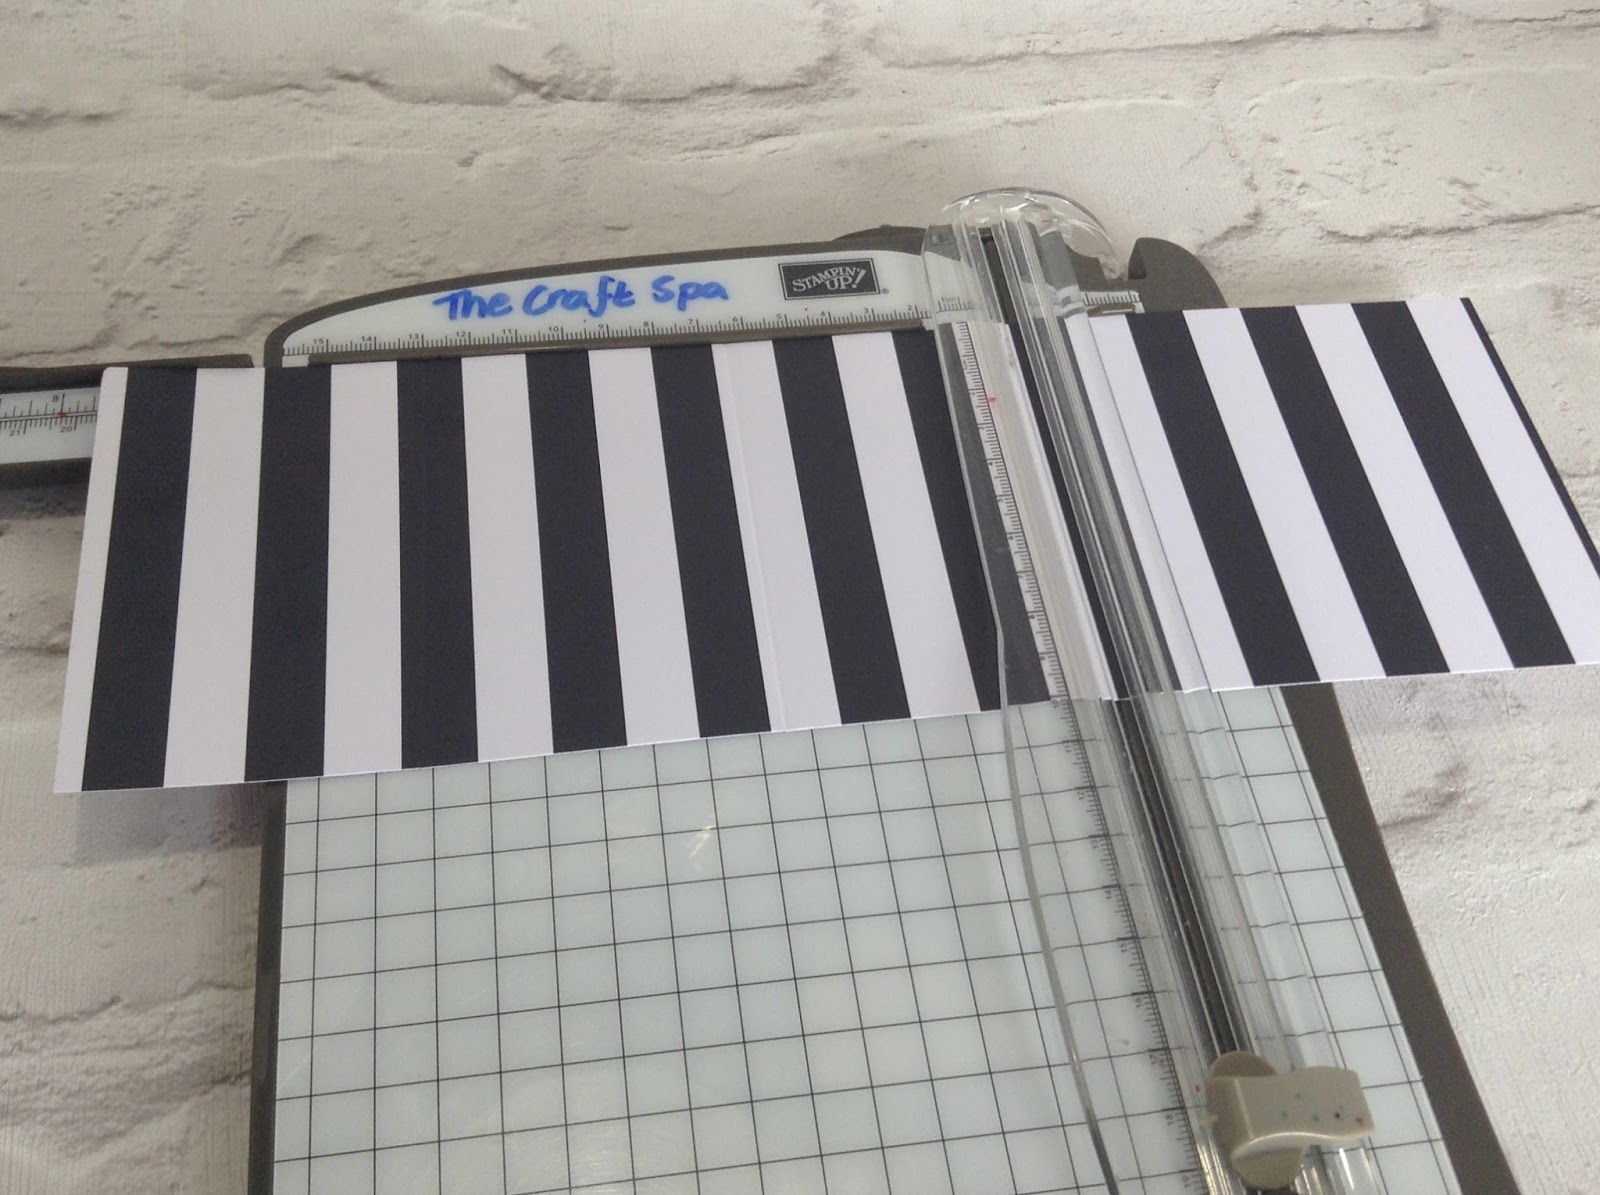
1. Cut 12x12 paper into 3 x 4" strips
TIP - easiest if you use paper with no pattern match/directional pattern!!
But otherwise... think about the pattern direction you want to show on the front & back of your finished card eg for stripes ending up vertical on my finished project - I need to cut the 4" strips looking at horizontal stripes!)
2. Score 2 strips LIGHTLY every 6 1/2cm ( ie 6.5, 13, 19.5 and 26cm)
OR every 2 1/2" ( ie 2 1/2", 5", 7 1/2" & 10")
4. Trim off the last short section on ONE of the strips
5 Pick up the 3rd strip and turn 180degrees (so any pattern direction is facing the other way up) and score LIGHTLY every 6 1/2cm ( ie 6.5, 13, 19.5 and 26cm) OR every 2 1/2" ( ie 2 1/2", 5", 7 1/2" & 10")  Sorry - no obvious pattern direction to see here!!!! But if you look closely to right and left of the strip you will see that it has been turned 180degrees.... so that the left has become the right...
4. Pick up the 2 longer strips & place 2 short sections together
5. Scallop Tag Topper punch those short sections

6. Trim off the "shoulders" (trimmer or scissors will do the job!)
7. Concertina fold shorter strip (mountain, valley, mountain with front pattern facing you) & place standing up in front of you!
8. Concertina fold other 2 strips from short punched section end (mountain, valley, mountain,valley with front pattern facing you)

9. Place standing up in front of you with shorter punched sections to outsides. One to left and other to right of the smaller (central) piece
10. Adhere longer pieces to shorter/central
11. Decorate as necessary. But don't stick your decorative front on yet!!

See this alternative to the birthday greeting version I showed here... I love the add of the 2U.... Nicky was inspired with her solution to having stuck her lettered mats down (cough) differently!!! And thank you to Heidi for the Retirement version...
Die cut Letters decoration tutorial here...
Night of Navy circle mat is 1 3/4" circle punched
White greeting circle is 1 5/8" circle from Layering Circles dies
Floral frame is Floral Phrases rose spray stamped above and below along the straight line & then handcut...

12. Place ribbon up through the punched hole on the left hand side, pull through over to the right and lay across the front. ( Tip - NOT through the right hand side punched hole)
13. Lay the LHS of the remaining ribbon across to the left, down & around the back and across to the right. Size as necessary (with bow allowance)
TIP - I personally find it easier to have the front & back ribbon lengths to be the same size off to the right... and then tie the bow and trim off as necessary... but you do cut off a few inches...
14. Adhere your decorative front (TIP - you only want glue to the left!!!)

15. Decide how you want to have the final fold of your card... I usually leave as a double fold as shown here... but you can have as a single fold too (example here ) ... and then tie off to close & make a bow with your ribbon. Trim ribbon as necessary...
16. Pop in an envelope (Double Fold fits nice and snugly/protectively into a Stampin' Up! medium envelope or a standard C6 envelope is great if your ribbon bow has gone off to the side!) or make an envelope box (Tutorial here) for a Single Fold version

If you prefer a video tutorial to the Metric Tag Topper Concertina Card... Julie has kindly already shared one here...


Thursday 23 June 2016

Botanical Builder Blooms meet Butterfly Basics

Just showcasing my favourite ribbon!! Sheer Linen Mint Macaron... Sheer Bliss!

Along with sponged white Botanical Blooms in Sweet Sugar Plum & Rich Razzleberry... Rich Razzleberry butterfly, Mint Macaron foliage and card blank, Sahara Sand honeycomb and Tip Top Taupe postmark, greeting & mat...

Die cut Botanical Builder flowers, greeting from One Big Meaning , rest from Butterfly Basics...
And some of you may be thinking that this card looks familiar... but not sure why.... well it is a remake of the following fabulous card we made at Julie's monthly training more than a year ago... 

Wednesday 22 June 2016

Birthday Floral Boutique Concertina Card

Another version of the Wedding Card posted earlier in the week... same card, different Floral Boutique paper pattern and the addition of the Floral Phrases rose sprays at either end as Birthday only 8 letters whilst Wedding Day is 10...

The Recipe and Tutorial will be for my Fancy Fold Friday post this week (as it is now late at night and I have a few photos to take!!) ... but for today... as quite a few of you have asked... how I did the letters...

1 Die cut your letters or numbers
2. Place your numbers or letters on a piece of scratch paper...
3. Grab your Night of Navy ink pad and the rose spray stamp from your Floral Phrases set
4. Ink up and stamp centrally...
5. Re re-stamp without inking above and below... adds a bit of extra dimension...
6. Repeat for each letter... 

And an extra tip for you... Some letters (such as I) can be stamped in one.... as per my O example below... but have your pokey/piercing tool or tweezers or something to hand... as those letters will stick to the stamp... and you don't want inky fingers!!!
7. And there you have it... easy and subtly decorated die cut letters and numbers... pretty too!!
And in preparation for my Friday post... have your Scalloped Tag Topper punch and a piece of 12x12 paper ready to go... as well as your alphabet dies, Floral Phrases stamps, Night of Navy ink and Sahara Sand and Whisper White card...and co-ordinating ribbon......