Monday, 30 September 2019
Merry Monday - Brightly Gleaming Triangular Tri Fold Card
Tuesday, 26 June 2018
Tuesday Tutorial - Large Gift Bag from 2 sheets of 12x12 paper
Plus a step by step Tutorial for you too... as well as a link to a Video Tutorial here that was created and shared by my lovely Stampin Up upline (aka mummy), Julie Kettlewell...
But first... the original credit must be given to the lovely ex-Stampin Up-demonstrator, Caroline Hallett... so much so... that this bag was even named the "Hallett Bag"...
But unfortunately Caroline closed down her Stampin Up blog and all its tutorials when she moved onto crafty pastures new... so luckily Julie shot her video tutorial... so that we can all continue to create this lovely bag... as it is one that has been on my To Do list for quite a few years...
You will need 2 pieces of the same pattern of 12x12 paper to create the bag...
Craft Spa Tutorial
REMEMBER THAT YOU NEED TO DO THE SAME ON BOTH 2 PIECES OF PAPER....
1. Place the paper in front of you.. with the pattern in the direction that you want it on the final bag...
2. Turn the paper 90 degrees...
3. Place on the trimmer & line up at 11 1/4" on the Top Bar and chop off the 3/4" strip as your handle
4. Place PORTRAIT on the trimmer (check 11 1/4" along the top)
5. Score at 1 1/4" & 10"
6. Fold over one of these "edges" to form the top of the bag...
NOTE- Think about the pattern direction of the main bag side and foldover section...
7. Adhere this Top edge
8. Place LANDSCAPE on the trimmer (check 12" along the top)
9. Score at 1/2", 1 1/4" & 2" (NOTE - do score from the same side on both pieces)
10. Fold over & Bone Fold...
Bottom = Mountain Fold
Sides = Mountain/Valley/Mountain
11. Cut off slim 1/2" bottom outer section
12. Dart up sides of left and right hand score lines to create a base tab
13. Apply Tear n Tape down long thin 1/2" side tab/section
14. Remove some of protective tape top and bottom so that protective tape folded out...
15. Place down onto flat side of other piece of paper and line up...
16. Pull out rest of protective strip & adhere
17. Repeat for other side
18 . Apply glue onto bottom tab
19. Fold over one bottom edge and stick to glue...
NOTE that the bottom sections don't each totally cover the whole depth of the bag... nature of the design..
20. Tape onto the other bottom edge, remove part of protective strip... and fold over to stick (put your hand into your bag to be able to apply some pressure!)
21. Apply tape about 2 1/2" from either side on the top edge of the bag
NOTE this is different to the 1 1/4" used on my original bag and in Julies video... but the "stresses" were too much... so this way is easier and more robust!!
23. Decorate as required
I used the Large die cut Label from the Share What You Love Embellishment Kit... plus a 9.9 x 6cm piece of card... corner rounded & and tag hole punched with the Detailed Trio Punch... with a simple stamped Oval from the Detailed With Love stamp set... tied onto a handle with 12" of Bakers Twine... and finished off with a bow from 13" of ribbon
Tuesday, 19 May 2015
More Video Techniques for Technique Tuesday
Decided to make a series of technique tutorials that I will post on Tuesdays…starting off with some more of the videos produced by Stampin’ Up!
Each one of these is a little gem – showcasing a simple and effective technique with minimal supplies needed. These include some of my favourite, most used techniques – whether as a beginner all those years ago – or as a more advanced stamper as now! And I loved to share these techniques with my new stampers – always get a WoW!!
Marker to Stamp Technique – use daily! Wouldn’t be without my big box of marker pens! One of my first Stampin’ Up! purchases – one of my best – one of my most used - and still going strong. Not got the fabulous box of Many Marvellous Markers yet? Treat yourself now – don’t leave till June!!
Using Sponge Daubers – use my daubers daily – do you?
Masking Technique. I do some masking every week…
Note that the stamp set featured in this video is a promotional Sale A Bration item that is no longer available. However I do have one left as a gift for an order over £50 (excl P&P). Only one available!
Friday, 15 May 2015
More Technique Video Tutorials–Watercolouring
Well seeing as you loved the Stampin Up! Video Technique I shared yesterday... I have just had a look and here are a few more I have found to to share…
Most of these are just 2 minutes to WOW! Simple but effective techniques that you will want to try too….
Watercolour Shadows & Highlights Techniques. Just posted. Guess what I will be trying out next!!
Now still on watercolouring.
The next few use stamps that were featured in the Sale A Bration promotion – so you will have to concentrate on the techniques rather than the images!! Though I do have a few spares if you would like to order £50+ product through me this month!
Watercolour with Blender Pens ( a must do technique as far as I am concerned!!)
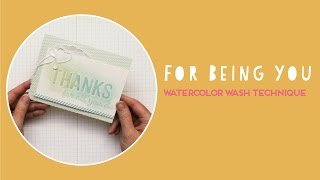
Watercolour Wash Technique ( So Simple, Such Fun & So Effective!)
So there you have it – one technique for each day this weekend!! Enjoy!
I’ll be looking for more of these next week for you. Thank you for filming these Stampin’ Up!
Thursday, 14 May 2015
Technique Video Tutorial
Quick share of a video produced by Stampin’ Up! entitled Rock n’ Roll Stamping.
This was one of my first new-to-me techniques when I first joined Stampin’ Up! nearly 7 years ago.
And one that I regularly use still…. A real good ‘un as they say in Yorkshire!
Enjoy!
Monday, 22 September 2014
Stamping Tip for Wondrous Wreath
A quick tip for you today…..
After spending time peering carefully through my clear photopolymer stamp to line up the “few leaves” over the “lots of leaves” - and having watched this video released by Stampin’ Up! showing us tips on how to use these stamps & framelits (which explains the fab new feature of alignment tabs to be found on both the wreath stamps and the dies to make lining up a breeze!) - but then deciding that I was not going to do a 2 die-cut pass…
A lightbulb moment hit me… obvious really but…. stamp the “few leaves”… then overstamp with the “lots of leaves”…. really easy to line everything up that way…. a lot quicker – and a slightly softer effect too….
(1) “Few leaves” in Garden Green…
(2) “Lots of Leaves” in Old Olive
And so onto today’s card…..
OK OK… the more observant of you will have spotted that the “to the world” greeting is from a retired set from last year… and some fellow Jems will recognise this card from my Inspiration display a year ago! Yes…new year…new wreath… that is all I am going to say!!!
So the other details…
The large letters are sponged through the alphabet masks in the Build A Banner Simply Created Kit which was re-released in this years Annual Catalogue. Great banner – but this kit is highly recommended just for the masks!!
Cherry Cobbler Dazzling Details adds some glimmer to the berries
The flower is in the Wondrous Wreath stamp set – along with the matching die in the Wonderful Wreath die set….
The wreath on the card was created before my lightbulb moment…. oops…. lining up not quite right!!!
Come back tomorrow for another tip to give this wreath some extra dimension…..