Showing posts with label Tag Topper Punch. Show all posts

Tuesday, 3 July 2018

Another Share What You Love Tag Topper Concertina Card

Another class... another demo... means another card version... and I LOVE this one...

Though I will be honest... this piece of paper with pearlescent Petal Pink flowers was my least favourite pattern... but I have now definitely changed my mind!!
Click here for the original EIGHTEENTH card and/or here for the Tutorial....

Large Letters die cut from more of the Share What You Love papers...
 And flowers fussy cut from another piece (s)...
Always like doing these cards in classes... as they always please... and are pretty simple to make... 


Thursday, 28 June 2018

3D Thursday... Tutorial for new Lidded Box for Tag Topper Concertina Card

So I came to package my Share What You Love Tag Topper Punch Concertina card that I posted here... and realised a few things...

The Crumb Cake medium envelopes I had used previously are no longer available... though the card would actually fit in a standard C6 envelope... but the sizing is not as perfect...
Not all the ladies coming to the class had an Envelope Punch Board that I had used to create the box envelopes before... But click here for the Tutorial for the Box for the double-folded card version (ie as per the way the card is folded closed here)... OR click here for the 1" deep box for a single folded card version with lots of embellishing... and here for the 3/4" deep box for a single-folded card version (better for UK postage)
I have three ladies that seriously LOVE the Share What You Love Embellishment Kit box as shown below... so that inspired me to make a version but sized specifically for this card... and I think it worked out pretty well...
Though I have to admit that I was going to create a double-sided version...but then I remembered that it was the first box and lid for 2 of them... so I kept it as simple as possible... but this way I can also make 2 from a piece of 12x12... whereas the double-sided version would have meant a full sheet of 12x12 paper for each box...

Now doesn't that just make the most special of cards... and presentation...
Now as you can see I originally made one on a Rich Razzleberry base (as that matched the original inspirational box more...) but I switched to a Crumb Cake base for those girls that don't like their pinks...
And so here is the Tutorial... for my US readers... note that the inches measurements are a literal/nearest conversion from centimetres ... and untested... so I am not sure how "tight" the box & lid will end up...

Craft Spa Recipe
A4 Card Rich Razzleberry OR Crumb Cake 17.5 x 14.5cm (6 7/8" x 5 3/4")
Share What You Love Papers 16.2 x 13.2cm (6 3/8" x 5 1/4")
A4 Thick Whisper White card 10.5 x 14.8cm (US Letter 4 1/4" x 5 1/2")

Craft Spa Tutorial
1. Score cardstock panel at 2 cm (3/4") all round
2. Bone Fold
3. Dart score lines on 2 opposing narrower sides 
4. Fold over 4 corner flaps and apply glue to top face
5. Adhere 4 flaps to sides to form the box/base

6. Score paper panel at 1.2cm (1/2") all round
7. Bone Fold
8. Dart score lines on 2 opposing narrower sides 
9. Fold over 4 corner flaps and apply glue to top face
10. Adhere 4 flaps to sides WHILST ON THE BASE to form the lid

11. Die cut the 2 Whisper White ovals
13. Ink up & stamp Rich Razzleberry greeting
14. Adhere to each other and to lid

Saturday, 15 July 2017

Foil Frenzy & Crafting Forever Concertina Card

The perfect way to celebrate a milestone moment for Betty in my Craft Therapists team... a specially designed new card with our new Crafting Forever stamp set and some special shiny Foil Frenzy paper which proved perfect for the job!
Crafting Forever Clear-Mount Stamp Set
Firstly, the card fold... I have shared many a Scallop Tag Topper Concertina card over the years since we first made one at Julie's training. But they all had 10 panels and more preparation/decoration... click here for the tutorial for the 10 panel ones...
The tutorial for this one will be another day...but this version has 14 panels allowing me to include the 11 letters in the Bronze Elite words plus 3 more for decoration... and this one is a lot simpler and quicker to decorate care of the thickness of the Foil Frenzy papers...
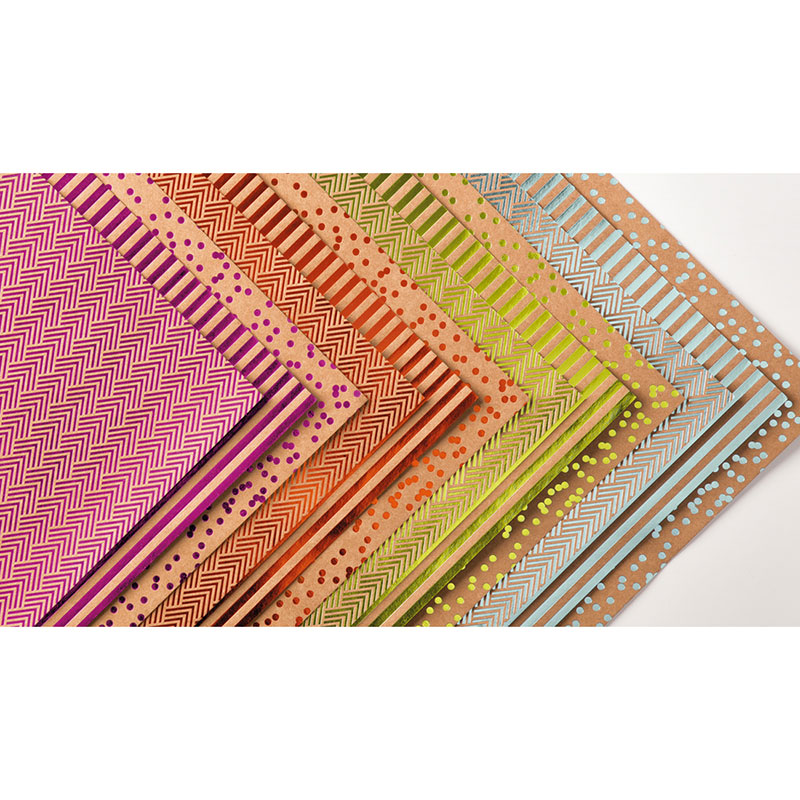
And secondly, the paper. The Tangerine Tango foiled papers in the very shiny Foil Frenzy pack are fantastic coupled with the Copper Foil to mark such a Bronze Elite occasion...
Foil Frenzy Specialty Designer Series Paper
I also used greetings from Happy Birthday Gorgeous (very glad I bought this stamp set... have to admit that I have had a lot of use out of it - many unexpected!), the wonderful Scallop Tag Topper Punch and the Classic Label punch
Congratulations on your promotion again Betty... I am very proud of you... enjoy your 25% discount on your Stampin' Up! supplies in the future!!! And your very special gift from me!

And for anyone else ready for a discount on products or to take on a new journey in their crafting life... click here to join me and The Craft Therapists Team... there are lots of extras available to you in the starter kit this month.... so now is a good time...

Sunday, 27 March 2016

Happy Easter to you!

2014_03_Easter Chick Tag Punch Treat Holder 5
Thought I would take an oldie but a goodie out of retirement for the day... just to wish you a Very Happy Easter... and my wish for lots of chocolate to be gifted to you today...

My ladies re-voted this little Easter Chick as their favourite still... so I couldn't resist re-sharing.... seeing as he is adorning our Easter table today....

Tutorial here...

Have a very Happy Easter...

Tuesday, 29 December 2015

A Round Up... Painted Blooms papers

I have just spotted that the End of Year Sale was updated again just before Christmas... and amongst other things... our favourite 2015 papers, Painted Blooms is now on there... at just £3.98 for the 12 sheet pack... which is a fantastic reduction for a £10.00 RRP pack...


So I thought it high time for a quick round up of some Painted Blooms projects... just press on the photo to go to the original post...

Also don't miss some of my other un-missables in the Sale... just read on to the end!!

First up... the the project that was the start of my Box Frame addiction!
Painted Blooms Box Frame Feb 2015 by Amanda Bates at The Craft Spa  (6)
Four Cards in a Painted Blooms wrapped Box from Quarterly Training...
Painted Petals. Made by Amanda Bates at The Craft Spa (18)
Our Easter Treats - the pull bars...
Pull Chocolate Bar Treat Holder, Amanda Bates at The Craft Spa 016
Easter Treats Amanda Bates at The Craft Spa 003
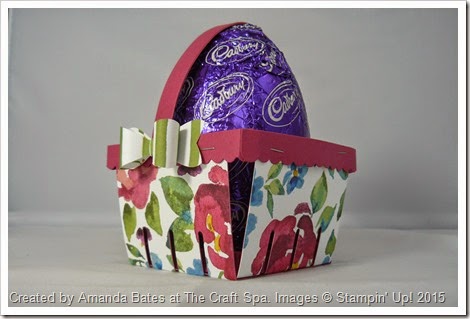
And our Baskets...
Amanda Bates at The Craft Spa 573
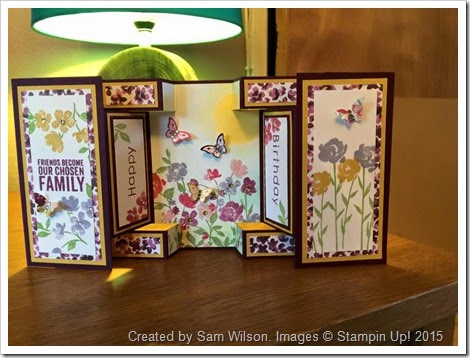
And finishing off with Sam's stunning Large Square Double Display Card make
Painted Blooms Large Square Double Display card by Sam Wilson
Snapshot of the papers...
Painted Blooms Designer Series Paper  by Stampin' Up!
And whilst I am looking at these Year End Bargains... a few more worth highlighting... either as un-missable (in my humble opinion!) - or just because they are such a bargain!

Festive Designer Kraft Paper...now only £3.58 for 2x 5yard rolls (RRP £8.95) Really good quality wrapping paper for all year round use... I stocked up! So I do use it all year round!
Festive Designer Kraft Paper Rolls
Chalkboard Paper... 10 sheets of 6"x 12" thick black card... now only £2.90... (RRP £7.25). Perfect for blackboard cards! And great for mini albums too!! I have a cunning plan for these...so I stocked up with these too!
Chalkboard Paper  by Stampin' Up!
Soft Sky Seam Binding... what a bargain!? And it was always my favourite... Now £2.50 RRP £6.25. Only 25p a yard...

Soft Sky 1/2" Seam Binding Ribbon
Watercolor Winter Simply Created Kit Now only £9.18 for 20 cards (RRP £22.95). Been on a while so easy to miss! But - at this price- these are fabulous cards for Christmas 2016! And so easy... This kit has been my favourite of all of the cards kit so far!
Stampin Up Watercolor Winter Kit
Watercolor Winter Card kit
And last but not least.... The Angled Tag Topper Punch Now just £12.57 (RRP £20.95)...having just made tags in record time for this Christmas - these punches are my must haves - and keepers!!
Angled Tag Topper Punch
Full list of items in the Year End Sale here... numerous papers, stamps, ribbon & embellishments - particularly good for those of you stocking up for next Christmas!

Right... off to unpack my pre-order box fully... I can feel a spot of crafting with new goodies coming on... yay!!! That is something that still makes me very happy.....

Saturday, 15 August 2015

Timeless Elegance Tag Topper Concertina Card

Well I couldn't not do one of these beauties whilst planning a Fancy Fold Card Class could I...
Still think these are just so simple but so stunning in the flesh... But they are really difficult to get a good photo of!
Tutorial here (video tutorial by my SU! upline, Julie Kettlewell)

2 ways to close...
or this... 
But there is a definite advantage with the first - called the Stampin' Up! Medium Envelope! The perfect fit!


Wednesday, 22 April 2015

Another Small Square Double Display Card

Mens Cards 044

Here is another version of the Double Display card I made for Training last weekend. Brighter and aimed at the younger males… Again using the fabulous Balloon Bash stamp set….

Mens Cards 045

Just a quick post today… and somewhat later than usual…. as I can see you are all loving the Retiring List and its discounts!! Been mad hectic around here for the last 48 hours…. Work wise and personally too!

Oh but whilst you are perusing…. don’t forget to look at the Weekly Deals and the Clearance Rack too… even more bargains to be had on those….

Particularly loving the Ornate Tag Topper Punch on the Weekly Deals. You too can make tickets like mine!

Ornate Tag Topper Punch by Stampin' Up!

Ornate Tag Topper Punch  137416   Price: £19.95 £14.96

Most tag punches punch out the entire tag, so you're limited to one size. But the Ornate Tag Topper Punch cuts out just the top of a tag so you can choose how long you want your tag to be. It also punches out the hole for a tassel or thread so you don't have to do it separately. Make quick tags, bag toppers, bookmarks, and more. Tag width: 2" (5.1 cm). Tag length: any length you want!
■ Push to punch--no squeezing
■ Large surface area offers precise cutting and leverage
■ Slim and sleek--easy to store

Hope to be back soon with my Not to Miss items from the Retiring List… though know quite a few from my original list have gone…. and need to check the others now before I can post!

Though I have to point out my favourite “must have at the price” on the Retiring List!! Especially if you haven’t got any Tag Topper Punches yet…  50 % off and fabulous…

Mine is a keeper….punches your standard Tag shape!! 2” wide…Any length… But also you can do so many of the other fantastic Tag Topper Punch projects we demos like to share ….

And it was still there last time I ordered….

Angled Tag Topper Punch

Angled Tag Topper Punch

Price: £20.95 £10.48

Saturday, 11 April 2015

Tickets 4 ways? A tutorial & Project Life Great Ouseburn Spring Festival

Tickets 3 ways by Amanda Bates at The Craft Spa (4)

Tickets anyone? A quick tip or two for you today…. and a Project Life page too….

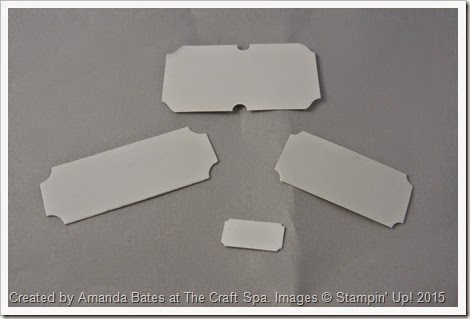
Whilst I was crafting away on my last series of Project Life pages…. I had a bit of a ticket theme going on… The  Ticket Duo Builder punch and the That’s The Ticket stamp set were out and in full use!

But then I realised that I had other images/greetings I wanted to use but that did not fit into the 2 ticket sizes in the Punch (which are those to bottom and to right in the image above)… so my brain started thinking…. and here are a couple of other ticket ideas for you….

First up - using the Project Life Cards & Labels Framelits dies – cut the frame then re-cut as wide as you need….. love that you can also get a cotton reel using this method!! (see centre)

Tickets 3 ways by Amanda Bates at The Craft Spa (2)

But this one I LOVE!!! And it happened totally by accident…..

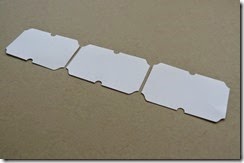
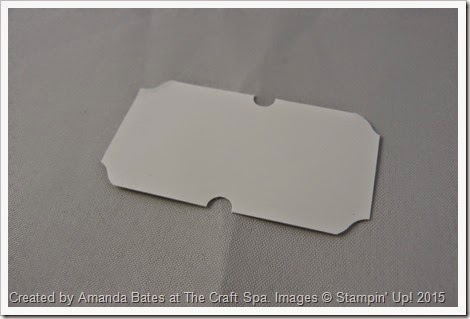
I was punching a Tag using my brand new Ornate Tag Topper Punch… the punch wasn’t open properly so the card did not go in all the way to the top – so I ended up with a semicircle notch at the top….

And then the idea dawned on me! So I cut off the rest of my Tag, stuck my card piece on a Post It Note and inserted the other side into the punch – lining up half way across the little circle and punched.

Et voila! A REALLY great ticket shape…. Love it when a punch does something you don’t expect it too…..
Tickets 3 ways by Amanda Bates at The Craft Spa (3)

So cut a piece of card just 5cm (2”) wide by 2.7cm (1 1/8”) long – but of course you can use any length you need...! Then….

1. Place card piece on a small Post It Note – make sure the sticky side is face up… otherwise it will stick to the punch when you insert it!

Ornate Tag Topper Punch TICKETS (1)

2. Insert into punch.

Ornate Tag Topper Punch TICKETS (2)

3. Turn punch over so you can see the card piece… Line up about half way across the circular hole…and punch!

Ornate Tag Topper Punch TICKETS (3)

4. Pull out the post it note/piece of card…

 Ornate Tag Topper Punch TICKETS (4)

5. Turn the card piece around the other way and place back on the post it note

Ornate Tag Topper Punch TICKETS (5)

6. Line up as before and punch…

Ornate Tag Topper Punch TICKETS (6)

7. Et voila…one ticket with notches either side

Ornate Tag Topper Punch TICKETS (7)

Or 3 in a row….

Ornate Tag Topper Punch TICKETS 021

But before I go…a quick one pager Project Life share…. and a plug….

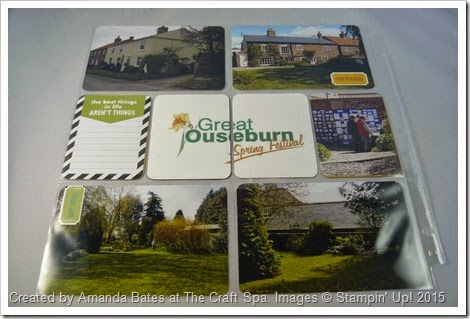
Our village – Great Ouseburn- between York & Harrogate in North Yorkshire - runs a fabulous Spring Festival fundraiser each year… this year it is BANK HOLIDAY MONDAY… 4th MAY 2015.
 Project Life by Amanda Bates at The Craft Spa

With some fabulous Open Gardens, Scarecrow Trail, Craft Fair, Plant Stall, Duck Race, Produce stall, Homemade Food Cafés, Barbeque, Pimms Bar & Posh Tombola on the Vicarage Lawn, Ice Creams, Church is Open, Woodland Walk, Nuzzlets animal rescue,  Morgan Car & Vintage Tractor Display, Raffle, Free shuttle bus, Free Parking.

A really lovely day out for all the family…

And this Project Life page is showing some photos from a year that we opened our Garden. I remember that it was one of those strange April days – gloriously sunny for most of the day with a lovely shower at the end – which ruined all my display samples!! You will notice that I sneaked in a Display board or two on the patio! Though I had to giggle at some of the projects on there…I have to admit that my crafting has come on a bit since those days!

But before you ask… no sadly our garden is not open this year…. so we will be busy elsewhere in the village this year…

Stampin᾿ Up! Supplies

Table built by craftingbecky.com