Showing posts with label Designer Tee. Show all posts

Thursday, 6 April 2017

Dragonfly Dreams...the Bee...

Need a quick idea to use those free Sale A Bration papers, Inside the Lines... well here are 5... ranging from very little colouring to colouring most of the panel! With a few out-takes (otherwise known as THE OOPS!!)

Top left you have seen before... click here for the how to details...

Then we have the Gold Aqua-winked one... amazing how subtle the Gold Wink of Stella pen can be... click here for the Aqua winking lowdown... but Oops #1... this was supposed to be a 3x3 grid!!!
Then we have the Thanks one... this one went to plan... same as the original one linked above but more coloured in... and do spot the gorgeous die cut bumble-bee... wish I had taken a close up photo... as it does seriously look like it is in flight...
Then the With an Extra Greeting panel one...  and Oops #2... do wait for your watercoloured panel to be dry before cutting with your trimmer into the 4 squares... that bottom left bit was wrecked...
And finally the Pink One... and Oops #3... if you stamp your greeting in Melon Mambo...do pick up your Melon Mambo watercolor pencil to do the colouring... not Rich Razzleberry...


Tuesday, 28 March 2017

Avant Garden Palm Trees Scene & Tutorial

Finally finished off a card project I started a while back!  As soon as I came up with the Avant Garden Palm Trees idea as shared here and here... the "daydream" stamp from Designer Tee and a hammock between palm trees beckoned me... but I had to go and create for my booked classes instead... so it went off to the side...

So today I grabbed my Serene Scenery paper stack and got to work. Love that the sky & clouds paper works so well for sea.... and that the dandelions paper works so well for a sunset sky... don't know why I didn't see these until today! But I am off to purchase some more now... makes cardmaking scenes so simple!
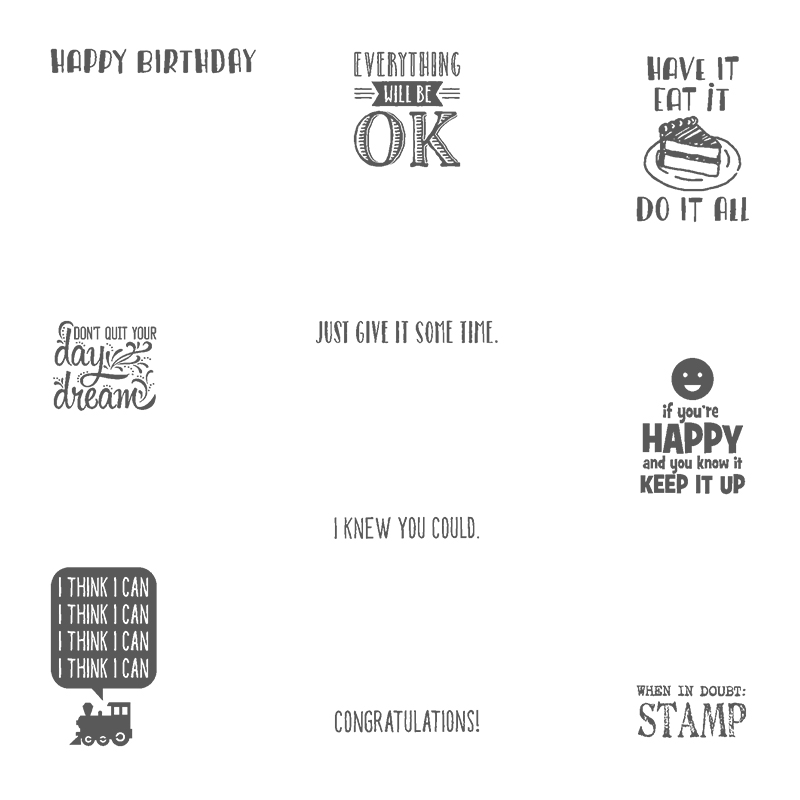
Stamped black sentiments both from Designer Tee (yours for free with a £45 order until Friday!) Have to admit that this is my most used Sale A Bration set...and not a T-shirt in sight (yet!)

Palm Trees stamped and given the Touches of Texture treatment as already shared here...

Hammock just a small piece of folded stripey ribbon with Linen Thread stapled along the back so I could attach to the trees (yes a few sewn hand-stitches would have been better... but I was a woman on a mission...and I can't sew!!)
Interestingly the card format I used changed suddenly from my original plan... as I saw this super Centre Box Card by Liza last night and had to make a version of the fold (without the extra box part as not needed on this occasion)... so thanks to Liza for immediately inspiring me to make this.... a super but simple fancy fold.... And it all folds to fit into a Medium Crumb Cake envelope (or a standard C6 envelope would work too)
My measurements are different as from our A4 card...
So this card is 10.5 x 21cm Thick Whisper White.
Scored when LANDSCAPE (long side at top!) at 3.5; 7; 14 and 17.5cm.

Paper Panels are 3x10cm (x4 for Fronts & Sides) and 6.5x10cm for the Back Panel.
Bottom Panel is Thick Whisper White 2.3 x 14cm & DSP 2 x 13.5cm

Enjoy! I did... and I don't think this is the last you will see of this card fold...
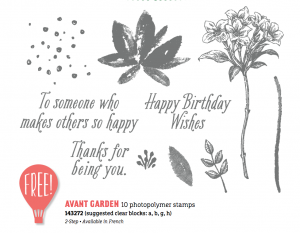
And remember...Sale A bration finishes this Friday 31st March... and that both Avant Garden and Designer Tee are stamps you can earn for free with a £45 order... full set pictures here... 
Related image
Image result for designer tee stampin up

Sunday, 12 March 2017

Watercolor Pencils #3 - Mediterranean Moments Cafe Scene...

The Watercolor Pencils and Mediterranean Moments are a match made in heaven for me! Along with the Watercolor Paper and the Aquapainters this time...

Can't say I am renowned for my watercolouring skills - but even I can make a half-decent job using these pencils..!!  And more importantly for me... really enjoy it too!!

And I will admit.. I love love love this little scene... but there again I have spent so much of my time on holidays in France over the years... it would be very hard for me to not love this set!
Things to spot here.... terms all made up by me... though there are probably some official watercolouring jargon terms for them too...

(1) Light, Medium and Dark Colouring/Shading... extra light touch for walls (Early Espresso) and pavement (Basic Gray)... medium touch for tablecloth and harder touch for seat cushions (both in Bermuda Bay)

(2) Spot Colouring... spot the geraniums in the planter under the window... just little spots of colour drawn direct with a hard touch of the Real Red pencil over the previously watercoloured (Old Olive) greenery... and no water add to those spots...

(3) Gel Pen Highlighting - impossible to see on the photos... but I added highlights to the chairs, windows and table legs using my (retired but never far away from me!) Signo gel pen... (though I do have a few gel pens left in stock....)

(4) Sale A Bration promotional Designer Tee stamp set greeting used... just the right size and font! (Yours for free with a £45 order until 31st March) Can't believe how much I have used this set... without a T-shirt in sight so far...
Image result for designer tee stampin up
Remember that I am still running the Watercolor Pencil Class if you missed last weeks'... just email me to book in...

Friday, 10 February 2017

Mini Explosion Card for Fancy Fold Friday

 
Oh I couldn't wait to make one of the Turkish Map Fold cards... this prototype being dressed up for a birthday... but this would make a super quick Valentine card if you are not ready for Tuesday!

NOTE FOR THE RECORD Jan 2022- I first found this paper fold on Craftsy.com in a Jan 2016 post... but they appear to have closed down the post (for free access)...  so I have amended the link to a later tutorial by fellow Stampin up demonstrator, Julie at The Paper Pixie...

Take a 6" square piece of paper... so any of the 6" square paper packs are perfect for the job, such as Sending Love used here... and fold as directed here... I just added an extra fold at the 4 corners... folding the peaks back on themselves to show a bit of the other side of the paper when open... 

My folded insert is then popped into an 8cm (3 3/8") square Whisper White card blank ...

Which is in turn popped into a Real Red 8.5x9cm card blank (17x9cm card scored LANDSCAPE at 8.5cm) (OR 3 1/2" x 3 3/8" card blank - 6 3/4" x 3 3/8" Scored LANDSCAPE at 3 3/8"). 

Inside finished off with a white embossed greeting from Big on Birthdays... though not very clear on the photos!

And on the front... Sahara Sand mat 3 x 2 3/4", Paper 2 3/4" x 2", Whisper White strip 3 3/4" x 5/8".

Front finished off with  Sahara Sand and Real Red Sealed With Love hearts and a greeting from Sale A Bration Designer Tee (yours for free with a £45 order!) - and Linen Thread... 

Gorgeous little card with a big WOW on opening! And a few more already made!!! They are so quick! And yes I do have envelopes to fit too!