Showing posts with label Centre Fold Card. Show all posts

Friday, 5 May 2017

A6 U Fold Card Tutorial for Fancy Fold Friday

Back to the U Fold Card  .... and a tutorial for you as this is resized specifically to fit the Star Blast die cut... and it is also the perfect size for fitting the card in a C6 envelope... so this will now be my go-to Small U Fold Card sizing...

It doesn't however fit in the SU! Medium Envelopes... which I presume are a US Standard envelope... so my US readers may wish to visit my very first U Fold Card (aka modified Centre Box Card) share in this post... (the one with the Palm Trees!) with both a metric tutorial and Liza's linked inches tutorial... that one does fit in the Medium Envelope...

You will need...

A4 Thick Whisper White 22.5 x 10.5cm (or 22.5 x 21cm if you want to do 2 at the same time like I do!)
A4 Thick Whisper White 15.5 x 8.5cm (*)
Paper for Back 8x10cm
Paper for Front/Sides 6 x 10cm (x2)
* Not got the Star Blast dies... shame but never fear... cut 15.5 x 3cm instead... and do something like this!)

And here is what you need to do...

1. Place the large Whisper white panel LANDSCAPE (long side along top) on your trimmer
2. Score at 3.5, 7, 15.5 & 19cm

3. If doing 2 up... Turn 180 degrees so PORTRAIT (short side along top) and cut at 10.5cm

4. Bone Fold Mountain, Valley, Valley, Mountain
5. Basic card done! Now wasn't that easy...

6. Die cut the smaller piece of Whisper White centrally using Star Blast die (note that the card panel is wider than the die!)
7. Snip at either side where shown...
8. Ink up & stamp as necessary

9. Cut the 2 smaller paper panels in half  PORTRAIT at 3cm
10. Adhere these cut panels to front and sides
11. Adhere larger paper to back

12. Adhere left side of front die cut piece to folded left hand side (NOTE - think about where your glue needs to go... or rather not go!!)
13. Fold the Left hand side over (so flat) and adhere the right hand side (again - think re glue!)
14. Finish decoration...
The card decoration is kept simple...

Front star panel stamped with a large greeting... and centre back stamped with the star flourish  - both from from the co-ordinating Birthday Blast stamp set

Sponge Brayered Irresistibly Floral papers on the sides

A Basic Black Star Blast die-cut added to the back of the white stars panel to add more definition
Whereas the first one had another Sponge Brayered Irresistibly Floral panel on the centre back and a gold glimmer Star Blast die cut added to the front of the white stars panel... and the side papers were added after the white Star Blast die cut panel...
Here are my Star Blast duo of cards together...
And before I go today... I have a few more of these to share in the pipeline... some which look completely different!... so keep watching this space!

Tuesday, 28 March 2017

Avant Garden Palm Trees Scene & Tutorial

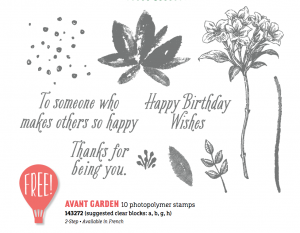
Finally finished off a card project I started a while back!  As soon as I came up with the Avant Garden Palm Trees idea as shared here and here... the "daydream" stamp from Designer Tee and a hammock between palm trees beckoned me... but I had to go and create for my booked classes instead... so it went off to the side...

So today I grabbed my Serene Scenery paper stack and got to work. Love that the sky & clouds paper works so well for sea.... and that the dandelions paper works so well for a sunset sky... don't know why I didn't see these until today! But I am off to purchase some more now... makes cardmaking scenes so simple!
Stamped black sentiments both from Designer Tee (yours for free with a £45 order until Friday!) Have to admit that this is my most used Sale A Bration set...and not a T-shirt in sight (yet!)

Palm Trees stamped and given the Touches of Texture treatment as already shared here...

Hammock just a small piece of folded stripey ribbon with Linen Thread stapled along the back so I could attach to the trees (yes a few sewn hand-stitches would have been better... but I was a woman on a mission...and I can't sew!!)
Interestingly the card format I used changed suddenly from my original plan... as I saw this super Centre Box Card by Liza last night and had to make a version of the fold (without the extra box part as not needed on this occasion)... so thanks to Liza for immediately inspiring me to make this.... a super but simple fancy fold.... And it all folds to fit into a Medium Crumb Cake envelope (or a standard C6 envelope would work too)
My measurements are different as from our A4 card...
So this card is 10.5 x 21cm Thick Whisper White.
Scored when LANDSCAPE (long side at top!) at 3.5; 7; 14 and 17.5cm.

Paper Panels are 3x10cm (x4 for Fronts & Sides) and 6.5x10cm for the Back Panel.
Bottom Panel is Thick Whisper White 2.3 x 14cm & DSP 2 x 13.5cm

Enjoy! I did... and I don't think this is the last you will see of this card fold...
And remember...Sale A bration finishes this Friday 31st March... and that both Avant Garden and Designer Tee are stamps you can earn for free with a £45 order... full set pictures here... 
Related image
Image result for designer tee stampin up