Monday 31 August 2020

Last Call for Bonus Days promotion free product claims


Today is the last day to claim your free products using your Bonus Days coupon codes... 
Coupon codes were emailed to you if/when you placed your July order..

And here is what you need to do...  

Click here to Shop... 
And then...

Sunday 30 August 2020

Shiny Slimline card for Sunday aka Evergreen Forest #3


Or should I say Wrapped in Christmas with Evergreen Forest  #3... though I don't think these photos do this card justice....

Now the main feature of this card was actually a bit of a mistake! I wanted to highlight the front trees... and decide that my trusty Wink of Stella glitter pen was the tool for the job...

But it hadn't been used for a long while... and so it was running a bit dry... so I gave it a good squeeze... and out loads popped straight onto my embossed panel!! So I swooshed it all around (just using the Winkie brush tip) and out those 3 front trees popped! Amazing!
And finished off with a few of the new Adhesive Backed Snowflakes ...

All set on a Slimline Card... which are "all the rage" at the moment....

This used to be called an A6L card (or A6 long in full) back in the day... Two from a piece of A4 card ... just in the other orientation!  Cut your A4 card in half (ie Landscape at 14.8cm) and then score in half (ie Portrait at 7.4cm)

And before I go... I do have to note the amount of experimentation I seem to be doing nowadays...
(Very sadly) Gone are the days of creating projects for and running face to face classes... so I can afford the time to just play... try things out... and for things to go wrong... as indeed they do!

And as I always say... we actually learn a lot more from our mistakes than we do from getting everything "right" all the time... which is my excuse for sharing all my mistakes with you....

Or as my (or rather Joseph Chilton Pearce's) favourite craft saying says...
Just SO true!

And here are the full Evergreen Forest  with Wrapped in Christmas trio... though rest assured I haven't put the embossing folder away yet... 
Scroll back 2 days/posts for the other two...

Saturday 29 August 2020

Simple on Saturday - Evergreen Forest #2

Think I should call this the Double Inked Embossing technique (oh dear that's DIE for short!)

Another simple card with amazing textural relief... albeit such a flat card...

This time I inked up the raised trees on the back face of the Evergreen Forest embossing folder with the Gray Granite ink pad....
Then I cleaned off any ink off the top flat part of the back face - with just a tissue...

And then I inked up the top flat part using Mist Moonlight ink and a Sponge right at the top and then a Finger Dauber around and in the tree line...

Then I embossed my piece of card...
You can then neaten off as desired using the sponge and or dauber... I just had a part between a couple of the trees that was still white... so I quickly applied a bit of ink using the side of the dauber...

And a hand cut snow bank to finish... again stamped with another lovely greeting from Wrapped in Christmas

But part of the experiment went wrong with the snow bank... though you may not be able to see in the photos...
I daubed the top of the snow bank with Gray Granite... as that added some extra definition... So all good so far...

And then I applied some Shimmery Crystal Effects... which then dried... well a sad glossy grey! So a bit of extra definition but not so nice to my eye! Think I should have used a pale blue instead to make it warmer... Any of Seaside Spray, Balmy Blue or Pool Party would have worked...


Friday 28 August 2020

Friday Forest...

Many people appear to have overlooked this little gem of an embossing folder in the new Autumn Winter mini catalogue... so I thought it high time to highlight it...

So introducing the Evergreen Forest embossing folder... and the start of a series of experiments... Maybe even a series of series... is that a serii!!!?
EVERGREEN FOREST 3D EMBOSSING FOLDER
Although you probably can't tell from these photos... this card has such texture care of the inked embossing... just love it... and not even any 3D foam Stampin Dimensionals in sight.... 

This is created by a simple inking up of the embossing folder... just dragging a Gray Granite ink pad over the raised ( back) face of the folder... with the flat part at the top being inked as well as the raised trees... And then embossing a piece of card..
Though not a perfect make as I ended up with a random sky pattern... which my eyes needed covering when making up a card... hence the circular embellishment to the top right...

Finished off with a snow bank (hand cut or die cut using the Coming Home bundle)
 
 Which I have then stamped with another greeting from the fabulous Wrapped in Christmas stamp set (think this may be my all time favourite christmas greeting set!)
WRAPPED IN CHRISTMAS CLING STAMP SET (ENGLISH)
And here are a couple more makes using the Evergreen Forest embossing folder... too nice not to share as well... 
EVERGREEN FOREST 3D EMBOSSING FOLDER

Thursday 27 August 2020

Three Ways on Thursday - Moving Along

Introducing Moving Along... a go to travel stamp... and very cute!  Love it!
MOVING ALONG PHOTOPOLYMER STAMP SET (EN)
3 simple cards based on 3 simple cutting templates and a small piece of Designer Paper, can't really go wrong... Simples!
And whilst I am here... a bonus card for you... 
MOVING ALONG PHOTOPOLYMER STAMP SET (EN)

Wednesday 26 August 2020

Wednesday Wreath - Blossoms In Bloom in the blues Stamped One Sheet Wonder....

So this was the third of my Stamped One Sheet Wonder sheets created last week...
Another wreath on a 12x12 Whisper White sheet... resulting in a set of 7 cards...
Featuring Blossoms in Bloom ( flowers and leaves), Very Versailles (leaves and text), Sending Sunshine (leaf frond) and Waterfront (splodges)  along with Sending Sunshine and Ornate Thanks for the final greetings...

Using my favourite floral colour palette of blues &  greens with a touch of yellow... or Balmy Blue, Misty Moonlight, Granny Apple Green, Mossy Meadow, Pretty Peacock and Mango Melody... with Gray Granite for the textural background features... and splodges...
And I can't wait for my next delivery to arrive next week... as I have some lovely flowers and leaves in there! Can't wait to play again...

PS Thank you to my customers and fellow demonstrators who have shared their Stamped One Sheet Wonder cards with me... I am so happy to have inspired so many of you to give this technique a go... it is definitely worth it! Though beware the need to buy more flowers and leaves !!!

Tuesday 25 August 2020

Tuesday Technique - Mirror Stamping

Realised that I didn't "come back" and share how I mirror stamped my flowers on this card... which I reckon makes for a "more balanced" image overall!

And so without further ado... the most effective method is to use a Silicone Craft Sheet and the Stamparatus...
Place the Silicone Craft Sheet onto your Stamparatus mat.... and your stamp onto the hinged plate...

Ink up and stamp the image 2-3 times onto the mat using Memento ink each time...

Then place a piece of card over...and use your Bone Folder to smooth out over the card and so maximise the ink transferral... for a beautiful clear reversed or mirror image...

Cut out the image by hand (my preference!) - or reverse die cut with your die (I find that putting the image on the cardstock up to the light and then positioning and securing the die onto the - unstamped- back of the cardstock (with tape on the die so it is ready to go!) is the best way to get things lined up...


Monday 24 August 2020

Love of Leaves with Gilded Autumn Trio

3 Love of Leaves cards... for 3 levels of papercrafter... though personally I like the simplest one (on the left) best!!
LOVE OF LEAVES PHOTOPOLYMER STAMP SET (ENGLISH)
Love these Leaves (as the name says!)
LOVE OF LEAVES BUNDLE (ENGLISH)
And the gorgeous Gilded Autumn papers...
GILDED AUTUMN SPECIALTY DESIGNER SERIES PAPER
Elegant designs in earthy colours... with copper and gold foil on some designs..

Click here to see each sheet... .

Saturday 22 August 2020

Hand Drawn Blooms & No Line Stamping Watercolour

 Another make using Hand Drawn Blooms and the No Line Stamping Technique...

You know the one... Inkup and stamp in a very pale colour so that the lines "disappear" when you add your colour... which works particularly well when watercolouring as you end up looking like a fantastic artist that can draw superbly! I used Gray Granite ink...

I used the Watercolor Pencils for the watercolouring as it has been a while since I had those out... just a scribble here and there and then pulled out using a Blender Pen... perfect mediums for watercolouring these small floral images and for adding colour to the stalks and sprays... And so many colours for such a small price...
Finished off with Daffodil Delight Ruched ribbon... with an illusion of the ribbon being tied around the stalks and then into a bow.... which is how you would do it naturally

So a straightforward small bow... which is stuck (with a Mini Glue Dot) on top of a small piece of ribbon that is pushed through either side of the stalks... as I cut a small slit either side of the stalks and pushed a small piece (only about 1") of the ribbon through before I stuck the panel onto the Balmy Blue mat....
Greeting from So Sentimental (have to admit that this greetings set is still getting a really good workout...)

And here are the No Line Stamping Hand Drawn Blooms duo... the other one being coloured in using Stampin Blends... click here for the rest of the details on that one (with or without the gnome!)


Friday 21 August 2020

Stamped A4 One Sheet Wonder Cards set

Following on from the last 2 days post... this was actually the first sheet I stamped one sheet wonder style...
But I was surprised ... as I realised that I had filled everything in... rather than  leaving lots of white space as 'those of you that visit me regularly' would have assumed I would have done!
So I could call this the technique that continues to amaze (me!)
And a shot of what I used on this one... as totally different to yesterdays... Blossoms in Bloom for the main parts... leaves from Sending Sunshine again... and greetings from So Sentimental...
Note that I applied a darker Midnight Muse (with a dauber) to the centre of the large flowers image before stamping... which I forgot to show in the shot of what I used below...

Oh plus the Waterfront splats and Very Versailles text... 
Though I will admit that ... in the future... I would stamp any text after cutting up my panels... as that way I wouldn't have to use my panels in the direction of the text!

Though funnily enough I can cope with this text being upside down... as I don't think you can really tell! But I don't like it running up or down in direction aka on its side...

Thursday 20 August 2020

Stamped One Sheet Wonder Wreath Card set #2

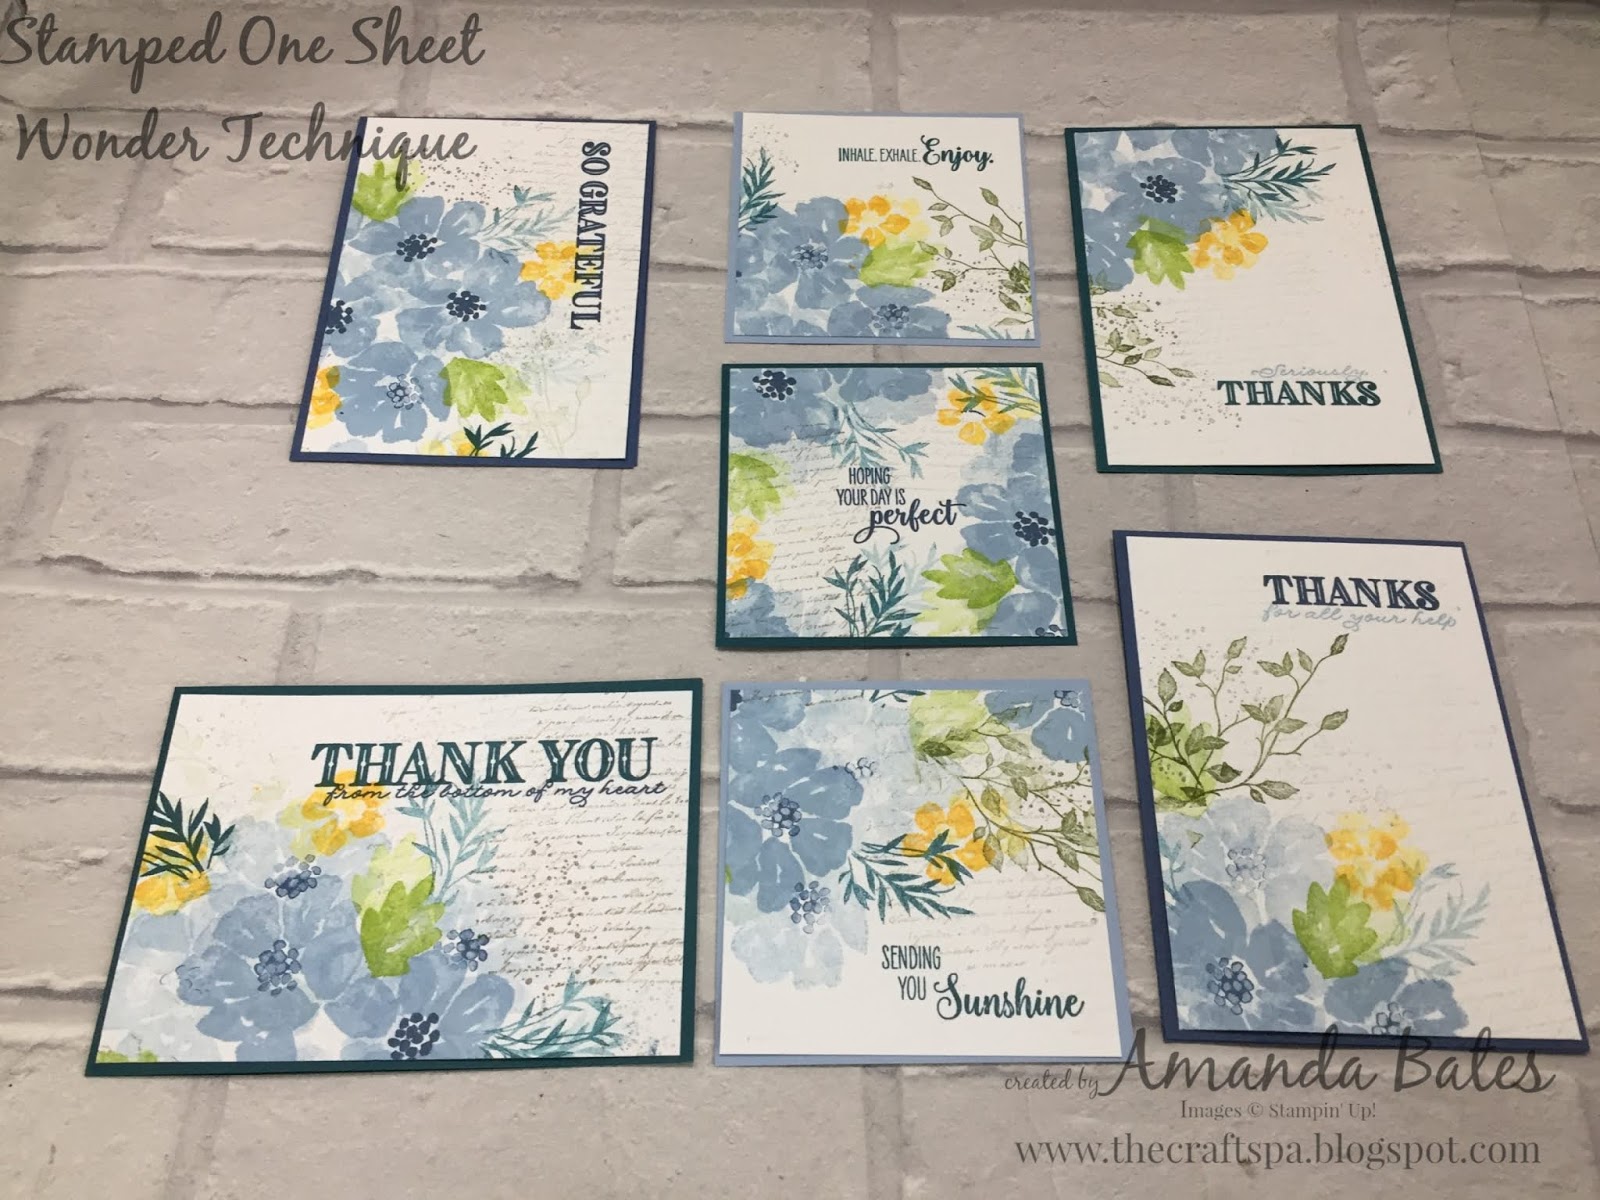
Following on from yesterday's post... I have some more details for you on the Stamped Wreath One Sheet Wonder set of cards I created...

Firstly... here are the colours and  products I used...
And just in case they are too pale to see..Soft Sea Foam and Petal Pink ink pads at the top of the piles...
Relevant stamps laid on top of relevant ink pad...so hopefully this one picture paints a 1000 words! 
And these are the Grey Granite splodges I forgot in the original photo! And I had already tidied away... so 2 photos then!

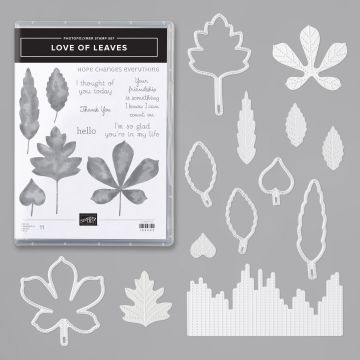
Not got some (or all) of these stamps... then click on the name to add to your shopping cart and order... for Blossoms in Bloom, Healing Hugs, Sending Sunshine and Waterfront... or otherwise... just grab some flowers, leaves, splodges and textures stamps and have a go! You won't regret it....
So the wreath was produced on a Very Vanilla 12" Square piece of card.... 

Spot that I lightly sponged Gray Granite over all my bright Vanilla areas! (again very unlike me with my love of white space but I just went all out of the box!!!)

And an admittance.. I thought I was using Sahara Sand... but hey - I had the wrong ink pad out!
Then the square was cut into 3 x 4" wide strips...
The left and right being cut into 4" x 14.5cm panels (so two from each) For those of you working with US Letter sized cardstock - I'd suggest 4" x 5 1/4" for your standard card blanks- the matting from the card blank will just be slightly wider than mine)
And the central strip into 3 x 4" panels... sorry no photo!
 I then re-orientated some so that stamping the greeting made most sense..
And there you have them... 
Oh actually not quite! Couple of the panels got slightly amended... so bear with me! Some strategic stamping to the rescue...

First up.. the central square panel was a bit bare for my taste... 
 So more Sending Sunshine Mossy Meadow leaves to the top...
Then a couple more Blossoms in Bloom Cajun Craze with Mango Melody centred flowers... to top and right
 Finishing off with the Healing Hugs Mossy Meadow greeting...
That's much better... 

And then an inked & caught clear block edge when stampin the Mossy Meadow greeting...

 Quickly covered with another Cajun Craze with Mango Melody centred flower...
Phew... much better...