Showing posts with label Healing Hugs. Show all posts

Thursday, 20 August 2020

Stamped One Sheet Wonder Wreath Card set #2

Following on from yesterday's post... I have some more details for you on the Stamped Wreath One Sheet Wonder set of cards I created...

Firstly... here are the colours and  products I used...
And just in case they are too pale to see..Soft Sea Foam and Petal Pink ink pads at the top of the piles...
Relevant stamps laid on top of relevant ink pad...so hopefully this one picture paints a 1000 words! 
And these are the Grey Granite splodges I forgot in the original photo! And I had already tidied away... so 2 photos then!

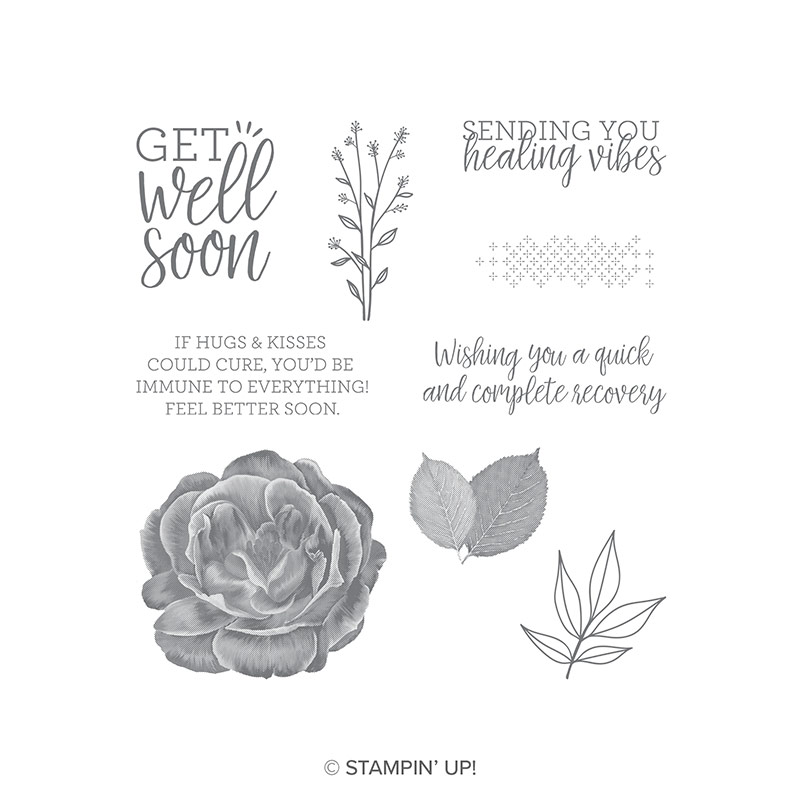
Not got some (or all) of these stamps... then click on the name to add to your shopping cart and order... for Blossoms in Bloom, Healing Hugs, Sending Sunshine and Waterfront... or otherwise... just grab some flowers, leaves, splodges and textures stamps and have a go! You won't regret it....
So the wreath was produced on a Very Vanilla 12" Square piece of card.... 

Spot that I lightly sponged Gray Granite over all my bright Vanilla areas! (again very unlike me with my love of white space but I just went all out of the box!!!)

And an admittance.. I thought I was using Sahara Sand... but hey - I had the wrong ink pad out!
Then the square was cut into 3 x 4" wide strips...
The left and right being cut into 4" x 14.5cm panels (so two from each) For those of you working with US Letter sized cardstock - I'd suggest 4" x 5 1/4" for your standard card blanks- the matting from the card blank will just be slightly wider than mine)
And the central strip into 3 x 4" panels... sorry no photo!
 I then re-orientated some so that stamping the greeting made most sense..
And there you have them... 
Oh actually not quite! Couple of the panels got slightly amended... so bear with me! Some strategic stamping to the rescue...

First up.. the central square panel was a bit bare for my taste... 
 So more Sending Sunshine Mossy Meadow leaves to the top...
Then a couple more Blossoms in Bloom Cajun Craze with Mango Melody centred flowers... to top and right
 Finishing off with the Healing Hugs Mossy Meadow greeting...
That's much better... 

And then an inked & caught clear block edge when stampin the Mossy Meadow greeting...

 Quickly covered with another Cajun Craze with Mango Melody centred flower...
Phew... much better...


Wednesday, 19 August 2020

Wednesday Wow - Stamped One Sheet Wonder

So last Wednesday I watched a video! And I watched it to the end... and I was very inspired! And so I made these... which I love so much that I didn't even finish popping the onto card blanks before I had to share with you....

And I know that many of you will be surprised at those words... as I am self-confessed video tutorial hater... yes we still truly exist! But maybe I have now (finally) seen though a little crack in my armour!!!
So a huge thanks to the lovely Ruth Trice, fellow UK demonstrator for her Zoom demonstration on the Stamped One Sheet Wonder technique (otherwise now also dubbed Split Cards Technique by others) and Liz Hockley, our Stampin' Up! UK Demonstrator Development Manager who arranged the session...

I was indeed lucky... as on the day... my lunch got delayed for a couple of  reasons... so as I sat down nearly an hour later... the live session popped up on my Facebook feed... so I just watched and listened whilst I ate... and then I was a  hooked... so watched to the end... as - if all had gone to my lunch plan - I would never have seen it...
I was particularly inspired by one of Ruth's samples... in colourways rarely seen on The Craft Spa blog... as  (most of ) my ladies just don't like these hues... but I think you may see more of these whilst I am not running face to face classes... as I just love this combination... warm, cozy and inviting... Love it when the unexpected happens!!
And now maybe I might even try to watch some other video tutorials again... and maybe even try doing one of my own... so please feel free to click here and email any must-watches, tips or format preferences!! Though I have to admit that I will never cope with watching the more waffly and/or drawn out tutorials....! I'd just scuttle back in my hole (as I have done for years!)
And I do have to laugh as I never thought I would use that cabbage rose from Healing Hugs... but it was perfect for this technique... So a third unexpected happening... In fact Healing Hugs had had a real good work out on this set...

And come back tomorrow for more details on this set of cards... as I have waffled on long enough for one day!
And a final admittance... Ruth has cost me a lot of money... as I have now spotted gorgeous flowers sets in the Annual Catalogue that my eyes had just never seen.. and this technique is just such fun... so I can't resist! For investigation purposes only you understand...


Thursday, 13 August 2020

Todays (Thursday) Tiles with multi colour stamping and a Round Up Shot...

Think these may be the last of my Today's Tiles projects... what will I do for Thursday posts now... LOL!

So a round up shot of my Today's Tiles projects... though to be fair some had already been posted off before I took this photo... so there are some missing...  wow! I did make a lot in one session... such fun...
Click here to see more details on these (and more) cards.. or ... if that fails!... type Todays Tiles into the "search this blog" box (4 down on the RHS)

So a couple of multi colour variants to share today... created to send cards with friends favourite colourways... so easy to do with the Todays Tiles set... though I wish I had stamped a few brighter variants at the time!!!

So Bermuda Bay  & Seaside Spray on Midnight Muse...
And Rich Razzleberry & Seaside Spray on Midnight Muse... with a 3/8" Denim Ribbon bow ... which  happens to go well with the new Midnight Muse colour...
Both finished off with a stamped Healing Hugs greeting on a die cut Stitched Shapes square...

Multicolour stamping using Stampin Spots (as perfect size!) and the decorative "over the top" stamp... inking up every other section* with one colour... then inking up the other sections with the other colour... and then stamping over my background...

* Annoyingly I have misplaced the photos I took at the time... but I found this easiest to ink up by using the paler colour first... Stampin Spot down onto the 4 sections required... and then inking up the darker sections by placing the stamp section down onto the spot...as I found it easier to line up more accurately that way.... but I do think this would have been even easier with the Stamparatus if I had had the patience at the time to set it up... But I only had a few hours with the stamp set... and lots of ideas to try!

Thursday, 31 October 2019

Friday, 4 October 2019

Fancy Fold Friday - Landscape Gap Card with Tutorial

I think that I warned you that there would be a few versions of the Gap Card...

Todays' is a standard A6 card ... but in landscape orientation this time... and so I have the Tutorial for you today... 
But click here for the A6 portrait tutorial... which has step by step photos if you need them.... 

Using the Garden Lane papers... and other Stampin' Up! products used are Butterfly WishesDaisy Lane & Medium Daisy PunchHealing Hugs, and Frosted Frames dies... 

And I love the fact that these Frosted Frames dies are not just for Christmas! The snowflakes looking like little leaves behind those daisies...
Craft Spa Recipe
Soft Sea Foam 14.8 x 17.5cm
Papers 14.3 x 3cm (x2) 
(D) (Fancy Frame) Mossy Meadow 10.5 x 14.8cm 
(S, D) (Stitched Frame)Thick Whisper White 7 x 8cm 

Craft Spa Tutorial

1.     Large panel LANDSCAPE
2.     Cut at 3.5cm
3.     Move along & score at 3.5cm
4.     Bone Fold
5.     Adhere papers

6.     Put temporary glue on back of small panel
7.     Line up at bottom of main card & temporarily adhere
TIP – use grid paper to aid your eye in getting things all straight

8.     Thinking about where you need your glue, apply glue to top and bottom of fancy die cut frame
TIP – I tend to just use a finger or thumb to eyeball where I don’t want my glue to go…but you can mark the back of the card as shown here…
9.     Adhere the frame

10.            Decorate as required

11.            Rub off the temporary glue (I just used my finger... but the retired Adhesive Remover works a treat too!

Saturday, 28 September 2019

Simple for Saturday... Garden Lane Faux Double Point

So time for a remake of the Faux (or Deconstructed) Double Point Card in the Garden Lane papers for my classes this week...

But before I start... Live in the UK? Want crafty supplies at discount? Have a large Stampin' Up! Wish List?

Then I would love it if you joined my team... as I have a very special place for you... and so a very special gift for you.... Click here for more details and/or please contact me via this email link...  No future pressures (unless you want them!) ... and Hobby Demonstrators truly welcome...
And so back to my card... now I have to admit that this is definitely the favourite of  the Double Point Cards... as  it is simpler... and quick... and you don't use much paper... so it is a good value card too!

Click here for the Tutorial... 

Other Stampin' Up! products used today include... 
All of which does make for a very quick card... 

Thursday, 26 September 2019

Garden Lane Gap Card

Back to another Gap Card...
This time in the Garden Lane papers... which are one of the packs on the Buy 3 Get a Fourth pack for Free paper promotion running at the moment...
And these papers are worth checking out... as they are suitable for virtually everyone and every occasion in your life... and can be simple dressed with flowers and leaves as and when required!
Click here for the card tutorial... with these Garden Lane papers pictured... though I didn't make the Scrap Card this time as these papers are 12x12 so I could get another card or two from the strip instead!
Other products used are Butterfly Wishes, Daisy Lane & Medium Daisy Punch, Healing Hugs, Leaf Punch, Floral Centres and Stitched Rectangle dies...

Friday, 12 July 2019

Fancy Fold Friday Tutorial - A6 (ish) Pop Up Front Step Panel Card

 
And so finally the Pop Up Front Step Panel Card Tutorial... This is the first variant I re-sized for specific purposes... which was to size for a Stitched Rectangle die cut front panel (as for this card).... so A6(ish) in size... (or A2 from US Letter card) 

And a size I have used a few times over the past few months... Click here for another Pressed Petals card - and the links to 3 other cards at the end of that post.... 
And this card is easier with step by step photos the first time around.. 

As although really easy once you know what you are doing... there are a few key steps that can easily go wrong! 

So... think FLAT WHEN STICKING... and think GO IN ENVELOPE!


Craft Spa Recipe 
Main Card - A4 Card Mossy Meadow 10.5cm x A4L (US Letter 4 1/4" x 11")
Front Panel - A4 Card Crumb Cake 14 x 6.5cm (US Letter 5 5/8" x 2 3/4")

Card Back - Floral Paper 10 x 8.5cm  (US 4" x 3 1/4")
Card Base – Text Paper 10 x 7cm (then cut LANDSCAPE to Top 2.5cm & 4.5cm Front/Bottom)  (US 4" x 2 3/4" - cut 1" Top & 1 3/4" Bottom)
Front Panel –Music Paper 6 x 11.5cm (then cut LANDSCAPE to Top 2.5cm & Front 9cm)  (US 2 1/2" x 4 3/4"- cut Top 1" & Bottom 3 3/4")
Craft Spa Tutorial
1.     Score Mossy Meadow panel LANDSCAPE at 14, 17*, 22 and 25cm (US Letter 5 1/2", 6 3/4", 8 3/4" & 10")
*TIP - 17cm is not to be found on the European SU! trimmer top bar! So score at 14, 22 and 25cm... then turn the panel around 180 degrees (ie so that the right hand side becomes the left hand side!) and score LANDSCAPE at 12.7cm (or 5") 


2.  Score Crumb Cake panel LANDSCAPE at 1 & 4cm (US Letter 3/8" & 1 5/8")
TIP - easiest to score LANDSCAPE at 1cm (US 3/8") to right hand side (RHS) on Top Bar...
Then turn 180 degrees (ie so that the RHS becomes the LHS!) and score LANDSCAPE at 4cm (US 1 5/8")

3.     Mountain bone fold all score lines

NOW... I highly recommend that you do a dry run of the following steps 4-6 then 8-12 then 13-16... before applying glue... as it is (usually) obvious once you do it...


4    Fold up the base of the Mossy Meadow card to create the front step (like a box section) 


5     Apply glue to last/end section (ie on the back!)
6     Fold up flat to stick  ie TIP - height of card should be smallest option so it will fit in a standard envelope!

TIP- the last "glued" section does not fold all the way down to the bottom/back score line - concentrate on folding all the card completely flat and sticking... NOT trying to fold that score line where it doesn't want to go!
7.      Adhere papers as necessary
Note that you are better inking up & stamping the greeting onto the front panel paper before sticking the paper panel!!! Especially when embossing like I have here...
8.   Fold over the top 2 sections of the scored Crumb Cake panel so that they are to the back... 
9.     Apply glue to last/thin "glue tab" section
10. Fold up card base/step so that height is smallest option!

Line up 2nd score line to top of back of main card (ie you have 2 sections folded to the back - not one as would [normally] be more logical!!)

And so that front panel is central to left and to right...

11. Stick
12. Apply pressure along the glue tab to adhere firmly...

13. Fold up card base/step so that height is smallest option!

14. Work out where you need your glue on the front panel at the bottom of the card!

15. Apply glue where needed (ie under the line of the bone folder!)
... or more importantly not where it it is not needed! (ie above the line of the bone folder!)

16. Fold front panel down flat to stick...
17. Decorate as necessary.

Notes 

(1) Don't stick anything that will go underneath the bottom of the card... It needs to be flat to stand up...
(2) I recommend that you have an envelope to hand to make sure everything is stuck on so that the card fits in your envelope. Especially if you are using a US medium (A2) envelope as you have less height than we do with our C6 envelope... With particular attention to the daisy to the top right... I believe that will have to be dropped down compared to mine...
And I thought I had better add the word MOTHER... as we have finally been given a date for her operation today! So I am organised for that next Tuesday now... well at least with a card! Label finished off on a small piece of Gold Foil... 


Stampin Up! products used  
Stamp Sets - Daisy Lane (flowers), Healing Hugs (greeting); Painted Harvest (leaves); Family Party (Mother)
Punches - Medium Daisy, Leaf
Papers - Pressed Petals
Card - Mossy Meadow, Crumb Cake, Thick Whisper White, Gold Foil
Inks - Crumb Cake, Daffodil Delight, Mossy Meadow, Soft Sea Foam, Pumpkin Pie, Versamark & White Embossing Powder
Tools - Heat Gun

And sorry! I can't tell you how many times this tutorial has been attempted over the past few months... but I was scuppered every time... such is the time (and concentration!) it takes to make, photo and write a step by step tutorial... and my hospital visiting hours for the last 3 months have meant that I just haven't had those hours in a day! 
Amanda's Quick Links
Just click on the relevant pictures below for On Line Store, Catalogues and/or more information... 
If you are ordering today... please add the Host Code shown below to earn yourself a gift... For orders over £150 you should claim your own Stampin Host Rewards... you will still get a separate gift from me... 

Current Catalogues & Extra Products