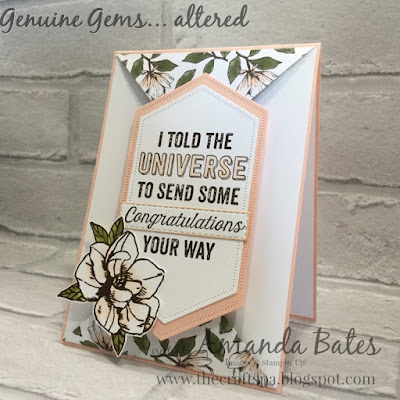
So here we go... the simple way to make a Nested Labels Double Point card... as long as you don't want the "flappy bit" which (for many) is probably a main feature of the original Double Point Card... though not for me...
So this simplified way gives me everything I like in the Double Point design... but at speed... and with less materials being needed....
And I changed this one up after the original
Noble Peacock De-constructed Double Point Card posted here... as thinner Magnolia Lane papers meant I could add a co-ordinating mat whilst I was at it...
And please note that for simplicity's sake in the Tutorial...
(1) I kept the paper panel the same size for both of these card variations (the coloured mat being optional and that bit larger...)
(2) I have not altered the panel & mat dimensions for a wider US A2 card (4 1/4" ilo Rest of World A6 4 1/8" wide)... so you will have a bit of a white gap to line up on the top and bottom edge of this version...
But that's nice! So why re-design and complicate matters!! Look at t
his version here to check out "a bit of a white gap"
Craft Spa Recipe
Stamps - Magnolia Blooms
Papers - Magnolia Lane
Stampin Blends - Mossy Meadow combo, Petal Pink combo, So Saffron Dark
Whisper White A6 Tent Card Blank
(OR US A2)
ie 10.5cm x A4long - scored LANDSCAPE at 14.8cm (OR US 4 1/4" x 11" long - score LANDSCAPE at 5 1/2")
Mossy Meadow Card 7.4cm (2 7/8") Square
Paper Panel 6.7cm (2 5/8") Square
(D) Mossy Meadow 12 x 7cm
(D) Whisper White Thick 12 x 7cm
where (D) is for die-cutting
Craft Spa Tutorial
1. Cut Card and Paper Squares diagonally (point to point!)
2. Adhere to each other
3. Adhere to card blank (with or without a gap round the 3 sides)
4. Die cut 2 x Nested Labels
5. Hand cut white Nested Label (using line inside the stitched line to guide your eye AND do shorter ends first)
6. Ink up & Stamp greeting
7. Adhere to each other and to card blank
8. Ink up & Stamp Early Espresso magnolias
9. Colour in using Stampin Blends
10. Fussy Cut using Paper Snips
11. Adhere


