Showing posts with label Perennial Birthday. Show all posts

Thursday, 29 August 2019

Genuine Gems - but not as we know it!

So some people seem to like ...and some loathe... the AWESOME word in the Genuine Gems stamp set...
So I came up with an alternative plan! Congratulations care of Flourishing Phrases... in a die cut Stitched Rectangle...
So now you can add pretty much anything!
Original greeting'd Magnolia Lane Double Point Card details as shared here

Friday, 9 August 2019

Magnolia Lane Double Point Card

Loving all the Double Point cards around on the web using the Stitched Nested Labels dies... a perfect match of card design and product!!
So thanks to the originator of the use of this concept this time round... which I think may have been Phyllis Shively &  Lisa Curcio here... who shares a video tutorial for you too...

Though I believe the originator of the card fold "way back when in 2017" is the talented Jeanie Stark who can can be found here...  along with her tutorial...
OR just "Google" or "You Tube" A6 Double Point Card if you need a video tutorial for an A6 version (from A4 card)
.
Though my "brain" can't work out the appeal of the extra front part that is formed... aka the flap part!
Apart from the fact that it does give a bit of dimension... so I will just be sticking that down! Which still keeps the extra dimension if you use 3D pads...
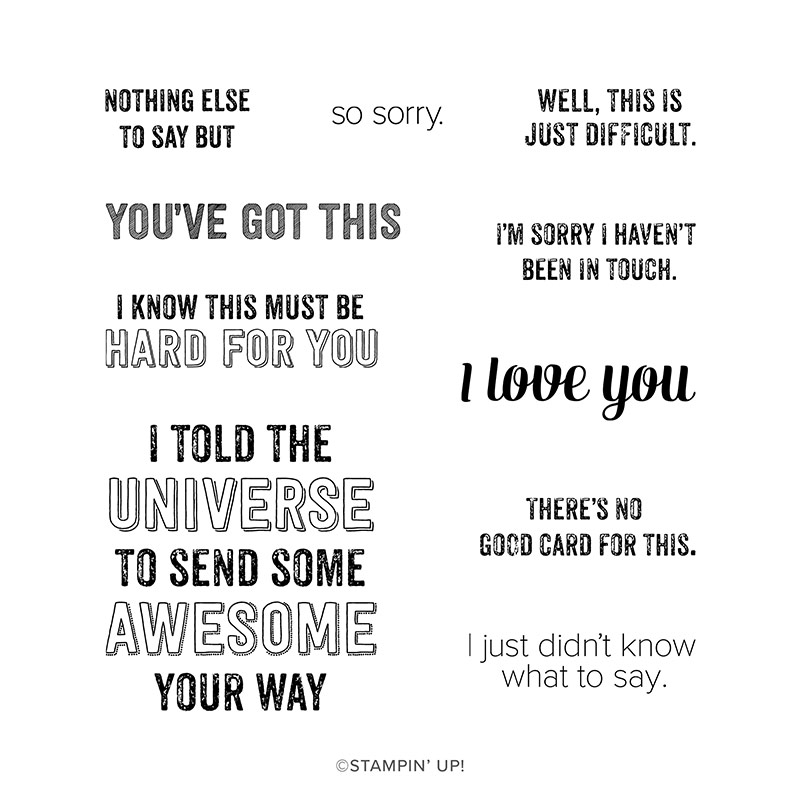
Front greeting from Genuine Gems... love it! 
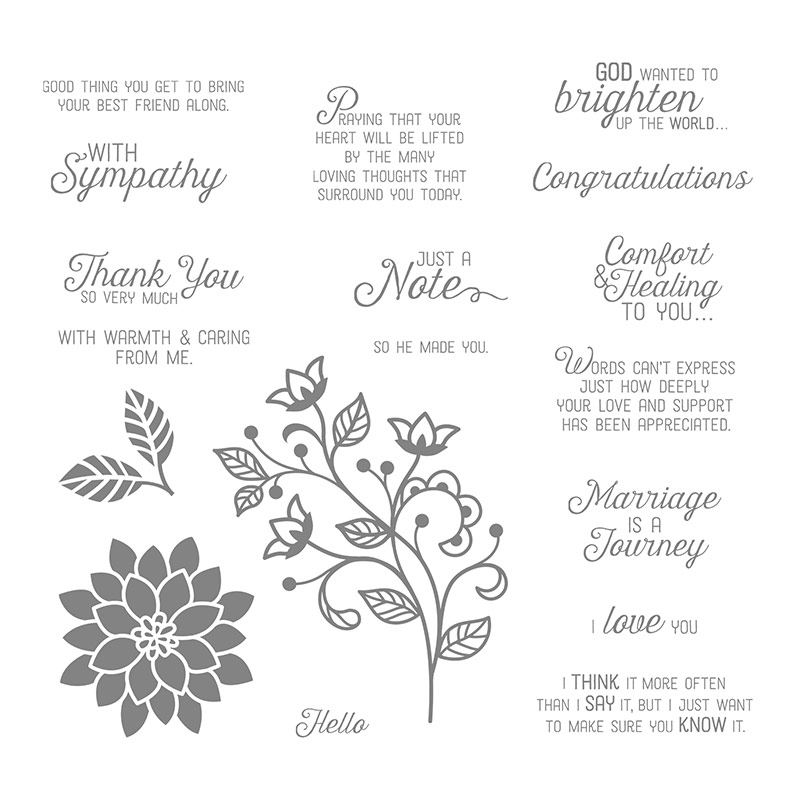
And inner greeting using my chopped up Happy Birthday from Perennial Birthday... the one at the bottom left below... that I chopped and can mount one word on top of the other as for this version... or side by side for the designed long version!
Oh and Click here for a simpler version of this Double Point card... aka the Deconstructed one!

Tuesday, 8 May 2018

A Special 18th Birthday Double Display Card... with more back!

So whilst it is Men in May time for classes... I was asked for a special card for an 18th birthday boy... so here you go... hope Oscar likes it!!

But before I start... the Retiring List has just been updated with some discounts on products... up to 50% ... off to research further and post again with a list in a little while... In the meantime...click on the icon below to go to the full Retiring List
Ages since I made a Double Display Card... and my ladies have made quite a few over the years... but not the one with the extra back!
Card Tutorial (but using 12"x12" cardstock for the main card) shared here... Though this one is actually from A4 card... so guess that means another tutorial coming your way at some point... in the meantime no-one else would know the difference!
Stampin Up Products Used
Papers - Naturally Eclectic, Fabulous Foils Acetate
Dies - Stitched Shapes, Happy Birthday, Celebrate You (coming back for sale 1st June) & Large Numbers (retiring - so please do not delay if you havent got them yet!!)
Stamps - Perennial Birthday
Card - Lemon Lime Twist, Night of Navy, Pool Party
Talking of the Fabulous Foils acetate... a word of warning!! There is a very thin protective layer on the sheets... on top of the silver side on this polka dot pattern... ie The acetate sheets are very clear - not slightly misty!! But it is SO difficult to spot if you don't know about it!!!!!


Wednesday, 18 April 2018

Hopeful Thoughts meets Waterfront ... on Wednesday

Another simple little scene care of Waterfront aided and abetted by the lovely Hopeful Thoughts (aka Thoughts & Prayers)

And please note...if you want the Hopeful Thoughts stamp set... please order now... as it is soon retiring... sniff! Still available in both Clear Mount & Wood Mount... Though it is definitely a keeper for me!
So back to the card... 10.5cm (US Letter 4 1/4") Small Square card blank, 8cm (3 1/8") Square Pool Party mat, 7.5cm (2 7/8") Whisper White panel...  

Colours being Pear Pizzazz grass, Soft Sky sea (retiring colour!! Sniff! I will REALLY miss this one for my little scenes...), Smoky Slate mountains with a touch of Basic Grey marker pen on the one, Old Olive & Early Espresso tree

Early Espresso greeting care of Perennial Birthday
Want to check out what else is retiring... read all about it by clicking here...
Or here for the retiring colours (and details of the new & whole Colour Revamp too!)

Wednesday, 11 April 2018

Centre Stage Gifts

Quick share of gifts made for my friends, team mates and Centre Stage buddies Julie and Sharon for last Friday night down in Telford... though, due to traffic and a very long journey... we arrived at the hotel so late... that we had to wait till after the event to open them this time... 

And what a dilemma... devour the pages of the new catalogue or open the gifts first... what's a demo to do !!!
So a Gift Bag Punch Board medium sided bag using the Foil Frenzy papers... cut 6" high...so 2 from a piece of these 12x12 "more like card than paper so perfect for gift bags" papers... directions as per this bag here... standing about 4 3/4" tall...

Decorated with Stitched Shapes die cut squares with Crafting Forever greetings and hand cut Perennial Birthday flowers on the back and bag...

Along with a stamped Stampin Up logo on a stitched square on the front... care of a retired stamp set....

And then came the "oh, why is this so difficult bit"... as I laminated the stitched squares for the front and back so as to prolong the life of my labels... and then spent well over an hour searching and trying all sorts of glues to stick the laminated squares on....! Got there in the end though... Practical but nicely covering up the other logo on the device!
The gift was a practical and handy little one... a little charger to recharge our phones mid On Stage event on the Saturday... as we demos always take so many photos of team mates, display boards and presentation screens... that the phones don't usually make it through to the end of the day!!

But more of all that on another day...

And suffice to say I received really beautiful gifts from Julie and Sharon... but again more of that on another day...

Saturday, 31 March 2018

Small Square Pop Out Swing Card - Springtime Foils Part 2

So... today is the very last day of Sale A Bration 2018... so only a few hours to sign up with extras in your Starter Kit (and more from me)... or to place an order and get Sale A Bration freebies for every £45 ordered... ends 31st March 10.30pm in the UK... Click here to read more...

And now  back to today's cards... with another comparison of Blends versus Markers on the Springtime Foils papers for you as I go along... which is code for 3 card versions being shared today... 
Small Square Pop Out Swing Card Card Tutorial shared here...

So this version has been simply Sponge Brayered with Pool Party ink... on both the front and inside panel... remembering of course to wipe off the ink from all that foil using a tissue!
The Sweet Soiree vellum embellishment has been coloured using darks Night of Navy and Pool Party Stampin Blends on the back (so as to avoid discolouring the silver foil on the front...) with the leaves being coloured with Daffodil Delight dark Blend on the back... and a gold gel pen on the front ( so as to ensure solid colour overall whereas the gold gel pen on its own proved difficult to colour evenly and solidly!) 

Note that I would have coloured in on the front using the Stampin Markers though... with a wipe off...

And the Silver Metallic Edged Ribbon was coloured using the dark Night of Navy Marker... with a wipe and more drying time... Greeting from Perennial Birthday...

Now... quick fast forward to another version...
Front paper Sponge Brayered in Pool Party again... Then the leaves were painstakingly coloured in using  the Night of Navy Stampin Marker... but.. it has to be said... it took a while... and I won't repeat! And nor did most of my ladies!! But I learnt something along the way...

A cotton bud becomes your best friend for removing the excess ink off small foiled elements... as a tissue would have just spread the excess ink all over!! Never would have thought of that before... 
And spot the Sweet Soiree Embellishment Kit leaves used around the Stitched Shapes square panel... a perfect match to the leaves on the paper... coloured in with the Night of Navy Stampin Marker... on the front with a cotton bud wipe!

Flowers from Cake Soiree... which as an aside... remember that you can get the Sweet Cake dies for free (today only) with a £90 order...

Stripes on the inner panel coloured in carefully using the Night of Navy and Pool Party Stampin Markers... I didn't find this too hard to do... but some of my ladies did... guess you need to have a steady hand... but it adds a lovely effect...
Ribbon coloured with the dark Pool Party Stampin Blend... 

And fast forward again... as I had to try colouring those foily leaves on the front panel with a Stampin Blend... so as to complete my Blends versus Markers survey!! Though I never did finish off decorating the card...

Easier than using the Markers (and careful cotton bud cleaning!) in the small leaf area... but the foiled parts became coloured as expected... and as I was trying to leave the outer leaf shape clean silver... it still took a while... and it went a bit "sloppy looking"... and the navy wasn't quite as deep navy...
And the stripes on the inner panel were much harder to colour in.. so I gave up with that idea very quickly and reverted to Stampin Markers (and cleaning)...
All in all... I prefer Stampin Markers for coloring my Springtime Foils papers... albeit with the Blender Pen for the larger areas... and maybe I won't be colouring any more of those small silver foil leaves anytime soon!! And for the ribbon... either works... but I love the extra feature of the silver edge becoming self coloured when you use the darker Stampin Blends...

And if you have got to this point of my ramblings ... I salute you!!!

Want more comparison... and a tip for blending with your Stampin Markers... then read more here... 


Monday, 26 March 2018

Blossoming Basket Part 2... and the Small Easter Basket now in inches too...

Quickly following on with another card using the Blossoming Basket bundle... which can be yours for free with a £90 order during Sale A Bration... though don't wait too long as Sale A Bration will end 31st March... that is just in 5 days time...

But before I start... as I have been asked by quite a few of you... the Tag Topper Small Easter Basket tutorial has now been updated to include the inches measurements from US Letter cardstock... and surprisingly it still works out for creating 2 mini baskets from the one piece of card... Click here for the tutorial...

Click here for the full details of the pictured versions... but Basket Weave embossed version...
 Faux Stitched version...
Ok.. back to today's card... quite a lot of details are the same as yesterday's card... but some sizing, colouring & layering differences... so I'll just start again and give the full step by step details... 

The full basket of flowers image was stamped twice in Memento Black... once on a trimmed Whisper White  4 1/2" square main image panel and once on a large piece of Whisper White scrap ... and then just the flowers onto another 2 pieces of smaller White scrap... 

A bit of dark & light Crumb Cake Stampin Blends action to add colour & texture to the basket and handle on the larger scrap (though the Crumb Cake Marker & a Blender Pen  would work just as well if you haven't got the Blends before they got turned off) And then a bit of basket fussy cutting... Though I could have got away with just colouring the basket on the main image panel... but I had already done one separately!

But whilst I am on the subject... come back tomorrow for a Tips & Techniques post on using Many Marvellous Markers in a blended way!!!

And then the flowers colouring on the smaller scraps... one set of three... and one single centre one... I used Dark & Light Calypso Coral Stampin Blends... with Dark Daffodil Delight for the centres... and then the flowers were fussy cut... one trio and one single (centre) Love how the colouring on these flowers makes them look really realistic!
The leaves were coloured in on the main square panel using the Dark & Light Stampin Old Olive Blends... 

The little tag was again stamped on Crumb Cake card in Early Espresso... the hearts coloured in using a (retired) White Signo Gel Pen... and fussy cut...

The basket and handle were stuck flat/direct to the main image panel ... though with hindsight I should have 3Dd the basket base...
The flowers and tag are stuck using 3D Stampin Dimensionals... those Mini Dimensionals being perfect for the tag! The trio of flowers being 3Dd.. then the single 3Dd again for extra dimension...

All mounted up on a 4 3/4" square Calypso Coral panel... and onto a 14.8cm square Thick Whisper White card blank (but use 5 1/2" square for US Letter card)

And then finished off with a Memento Black full greeting from the Perennial Birthday set... as the wording just seemed so right with the image...
Think that is everything! Amazing how so simple a card can need so many words!!

And if you missed it in yesterdays post... here is a little video on the bundle for those of you that prefer them...

Friday, 23 March 2018

Fancy Fold Friday - Small Square Pop Out Swing Card with Tutorial

Gosh I have had so many emails and messages about this card fold... so it has taken priority amongst all the other eagerly awaited card folds!

So here you have the Tutorial for the Small Square Swing Fold (aka Lever) Card
Craft Spa Recipe
For my US Readers... Note that I have done a literal conversion from the Metric (Centimetres) version... as it works so well with a 6" wide piece of Springtime Foils papers for the insert panel... so it will be a little bit of a trim down for you from US Letter sized card... and also beware... as I have not done a test run with the inches version... I am sure it will work but you might be a micron out from a fully opening card...

Card Blank - Cardstock Night of Navy 21 x 10.5cm (8 1/4" x 4 1/8")

Insert - Papers Springtime Foils Stripe 15.25 x 10cm (6" x 3 7/8")
Tabs - CS Night of Navy 2 x 10.2cm (x2) (3/4" x 4") 
Paper - Front of Card 10cm Square (3 7/8")
Paper/Card for Inner Panel 4.7 x 10cm (1 7/8" x 3 7/8")(I used Thin Whisper White so as to not add bulk!)
Card for stamping/diecutting front centre panel - Thick Whisper White 7cm (2 3/4") Square 
Card for diecutting front centre frame - Night of Navy 7cm (2 3/4") Square 
Papers- Springtime Foils... Available exclusively and for free during the Sale A Bration promotion. Ends 31st March 2018.
Ribbon - Silver Metallic Edge x 9" 

Craft Spa Instructions
Excuse the old photos... using different card colours... but new photos would mean that there wouldn't be a tutorial!! There are only so many hours in a day after all...


1. Score LANDSCAPE larger (Night of Navy for this card) card blank panel at 10.5cm. (4 1/8") Bone Fold.
Tabbed Pop Out Swing Card Tutorial, Amanda Bates @ The Craft Spa 001
2. Score smaller (Striped Springtime Foils) insert panel at 5.1 & 10.2cm (2" & 4")
3. Bone Fold as concertina/Z-fold ( ie one as mountain & 1 as valley fold)
Tabbed Pop Out Swing Card Tutorial, Amanda Bates @ The Craft Spa 002
4. Score 2 smallest (Night of Navy) panels at 5.1cm (2")(for Tabs) and Bone Fold

5. Adhere paper to front of card blank...
6. Die cut Aperture in card blank front  … 2nd largest Square in the Stitched Shapes Framelit dies  used here...
Tabbed Pop Out Swing Card Tutorial, Amanda Bates @ The Craft Spa 004
7. Adhere Z folded panel to RHS of open card blank (note: valley fold of Z Fold panel to LHS when stuck)
Tabbed Pop Out Swing Card Tutorial, Amanda Bates @ The Craft Spa 008
8. Fold over front of card blank. (with Z folded panel folded inside)
9. Apply glue through aperture to top of Z fold panel (ie to RHS of aperture) Note I have used Sticky Strip just so you can see where the glue needs to be…..
Tabbed Pop Out Swing Card Tutorial, Amanda Bates @ The Craft Spa 009
10. Adhere stamped and die-cut Stitched Shapes square through the aperture (making sure it can swing through the aperture)
 Tabbed Pop Out Swing Card Tutorial, Amanda Bates @ The Craft Spa 010Tabbed Pop Out Swing Card Tutorial, Amanda Bates @ The Craft Spa 015
So now for the Tabs to attach it all together….. and allow it all to pop out and swing…

10.Open up Card blank. Open out Z folded panel to the right.
 Tabbed Pop Out Swing Card Tutorial, Amanda Bates @ The Craft Spa 016
11. Apply Glue to one side of the 2 Tabs
Tabbed Pop Out Swing Card Tutorial, Amanda Bates @ The Craft Spa 017
12. With folded edge of Tabs to outer/RH edge of Z panel - adhere one side of Tabs to top and bottom of Z fold insert panel  (ie above and below the die cut panel) ensuring that these tabs are clear ...
(a) above and below the aperture shape
and
(b) the Z fold insert panel LHS score line.
Trim if necessary
 Tabbed Pop Out Swing Card Tutorial, Amanda Bates @ The Craft Spa 018
13.Fold top layer of Z Fold panel back over & open the Tabs out towards the central score line of the card blank.
  Tabbed Pop Out Swing Card Tutorial, Amanda Bates @ The Craft Spa 019
Check that the Tabs will clear the central score line of the card blank.
Tabbed Pop Out Swing Card Tutorial, Amanda Bates @ The Craft Spa 020
Trim if necessary
Tabbed Pop Out Swing Card Tutorial, Amanda Bates @ The Craft Spa 021
14. With the Tabs opened out, apply glue to top side (ie facing you)
Tabbed Pop Out Swing Card Tutorial, Amanda Bates @ The Craft Spa 022
14. Fold front of card blank shut to close down onto tabs
Tabbed Pop Out Swing Card Tutorial, Amanda Bates @ The Craft Spa 023
And there you have it…one safely attached swing out card mechanism….
Tabbed Pop Out Swing Card Tutorial, Amanda Bates @ The Craft Spa 024Tabbed Pop Out Swing Card Tutorial, Amanda Bates @ The Craft Spa 025
Now... depending on the colours you have used for the card blank and the insert panel... some of you won’t like the fact that you can see the Tab on the back of the white Z folded panel…
Tabbed Pop Out Swing Card Tutorial, Amanda Bates @ The Craft Spa 026
3 ways to work round that …
(1) have the card blank and tabs in the same colour (as I have with this card) so that you can't see the colour difference when you open the card... 
(2) have the card blank and Z folded insert panel all in the same colour ... so no colour difference anywhere!
(3) cut two extra 2 x 5.1cm Tabs in the same colour as your Z Fold insert panel (so plain Whisper White would work for this one)…and just stick over the top!
Tabbed Pop Out Swing Card Tutorial, Amanda Bates @ The Craft Spa 030
Tabbed Pop Out Swing Card Tutorial, Amanda Bates @ The Craft Spa 031
Look vanished! 

So there you have it… finish off your decoration to the front section… and you have a simple looking card with a WOW on opening… and it is simple to make too… especially by a third run...

My final decoration is purposefully very quick and simple as over 50 Easter Treats plus a few cards amongst 5 ladies was a mean order!! But click here for another one with a bit more work...and colour!

So a Scalloped Night of Navy Frame (created by using the Layering Squares die and the same Stitched Shapes square die ... at the same time!!) 

Plus a flowery die cut from the Sweet Soiree Embellishments kit... not how I coloured the paler pink flowers with the Night of Navy Stampin Blends... great job to co-ordinate...
Finished off with a Night of Navy Stampin Blends coloured Pool Party sequin from the Tutti Frutti Adhesive Backed Sequins pack...

And a Dark Night of Navy Stampin Blends coloured Silver Metallic edge ribbon... which is particularly gorgeous!
Though I am now really sorry to say that Stampin Blends are NOW officially unorderable until May...