Showing posts with label Double Display Card. Show all posts

Tuesday, 8 October 2019

A trio of Tree Punch projects....

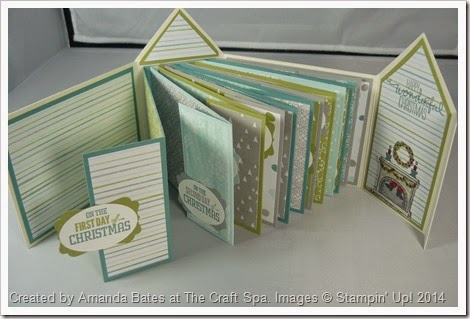
All is Calm, Double Display Card, Festival of Trees, Wonderful Wreath, by Amanda Bates, The Craft Spa (1)
As I shared the Perfectly Plaid stamps and Tree punch on Sunday... I was reminded of a number of projects I made using the Festival of Trees and that Pine Tree Punch...

But before I start... 2 quick announcements...
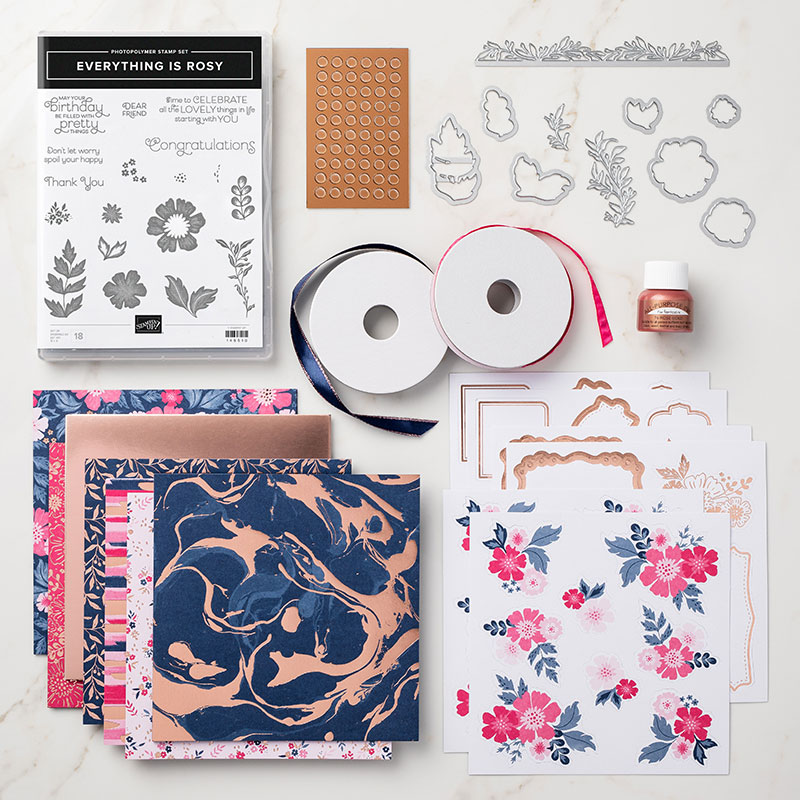
(1) The really beautiful Everything is Rosy product bundle is available in the Clearance Rack (with 15% off) while supplies last...
10.01.19_BANNER_ROSY_OOP_NAUKSP
You know the one... pinks, navy blues and a touch of rose gold! Click here to go to see...
Everything Is Rosy Product Medley
(2) The "technical glitch" for ordering the Farmhouse Christmas tutorials yesterday morning is sorted!! So they are now ready to order!! Sorry for any inconvenience...  And thank you for the afternoon orders... all of which have been emailed out already...

Right back to today!

So I thought it may be interesting for some of you if I did a quick re-run and share...
Just click on the photo to go to the original post...

I have found this fascinating... as these have been some of my own personal favourite projects  - and my most visited card tutorial - over the last 4 years or so... and indeed many of these still come out every christmas!
12 Days of Christmas, All is Calm House Mini Book, Amanda Bates, The Craft Spa,  (2)
Hope that this post may inspire some of you... Enjoy...

And I do have to laugh... as I have lots of this year's christmas projects sitting ready to share with you... but it just seemed to make more sense to take a bit of time and share some golden oldies this week! 
12 Days of Christmas, All is Calm House Mini Book, Amanda Bates, The Craft Spa,  (7)

Tuesday, 8 May 2018

A Special 18th Birthday Double Display Card... with more back!

So whilst it is Men in May time for classes... I was asked for a special card for an 18th birthday boy... so here you go... hope Oscar likes it!!

But before I start... the Retiring List has just been updated with some discounts on products... up to 50% ... off to research further and post again with a list in a little while... In the meantime...click on the icon below to go to the full Retiring List

Ages since I made a Double Display Card... and my ladies have made quite a few over the years... but not the one with the extra back!
Card Tutorial (but using 12"x12" cardstock for the main card) shared here... Though this one is actually from A4 card... so guess that means another tutorial coming your way at some point... in the meantime no-one else would know the difference!
Stampin Up Products Used
Papers - Naturally Eclectic, Fabulous Foils Acetate
Dies - Stitched Shapes, Happy Birthday, Celebrate You (coming back for sale 1st June) & Large Numbers (retiring - so please do not delay if you havent got them yet!!)
Stamps - Perennial Birthday
Card - Lemon Lime Twist, Night of Navy, Pool Party
Talking of the Fabulous Foils acetate... a word of warning!! There is a very thin protective layer on the sheets... on top of the silver side on this polka dot pattern... ie The acetate sheets are very clear - not slightly misty!! But it is SO difficult to spot if you don't know about it!!!!!


Tuesday, 7 November 2017

Year of Cheer 20th Wedding Anniversary Double Display card

Very quick share today... as I am up to my eyeballs in spray paint!! Minor exaggeration there... but more on that another day...

Here is the finished 20th Wedding Anniversary double display card I made for Jon using the Year of Cheer papers...
Want to make one of your own? Tutorials are linked in this post here...
A Birthday version shared here... And a christmas version shared here...

Friday, 13 October 2017

A Year of Cheer snowflake is not just for Christmas!

Just had one of those moments!! And loving what it created!!

So I was asked to demo my Year of Cheer Large Square Double Display card in my next class... and I decided it was time I put a Birthday one together... so I didn't want snowflakes...

But the card looked a bit plain on the front... and then it dawned on me...what was to stop me punching out round a snowflake in the Year of Cheer papers with the Pansy Punch... absolutely nothing!! Works SO well...Though you get less pansies than snowflakes for your money...
I daubed Smoky Slate ink around the white pansy... and coloured the second using a sponge and Cajun Craze ink (and a "dauber splodge" in the centre)... finishing off with a quick shape-ing care of my Bone Folder & Thick Mat. Do remember to rub off the excess ink from the foil parts of  a coloured flower with a tissue if you try one at home though!!

A couple of Clear Faceted Gems later... and couple of Leaf Punch punched Champagne Foil Leaves... veined into shape as described in this post... and the decoration was complete...
Happy Birthday die cut from the Champagne Foil mat before assembly... and the silver embossed TO YOU on the front is from Big on Birthdays...punched with the Classic Label Punch and trimmed to size...

Click here for the Christmas version of this card... or here for an Anniversary one (and the links to the Tutorials)

And I know I will be punching snowflake pansies again sometime soon!!

Wednesday, 27 September 2017

Season & Year of Cheer Double Display Card

So a remake was on the cards for this one... something for Christmas this time... but using the same Year of Cheer papers, Foil Snowflakes, Clear Faceted Gems and the old favourite Large Square Double Display card fold... 

But a few other details changed as I went along...
Seasonal Layers snowflakes die cut from the Champagne Foil before assembly...

And if you look closely... some of the snowflake waste was used as pin/brad heads at the corners and centres... perfect little detail... so they are all getting saved now!
Die cut Stitched Frames circle used for the greeting.... which is from Watercolor Christmas...and heat embossed in copper... 

Large Foil Snowflakes cut and stuck the other way round...


Friday, 24 February 2017

Double Tri Display Card Tutorial for Fancy Fold Friday

Here is another Double Tri Display Card dressed up using the Falling In Love and Dragonfly Dreams papers for Mother's Day - set off on Blushing Bride cardstock this time...

Click here for more details on the decoration of this and on the original Sahara Sand version shared last week
And a bit of class feedback on this card... my poor little apostrophe was moved every time someone came to stamp the 'S at the end... So click here for background information on the Mother's Day and the apostrophe S debate (Mother's Day, Mothers Day, Mothers' Day) for those of you that are interested in things like that! 

And so here is the card fold Tutorial for you...

I would love to see what you make with this card fold... so please do feel free to share your makes with me and/or the world!... just remember to link back here to further share the method to the creative world...

Double Tri Display Card Tutorial © Amanda Bates at The Craft Spa

You will need:
Main Card: 12x12 Cardstock 12” x 5 ¼
Front Card Panels:  2” x 5 ¼” (x2)
Back Card Panel: 2 ¾” x 2 ½” (ie for writing on!)

And papers to decorate:-
Front Panels: 1 ⅞”W x 5⅛”H (x2)
Central 6 Panels: 1⅜”W x 2⅝”H (x 6)
Top & Bottom Panels: 1⅜” x 1⅛”

1)      Line up 5¼” x 12” piece of cardstock PORTRAIT at 1¼” on Top Bar
2)      CUT from ¾” to 5¼” (1.9-13.3cm)
3)      LIFT the cut bar!
4)      CUT from 6¾” to 11¼” (17.1-28.6cm)
5)      Line up PORTRAIT at 4” on Top Bar
6)      CUT from ¾” to 5¼” (1.9-13.3cm); LIFT!; CUT from 6¾” to 11¼” (17.1-28.6cm)
7)      LANDSCAPE. SCORE whole of card at 10½”, 9”, 7½”, 6”, 4 ½”, 3” and 1½”
8)      LANDSCAPE. SCORE outer sections at 6¾” & 5¼” (ie top and bottom sections)
9)      LANDSCAPE. SCORE inner sections at ¾” & 11 ¼” (ie central section)
10)   Peak/Mountain Bone Fold the central 6” score line
11)   Holding your card PORTRAIT and starting from the front edge… lightly fold the central section score-lines as Peak, Valley, Peak, Valley
12)   And the outer section score-lines as Peak, Valley, Peak, Valley

13)   Fold over towards the centre (ie 6" peak folded score-line) until it all just neatly folds on itself…
14)   Bone Fold
15)   Repeat 11-14 from the other side
16)   Apply glue to outer/front C-section(s) (I have used Tear & Tape so you can see where in the photo - but personally I use Tombow so I have a bit of slide! And I apply glue & assemble one side at a time)
17)   Adhere Front Panel (2” x 5 ¼”) with edge lined up with first peak fold (ie not the outer edge of the card!)
18)   Repeat for other side
Just a note... This version is sized to best incorporate the Large Letter alphabet die sizes... based on using one width of 12" card... The finished card size is 4”W x 5 ¼” H which fits perfectly into a Stampin’ Up! Medium CrumbCake envelope for posting… 

And a pictorial of the cut & score lines on the main card for you... 
And then it is just about the decoration... 
Folded up... 
And the back... I might even decorate this side too another day! Note that I scored that Very Vanilla 2 ¾” x 2 ½” greeting panel in half at 1 3/8" so that the fold line was slightly neater...


Friday, 21 October 2016

Presents & Pinecones Large Square Double Display Card & A4 Tutorial

A Fancy Fold Friday post with Tutorial for you. This is the Tutorial for the Large Square Double Display Card from A4 cardstock which I thought I had already published - but discovered I had not. So thought I should quickly rectify the situation!!

And remember that these Presents & Pinecones papers are on Special Offer this month
And here are the links to the Large Square Double Display Card Tutorials using 12x12 cardstock  versions - inches and centimetres.
Large Square Double Display Card Tutorial– A4 Metric Version 
You will need:-
Thick Whisper White A4 Cardstock 15x 29cm
Whisper White 12x12 Cardstock 15cm Square
Early Espresso Cardstock 10 cm Square
Presents & Pinecones Paper Mint Macaron 9.5cm Square (x2)
Presents & Pinecones Paper Stripe/Fronds 4.5cm x 9.5cm (x2)
Presents & Pinecones Paper Stripe/Fronds 4.5cm x 2cm (x2)
Stamps & Dies – Christmas Pines

 1.       PORTRAIT. Line up at 2.5cm on Top Bar
2.       Cut from 2 to 12cm. LIFT. Cut from 17 to 27cm
3.       Turn 180 degrees & Repeat 1-2

4.       LANDSCAPE. Score across whole width at 4.5, 9.5, 19.5 & 24.5cm
5.       LANDSCAPE. Score top and bottom sections at 2, 12, 17 & 27cm
(TOP TIP - you will find 17cm difficult to find/do on a Trimmer!! So alternatively…
Line up at 12cm to LEFT HAND SIDE. Score top and bottom sections
Line up at 2 cm to RIGHT HAND SIDE, Score top and bottom sections
Turn 180degrees and repeat for 12cm LHS and 2cm RHS)

6.       With panel PORTRAIT out in front of you… Hand fold from edge facing you…
1st LH & RH outer score-lines - Mountain folds
1st centre section score line - Mountain fold
4th/last LH & RH outer score lines- Valley fold
2nd/last centre section - Valley fold ( you can put your fingers through the previous folds to do so!)
3rd outers - Mountain Fold (will have happened automatically!)
2nd outers – Valley Fold (will have happened automatically!)
NOTE – the photos are of a Small Square Double Display Card but show you what you need to do!!


7.       Fold up towards centre, ensure cut-lines/sections lined up & free to move & then Bone Fold
TIP – an extra “crease” will now magically appear in the centre of the 4 top & bottom outer sections – do not worry, you will be covering these! But don’t further crease or bone-fold it!!! 

8.       Repeat 6-7 from other side

9.       Decorate the Card Front
(a) Adhere Mint Macaron Paper to Early Espresso Square panel
(b) Adhere to 15cm Whisper White Square Panel
(c) Chop in half at 7.5cm (best to use a guillotine cutter as you have 3 layers to cut through…)
(d) Stamp Early Espresso greeting on RIGHT HAND section
(e) Adhere these Card Front Sections to front LH & RH sections of Main Card – one at a time lining everything up nicely as you go! 


TOP TIPS – put glue on front sections of Main Card NOT the back of the Card Front Sections!!! Or you will have glue where you don’t want it!!!

I would recommend also Tombow – I have only used Sticky Strip for the photo so you can see where to put the glue! 


10.   Stamp, die cut and decorate as necessary
TIPS
(       (a)    the pine boughs are a Mint Macaron one layered over an Emerald Envy one. Layered as a shadow
        (b)    the seed-head is die cut in Cherry Cobbler and then the stalks coloured using an Early Espresso marker pen – leaving the berries in red…
        (c)     The central square paper panel is stamped with Mint Macaron stars/snowflakes from the Christmas Pines stamp set– subtle but adds great detail…