Showing posts with label Double Tri Display Card. Show all posts

Friday, 24 February 2017

Double Tri Display Card Tutorial for Fancy Fold Friday

Here is another Double Tri Display Card dressed up using the Falling In Love and Dragonfly Dreams papers for Mother's Day - set off on Blushing Bride cardstock this time...

Click here for more details on the decoration of this and on the original Sahara Sand version shared last week
And a bit of class feedback on this card... my poor little apostrophe was moved every time someone came to stamp the 'S at the end... So click here for background information on the Mother's Day and the apostrophe S debate (Mother's Day, Mothers Day, Mothers' Day) for those of you that are interested in things like that! 

And so here is the card fold Tutorial for you...

I would love to see what you make with this card fold... so please do feel free to share your makes with me and/or the world!... just remember to link back here to further share the method to the creative world...

Double Tri Display Card Tutorial © Amanda Bates at The Craft Spa

You will need:
Main Card: 12x12 Cardstock 12” x 5 ¼
Front Card Panels:  2” x 5 ¼” (x2)
Back Card Panel: 2 ¾” x 2 ½” (ie for writing on!)

And papers to decorate:-
Front Panels: 1 ⅞”W x 5⅛”H (x2)
Central 6 Panels: 1⅜”W x 2⅝”H (x 6)
Top & Bottom Panels: 1⅜” x 1⅛”

1)      Line up 5¼” x 12” piece of cardstock PORTRAIT at 1¼” on Top Bar
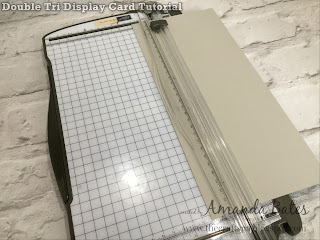
2)      CUT from ¾” to 5¼” (1.9-13.3cm)
3)      LIFT the cut bar!
4)      CUT from 6¾” to 11¼” (17.1-28.6cm)
5)      Line up PORTRAIT at 4” on Top Bar
6)      CUT from ¾” to 5¼” (1.9-13.3cm); LIFT!; CUT from 6¾” to 11¼” (17.1-28.6cm)
7)      LANDSCAPE. SCORE whole of card at 10½”, 9”, 7½”, 6”, 4 ½”, 3” and 1½”
8)      LANDSCAPE. SCORE outer sections at 6¾” & 5¼” (ie top and bottom sections)
9)      LANDSCAPE. SCORE inner sections at ¾” & 11 ¼” (ie central section)
10)   Peak/Mountain Bone Fold the central 6” score line
11)   Holding your card PORTRAIT and starting from the front edge… lightly fold the central section score-lines as Peak, Valley, Peak, Valley
12)   And the outer section score-lines as Peak, Valley, Peak, Valley

13)   Fold over towards the centre (ie 6" peak folded score-line) until it all just neatly folds on itself…
14)   Bone Fold
15)   Repeat 11-14 from the other side
16)   Apply glue to outer/front C-section(s) (I have used Tear & Tape so you can see where in the photo - but personally I use Tombow so I have a bit of slide! And I apply glue & assemble one side at a time)
17)   Adhere Front Panel (2” x 5 ¼”) with edge lined up with first peak fold (ie not the outer edge of the card!)
18)   Repeat for other side
Just a note... This version is sized to best incorporate the Large Letter alphabet die sizes... based on using one width of 12" card... The finished card size is 4”W x 5 ¼” H which fits perfectly into a Stampin’ Up! Medium CrumbCake envelope for posting… 

And a pictorial of the cut & score lines on the main card for you... 
And then it is just about the decoration... 
Folded up... 
And the back... I might even decorate this side too another day! Note that I scored that Very Vanilla 2 ¾” x 2 ½” greeting panel in half at 1 3/8" so that the fold line was slightly neater...


Friday, 17 February 2017

Butterflies Double Tri-Display Card by Denise

Just have to admit that I met myself coming backwards this week... 5 classes in 7 days! Lovely week spent crafting with and inspiring others... but other best laid plans... mmmmm.... well!

So I was planning on sharing the Six Panel Pop & Twist Card Tutorial today for my Fancy Fold Friday post... and it is written up and the photos taken... but in true iPad to PC transferring style - the photo order is completely scrambled!! So one to sort out tomorrow...

In the meantime.... here is a lovely Fancy Fold project my friend Denise made this week with the Falling in Love papers... her mother is definitely into butterflies and neutrals rather than pinks and dragonflies - so she did a switch with the kit... just a shame I didn't have any more of the papers to get all the butterflies in the same direction!!! Original version card from the kit here...

Lovely Denise.... definitely right up my colour street!!

Wednesday, 15 February 2017

Double Tri-Display Card

Time to bring you my my latest card invention! Another World Exclusive (I believe!) 

A total re-design of my uber-popular Large Square Double Display Card to incorporate 6 panels with Large Letters die-cuts on... 

Amazing what happens when I have a supply of 12"x 12" card again.... thanks to the Falling in Love Cardstock Pack (which I didn't realise was 12 x 12 until it arrived in the special Demo Bundle that Stampin' Up! put together for our pre-orders!! Oops nearly missed it....)
So by popular request - most of my classes this month are concentrating on Mother's Day cards ( as Mother's Day is 26 March in the UK - rather than the the 14 May in the US) & Wedding/Wedding Anniversary cards  - and the Falling in Love papers & Suite called out to be used. As well as some specific requests for Dragonflies!

I hope to be able to re-make, photo and write up a tutorial in the next week - or two... but in the meantime... a bit about the decoration of this version...
Dragonflies care of Dragonfly Dreams... left hand one cut out of watercolour paper... watercolour washed using the Aqua Painter with Blushing Bride and then Sweet Sugarplum and popped onto a solid Copper Foil die cut. Right hand one copper embossed, wings and body stamped with Blushing Bride - and then wuiped off with a tissue paper before cutting out the solid shape
Mother care of the Large Letters dies and Very Vanilla cardstock...and then 2 of the letters (O,E) stamped in Sahara Sand using the flower stamp in the Window Shopping stamp set. And 'S at the far right hand side (of the R) care of Brushwork Alphabet

Copper embossed greetings of Happy & Day care of the one Happy Day stamp I mutilated (cut in half!) in the spirit of easy stamping!! From the Perfectly Wrapped set