Showing posts with label Stampin Up Card Tutorial. Show all posts

Tuesday, 28 February 2023

Tuesday Tutorial - A6(ish) Double W Fold - Fitting Florets


Back to the second version of my Double W Fold card... 

But before I start... today is the last day of the Sale A Bration promotion!! So don't forget to order and sign up whilst you can get all those extra freebies...click HERE for more details...

This version maximising the use of one piece of A4 cardstock... resulting in a card that is 14.5cm wide (hence the A6ish name in the title as it is very slightly smaller than the standard A6 14.8cm size... )

And I do find it fair to warn you... I have been very busy with variants of Double W Fold cards... so lots more to come... 

Craft Spa Recipe - A6 (ish) Double W Fold Card (actually 14.5cm)

A4 Balmy Blue 29.7 x 10.5cm  & 29 x 10.5cm
Inside Bottom paper panels 28 x 3.5cm (x2)
Inside Top paper panels 28 x 7cm (x2)
Front Night of Navy mat 13.5 x 9.5cm
Front paper panel 13 x 9cm... then cut 9cm square; 4 x 9cm
Front frame mat 5.9cm Square
Front frame (D) Whispwer White 6cm Square
Ribbon x 17"


Craft Spa Instructions -  - A6 (ish) Double W Fold Card
  1. Score both LANDSCAPE Balmy Blue panels at 14.5cm
  2. Score longer Balmy Blue panel LANDSCAPE at 29cm  
  3. Valley Fold both "in half"
  4.  Mountain fold thin section on longer piece (aka the glue tab)
  5. Open both out and place stood up in front of you - with the longer piece to the left with the glue tab to the right side... 
  6. Apply glue to the front face glue tab... and stick the shorter/RH panel to the tab...

  7. Cut the 2 LANDSCAPE taller paper panels in half at 14cm
  8. Adhere papers
  9. Open out the card

  10. Score the two shorter paper panels at 7,14 & 21 cm
  11. Bone Fold Valley, Mountain & Valley
  12. Concertina Fold (forms a W shape with a central mountain and valleys either side)

    For the left hand sections of the card...
  13. Hold concertina panel with 2 open edges and folded centre facing to the right
  14. Apply glue to back face  
  15. Stick concertina panel down onto right of right hand section lining up with your paper at the side...
  16. With concertina panel still folded up... apply glue to top face
  17. Close left section of card onto the glued face

  18. Repeat with other concertina panel for 2 right sections of card...sticking the concertina panel (with 2 open edges and folded centre facing to the left) to the left side of the left section this time... and folding the right section of the card onto the top...

  19. Ink up, stamp, cut and punch as necessary
    I used the A La Mode dies and Alphabest stamp & punch bundle ... along with retired Stitched Shapes dies and a 1 3/4" square punch
  20.  Decorate card

    I have purposefully left this one blank on the front as I can then add the age when I am ready to send it!

    But you can get the idea from the one I previously shared here...


Tuesday, 21 February 2023

Tuesday Tutorial - Dainty Flowers Double W Fold Card

Another version of the Double W Fold card I shared here last Friday... along with the recipe and instructions so you can try one at home! This one having the BIRTHDAY greeting letters set on square panels (1 3/4" mats with 1 5/8" stitched squares)

This version is sized around the front panel which is cut from this sheet in the Dainty Flowers paper pack.... that can be earnt for free...with an order of £45+... during the Sale A Bration promotion that runs until 28 February

So 12 of these cards could be made from just one pack of the papers... Simples!

Greeting letters care of the fantastic new A La Mode dies... which is a perfect set of dies for your letters and number needs...

Craft Spa Recipe

A4 Thick Whisper White 28.2 x 10.5cm AND 27.2 x 10.5cm
Front Paper Panel 12x9cm
Rich Razzleberry card mat 12.5 x 9.5cm
Inside Paper panels 13.1 x 7cm (x4)
A4 Old Olive card 28 x 3.5cm (x2)

Craft Spa Instructions
  1. Score 2 LANDSCAPE white panels at 13.6cm
  2. Score longer white panel LANDSCAPE at 27.2cm (aka 1cm to the RHS) 
  3. Valley Fold both "in half"
  4.  Mountain fold thin section on longer piece (aka the glue tab)
  5. Open both out and place stood up in front of you - with the longer piece to the left with the glue tab to the right side... 
  6. Apply glue to the front face glue tab... and stick the shorter /RH panel to the tab...
  7. Adhere papers
  8. Open out the card

  9. Score the two Old Olive card panels at 7,14 & 21 cm
  10. Bone Fold Valley, Mountain & Valley
  11. Concertina Fold (forms a W shape with a central mountain and valleys either side)

    For the left hand sections of the card
  12. Hold concertina panel with 2 open edges and folded centre facing to the right
  13. Apply glue to back face  
  14. Stick concertina panel down onto right of right hand section lining up with your paper at the side...
  15. With concertina panel still folded up... apply glue to top face
  16. Close left section of card onto the glued face

  17. Repeat with other concertina panel for 2 right sections of card...sticking the concertina panel (with 2 open edges and folded centre facing to the left) to the left side of the left section this time... and folding the right section of the card onto the top...

  18. Ink up, stamp, cut and punch as necessary
    I used the A La Mode dies, the Petal Park flowers stamps & punch, Framed Florets greeting on the front and the gorgeous new Dragonfly Trinkets... along with retired Stitched Shapes dies and 2" punched circle or 1 3/4"square mats...
  19.  Decorate card

And here's a reminder of the one I shared last Friday... with the circular letter panels and lots of HAPPY (care of the Biggest Wish stamp set - stamped in 3 colours-Rich Razzleberry, Old Olive and Petal Pink-  and handcut into letters)

Tuesday, 24 September 2019

Tuesday Tutorial - Feels Like Frost Gap & Scrap cards

Another Feels Like Frost & Frosted Foliage card for you... check out the shiny foiled side of these papers!

But be warned... as I am loving this card! It is just a perfect format with these beautiful Frosted Frames die cuts...
And as promised... one tutorial... but for 2 cards...

So I am calling this a "Gap card"... as
(1) I just think that just sums it up...

And (2) Gap just happens to rhyme with Scrap...

Which is what I called this co-ordinating card I shared yesterday... as that is just created with the paper scrap left from my Gap card...
Though I know there are other names for this card fold out there... such as Split Panel card ... Floating Card (though the more recent  Floating Die Cut Frame card or abbreviated Floating Frame card or Floating card or has kind of taken over for that name)... as well as Gap card... 

And so onto the Tutorial for you... photos from a remake going on behind the scenes for my non Christmas classes this week! Hence the change in colours and papers... and the front panel! Sorry for any confusion that causes!!! But I thought best to share with photos than without...
Craft Spa Recipe 
Gap Card - Seaside Spray 10.5 x 24.8cm
Scrap Card - Thick Whisper White A4L x 10.5cm (scored LANDSCAPE at 14.8cm)
Papers 10 x 4.5cm (x2) and Scrap
Seaside Spray 6.6 x 7.4cm (x2)
(D) (Fancy Frame)Whisper White 10.4 x 14.8cm 
(S, D) (Stitched Frame)Thick Whisper White 7 x 8cm (x2)
(D) (Snowflakes) 3.5 X 6CM Clear Glimmer, Seaside Spray, Silver Foil
(D) (Leaves) Silver Foil  
where (D) is for die cutting and (S) is for stamping 

Craft Spa Tutorial
1.       Large panel LANDSCAPE

2.       Cut at 5cm

3.       Move along and Score at 5cm

4.       Bone Fold

5.       Adhere papers

6.       Put temporary glue on back of small panel

7.       Line up at bottom of main card & temporarily adhere TIP – use grid paper to aid your eye in getting things all straight
8.       Thinking about where you need your glue, apply glue to top and bottom of fancy die cut frame ( or matted stitched rectangle as in this example!)
TIP – I tend to just use a finger or thumb to eyeball where I don’t want my glue to go…but you can mark the back of the card as shown here…
9.       Adhere the frame
10.   Decorate as required
TIP – I used a ½” Circle Punch (now retired) to trim the 4 corners of my Seaside Spray mat to match the corners of the die cut greeting frame)
11. Rub off the temporary glue (I just used my finger... but the retired Adhesive Remover works a treat too!
12.  Adhere the left over piece of paper to the front of a standard A6 card blank… and decorate as required… 
And here are the 2 cards together... 
And apologies to my American subscribers... I will be back with measurements for an A2 version sometime soon... I had an unexpected but lovely visitor today... so the time just went... 


Tuesday, 20 August 2019

Tuesday Tutorial - De-Constructed (Faux) Double Point Card

So here we go... the simple way to make a Nested Labels Double Point card... as long as you don't want the "flappy bit" which (for many) is probably a main feature of the original Double Point Card... though not for me...

So this simplified way gives me everything I like in the Double Point design... but at speed... and with less materials being needed....
And I changed this one up after the original Noble Peacock De-constructed Double Point Card posted here... as thinner Magnolia Lane papers meant I could add a co-ordinating mat whilst I was at it...

And please note that for simplicity's sake in the Tutorial...
(1) I kept the paper panel the same size for both of these card variations (the coloured mat being optional and that bit larger...)

(2) I have not altered the panel & mat dimensions for a wider US A2 card (4 1/4" ilo Rest of World A6 4 1/8" wide)... so you will have a bit of a white gap to line up on the top and bottom edge of this version...

But that's nice! So why re-design and complicate matters!! Look at this version here to check out "a bit of a white gap"
Craft Spa Recipe
Stamps - Magnolia Blooms
Papers - Magnolia Lane
Stampin Blends - Mossy Meadow combo, Petal Pink combo, So Saffron Dark

Whisper White A6 Tent Card Blank (OR US A2) 
ie 10.5cm x A4long - scored LANDSCAPE at 14.8cm (OR US 
4 1/4" x 11" long - score LANDSCAPE at 5 1/2")
Mossy Meadow Card 7.4cm (2 7/8") Square
Paper Panel 6.7cm (2 5/8") Square
(D) Mossy Meadow 12 x 7cm
(D) Whisper White Thick 12 x 7cm     where (D) is for die-cutting

Craft Spa Tutorial
1. Cut Card and Paper Squares diagonally (point to point!)
2. Adhere to each other
3. Adhere to card blank (with or without a gap round the 3 sides)

4. Die cut 2 x Nested Labels
5. Hand cut white Nested Label (using line inside the stitched line to guide your eye AND do shorter ends first)
6. Ink up & Stamp greeting
7. Adhere to each other and to card blank

8. Ink up & Stamp Early Espresso magnolias
9. Colour in using Stampin Blends
10. Fussy Cut using Paper Snips
11. Adhere


Friday, 16 August 2019

Noble Peacock Pop Up Front Step Panel Card - in Pretty Peacock

And this was the favourite of the Noble Peacock papers cards... as the Pretty Peacock colour is causing many a swoon around these parts...

Click here for the Tutorial and the Blueberry Bushel version...
And note again that I will use Granny Apple Green (instead of Old Olive) for this card in the future... still co-ordinates with those foiled papers ... but brighter, lighter and more on trend!

Friday, 2 August 2019

Everything Amazing and Foils for Friday!

So my ladies are loving the Noble Peacock foiled papers... with 3 of the class groups requesting them to be used first... which made my life somewhat easier for a change!

So another series for you... starting with a (A6ish ) Landscape Pop Up Front Step Panel Card (or Flat Pop Up for short!)  as my ladies are still really loving these cards too...
So a card tailor made for our Stitched Rectangles frames... and featuring Everything Amazing to send a strong positive congratulations sentiment! Suitable for teens, men and the ladies too... so a truly versatile card for a change!

Metallic Edge Ribbon coloured care of Stampin Blends markers... in Light Old Olive here... though I did switch to Light Granny Apple Green in subsequent makes as that kept things just so much lighter and brighter... and young at heart...
Magnolia Blooms "Congratulations" on the top die cut using the Stitched Rectangles dies too...
Please visit the full tutorial for the A6ish portrait version of a Pop Up Centre Step Panel Card here if you need to see the steps for such a Pop Up card step by step! With the photos to help...

And before I post a quick tutorial ... an admittance... my card just fits in a standard C6 envelope ... but it wouldn't fit in a standard US A2/medium envelope...  And depending on where you end up sticking your top panel... it may not fit in a c6 envelope either... Neither will it fit if you have embellishments sticking up over the top of the front panel (now there is a hint re another one I have already made!!!)

So use your envelope when sticking your card/embellishments together... Though you can always rescore your envelope where required, re-fold and have less of a flap... yes I have done that from time to time!!! Or use a Square envelope.... Or even make a custom envelope if you still have your scoreboard...

And a last minute apology... as (my) time is very very short in the short term at the moment... so I can't convert to US card sizings... but I will come back to do that when I can...

Craft Spa Recipe
Blueberry Bushel 14.8 x 21cm
Old Olive (but I would prefer Granny Apple Green!) 10.5 x 11cm
Noble Peacock Paper Blueberry Bushel 14.3 x 7cm
Foil Blueberry Bushel 14.3 x 5 cm
Noble Peacock Paper Old Olive 10 x 2.5cm
Quilted Embossing Folder

1. Score LANDSCAPE Blueberry Bushel card at 10.5, 13.5, 16.5 and 19.5cm
2. Score LANDSCAPE (check 11 cm along top- not 10.5cm!!!)  Old Olive panel at 1 & 4cm
3. Mountain Fold all folds...
4. Roll & stick main card base (recommend dry run first!!)
5. Emboss Blueberry Bushel Foil panel & trim PORTRAIT in half at 2.5cm
6. Adhere all papers.

7. Adhere front panel ...  Note that I lined this up/stuck this differently to that in the Full Tutorial  (and so I definitely recommend a dry run first!! ... especially as I haven't got the chance to redo and take a photo!)

As I adhered the bottom onto the base step first... with the bottom of the Old Olive section about half way up the base step...

And then closed the card up... with the 2 top sections folded over... and so that the top of the Old Olive front section is about 1 cm above the top of the base card (not lined up with the top as in the other version)

8. Decorate as necessary


Friday, 5 July 2019

Fancy Fold Friday - Pressed Petals Pop Up Front Step Panel card

So back to my coloured Floral Centre posted earlier in the week... which had to be made to co-ordinate with the flowers in these papers!
I just couldn't resist making another of these Pop Up Front Step Panel Cards  using my new Pressed Petals papers
and Pressed Petals Washi Tape... with a bit of help from my Leaf Punch... 
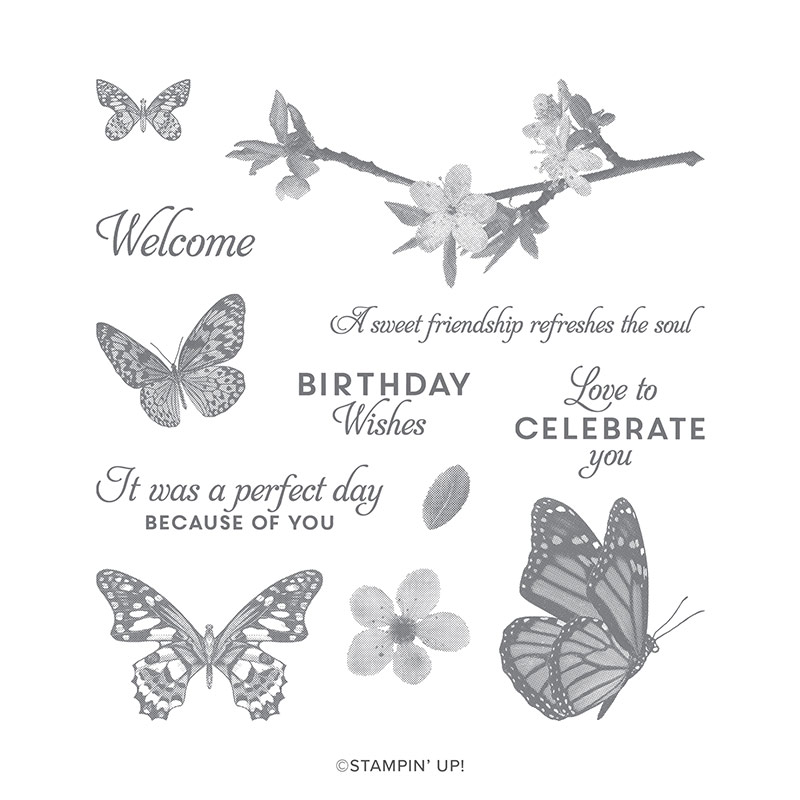
Along with the new and simply gorgeous Butterfly Wishes stamp set...
Though unfortunately the tutorial I had planned (and even written!) isn't posted today... as there were far too many words in a step by step as not enough photos!! So it all became a bit confusing...
 So sorry... for another day after all...
Click on the highlighted links below to see other examples of this card using Spring Summer (aka Occasions) catalogue products already shared with you...


Amanda's Quick Links
Just click on the relevant pictures below for On Line Store, Catalogues and/or more information... 
If you are ordering today... please add the Host Code shown below to earn yourself a gift... For orders over £150 you should claim your own Stampin Host Rewards... you will still get a separate gift from me... 
Kits & Product Shares


Current Catalogues & Products