

Another clean & simple gold embossed Corner Garden card... simpler version here

Another triple embossed Wood Expression... link to details here...

Another ShadowBox Frame card

But seeing as it is Friday - Fancy Fold Friday - and as this one is a different version... the full tutorial for the card!

Shadow Box Frame Card Tutorial – 13 cm Square with 1cm Box Sides and Top
Start off with a 21cm square of Thick Whisper
White cardstock cut from a piece of A4 card...
Please note that my photos are from the original full A4 sheet tutorial posted here – just imagine all the next photos as squares of cardstock rather than the rectangles shown!!!
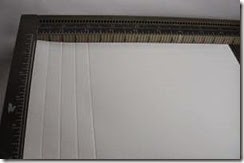

2. Make
an “extra short score” at 5cm & 16cm from top to 2ndscore-line
down . 
3. Turn
180 degrees and repeat (2)

4. Cut up
these extra score lines and diagonally across to the 3rd score line


5. Cut
out the “16-part” squares at each corner
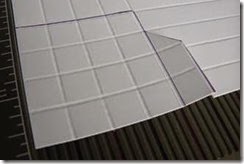

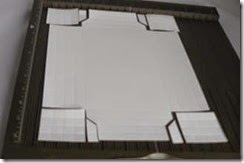
6. Bone
fold all score-lines

8. Apply glue to folded
side of outer-most sections on all 4 sides ( See NOTE below!)
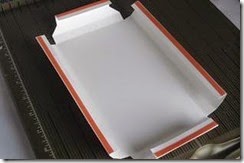
9. Apply Tear & Tape OR Sticky Strip
across back of 4 diagonal sections (or add a glue dot!)

9.
Assemble straight sides first.
Recommend sticking any paper/photo in first before assembling if you want as an edge to edge back!
Remove part of red protective cover
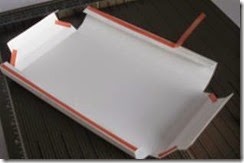
Recommend sticking any paper/photo in first before assembling if you want as an edge to edge back!
Remove part of red protective cover
10. Line
up outer edge to inner score-line at that end & press down flat to stick.

11. Line
up outer edge to inner score line at other end & pull out rest of red
protective cover to stick. Now your box section should pop up … nice and square
and straight!!

12.
Repeat for other straight edge

13. Now
onto the 2 notched ends …. Repeat process for the 2 straight sides BUT…. and
this is the MOST important TIP….
Remove red protective cover on the 2 small diagonals and cover with some longer
lengths of scrap red protective cover
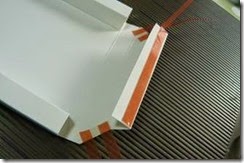
14. Fold
the straight edge down as before & glue into place
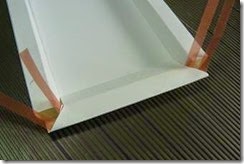
15. Then
push the sides up & over the square/box side sections, get the
mitres/diagonals in place & then pull the red protective cover out
(concentrating on one side at a time!)

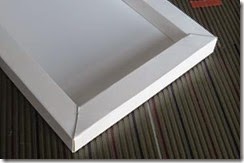
16. Repeat for the other notched
side.
NOTE - I have to admit that I am
still using my Tear & Tape (or Sticky Strip for those of you that have not
seen the light…and converted…) on those diagonals - but I now use my trusty Tombow on the
straight sides – applying a bead onto the base of the frame next to the inner scoreline
works a treat – no wet glue on my fingers as I roll the section around and over…
next version will include photos!
And there you have it…one 1cm
section Shadow Box Frame from an A4 Wide (ie 21cm) Square of card with perfect
mitred corners!
Ends up as a
13cm Square (c. 5 1/4") Square – card.
So to finish it
off as a card that opens and closes – add a 26 x 13cm scored in half LANDSCAPE at 13cm - to the back.
And decorate the
front section as you desire


