Showing posts with label Corner Garden. Show all posts

Sunday, 16 August 2015

3D Corner Garden Shadow Box Frame Card

 
Just realised I haven't shared this one. 
Again I kept the look clean & simple... 
But added depth by cutting out different layers of embossed flowers and leaves and  adhered them on top of each other using 3D foam.
A double die cut butterfly in Very Vanilla and Gold foil...and a gold mat to finish it off...

Very effective in the flesh... and I hope that you can get an idea from the photos...
Shadow Box Frame Card Tutorial here.

Sunday, 9 August 2015

Bright and Beautiful Corner Garden

OK... so I was set a challenge... to go bright with those beautiful flowers in the Corner Garden image..

And so here is the result... still with the gold embossing...but direct marker colouring of the flowers ... so really bright! Adult colouring at its best...as you can do it over and over again.... #arttherapy
Actually reminds me of some painted china that used to be around...

And I love the Watercolor Wings butterflies with their gold tips and bodies... they really pop!
And a product highlight for you... the Adhesive Remover aka the Mistake Rubber Outer!

I am sure that you will all have the sense to have this little must have item.. I definitely wouldn't be without it...and I do use it a lot...

I do find that I wreck lots of my makes  - right at the last minute - with a careless straying of a glue covered finger.... and that is SO annoying....

So here is the Before (see left above the foil mat - above the stalk of the red flowers) Lovely big glue splat!!
And here is the After - glue be gone - MAGIC - phew!
Rather glad I was set this challenge... I actually love the final result! Just goes to show that you can't go wrong with this Corner Garden stamp set

Friday, 7 August 2015

Corner Garden Metric Shadowbox Frame Card with Fancy Fold Friday Tutorial


Another clean & simple gold embossed Corner Garden card... simpler version here
Another triple embossed Wood Expression... link to details here... 
Another ShadowBox Frame card 
But seeing as it is Friday - Fancy Fold Friday -  and as this one is a different version... the full tutorial for the card! 

Shadow Box Frame Card Tutorial – 13 cm Square with 1cm Box Sides and Top
Start off with a 21cm square of Thick Whisper White cardstock cut from a piece of A4 card...  

Please note that my photos are from the original full A4 sheet tutorial posted here – just imagine all the next photos as squares of cardstock rather than the rectangles shown!!!

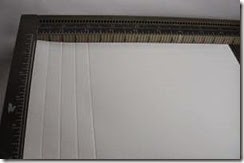
1. Score at 1, 2, 3 and 4 cm on all 4 sides.
clip_image006
clip_image008
2. Make an “extra short score” at 5cm & 16cm from top to 2ndscore-line down . clip_image010
3. Turn 180 degrees and repeat (2)
clip_image012
4. Cut up these extra score lines and diagonally across to the 3rd score line
clip_image014

clip_image016
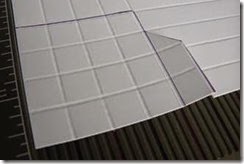
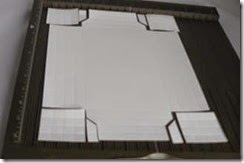
5. Cut out the “16-part” squares at each corner
clip_image018

clip_image020

clip_image022
6. Bone fold all score-lines
clip_image024
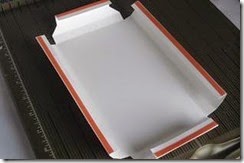
8. Apply glue to folded side of outer-most sections on all 4 sides ( See NOTE below!)
clip_image026
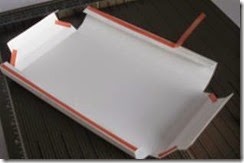
9. Apply Tear & Tape OR Sticky Strip across back of 4 diagonal sections (or add a glue dot!)
clip_image028
9. Assemble straight sides first. 
Recommend sticking any paper/photo in first before assembling if you want as an edge to edge back!
Remove part of red protective cover
clip_image032
10. Line up outer edge to inner score-line at that end & press down flat to stick. 
clip_image034
11. Line up outer edge to inner score line at other end & pull out rest of red protective cover to stick. Now your box section should pop up … nice and square and straight!!
clip_image036
12. Repeat for other straight edge
clip_image038
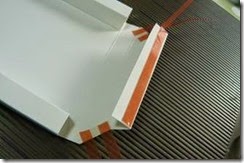
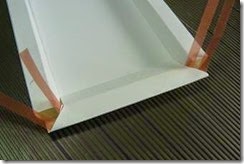
13. Now onto the 2 notched ends …. Repeat process for the 2 straight sides BUT…. and this is the MOST important TIP…. Remove red protective cover on the 2 small diagonals and cover with some longer lengths of scrap red protective cover
clip_image040
14. Fold the straight edge down as before & glue into place
clip_image042
15. Then push the sides up & over the square/box side sections, get the mitres/diagonals in place & then pull the red protective cover out (concentrating on one side at a time!)
clip_image044
clip_image046
16. Repeat for the other notched side. 

NOTE - I have to admit that I am still using my Tear & Tape (or Sticky Strip for those of you that have not seen the light…and converted…) on those diagonals  - but I now use my trusty Tombow on the straight sides – applying a bead onto the base of the frame next to the inner scoreline works a treat – no wet glue on my fingers as I roll the section around and over… next version will include photos!

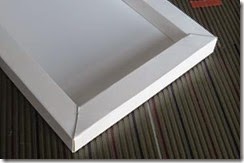
And there you have it…one 1cm section Shadow Box Frame from an A4 Wide (ie 21cm) Square of card with perfect mitred corners!

Ends up as a 13cm Square (c. 5 1/4") Square – card.

So to finish it off as a card that opens and closes – add a 26 x 13cm scored in half LANDSCAPE at 13cm - to the back.


And decorate the front section as you desire


Thursday, 6 August 2015

More CAS Corner Garden....

Continuing on with my theme of Corner Garden stamp set, embossing and keeping it clean & simple

Turning to silver this time... standard A6 card... standard medium mat...
First up  - just silver embossing the flowers and the wing tips of the butterfly.... rest of the butterfly in Soft Sky & Lost Lagoon... wording from Petite Pairs in Lost Lagoon
And then adding a bit of water colouring to those flowers with my Aquapainters and Soft Sky, Mint Macaron, Lost Lagoon & Crushed Curry inks, but keeping it VERY subtle! Also adding some ribbon and a different butterfly ...
Butterfly is stamped using Versamark ( using the 1st layer - or background - small butterfly stamp from Watercolor Wings), then silver embossed, then die cut - and finished off with a Lost Lagoon stamped body . Then that butterfly is layered on another plain die cut Mint Macaron butterfly underneath...
Both together again....
Wonder if you can tell which is my favourite flower - and which is my least!!!

Tuesday, 4 August 2015

CAS Embossed Corner Garden Cards & Tuesday Tips


Let's start off with simply does it! 
A straightforward Very Vanilla card base plus a gold embossed panel. 
Add  gold foil and Very Vanilla die-cut butterflies with a few pearls for the body and a gold embossed Wooden Expressions Natural Element greeting.
All topped off with a shiny gold foil mat.

So Simple...but so effective in the flesh! Not sure the photos do the card justice...

And a Trio of Tips for you (seeing as it is Tuesday!)

First tip - This is how I cut my 4" square gold foil mat and butterfly...
So I ended up with all of these... watch out for some follow up makes! Well that foil is quite expensive... I like it to go a long way...
And this is how I embossed my Wooden Essentials.... going back to a technique I learnt as a beginner crafter about 11 years ago when it was all the rage... Triple Embossing...

First...lay your wooden greeting down on your work surface. Grab your Versamark pad and tap it down onto your wooden piece.
Add your gold embossing powder, tap off and heat to melt.

Repeat twice more with a little time to rest in between...(you can actually add the gold embossing powder direct onto your previous layer whilst it is still hot without the need for Versamark... but I recommend this cool down/re-Versamark method as the wood becomes more brittle as the layers go on.... yes I learnt the hard way!! My first one split as I was a bit rough with it!!!

And  - a Third Tip tip - don't forget to add Versamark/gold embossing powder to the thin/front edge if you will see this on your finished project!! Not a particularly good photo but the left is just wood whereas the right is gold embossed on that edge!
So what is the difference - here you go - single embossed Thanks; double embossed Celebrate and Triple embossed Congrats - like pure alchemy!
And a final point on Triple Embossing items like this - you don't need fancy or Ultra Thick embossing powders or extra tools (which is what I was sold all those years ago!) Any decent embossing powder will do the job nicely....

And before I go - how about another card
Yup - another Shadowbox Frame card for you..... 
Super CAS style...proving that the front of these doesn't even need to be covered with paper... the final result is neat enough... tutorial here...

Supplies used
Stamps - Corner Garden
Card - Gold Foil, Very Vanilla
Inks - Versamark & Gold Embossing powder
Wooden Expressions Natural Elements
Dies - Butterflies