Showing posts with label Bonus Tip. Show all posts

Wednesday, 27 March 2019

Wednesday WOW (Way of Working) with All Adorned - and a Tutorial ...

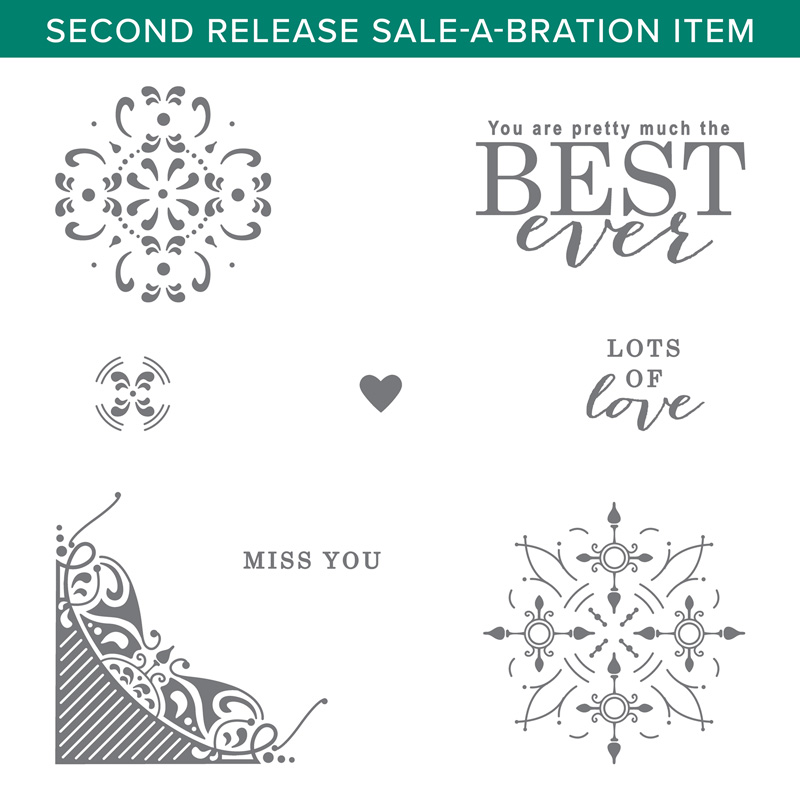
Another tip (or way of working!) for the lovely All Adorned stamp set greeting... let's make it even stronger in sentiment...
And how's about a mini step by step photo tutorial for you! For the Post It Note Cover Method of selectively inking a stamp... for those of you that like a name for things!! 

Cover the small words at the top with a post it note... so only BEST EVER words showing... 
 Ink up the "BEST EVER" words with your ink pad...
 Remove post it note...
And stamp...

So now we have... BEST EVER... MOTHER... well why not! 
MOTHER care of Thoughtful Banners... I just used a marker to just ink up the required word on the bottom-left sentiment... or FATHER in the one above will come in useful for my next classes...
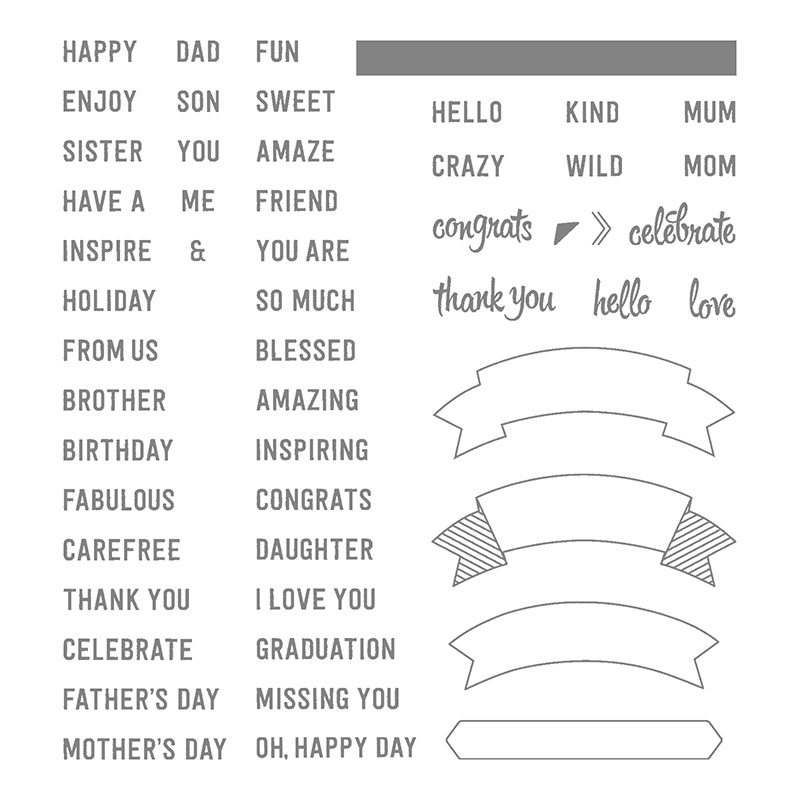
                          Thoughtful Banners Photopolymer Stamp Set
And more on this Sweet Cup project another day... 

Alternatively... you could ink up the BEST EVER using a marker pen too... but this way is easier... and quicker! And the "post it note cover method" would probably take the same amount of time for inking up the MOTHER part... 
Remember this lovely All Adorned stamp set is exclusively available for free with a £45 order during Sale A Bration... which ends this Sunday, 31st March... (which happens to be Mother's Day in the UK too)... so only for 4 more days!
Amanda's Quick Links
Just click on the relevant pictures below for catalogues and/or more information... 

If you are ordering today... do remember to add the Host Code shown below to earn yourself a gift and help support The Craft Spa at the same time... 
Please note that this host code is relevant to today's blog post date... it does expire and change over time... but the current code is always shown at the top right hand side of my blog...

Just click on the relevant pictures below for catalogues and/or more information...
JOIN: £170 product for just £99. OR £170 product plus Tote Bag for £125
Sale A Bration Co-ordination products - available March 2019 only

Earn free Sale A Bration products for every £45 spent (note that some require £90 orders to redeem). Promotion ends 31st March 2019. 

See them all in the Online Store here... or here are the 3 leaflets to flick through...

Current Catalogues & Products


Tuesday, 26 March 2019

Tuesday Tips for All Adorned stamps & Story Label punch

Just sharing a card and a few tips for the All Adorned stamp set (free with a £45 order during Sale A Bration) and the Story Label punch... as these products are now only available for a few more days... as Sale A Bration ends on this Sunday, 31st March

And I have Jane to thank for the brilliant idea of using the sentiment in this way! But more on that later... 
UNSET
This was a panel I just "messed about with" during a class so that the ladies could see the stamp set in action... and it was an immediate hit... so I thought I should finish it off as a simple card for them... 

Simple Night of Navy stamping 4 corners and centre... with Lemon Lime Twist over-centre and small accent to top-bottom-left-right!

And embellishing was quick and simple... thanks to the Gingham Gala Self Adhesive Sequins and Happiness Blooms Enamel Dots... perfect colours!!
And now back to Jane's idea for the sentiment... so a couple of quick Top Tips for you... 

Firstly add a "family member name or FRIEND" and it then means so much more... as in "son" in this example... 

Care of Thoughtful Banners... which has a few family member names to go at...  and FRIEND too..
Thoughtful Banners Photopolymer Stamp Set
And a bonus quick tip for the Story Label punch... I have mentioned this before but I finally got round to taking a photo... just cut one punched shape in half horizontally (right to left) and stick on top and bottom for a coloured mat... 
You can also punch another... and cut in half vertically (bottom to top)....and then stick on left and right... but .... with this shape... I think it looks better just top and bottom!
And come back tomorrow for some more quick tips with your All Adorned stamp set...

Amanda's Quick Links
Just click on the relevant pictures below for catalogues and/or more information... 

If you are ordering today... do remember to add the Host Code shown below to earn yourself a gift and help support The Craft Spa at the same time... 
Please note that this host code is relevant to today's blog post date... it does expire and change over time... but the current code is always shown at the top right hand side of my blog...

Just click on the relevant pictures below for catalogues and/or more information...
JOIN: £170 product for just £99. OR £170 product plus Tote Bag for £125
Sale A Bration Co-ordination products - available March 2019 only

Earn free Sale A Bration products for every £45 spent (note that some require £90 orders to redeem). Promotion ends 31st March 2019. 

See them all in the Online Store here... or here are the 3 leaflets to flick through...

Current Catalogues & Products


Sunday, 29 October 2017

Red... and yellow... and green... and blue

Well just red in my case today... but yours can be any colour you like! Well once you have your Stampin Blends safely in your hands...

So this made me very happy this week... and I couldn't wait to share this Top Tip with you... the project will have to wait until another day!

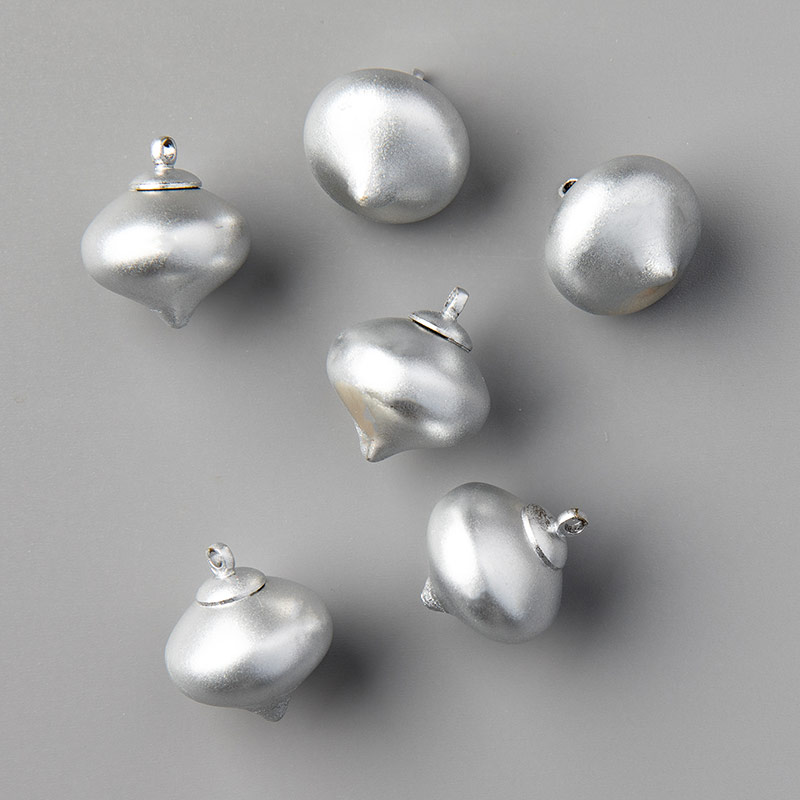
I needed a red bauble for a project... and I only had the silver Mini Ornaments to hand...
Mini Ornaments
Perfect size... love them... but definitely not the right colour!! 

And then I thought...why not! So I grabbed my dark Cherry Cobbler Stampin Blend marker and coloured them easy peasy... and it has not shifted since! And a little tip... easier with the brush end...

So what colour will you make yours??

Stampin Blends alcohol markers coming very soon... just 48 hours to wait! Remember to click here to email me for the leaflet and details on my Stampin Blends club... I promise you won't be disappointed...

Tuesday, 8 August 2017

Carols of Christmas Poinsettias.... and Three Tuesday Tips

Just realised I forgot to share this card made using the pre-released Carols of Christmas stamp set and Card Front Builder dies...
These are in the Autumn Winter catalogue which will be released 1st September... but this set is available to you to purchase now... Wood mount bundle here and Clear mount here...
Now I have to admit to 3 reasons why I didn't post this earlier...
(1) It is in a different colourway to all my other Carols of Christmas makes so it didn't fit in my series! 
(2) This is in Real Red and Tranquil Tide... and I wasn't going to share until I re-made it all in golds! But then everyone at Team Training liked the colours - so what do I know... so thought I should share in any case...
(3) I struggled to line up the die and stamped images to cut out my poinsettias! In fact I just couldn't do it really... and although they are die cut on this card... it took ages in trial and error.... so I resorted to fussy cutting for some more I now have in stock... yes they are in gold!

But then fast forward 2 weeks to Team Training last week...and suddenly I could see the how! It just came upon me in a flash... so I can happily share the trick with you too....

So Tip Number 1...
Stamp up your poinsettias with the arrow on the stamp pointing to the top....
Place the die over your poinsettia (aligned top of image to the top!!!!) with the corner/90 degree angle of the die to the centre at the bottom... 
Note that there are 2 of these dies.... so you can cut 2 corners of a mat at a time...
So I have now marked the relevant die with a B for bottom as a reminder... note that the Sizzix/number etching is upside down...

And cut! See not so hard.... 
I even managed to space and stamp my four demo poinsettias perfectly for all to (just) be cut out just right! Phew!
Tip Number 2... cutting a smaller poinsettia out! Same theory... but using the other corner die... so Sizzix etching right way up this time... just had to tilt the bottom angle a bit more up to the right to get it to line up...
And Tip Number 3... The new Mini Stampin Dimensionals are the bomb!! So perfectly sized... 

Pop them in the die cut area of where you want your flower to go... remove the protective cover... and pop your poinsettia on top... much quicker and easier to line up right than a flower with a 3D foam pad underneath...