Showing posts with label Christmas Lamppost. Show all posts

Wednesday, 20 December 2017

Ah that's better....


 So I admitted that I would make a change when I shared this card earlier...
So here you have the card with just the one bow to finish off... simply much better!

More details here...

Wednesday, 13 December 2017

Handwritten Alphabet Christmas Around the World


Wondering what to do with all your wreaths and bows in the Christmas Around the World paper pack...

Why not try this... bows die cut care of the Christmas Lamppost dies... bit of  fussy cutting of the wreaths to get the solid centre for stamping on with the Hand Lettered Alphabet though...
Finished off with a split greeting from Santa's Sleigh... using marker pens on the words you require... ... or as Amanda has done ...by simply chopping her stamp up into 3 parts!

Though I have to admit...  looking at the photo...  wish I had only put one of the bows on! Funny how things can look very different in a snapshot!


Monday, 11 December 2017

Christmas Lantern re-dressed....


Finally got round to photoing the final Christmas Lantern with its proper lights in situ... and a few Champagne Foil die cut Seasonal Layers snowflakes added to finish...

Can't tell you how much better it looks with the tiny lights behind the lantern glass... albeit very fiddly to achieve... getting Tear n Tape behind the "lamp glass on the inside of the lantern" and then sticking the lightbulb on...
And I have to laugh at this final photo... as no way does it look purple in real life!! Cool White is (supposed to be) the look... 


Saturday, 25 November 2017

Lovely as a Tree simple snowy scene & Free delivery anyone?

And here is the other super CAS card sample I made whilst plotting out my Narnia card shared yesterday... and as I have been asked a few times so nicely... here is what you need for this super CAS (clean & simple) version...

But before I start... newsflash... Free shipping for 24 hours on all Stampin Up! orders ... starts  Sun 26 November 11:00 p.m. ...ends Mon 27 November 10:59 p.m. (GMT). Not near a PC or anything then?... let me know and I can place a direct ship order for you...
And also don't forget that there is only 2 days left of the Extravaganza Sale... ends Sunday 26 November 10.59pm GMT
Click here to go straight to my Online Store to quickly see pictures/prices of the items on offer until ... 10-40% off ... what have you go to lose! Apart from paying for P&P...Click here to check out all the details... or here to check out my Top Picks... though I did miss the Cable Knit embossing folder!!!

Oh and don't forget if ordering over the next few days... this month's Host Code is 392YRRXW for an extra gift (and the new Spring Summer & Sale A Bration catalogues!) from me in December... 

So back to the card today...

Craft Spa Recipe
A6 Tent Card Blank (ie 10.5cm x A4L scored LANDSCAPE at 14.8cm) (US 4 1/4" x 5 1/2" H Card Blank)
Basic Black 6.8 x 11.1cm H (US 2 3/4" x 4" H)
Papers (Christmas Around the World) 6.5 x 10.8cm H (US 2 5/8" x 3 7/8"H)
Clear Glimmer 6.5 x 2.5cm (US 2 5/8" x 1" H) (TIP cut starting from half way up on one side and create a curved snow bank as you go across & back to the centre on the other side... then you have 2 pieces of snow for 2 cards... one a valley and one a peak!)
Lantern parts - as detailed here 
Stamping of trees - as detailed there too...

And here are the 2 CAS versions side by side... Which do you prefer?? And spot the snow bank duo!
Lamppost one shared here... 
And the larger... bring it all together on the one card to impress more... shared here yesterday with its tutorial...

And if you are local... remember that it these are one of my Ronald McDonald House Charities Christmas Cheer Challenge event card designs...
Events running next week, Friday 1st and Sunday 3rd December... click here to find out more details and how you can help making cards for others if you are free...

Friday, 24 November 2017

What's in Your Wardrobe....? And the Tutorial...

But first...  a belated Happy Thanksgiving to my US readers... I hope that you had a lovely day with family & friends... and are now enjoying the madness of Black Friday!

So back to my wardrobe... though I think that my regular blog readers will already know this year's answer!
For me... it has to be a Narnia-esque scene from the The Lion, The Witch & The Wardrobe... a favourite book of mine when I was young... and this was my first thought when I spotted the Christmas Lamppost dies in the Autumn Winter catalogue... and so glad it was... as it has been the class favourite this year...
And so glad it all came together in this way... just a shame that I hadn't photographed the wardrobe shot when I first shared the alternative Narnia scene... it kind of spoilt the overall plot!! Just click here for that variant using Card Front Builder dies instead of the embossed white trees...

And  I do so wish that I could share the glittery sparkle on this card better ... as that is what really sets this all off to Narnia perfection!!

Want to make one for yourself ... well here you go! And apologies for the laughing heard around these parts for one of the later steps in the how to make a more Narnia-esque lamp!
Craft Spa recipe
Thick Whisper White A4L x 16.5cm H (US Letter 11" x 6 1/2")
Paper 28.1 x 12cm H (US 10 1/4" x 4 3/4")
Lamppost - Basic Black card 2.5 x 14.8cm (US 1" x 5 1/2")
Lamp Glass - Vellum 2 x 4cm (US 3/4" x 1 1/2")
Doors - Thick Whisper White x A5 (ie 14.8 x 21cm)(US 5 1/2" x 8 1/2")

Stamps - Lovely as a Tree; Snowflake Sentiments
Dies - Christmas Lamppost; Hearth & Home; Seasonal Layers
Paper - Christmas Around the World
Punch - 1 1/2" Circle Punch
Dazzling Diamonds Glitter & Glimmer Paper
Wink of Stella Clear
Stampin' Blends marker - dark Daffodil Delight

Craft Spa directions

Making your card
1. Large A4L (US 11 x 6 1/2") Whisper White panel LANDSCAPE
2. Score at 7.4cm from both sides (US 2 3/4")
3. Valley bone fold both score lines

Decorating the little scene
4. Mark bottom of paper at 6.9cm & 21.2 cm (US 2 1/2" & 7 3/4")
5. Ink up & stamp tallest Tranquil Tide trees up from those marks
TIPS
(a) avoid stamping the ground level part of the image onto the paper
(b) "second stamp" a smaller tree to the side whilst you are it... ie stamp a second smaller tree without re-inking the stamp... so that you get a faded tree in the background
(c) Always Artichoke inked trees also looks nice... hence the sample card shared here yesterday...

6. Continue stamping and second stamping green trees as desired...
7. Swoosh with your embossing buddy
8. Ink up & stamp Versamark trees and white emboss...
9. Add glue & liberally cover with Dazzling Diamonds glitter
10. Leave paper panel to dry for a while! Otherwise you will have very gluey/glittery fingers, card and worktop!!!!

Making the Doors
11. Die cut 4 x Heart & Home windows
12. Make into doors as shown here...
13. Die cut a Seasonal Layers large snowflake in Foil (Champagne Foil used here) and pull the small circles out from the waste to add as door knobs... I just use a really really tiny drop of Tombow and add the circle on top...

 Making a more Narnia-esque lamp
14. Colour vellum with dark Daffodil Delight and die cut (that's the 3 plant pot flat looking die!!)
15. Die cut other Basic Black Lamppost parts... hopefully this picture will paint a 1000 words... for the bits to cut... and the next few assembly steps (16-22)...
16. Colour your yellow lamp glass with clear Wink of Stella to add that shine..,.
17. Apply glue very sparingly to back of black lamp and pop onto the lamp glass
18. Tiny dab of glue onto the centre of the 3 prong twirly/ partial bit and stick lamp on top
19. Trim off the 2 side arms at bottom of base
20. Tiny dab of glue onto top of lamppost & stick lamp on top
21. Tinier dab of glue about 1cm (US 3/8") down the lamppost & stick cross-member on top
22. Crop the cross-member to the left (LOL!!! Maybe I should say cross-piece... nah... leaving it so some of you can have a laugh too... ! Though I did change the word trim to crop and put the cross- back in the member...!!! So glad this is not in video format... )

Finishing off
23.. Cut Landscape paper panel down to 6.9 cm and 14.3 cm (aka 6.9cm from either side) (US 2 1/2" & 7 3/4" - aka 2 1/2" from each side)
24. Adhere to inside of card
25. Ink up & stamp Black greetings
26. Adhere punched Glimmer circle & Lamppost...

Thursday, 23 November 2017

Lovely as a Tree & Christmas Lamppost card

So as I was making my larger fold out Christmas Lampost & Around the World papers Narnia-scene gate fold card that I shared here last week ... I trialled a couple of different ideas on standard A6 cards...

And this card design has been so popular that it is going to be one of my Ronald McDonald House Charities Christmas Cheer Challenge event card designs...
Events running next week, Friday 1st and Sunday 3rd December... click here to find out more details and how you can help making cards for others if you are local and free...
This one just uses Always Artichoke ink instead of Tranquil Tide for the Lovely as A Tree fir trees...

Greetings from Snowflake Sentiments... all doused with a lot of Dazzling Diamonds glitter and a Dazzling Diamonds Glimmer moon and snow...

Edited to Add - recipe shared here on 25 November.... 

Friday, 17 November 2017

Christmas Lamppost Narnia card

As soon as I saw the Christmas Lamppost dies in the Autumn Winter catalogue I knew this card was coming... and I couldn't wait to share it with you today... all set on a simple little gatefold card (14.8cm Square or US Letter 5 1/2" Square as nearest equivalent)

Edited To Add 24th Nov- Tutorial now posted here 

Christmas Around the World papers... Tranquil Tide stamped fir trees from Lovely as a Tree ... Die cut Clear Glimmer (mounted on Tranquil Tide) trees & silver deer using Card Front Builder dies ... Die cut Christmas Lampost lamp .... Greetings from Snowflake Sentiments... all doused with a lot of Dazzling Diamonds glitter...
And oops ...so annoying... forgot to photo the front... so I will be back with that ... and a slight variant I made to speed up the card in class... and more details... sometime very soon... including the little tweak to make the lamp more like the Narnia one....

Friday, 3 November 2017

Anything But A Card for Global Stamping Friends Blog Hop

Hello and welcome to November's Global Stamping Friends Blog Hop... you are now in the UK with Amanda Bates at The Craft Spa...
Our theme this month is Anything But A Card... which is lovely as it has made me focus and get one of my December projects done a whole month early! So now the first ladies will be making one on Wednesday (just in case they were wondering!!!)

So I have a lantern for you using one of the fabulous large lanterns I found last year! So a matching set for my regular ladies... one for each end of their mantelpieces... 
A die cutting dream of a project... using Detailed Gate, Christmas Lamp Post and Hometown Greetings... all available with co-ordinating stamp sets in bundles with 10%... 

Plus Christmas Around the World & Halloween Night papers and a Boxwood Wreath with a Jute Twine bow to finish off...
But I have few admittances...

(1) This project was inspired by an amazing dome version by fellow demo Shannon Vanstone... though I couldn't find a dome as impressive as Shannon's so I had to alter details as I went along!

(2) My lantern has etched wording at the back that needs covering up... hence the die cut snowflake panel... 
(3) The actual lights I will use arrive on Monday... so I will finish off the project with some more sparkle & twinkle then... The lights used here are the same but have a ridiculously large battery box which is difficult to hide!

(4) I will personally use the double stamped gateposts in Graveyard Gates (as explained & used here) for gift re-makes... but I wanted to keep the project easier for some of my ladies (that panic when the Stamp A Ma Jig comes out!) and we still have the Halloween Night papers in the Clearance Rack here in Europe... so the brick paper sheet made these gateposts a breeze!
And now it is time to pass you onto the lovely Karie in the USA... I know she has 3 lovely projects to share with you...

And here is a Roll Call for you  -  if you prefer to hop backwards and forwards that way - or just in case of any broken links...

Global Stamping Friends Blog Hop Roll Call
5.  Amanda Bates (YOU ARE HERE!)

Sunday, 15 October 2017

Christmas Lamppost Duo

Having spent the day creating something specially to share with you... I am beyond frustrated as the photos have not transferred to where I need them so it is time for something else after all! And it is time for bed...

So a quick Brightly Lit Christmas Lamppost two-cards-from-one round-up share today instead... go here and here for more details on the cards...
One piece of glimmer and one piece of Whisper White being cut to created those 2 snow banks at the bottoms - one set for each card... so two-from-one!

And remember that these Christmas Around the World papers are in the 4 for 3 Paper Sale on this month... 

I will be back very soon!

Saturday, 14 October 2017

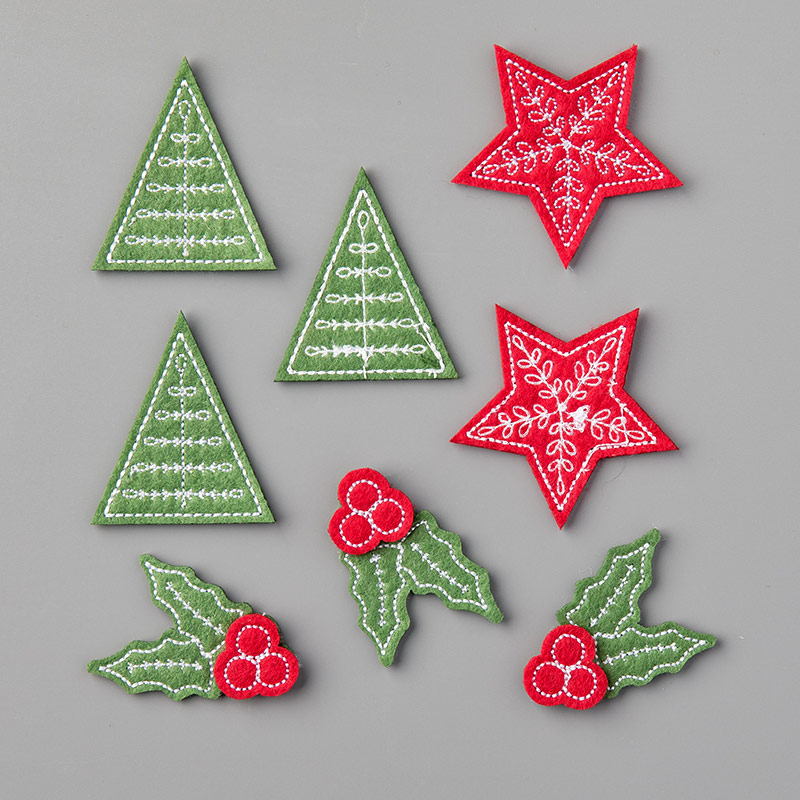
Stitched Felt Embellishment peg...

Simple and sweet today... a quick dressing of a wooden peg to say a little thank you...

Stitched Felt embellishments tree...
Stitched Felt Embellishments
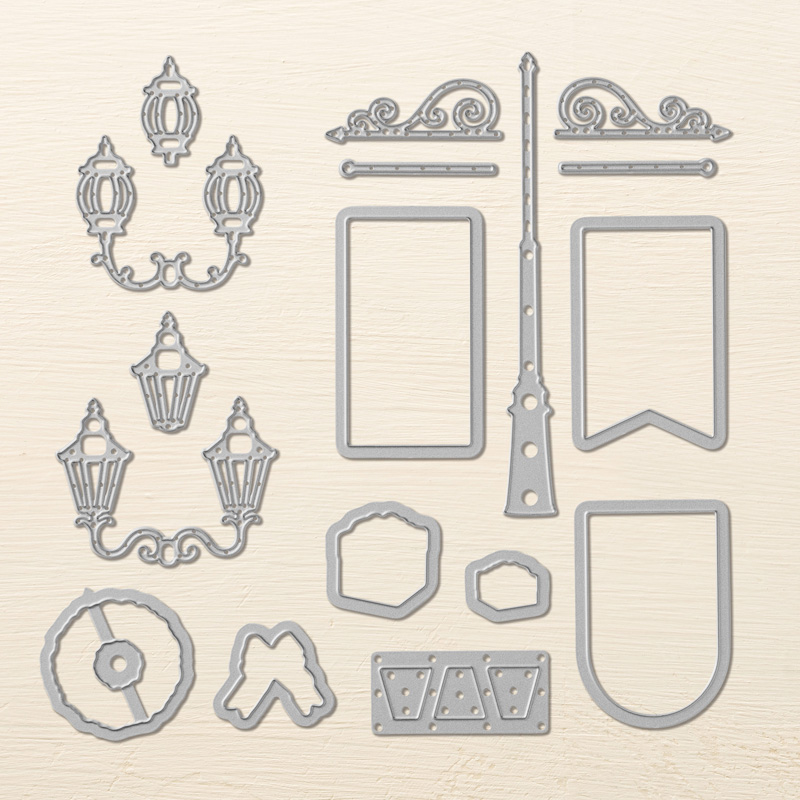
Tiny 1/8" Real Red Ribbon bow... and a glittery pot using the Christmas Lampost dies (ie the lamp glass trio die... the one to the right of the bow at the bottom...)
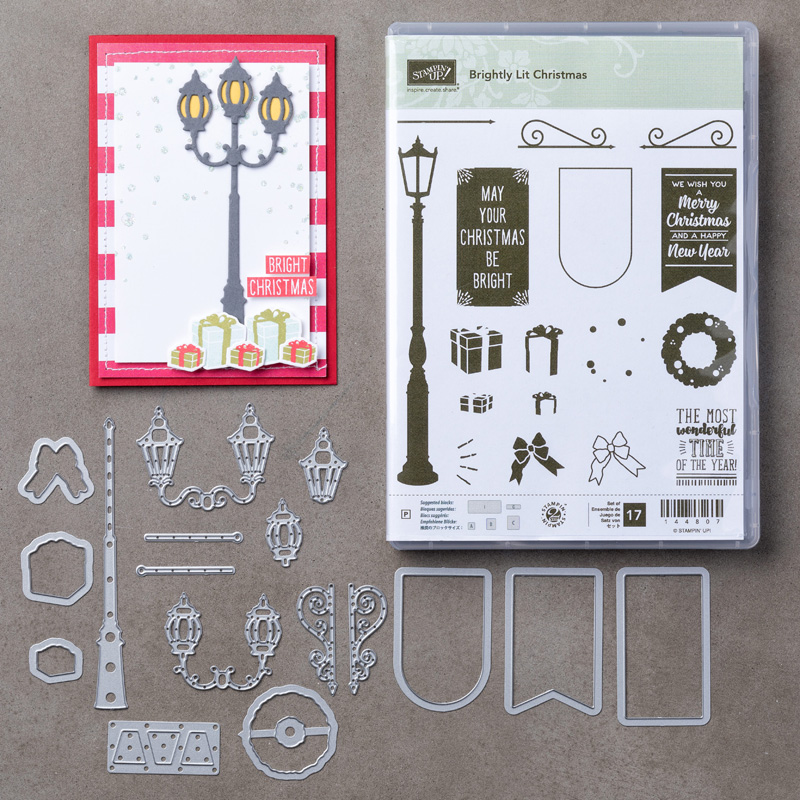
Christmas Lamppost Thinlits Dies
Really quick... really sweet... and lots of "ahh"s and "so cute"s going on when shared in the flesh... and some more going to be made very soon... going to be a night of tiny bows tonight!

Though future ones will have a black pot... or a star... or holly!
PS I can't remember which set the greeting came from... as the pegs were actually stamped a long time ago! But nowadays... I would just use Teeny Tiny Sentiments (also known as Teeny Tiny Wishes in other parts of the world)


Tuesday, 3 October 2017

Brightly Lit Christmas Lamppost & Around the World Papers - Part 2

Adding a bit more detail to yesterday's card... click here for most of the card detail...

A few extra scrolls to the bottom.... love these for an extra decorative touch!
Die cut wreath, bow and presents from the Christmas Around the World papers... using the Brightly Lit/ Christmas Lamppost dies...

And finished off with a stamped Brightly Lit Christmas greeting...

Monday, 2 October 2017

Brightly Lit Christmas Lamppost & Around the World Papers

Another card featuring the Christmas Around the World papers (on this month's 4 For 3 promotional list!)

Coupled with the Brightly Lit Christmas bundle ...  aka the Lamp Post... (or you can get Brightly Lit Christmas stamps (15% off with the World Card Making Day deal until 10 October) though the bundle including the dies is still a better deal! Just...)
Clean, simple and quick... and I do so have a thing about lampposts!

Didn't know why... until I came across an old photo of my family home very recently... and there it was... the proper "antique" lamp post at the top of the drive... wasn't in my memories... but there it was!
Back to the card... Christmas Around the World papers background on Basic Black mat... Die cut Basic Black Lamppost & Lamps... Dazzling Diamonds Glimmer glass & snow bank (hand trimmed) with another plain white snow bank ( with Dazzling Diamonds glitter added to the top) to the rear...  and a Garden Green bow die cut from the Around the World papers... on a Real Red stamped & die cut banner
Friday, 1 September 2017

Global Stamping Friends Blog Hop - A Colour Challenge

Welcome to the Global Stamping Friends September Blog Hop... you are with Amanda Bates at The Craft Spa in the UK... and I have a little card duo for you ...
Note that this is my second post today... scroll down  - or click here - for the new Autumn Winter Catalogue release and my special Launch Offers....

So we have a GSF Colour Challenge to share with you today... what can I say... right up my street!
And a perfect combination to introduce one of my favourite new bundles in the new Autumn Winter (aka Holidays aka Christmas) Catalogue... welcome to Brightly Lit Christmas and Christmas Lamppost dies... available as a bundle (with 10% off for the pair)
Brightly Lit Christmas Photopolymer Bundle
So starting off simply as is my way when starting with a new product! 

A masked and sponged panel in Pool Party and Night of Navy...
Die cut Smoky Slate Lamppost and lanterns... sponged very lightly with Smoky Slate on top and harder around the edges to add texture & definition... 

White die cut lamp-glass inserts behind (yes that is what the one die with 3 "flower pots" does! See bottom left corner in the product picture above) 

And finished off with a stamped and die cut label & bow...
The second card has the addition of Smoky Slate sponging to form a pavement... with a Basic Black stamped and hand cut lamppost so you can see the difference! And spot the add of the Pool Party water coloured glass...

I could have course have stamped this direct but I always like an excuse for a bit of fussy cutting at night! 
The sign holder is stamped direct in Basic Black... a stamped and die cut sign and bow to decorate... 

And I used a couple of die cut sign holders as a flourish for the bottom right hand side... love the effect! I could have course have stamped these instead...
Don't forget to click here and check out the New Catalogue and/or my Launch Offers if you are in the UK...

And now it is time to pass you onto the lovely and very talented Jenn over in California, USA... just click on the arrow! Until next time...

Blog Roll Call

18. Amanda Bates (YOU ARE HERE)