Showing posts with label Double Fan Fold Card. Show all posts

Tuesday, 16 March 2021

Tuesday Tutorial - A6 Double Fan Fold Card


Quickly coming back to the True Love A6 Double Fan Fold card I posted last Friday... with the A6 recipe and measurements for the A4 cardstock users... 

Edited to Add...But before I start... Free Shipping tomorrow... for orders £35+... 24 hours only... starting at 11pm tonight for us in the UK... 

And I have added the links to more detailed tutorials at the end for those of you that haven't made a Double Fan Fold card before... I used Carole's tutorial as my base for this size as it is the most similar... and there are some very useful photos in her post to make the steps clearer... 


Recipe

Basic Black cardstock 14.8 x 19cm.
Basic White cardstock 6.5 x 14.3cm (for back of card)
True Love Paper Front Panel 6.5 x 14.3cm
True Love Paper Long Side Triangle 2.5 x 14cm (x2)
True Love Paper Short Side (Top & Bottom) Triangles 2.5 x 5.7cm (x4)

Tutorial

(1) Score Black card panel when LANDSCAPE (ie 19cm length along top) at 3, 6, 13 &16 cm

(2) Score - when LANDSCAPE (ie 19cm length along top) - from upper left corner (0) to bottom 6cm score line (ie 2nd score line from left). Then score from top 6cm (2nd) score line to bottom left corner (0)

(3) Now score from upper 13cm score line (ie 3rd from left) to bottom right (19cm) corner. Then score from upper right corner (19cm) to bottom left 13cm (3rd) score line.

Cut the paper pieces at a diagonal…

(4) For the 4 small Short Side triangles… When PORTRAIT (ie narrow 2.5cm side along top) - cut from upper left corner to lower right corner for 2 of the pieces. Then, cut from upper right corner to bottom left corner for the remaining 2 pieces

(5) For the 2 Long Side triangles… Mark the top centre at 7cm when LANDSCAPE (ie along the 14cm side) Cut from that top centre point to bottom left corner and then from top centre to bottom right

(6) Adhere all papers

(7) Die cut Stitched Stars, Gold Foil numbers (retired) and Stitched So Sweetly label

(8) Add Matte Black Dots and Gilded Gems to centres of stars


Click the links below for detailed tutorials ...

(1) Originator Sam Calcott at Mixed Up Craft's  7x 5 version (with video)

(2)  Tina Shaw's 7x5 version (with video)

(3) Carole Baumgartner's A2 version with photos... which is the one I used...
This size does also fit in a standard C6 envelope in case you were wondering...

Friday, 12 March 2021

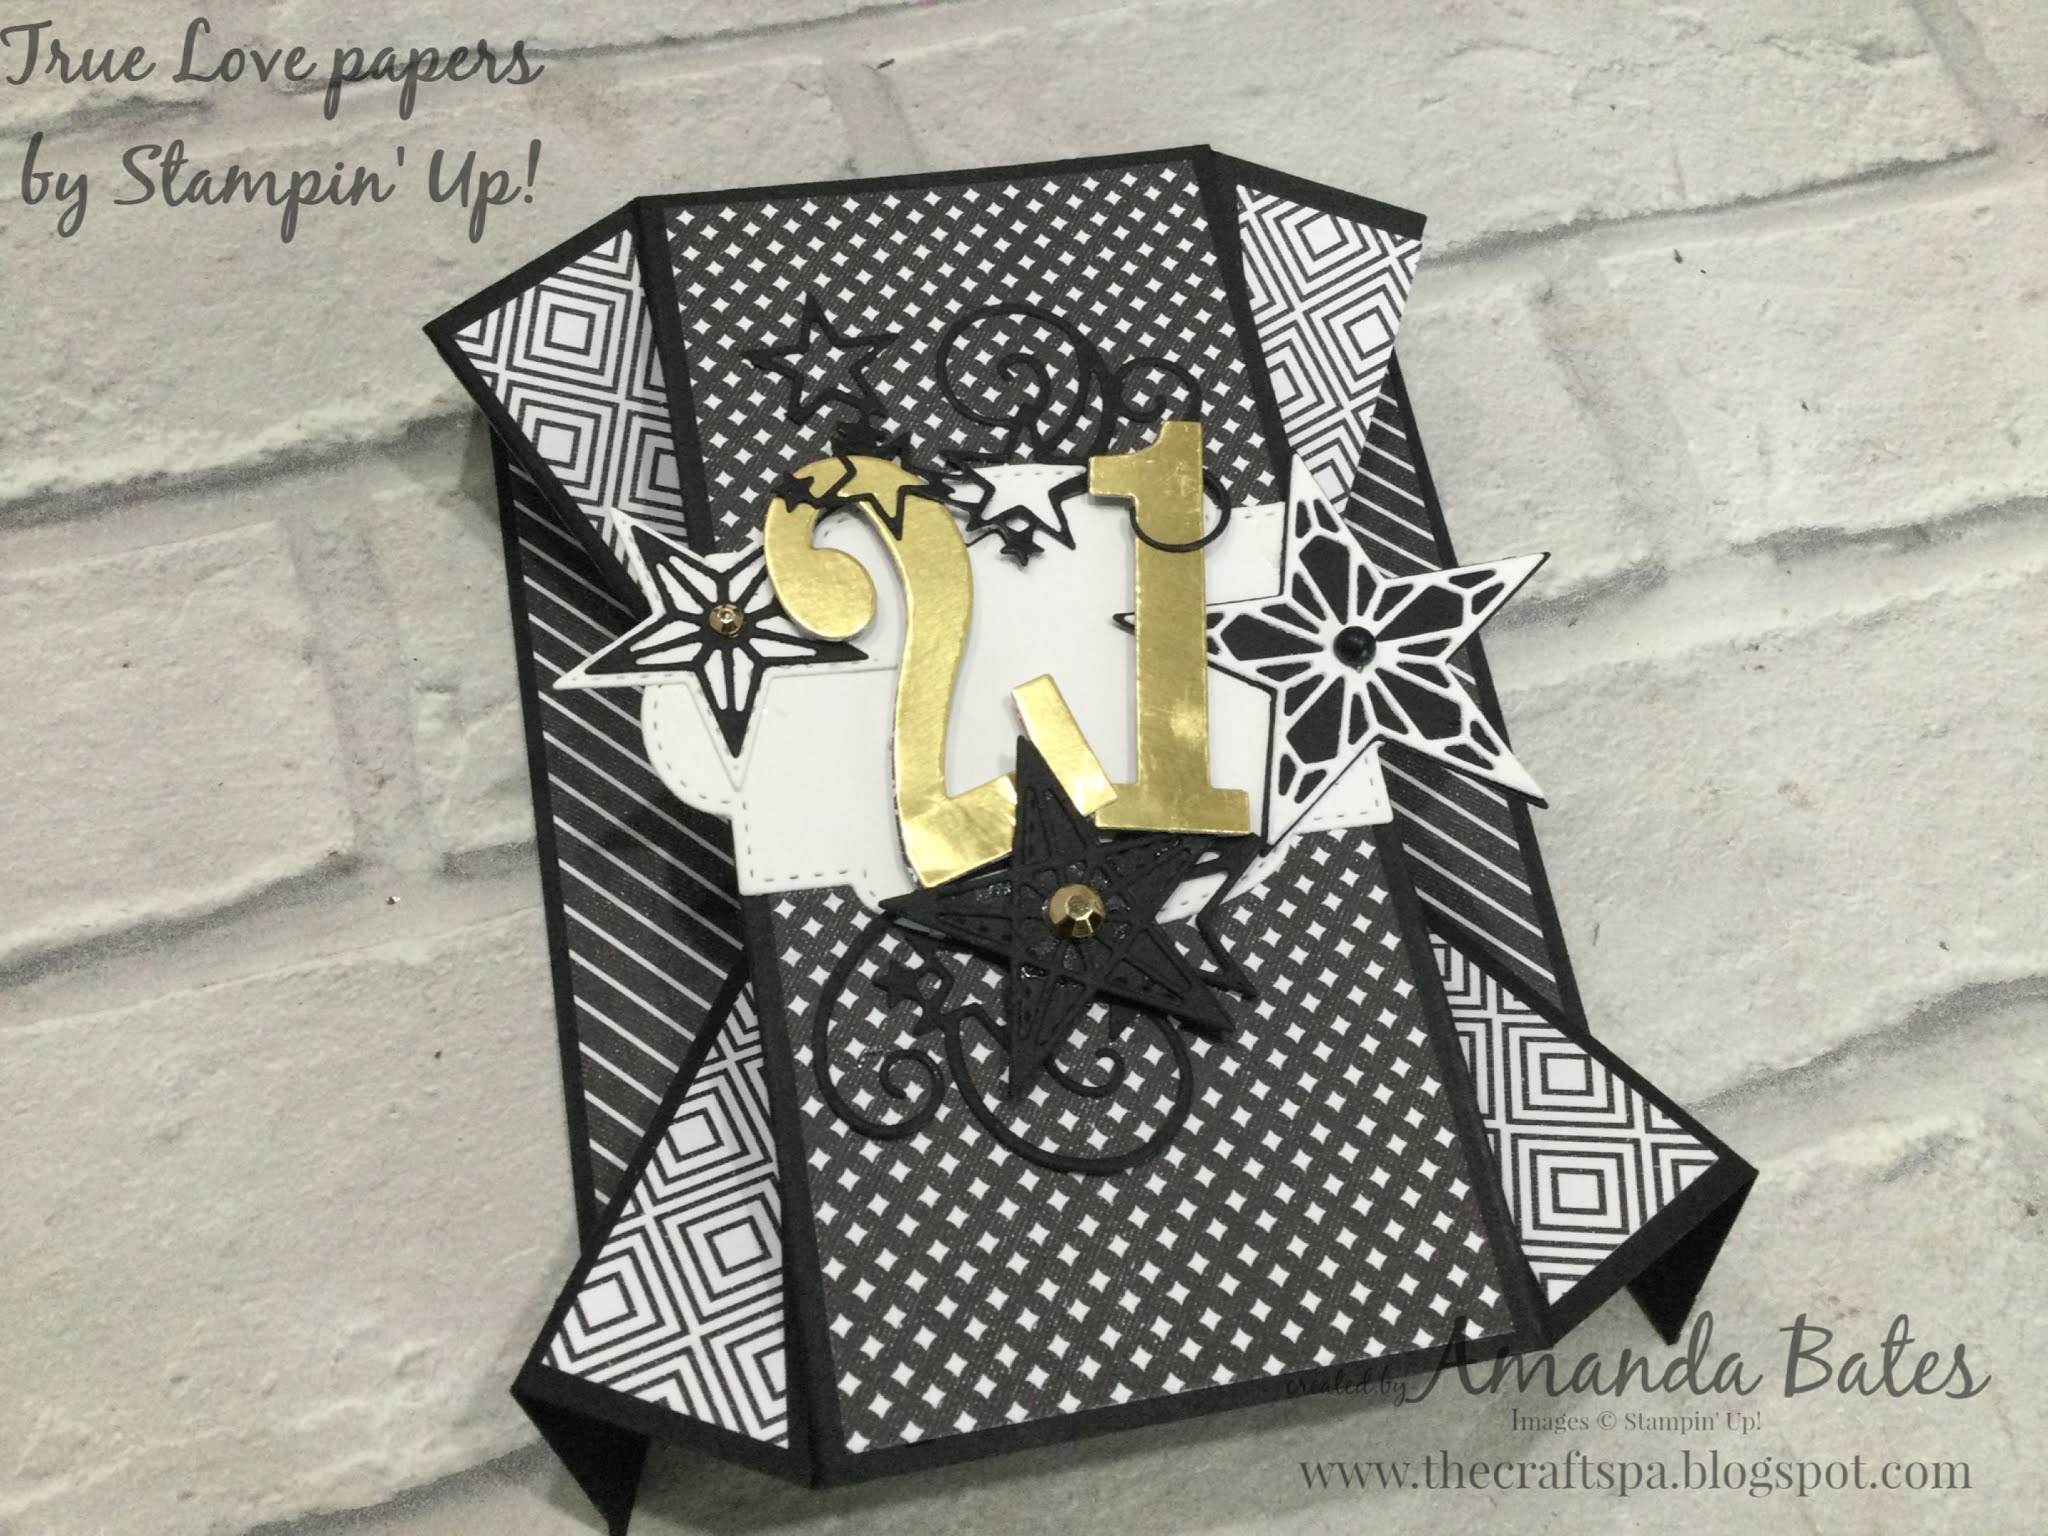
Fun Fold Friday - True Love A6 Double Fan Fold


Quickly popping on with another of the Double Fan Fold cards I made with the True Love pack of papers... 

Though I have just realised that this one is my A6 version from A4 card... so let me know in the comments if you are interested in the recipe and instructions... but I'll have to come back another day with those...

But for a young man this time soI didn't want any flowers... but as always ... the Stitched Stars dies came to the rescue... where would I be for the menfolk  - and for congratulations cards - without them!! Oh and the retired Large Letters of course - definitely can't be without those!

So it's a very happy 21st birthday Tom... from us to you... 

And remember I have put a True Love co-ordinated Paper Kit together for those of you that want to try without buying everything! Next Close date 22 March. Click here for more details... and scroll down...


Friday, 26 February 2021

Fancy Fold Friday - True Love Double Fan Fold...

 Oh my... this card makes me happy!

Another lovely Double Fan Fold  card... resized for standard envelopes this time... as per Carole Baumgartner's tutorial here...(which in turn was a resized CASE of this card by Tina Shaw shared the month before) though I just used the foiled mat dimensions for the decorative papers... as I only used papers...

Black and white papers... care of the True Love paper pack...

With a pop of colour - care of Coastal Cabana cardstock... with Bermuda Bay Light plus Pool Party combo Stampin Blends coloured flowers... and Old Olive combo coloured leaves...

And last but not least... coloured stripes on the front face... care of Light Olive and Dark Pool Party Stampin Blends... 

Finished off again with the "cut up" greeting from Happiest of Birthdays ... die cut into a label using the Stitched So Sweetly dies... more details on those here...

Stampin Up! Products Used

True Love Papers

Happiest of Birthdays stamps

Stitched So Sweetly dies

Stampin Blends Old Olive, Bermuda Bay, Pool Party

Mmm... wonder what I may have made next....

Wednesday, 24 February 2021

Wednesday WOW - Paper Blooms Double Fan Fold Card


OMG... I have been wanting to make one of these Double Fan Fold cards for ages... ever since I first saw one on Sam's Mixed Up Craft blog back in August 2020... and many a-one seen since... and I am definitely not disappointed... Thank you Sam...

So this is my first Double Fan Fold card... and I followed Sam's tutorial to the letter... as it creates a nice big card... And I can have to admit... that I absolutely LOVE this card... 

Flowers all fussy cut from the Paper Blooms papers.... shiny Rococo Rose foil from the Love You always Foil Sheet pack...

And check out the 2 butterflies... one stamped and die cut to the top left... and the other fussy die cut to the bottom right...  A sneak peek of a new product suite coming 2nd March... Butterfly Bouquet... more details coming Sunday...

The perfect set of products for you butterfly fanciers... simply gorgeous... may just be the nicest butterflies I have ever had!!


Stampin Up! Products Used

Paper Blooms papers (free with Sale a Bration promotion...but only till Sun 28 Feb)

Love You Always Foil Sheets 

Happiest of Birthdays stamps

Stitched So Sweetly dies

Butterfly Brilliance bundle

And a couple of simple tips for you... 

(1) Don't be too scared to cut your stamps... makes for much more versatility... as I can use Happy Birthday on its own now... on top of each other (as here)  or side by side to form the long sentiment when I want that... And I can still use ... as designed for... when I need that sentiment too...

(2) Gut your foil... I cut in at 1cm (approx 3/8") from each side... 
So now I have a panel I can use for something else another day...

It gets covered by the paper panel in any case...