Showing posts with label free tutorial. Show all posts

Wednesday, 9 March 2022

Wednesday Welcoming Windows Class Kit & Tutorials

Delighted to see the Welcoming Windows bundle in the Spring Sale... so only £41.50 plus P&P during March... 

As I have to admit.... that this set is a favourite of mine... and out in my craft room more than it is filed away... and in time... it will be a "keeper"

And I making the UK Postal Class Kits and PDF Tutorials packages for this bundle readily available again... Click HERE to see more project photos...

Just Click HERE to order the Tutorials or Class Kit (you'll need to scroll down)

But (unless very local) please order your bundle with direct delivery to you ... and I will send the Class Kit etc under separate cover...  Close date 31st March... though I will endeavour to send out class kits earlier for earlier orders...

Tutorials £4 

OR free UK Class Kit & Tutorials with any £41.50 bundle order 

OR Class Kit & Tutorials £15 (UK only)

WELCOMING WINDOWS CARDS


Friday, 5 November 2021

Friday Fun Fold - Lock & Pop Card Tutorial


Another Large Square Lock & Pop card for you today... 

As one just had to be made with a Merriest Frames embossed and die cut panel... though still featuring the gorgeous Tidings of Christmas papers and Merriest Moments stamps...

Click here for the previous Christmas one... or here OR here for All Year round versions... And yes... I did finish the 60+ cards mentioned... but more on that another day...

So whilst I am at it... a quick tutorial for you too... love a simple fun fold like this one... 

1. Cut cardstock to 14.8cm x 29cm

2. Landscape. Score at 1, 7, 13, 16, 22 & 28cm 

3. Bone Fold Mountain, Valley, Mountain, Mountain, Valley, Mountain

4. Decorate as required.
I prepped 3 panels of papers cut to 11 x 14.3cm H. Which we then cut in half in portrait orientation to 5.5 x 14.3cm H just prior to sticking... Saves all the panels getting all mixed up!

Oh and yes lots going out with the Merriest Frames panel... but more on that another day...

Friday, 4 June 2021

Fun Fold Friday - Side Fold Card


Sharing another of our lovely team new catalogue "happy mail" swaps... with directions for a simple but effective little fun fold for you... as I will be CASE-ing this card design very soon... so the ruler was out...

Created by our very talented Ruth Wareing of stampinghappiness blog fame... 

Featuring Hand Penned in Highland Heather and Garden Green... finished off with clear Epoxy Essentials & Highland Heather 1/2" Grosgrain ribbon...

So cut a 28cm long x 10.5cm wide piece of (Highland Heather) cardstock...

Score at 14 & 17.5cm. Bone Fold Mountain then Valley.

Cut two 10cm Square and one 3 x 10cm Whisper White panels (one of squares is on inside)

Decorate as necessary  (I don't know if you can tell but the stamped & die cut flowers are 3D'd and very effective...)

Wrap & tie ribbon around the side panel

Adhere the side panel down

Thank you Ruth... I really love this card... a simple little fun fold stunner... right up my street...

And before I go... Click here to see all the details about the Hand Penned suite...


Tuesday, 16 March 2021

Tuesday Tutorial - A6 Double Fan Fold Card


Quickly coming back to the True Love A6 Double Fan Fold card I posted last Friday... with the A6 recipe and measurements for the A4 cardstock users... 

Edited to Add...But before I start... Free Shipping tomorrow... for orders £35+... 24 hours only... starting at 11pm tonight for us in the UK... 

And I have added the links to more detailed tutorials at the end for those of you that haven't made a Double Fan Fold card before... I used Carole's tutorial as my base for this size as it is the most similar... and there are some very useful photos in her post to make the steps clearer... 


Recipe

Basic Black cardstock 14.8 x 19cm.
Basic White cardstock 6.5 x 14.3cm (for back of card)
True Love Paper Front Panel 6.5 x 14.3cm
True Love Paper Long Side Triangle 2.5 x 14cm (x2)
True Love Paper Short Side (Top & Bottom) Triangles 2.5 x 5.7cm (x4)

Tutorial

(1) Score Black card panel when LANDSCAPE (ie 19cm length along top) at 3, 6, 13 &16 cm

(2) Score - when LANDSCAPE (ie 19cm length along top) - from upper left corner (0) to bottom 6cm score line (ie 2nd score line from left). Then score from top 6cm (2nd) score line to bottom left corner (0)

(3) Now score from upper 13cm score line (ie 3rd from left) to bottom right (19cm) corner. Then score from upper right corner (19cm) to bottom left 13cm (3rd) score line.

Cut the paper pieces at a diagonal…

(4) For the 4 small Short Side triangles… When PORTRAIT (ie narrow 2.5cm side along top) - cut from upper left corner to lower right corner for 2 of the pieces. Then, cut from upper right corner to bottom left corner for the remaining 2 pieces

(5) For the 2 Long Side triangles… Mark the top centre at 7cm when LANDSCAPE (ie along the 14cm side) Cut from that top centre point to bottom left corner and then from top centre to bottom right

(6) Adhere all papers

(7) Die cut Stitched Stars, Gold Foil numbers (retired) and Stitched So Sweetly label

(8) Add Matte Black Dots and Gilded Gems to centres of stars


Click the links below for detailed tutorials ...

(1) Originator Sam Calcott at Mixed Up Craft's  7x 5 version (with video)

(2)  Tina Shaw's 7x5 version (with video)

(3) Carole Baumgartner's A2 version with photos... which is the one I used...
This size does also fit in a standard C6 envelope in case you were wondering...

Wednesday, 15 April 2020

The Clearance Rack has been updated...

The Clearance Rack has just been updated... discounts of up to 60%... but supplies are limited and so only available whilst they are available!

Go have a browse in our new look... easier to use... Online Shop... and enjoy picking up some bargains along the way! Especially products for Christmas and Autumn... Just think how organised you could be this year!

But remember to ...
(1) click on NEWEST in the Top Right drop down list to see the new items first!

(2) if ordering under £150... enter my Host Code SMUXM3HE  where prompted... for a gift in the post from me for orders from £20...

(3) Live in the UK... and your order is over £40... then you can choose to have the Bench Fold Series 1-3 as your gift instead... enter the Host Code SMUXM3HE and then email me by clicking here to tell me that is your wish! Please quote your order number...
So sorry that I can't offer that option to the Rest of the World!

(4) Add any items to your order...Clearance Rack or rest of catalogues!

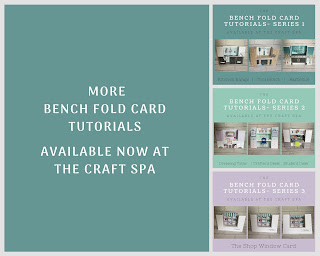
And for those of you looking for the Bench Fold Card tutorials... for the Dressing Table, Desks and/or Shop Window... just scroll down or click on the image below...