Showing posts with label Ice Cream. Show all posts

Saturday, 1 July 2017

You are my Sunshine Blog Hop

Gosh these months roll round so quickly... so it is time again for the Jems Monthly Blog Hop... with a theme of " You are my Sunshine"...
Oh gosh this theme made me really have to think! But soon... lots of completely different ideas came... and this is the one I chose to create!

So Sunshine... meaning summer... meaning hot... meaning ice cream! And it just had to be an ice cream stand!!

And then of course my Bench Fold Card immediately spring to mind... but with a twist! Roof Fold anyone???
Click HERE to go and order the tutorial (s)... though please note there isn't a specific Ice Cream/Roof Fold one...

But before I start with some details... thanks to Sarah Jane Rae for redesigning our lovely fresh new Blog Hop icon...almost a perfect match to my project! And would have been even more so if I had the time to add the banner I had planned!!! But it is time for the Students & Parents Leavers Ball tonight... so the hair will have to be done properly!

Love how this all came together... but some details to point out...
The new Pinewood Planks Dynamic embossing folder made easy work of my wood plank base... I embossed a long white section then cut out Pool Party planks and stuck them on the top.... just making sure to cover the joining double embossed white plank with a pool party one to cover the seam!

Ice creams simply made using the Cool Treats stamps and matching Frozen Treats dies... with sprinkles on top! These are stuck on a panel of acetate so that they look like ice cream cones in a stand as well as popping forward from the back panel for even more dimension...
Greetings all from the Cool Treats stamp set too... love the embossed ones on the blackboards!

And last but not least...the front canopy is made by punching Pool Party, Powder Pink, Whisper White & Berry Burst card using the Classic Label punch and sticking them on a long white strip with an overhang for the front and then just a trim all along the length for the back... easy to do that way...
Original Bench Fold Card Tutorial details here ... albeit without the roof... that will be found in Series Three I think...which I am working on for the end of July... 

And yes it does fold flat... in either of 2 ways depending on your envelope stock... though I think most recipients would find it difficult to work out how to re-assemble... so it would be a card for you to be there whilst opening!!

Very large square envelope required... the easier way to fold and the recipient may be able to work it out!
A5 envelope required... but maybe not fathomable for the recipient!!
And now it is time to pass you onto the lovely Anne... who has made lots of fabulous things to share with you... 


Tuesday, 17 January 2017

Tasty Trucks for free during Sale A Bration...

Quick share of a card made using the Sale A Bration Tasty Trucks stamp set and Tasty Treats papers . Cute! Makes me feel all summery! This stamp set can be yours too for free with a £45 order!
This is one of the cards we made at our Monthly Training the other week... and so this card may already seem familiar to some of you! Thanks for a great refreshing make Julie... 

This was also my first try out of the new watercolor pencils which I think are fantastic as they make colouring and blending a breeze...  even for me... and all in Stampin' Up! colours too... double win...


Friday, 29 January 2016

6" Square Pop Out Swing Card - and Tutorial

Anyone for ice cream??? 

Time for another version of the Birthday Bouquet Pop Out Swing Card... as seeing as it is Friday... Fancy Fold Friday that is... another tutorial for you!
For some reason I decided to go slightly larger than the original 5 1/2" Square Pop Out Swing Card version posted here... think I must have just found a pack of 12 x 12 card... and reckoned it was time to use it! I will no doubt regret that decision when I am next making mini books for a class!
Anyways it has resulted in a different version/tutorial for you!
All of my Birthday Bouquet Pop Out Swing cards were 6" Square versions... Link to the others here...and I think there even a couple more to come when I finish decorating them... I am so ahead with my personal cards to send this year!

Recipe
Card Blank - Cardstock Pool Party 12"x6"
Inner Panel - Cardstock Pool Party (Whisper White in tutorial photos) 7 ½”x5 3/4" 
Inner Tabs - Cardstock Pool Party 7/8"x5 3/4" (x2)
Card Front Outer Panel - Paper 5 3/4" Square
Card Front - Centre Panel-CS M. Meadow 3 7/16" Square; Paper 3 1/4" Sq. 
Inside Mats -Cardstock Mossy Meadow 2 1/4" x 5 1/2" (x2); 
Inside Panels - Cardstock Whisper White 2"x5 1/4" (x1); Paper 2"x5 1/4" (x1)
Glimmer Paper Blushing Bride 2 3/4" Square

Instructions
1. Score wider 12" x 6" LANDSCAPE Pool Party panel at 6". Bone Fold.
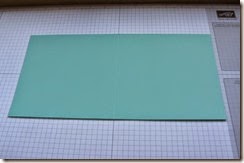
Tabbed Pop Out Swing Card Tutorial, Amanda Bates @ The Craft Spa 001
2. Score narrower LANDSCAPE Pool Party panel at 2 ½” & 5” (note white in photos so you can see what is going on!)

3. Bone Fold as concertina/Z-fold ( ie one as mountain & 1 as valley fold)
Tabbed Pop Out Swing Card Tutorial, Amanda Bates @ The Craft Spa 002
4. Score 2 narrow Pool Party tab/panels at 2 ½” . Bone Fold (TIP - make sure this is a slightly short 2 1/2" ie so you can see the 2 1/2" line when you line it up to score. This will save you trimming at a later stage!)

5. Temporarily adhere paper central to the front of your 6" card blank ( TIP - note your paper orientation if there is a pattern!)

6. Die cut Square Aperture in card blank front and keep the die cut square of card… the paper is excess...
Tabbed Pop Out Swing Card Tutorial, Amanda Bates @ The Craft Spa 004
7. Adhere the paper frame to the card frame (TIP - do this now...as the 2 frames will be as you have cut them...so the apertures will be the same way around/in the same place and they will fit neatly! If you put the paper to one side and stick later - you will spend many a happy 5 minutes working out which way round to stick it!)

8. Adhere Z folded panel to RHS of open card blank (note: valley fold of Z Fold panel to LHS when stuck )
Tabbed Pop Out Swing Card Tutorial, Amanda Bates @ The Craft Spa 008
9. Fold over front of card blank. (with Z folded panel folded)

10. Apply glue through aperture to top of Z fold panel ( ie to RHS of aperture) Note I have only used Sticky Strip just so you can see where the glue needs to be…..
Tabbed Pop Out Swing Card Tutorial, Amanda Bates @ The Craft Spa 009
11. Adhere die-cut square (making sure the Square can swing through the aperture)
 Tabbed Pop Out Swing Card Tutorial, Amanda Bates @ The Craft Spa 010
Tabbed Pop Out Swing Card Tutorial, Amanda Bates @ The Craft Spa 015
Tabbed Pop Out Swing Card Tutorial, Amanda Bates @ The Craft Spa 011
But when you open this card…that Square section doesn’t pop out or swing… it just … well sits there!
Tabbed Pop Out Swing Card Tutorial, Amanda Bates @ The Craft Spa 013 
So now for the Tabs to attach it all together….. and allow it all to pop out and swing…

12. Open up Card blank. Open out Z folded panel to the right.
 Tabbed Pop Out Swing Card Tutorial, Amanda Bates @ The Craft Spa 016
13. Apply glue to narrower side of the 2 Tabs (again I have only used Sticky Strip so you can see it!)
Tabbed Pop Out Swing Card Tutorial, Amanda Bates @ The Craft Spa 017
14. With folded edge of Tabs to outer/RH edge of Z panel - adhere narrower side of Tabs to top and bottom (ie above and below the square panel) ensuring that these tabs clear the square and Z folded panel LHS score line. (Trim if necessary)
 Tabbed Pop Out Swing Card Tutorial, Amanda Bates @ The Craft Spa 018
15. Fold top layer of Z Fold panel back over & open the Tabs out.
  Tabbed Pop Out Swing Card Tutorial, Amanda Bates @ The Craft Spa 019
Check that the Tabs will clear the central score line of the Card Blank.
Tabbed Pop Out Swing Card Tutorial, Amanda Bates @ The Craft Spa 020
Trim if necessary
Tabbed Pop Out Swing Card Tutorial, Amanda Bates @ The Craft Spa 021
16. With the Tabs opened out, apply glue to top side
Tabbed Pop Out Swing Card Tutorial, Amanda Bates @ The Craft Spa 022
17. Fold front of card blank shut to close down onto tabs
Tabbed Pop Out Swing Card Tutorial, Amanda Bates @ The Craft Spa 023
And there you have it…one safely attached swing out card mechanism….
Tabbed Pop Out Swing Card Tutorial, Amanda Bates @ The Craft Spa 024
Tabbed Pop Out Swing Card Tutorial, Amanda Bates @ The Craft Spa 025
Now  - if you have done a version using white card as per these photos... some of you won’t like the fact that you can see the Tab on the back of the white Z folded panel…
Tabbed Pop Out Swing Card Tutorial, Amanda Bates @ The Craft Spa 026
2 ways to work round that …
(1) make your card blank and Z folded panel all in the same colour as I have done with this version of the card
(2) cut 2 x  7/8" x 2 1/2” White Tabs…and just stick over the top!
Tabbed Pop Out Swing Card Tutorial, Amanda Bates @ The Craft Spa 030
Tabbed Pop Out Swing Card Tutorial, Amanda Bates @ The Craft Spa 031
Look vanished!

So there you have it… add a decorated panel to the front Square section… and you have a simple looking card with a WOW on opening… and it is simple to make too…
Tabbed Pop Out Swing Card Tutorial, Amanda Bates @ The Craft Spa 027
Now enjoy playing with the swing thing!! It is hard to resist!!
Built for Free Using: My Stampin Blog