Showing posts with label Birthday Bouquet. Show all posts

Monday, 30 May 2016

Aqua Winking...and Birthday Blooms

Remember this card... well seeing as it was SO popular both here in the flesh and on Pinterest... I decided to re-make all the cards in the set for my class using the Aqua-painter and the Gold Wink of Stella....
And as I demonstrated the technique at class...a  new expression came to mind...  aqua-winking... lot easier to say than the following....
1. Scribble your Gold Wink of Stella on a clear block (or piece of plastic or ceramic plate or something smooth and slippy...)

2. Pick up your Gold from the block using your Aqua Painter and aqua-wink (watercolour) as required ... note just add a drop of water if you want the colour to be even more subtle!!
3. Go over with your Clear Wink of Stella if you want even more shine...

4. Use Staz On cleaner to clean your clear block when you have finished (as the gold stains!!)
Don't forget to paper tole the flowers too... makes a huge difference to these cards... though unfortunately somewhat too subtle to see on the photos!! So you will have to trust me...

SU! Supplies
Stamps - Birthday Blooms
Inks - Gold Wink of Stella, Always Artichoke, Mint Macaron, Pool Party, Archival/Staz On Black, Versamark & White embossing powder, Gold embossing powder
Tools - Aquapainters, Curvy Corner Trio Punch, Heat Gun
Papers - Birthday Blooms
Embellishments - Gold Bow Clips, Striped Mossy Meadow Cotton Ribbon
Card - Always Artichoke, Pool Party, Hello Honey, Shimmery White, Watercolor Paper, Thin Whisper White

Go here for the lowdown on which white card was used on which card... I am definitely still loving the Shimmery White card best for watercolouring and aqua-winking...

Tuesday, 24 May 2016

Happy 80th Birthday Hilda

Oops did I let the cat out of the bag! Couldn't share this card on here before as it had to arrive at it destination first!
Another Square Pop Up Z Fold Card.... but a much prettier version in the Birthday Bouquet papers... as I know these are Hilda's favourite papers...
Hope you liked the card!

Friday, 8 April 2016

Birthday Bouquet Swing Easel Card

Sorry but it is a really quick post today.... I actually nearly forgot and it is really late at night now!! Just one of those weeks with school holidays.. and then great Weekly Deals & update to Clearance Rack etc.... (and I thought I was going to get a few days off!!!!)

Birthday Bouquet papers and a butterfly... along with sentiments from Watercolour Words and Remembering Your Birthday... the latter being punched out using the Washi Label punch...
Want to make your own... here are the tutorials.... A4 card version and 12x12 card version... 

Want to order some Clearance Rack or Weekly Deals products... then go to my Online Store (press the Shop Now button)... or email me... 


Thursday, 7 April 2016

Balloon Celebration Pop Out Swing Card

So a break from Rose Wonder today... Another Pop Out Swing Card with Balloons for a family member celebrating his 16th...
Want to try one for yourself... 6" Square tutorial here...

Not got any 12" card in yours stash... then try out the smaller 5 1/2" Square one here...

And I have to laugh at myself... as I have searched and searched... I would have sworn that I had posted a 14.8cm version from A4 card... but it is eluding me for now!!

Seems to be a theme this year... I either think I have done things that I haven't - or even funnier I do things that I don't think I have!!! Anyone else have the same problem - or is it just me!!!!?

SU! Products Used
Stamps - Number of Years, Balloon Celebration
Does - Large Numbers
Papers - Birthday Bouquet 
Card - Pool Party, Mossy Meadow, Silver Glimmer
Inks - Mossy Meadow, Pool Party, Mint Macaron

Wednesday, 16 March 2016

Pretty Easter Bakers Box

Slightly more space for your Easter Treats today! Care of my Bakers Box die and some Birthday Bouquet papers.... Simple... but oh so so pretty... 

I used the confetti paper design purposefully so that everyone could choose their own box colours from a pick of Pool Party, Mint Macaron, Blushing Bride or Watermelon Wonder...
Flower arrangement just cut out from the 12x12 paper piece in the pack...

And an admittance... the greeting is from the retired Easter Blossoms stamp set... well it was just the perfect size for my 2" Circle Punch and 2 3/8" Scallop Circle Punch... Wow  - I have just checked - that stamp set retired 4 years ago in 2012... 
And before you go... don't forget to check out this week's NEW Weekly Deals - products at 25% off...

Sunday, 6 March 2016

Beautiful Balloons Ride Celebration by Jane

We had a special moment in classes this week... We were all poised to make this card...when Jane said can I add a Beetle!? Well of course Jane...
 
Isn't it fabulous!! I just had to share... 

I love it Jane! And I am absolutely positive that your friend about to celebrate her 40th Birthday will too....
And I hope you have a bit of your Wink of Stella pen left!!! 


Monday, 8 February 2016

Balloon Numbers Duo - Before and After!

Hopefully the last of my quick shares! This card will seem familiar... but my class was supposed to be based on the Number of Years stamps & Large Numbers Framelits... rather than Balloon Celebration & duo punch... 
So why not numbers as balloons...works for me!
And before and after? Well I reckoned a quick bit of Faux Stitching with the thin end of my marker pen around the Balloon numbers and circle aperture just finished everything off...


Built for Free Using: My Stampin Blog

Thursday, 4 February 2016

Birthday Bouquet 54321 Class

And so to finish off the cards everyone made in the 54321 class...
Here is the card designed for everyone to make 5 quickies....
These are all CASED from a card we made at Monthly Training
The prepped papers were all different...not because I had necessarily planned it that way originally...
But because my delivery arrived at the end of the class! So I had to have a quick rethink the night before...
But it was a good rejig of a plan....
More details on the bottom left card here...
Just realised I haven't posted the original card we made at Training... better re-take a photo and post another day...


Built for Free Using: My Stampin Blog

Wednesday, 3 February 2016

Birthday Bouquet Notecards Set

A quartet for you today... a lovely little set of note cards using the Birthday Blooms stamp set and the Birthday Bouquet papers... All finished off in envelopes made using the Envelope Punch Board... and then packed in a Half Wide size stamp set case...

Lovely set for gifting...

This was the other project we made at Quarterly Training the other week... nice and simple but very very effective!

As usual I went a bit mad with the Winking! Not only are the cut out flowers from the papers all sparkly...but the stamped leaves on the Mint Macaron mat below... lovely little addition...really adds something special in the flesh...
And then I went too far... the flowers being Winked on the Blushing Bride mat... I personally think this is a bit too much!!
Don't miss the Weekly Deals this week... some great stamps and dies on there this week!!
Here is an earlier post with a Wondrous Wreath round up! Just in case you need reminding of this fabulous stamp set which I have used SO much over the past couple of years...


Built for Free Using: My Stampin Blog

Monday, 1 February 2016

Birthday Blooms Trio

Whilst I am on the subject of the last Quarterly Team Training...
Here are 3 of the cards Julie had put together for us to make...
A simple little trio to practice our water-colouring skills (or maybe not as in my case!)
Lots of use of our Aqua Panters... Plus a bit of Wink of Stella-ing of course! 

The first is a CASE from the Spring Summer catalogue. Watercoloured on Whisper White card... works well...
The second is watercoloured on White Shimmer card... works a treat for watercolouring... Though I have to laugh at my somewhat raggy Pool Party Glitter ribbon though... I think my sample has been somewhat man-handled!
And the third is watercoloured on Watercolor Paper designed for the job.... gorgeous! The flower is embossed using white embossing powder and then watercolourd in... 
As always we had a great full day at Quarterly Training... great makes... really useful business tips... fantastic swaps... lots of inspiring projects from many team members on display... lots of catching up...lovely food... all in all... a relaxing day amongst good friends! Old and new... 

Want to join us next time... ? Well now is a particularly good time to join - as you get £160 product for your £99 investment... Just contact me for further information - or go here to order your starter kit straightaway...


Built for Free Using: My Stampin Blog

Friday, 29 January 2016

6" Square Pop Out Swing Card - and Tutorial

Anyone for ice cream??? 

Time for another version of the Birthday Bouquet Pop Out Swing Card... as seeing as it is Friday... Fancy Fold Friday that is... another tutorial for you!
For some reason I decided to go slightly larger than the original 5 1/2" Square Pop Out Swing Card version posted here... think I must have just found a pack of 12 x 12 card... and reckoned it was time to use it! I will no doubt regret that decision when I am next making mini books for a class!
Anyways it has resulted in a different version/tutorial for you!
All of my Birthday Bouquet Pop Out Swing cards were 6" Square versions... Link to the others here...and I think there even a couple more to come when I finish decorating them... I am so ahead with my personal cards to send this year!

Recipe
Card Blank - Cardstock Pool Party 12"x6"
Inner Panel - Cardstock Pool Party (Whisper White in tutorial photos) 7 ½”x5 3/4" 
Inner Tabs - Cardstock Pool Party 7/8"x5 3/4" (x2)
Card Front Outer Panel - Paper 5 3/4" Square
Card Front - Centre Panel-CS M. Meadow 3 7/16" Square; Paper 3 1/4" Sq. 
Inside Mats -Cardstock Mossy Meadow 2 1/4" x 5 1/2" (x2); 
Inside Panels - Cardstock Whisper White 2"x5 1/4" (x1); Paper 2"x5 1/4" (x1)
Glimmer Paper Blushing Bride 2 3/4" Square

Instructions
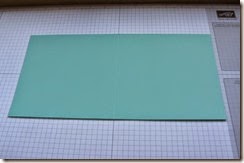
1. Score wider 12" x 6" LANDSCAPE Pool Party panel at 6". Bone Fold.
Tabbed Pop Out Swing Card Tutorial, Amanda Bates @ The Craft Spa 001
2. Score narrower LANDSCAPE Pool Party panel at 2 ½” & 5” (note white in photos so you can see what is going on!)

3. Bone Fold as concertina/Z-fold ( ie one as mountain & 1 as valley fold)
Tabbed Pop Out Swing Card Tutorial, Amanda Bates @ The Craft Spa 002
4. Score 2 narrow Pool Party tab/panels at 2 ½” . Bone Fold (TIP - make sure this is a slightly short 2 1/2" ie so you can see the 2 1/2" line when you line it up to score. This will save you trimming at a later stage!)

5. Temporarily adhere paper central to the front of your 6" card blank ( TIP - note your paper orientation if there is a pattern!)

6. Die cut Square Aperture in card blank front and keep the die cut square of card… the paper is excess...
Tabbed Pop Out Swing Card Tutorial, Amanda Bates @ The Craft Spa 004
7. Adhere the paper frame to the card frame (TIP - do this now...as the 2 frames will be as you have cut them...so the apertures will be the same way around/in the same place and they will fit neatly! If you put the paper to one side and stick later - you will spend many a happy 5 minutes working out which way round to stick it!)

8. Adhere Z folded panel to RHS of open card blank (note: valley fold of Z Fold panel to LHS when stuck )
Tabbed Pop Out Swing Card Tutorial, Amanda Bates @ The Craft Spa 008
9. Fold over front of card blank. (with Z folded panel folded)

10. Apply glue through aperture to top of Z fold panel ( ie to RHS of aperture) Note I have only used Sticky Strip just so you can see where the glue needs to be…..
Tabbed Pop Out Swing Card Tutorial, Amanda Bates @ The Craft Spa 009
11. Adhere die-cut square (making sure the Square can swing through the aperture)
 Tabbed Pop Out Swing Card Tutorial, Amanda Bates @ The Craft Spa 010
Tabbed Pop Out Swing Card Tutorial, Amanda Bates @ The Craft Spa 015
Tabbed Pop Out Swing Card Tutorial, Amanda Bates @ The Craft Spa 011
But when you open this card…that Square section doesn’t pop out or swing… it just … well sits there!
Tabbed Pop Out Swing Card Tutorial, Amanda Bates @ The Craft Spa 013 
So now for the Tabs to attach it all together….. and allow it all to pop out and swing…

12. Open up Card blank. Open out Z folded panel to the right.
 Tabbed Pop Out Swing Card Tutorial, Amanda Bates @ The Craft Spa 016
13. Apply glue to narrower side of the 2 Tabs (again I have only used Sticky Strip so you can see it!)
Tabbed Pop Out Swing Card Tutorial, Amanda Bates @ The Craft Spa 017
14. With folded edge of Tabs to outer/RH edge of Z panel - adhere narrower side of Tabs to top and bottom (ie above and below the square panel) ensuring that these tabs clear the square and Z folded panel LHS score line. (Trim if necessary)
 Tabbed Pop Out Swing Card Tutorial, Amanda Bates @ The Craft Spa 018
15. Fold top layer of Z Fold panel back over & open the Tabs out.
  Tabbed Pop Out Swing Card Tutorial, Amanda Bates @ The Craft Spa 019
Check that the Tabs will clear the central score line of the Card Blank.
Tabbed Pop Out Swing Card Tutorial, Amanda Bates @ The Craft Spa 020
Trim if necessary
Tabbed Pop Out Swing Card Tutorial, Amanda Bates @ The Craft Spa 021
16. With the Tabs opened out, apply glue to top side
Tabbed Pop Out Swing Card Tutorial, Amanda Bates @ The Craft Spa 022
17. Fold front of card blank shut to close down onto tabs
Tabbed Pop Out Swing Card Tutorial, Amanda Bates @ The Craft Spa 023
And there you have it…one safely attached swing out card mechanism….
Tabbed Pop Out Swing Card Tutorial, Amanda Bates @ The Craft Spa 024
Tabbed Pop Out Swing Card Tutorial, Amanda Bates @ The Craft Spa 025
Now  - if you have done a version using white card as per these photos... some of you won’t like the fact that you can see the Tab on the back of the white Z folded panel…
Tabbed Pop Out Swing Card Tutorial, Amanda Bates @ The Craft Spa 026
2 ways to work round that …
(1) make your card blank and Z folded panel all in the same colour as I have done with this version of the card
(2) cut 2 x  7/8" x 2 1/2” White Tabs…and just stick over the top!
Tabbed Pop Out Swing Card Tutorial, Amanda Bates @ The Craft Spa 030
Tabbed Pop Out Swing Card Tutorial, Amanda Bates @ The Craft Spa 031
Look vanished!

So there you have it… add a decorated panel to the front Square section… and you have a simple looking card with a WOW on opening… and it is simple to make too…
Tabbed Pop Out Swing Card Tutorial, Amanda Bates @ The Craft Spa 027
Now enjoy playing with the swing thing!! It is hard to resist!!
Built for Free Using: My Stampin Blog