Showing posts with label Honeycomb Embellishments. Show all posts

Monday, 14 March 2016

Easter Bunny Pyramid Pal... extended version...

Another easy project for Easter today... lots of happy oohs and aahs over re-creating this little project....  

A pyramid bunny care of the Playful Pyramid Pals stamps & dies.... 

Popped onto a scalloped polka dot  square muffin box as a lid (mine from good ol' Home Bargains).... more than doubles the amount of chocolate you can gift! And looks SO cute!!
Finished off with a Honeycomb Bob Tail on the back ...
And a Playful Pals carrot... an awesome idea for which I cannot take any credit! That goes to Karen Fontinelle whose blog post you can visit here for more details.... 

I drew my lines in using marker pens the same colour as my card (Tangerine Tango & Cucumber Crush) - but I would stick to a black pen for a re-make!

Thursday, 4 February 2016

Birthday Bouquet 54321 Class

And so to finish off the cards everyone made in the 54321 class...
Here is the card designed for everyone to make 5 quickies....
These are all CASED from a card we made at Monthly Training
The prepped papers were all different...not because I had necessarily planned it that way originally...
But because my delivery arrived at the end of the class! So I had to have a quick rethink the night before...
But it was a good rejig of a plan....
More details on the bottom left card here...
Just realised I haven't posted the original card we made at Training... better re-take a photo and post another day...


Built for Free Using: My Stampin Blog

Friday, 29 January 2016

6" Square Pop Out Swing Card - and Tutorial

Anyone for ice cream??? 

Time for another version of the Birthday Bouquet Pop Out Swing Card... as seeing as it is Friday... Fancy Fold Friday that is... another tutorial for you!
For some reason I decided to go slightly larger than the original 5 1/2" Square Pop Out Swing Card version posted here... think I must have just found a pack of 12 x 12 card... and reckoned it was time to use it! I will no doubt regret that decision when I am next making mini books for a class!
Anyways it has resulted in a different version/tutorial for you!
All of my Birthday Bouquet Pop Out Swing cards were 6" Square versions... Link to the others here...and I think there even a couple more to come when I finish decorating them... I am so ahead with my personal cards to send this year!

Recipe
Card Blank - Cardstock Pool Party 12"x6"
Inner Panel - Cardstock Pool Party (Whisper White in tutorial photos) 7 ½”x5 3/4" 
Inner Tabs - Cardstock Pool Party 7/8"x5 3/4" (x2)
Card Front Outer Panel - Paper 5 3/4" Square
Card Front - Centre Panel-CS M. Meadow 3 7/16" Square; Paper 3 1/4" Sq. 
Inside Mats -Cardstock Mossy Meadow 2 1/4" x 5 1/2" (x2); 
Inside Panels - Cardstock Whisper White 2"x5 1/4" (x1); Paper 2"x5 1/4" (x1)
Glimmer Paper Blushing Bride 2 3/4" Square

Instructions
1. Score wider 12" x 6" LANDSCAPE Pool Party panel at 6". Bone Fold.
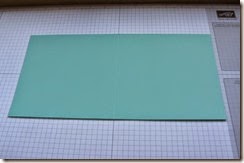
Tabbed Pop Out Swing Card Tutorial, Amanda Bates @ The Craft Spa 001
2. Score narrower LANDSCAPE Pool Party panel at 2 ½” & 5” (note white in photos so you can see what is going on!)

3. Bone Fold as concertina/Z-fold ( ie one as mountain & 1 as valley fold)
Tabbed Pop Out Swing Card Tutorial, Amanda Bates @ The Craft Spa 002
4. Score 2 narrow Pool Party tab/panels at 2 ½” . Bone Fold (TIP - make sure this is a slightly short 2 1/2" ie so you can see the 2 1/2" line when you line it up to score. This will save you trimming at a later stage!)

5. Temporarily adhere paper central to the front of your 6" card blank ( TIP - note your paper orientation if there is a pattern!)

6. Die cut Square Aperture in card blank front and keep the die cut square of card… the paper is excess...
Tabbed Pop Out Swing Card Tutorial, Amanda Bates @ The Craft Spa 004
7. Adhere the paper frame to the card frame (TIP - do this now...as the 2 frames will be as you have cut them...so the apertures will be the same way around/in the same place and they will fit neatly! If you put the paper to one side and stick later - you will spend many a happy 5 minutes working out which way round to stick it!)

8. Adhere Z folded panel to RHS of open card blank (note: valley fold of Z Fold panel to LHS when stuck )
Tabbed Pop Out Swing Card Tutorial, Amanda Bates @ The Craft Spa 008
9. Fold over front of card blank. (with Z folded panel folded)

10. Apply glue through aperture to top of Z fold panel ( ie to RHS of aperture) Note I have only used Sticky Strip just so you can see where the glue needs to be…..
Tabbed Pop Out Swing Card Tutorial, Amanda Bates @ The Craft Spa 009
11. Adhere die-cut square (making sure the Square can swing through the aperture)
 Tabbed Pop Out Swing Card Tutorial, Amanda Bates @ The Craft Spa 010
Tabbed Pop Out Swing Card Tutorial, Amanda Bates @ The Craft Spa 015
Tabbed Pop Out Swing Card Tutorial, Amanda Bates @ The Craft Spa 011
But when you open this card…that Square section doesn’t pop out or swing… it just … well sits there!
Tabbed Pop Out Swing Card Tutorial, Amanda Bates @ The Craft Spa 013 
So now for the Tabs to attach it all together….. and allow it all to pop out and swing…

12. Open up Card blank. Open out Z folded panel to the right.
 Tabbed Pop Out Swing Card Tutorial, Amanda Bates @ The Craft Spa 016
13. Apply glue to narrower side of the 2 Tabs (again I have only used Sticky Strip so you can see it!)
Tabbed Pop Out Swing Card Tutorial, Amanda Bates @ The Craft Spa 017
14. With folded edge of Tabs to outer/RH edge of Z panel - adhere narrower side of Tabs to top and bottom (ie above and below the square panel) ensuring that these tabs clear the square and Z folded panel LHS score line. (Trim if necessary)
 Tabbed Pop Out Swing Card Tutorial, Amanda Bates @ The Craft Spa 018
15. Fold top layer of Z Fold panel back over & open the Tabs out.
  Tabbed Pop Out Swing Card Tutorial, Amanda Bates @ The Craft Spa 019
Check that the Tabs will clear the central score line of the Card Blank.
Tabbed Pop Out Swing Card Tutorial, Amanda Bates @ The Craft Spa 020
Trim if necessary
Tabbed Pop Out Swing Card Tutorial, Amanda Bates @ The Craft Spa 021
16. With the Tabs opened out, apply glue to top side
Tabbed Pop Out Swing Card Tutorial, Amanda Bates @ The Craft Spa 022
17. Fold front of card blank shut to close down onto tabs
Tabbed Pop Out Swing Card Tutorial, Amanda Bates @ The Craft Spa 023
And there you have it…one safely attached swing out card mechanism….
Tabbed Pop Out Swing Card Tutorial, Amanda Bates @ The Craft Spa 024
Tabbed Pop Out Swing Card Tutorial, Amanda Bates @ The Craft Spa 025
Now  - if you have done a version using white card as per these photos... some of you won’t like the fact that you can see the Tab on the back of the white Z folded panel…
Tabbed Pop Out Swing Card Tutorial, Amanda Bates @ The Craft Spa 026
2 ways to work round that …
(1) make your card blank and Z folded panel all in the same colour as I have done with this version of the card
(2) cut 2 x  7/8" x 2 1/2” White Tabs…and just stick over the top!
Tabbed Pop Out Swing Card Tutorial, Amanda Bates @ The Craft Spa 030
Tabbed Pop Out Swing Card Tutorial, Amanda Bates @ The Craft Spa 031
Look vanished!

So there you have it… add a decorated panel to the front Square section… and you have a simple looking card with a WOW on opening… and it is simple to make too…
Tabbed Pop Out Swing Card Tutorial, Amanda Bates @ The Craft Spa 027
Now enjoy playing with the swing thing!! It is hard to resist!!
Built for Free Using: My Stampin Blog

Tuesday, 26 January 2016

Something pink with sprinkles on top...

Birthday Bouquet meets Honeycomb Embellishments meets Sale A Bration stamp set Honeycomb Happiness... 
A card to make you think of summer...or parties.. or anything involving ice cream with sprinkles on top...
And a Tuesday Tip for you... I have to share fellow team member Barbara's idea  - as amended by a very knowledgeable email update from Helen over in Australia (thank you so much Helen!!) - with the Honeycomb embellishments... just pull off the protective paper backing on the embellishment & adhere one side and leave the other side as is... then you can post the card easily! And you can decide whether to add an instructional note for the recipient on the paper of the unpeeled side ....eg Peel & Stick!

Much better than squashing the honeycomb like I did with mine... though  - I hasten to add - that was in a tight plastic wallet rather than in an envelope!

Love the greeting from Remembering Your Birthday for this ice cream ensemble.... perfect!

Apologies for the rubbish photos... it was obviously late at night!

PS I used the Circle Framelits but I forgot to add them to the Supplies List... also Honeycomb Happiness is available in wood mount too ( but I couldn't find it on the lists!)


Built for Free Using: My Stampin Blog