Showing posts with label Jems Blog Hop. Show all posts

Saturday, 7 April 2018

Treasure those Memories for Jems Blog Hop...

Hello and welcome to the April Jems Blog Hop... featuring Memory Making aka Scrapbooking... to Treasure Those Memories...
Now scrapbooking is something I haven't done for ages!! And I used to really enjoy those classes....
So for today I have two pages for you ... and this maybe the only opportunity you get to see me!! As I am incredibly camera shy!!!

Albeit these photos being taken over 20 years ago on my wedding day! Gosh don't we both look young!!!
And I have to laugh at the word Smile... which is just one of the large stickers in the pack... that I have stuck to the top of a large photo... and that photo is stuck onto the top of some of the pockets rather than cutting a large photo up and inserting into pockets (as per the TOGETHER photo to the right)

As the memory comes flooding back ... of my mother-in-law telling both of us off on the day for smiling and laughing too much!!! Isn't that how a wedding day should be!!?? Though I have to admit that the biggest laugh was when I had to say Jon's middle name for the first time... and I kind of shouted it... and then we both got uncontrollable giggles!!! Yup... right in the middle of the wedding vows... 
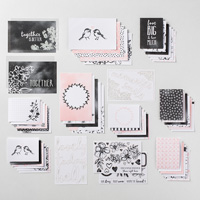
I used the Petal Passion card pack...
Petal Passion Memories & More Card Pack
Just one of the fabulous Memories & More range of products stocked by Stampin'  Up!

Memories & More is so easy to do... find your photos... pop cards and photos in pockets... add a few stickers and transparencies that come with the kit... and 10 minutes later memories saved...

This kit also co-ordinates with the Petal Passion 12x12 papers...
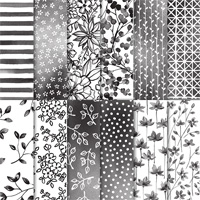
Petal Passion Designer Series Paper
So you can easily mix traditional 12x12 scrapbooking with Memories & More photo-pocket scrapbooking... What's not to love?

And here is a lovely photo of the full Petal Passion suite from the SU! display boards... spot that you can add any colour to liven things up as you require... I think there may a bit of So Saffron added to my pages next week...

So it is now time to say Goodbye... and pass you onto the lovely Lynn... just click on the big arrow below to go straight to the post...

Worth a quick trip around... as there only a few of us taking part as many of us demos are away celebrating together at the Stampin Up! On Stage event as this posts...  

Yes by the time you read this... I will have seen the new catalogue!!! Happy dance!!!
Oh and just in case of any link problems that we won't be able to sort on Saturday... as we are in a busy room of 500-600 UK demos... here is the full list for today's Blog Hop...


  • Umalini Kathirgamanathan
  • Samantha Webster
  • Sarah Lavelle
  • Amanda Bates (YOU ARE HERE)
  • Lynn Smith


  • Saturday, 3 March 2018

    Easter Treats for Jems March Blog Hop

    Hello and welcome to the Jems Team Blog Hop from Amanda Bates at The Craft Spa...

    Officially the theme is anything for Spring or Easter... but for me it had to be something for a treat with chocolate in! Caramel chocolate of course! Though any of the small easter egg treats would fit...

    And a re-visit of a Craft Spa Scalloped Tag Topper Punch classic for you... just click here for the Tutorial... for Charlie Chick! (as the lovely Doreen nicknamed him)
    With a very simple update for 2018... as somewhat unusually... everything is still current for my little Easter treat project... apart from the Wide Oval Punch... though we now have the Layering Ovals or Stitched Shapes dies to do the same job...

    So just an update to the greeting really... Crushed Curry HAPPY from Perennial Birthday... plus Pumpkin Pie EASTER from Teeny Tiny Sentiments (aka Teeny Tiny Wishes for those of you in the US) ... both partial greetings...so simply marker inked as required...

    And of course... containing a Caramel Egg instead of a Creme Egg... so DS will be happy!

    And I have to laugh... as it is amazing how many characters Charlie Chick takes on depending on the angle of the camera lens... particularly as I am looking at about 15 photos...

    Some look more feminine... some more masculine... some more cheeky... some more aloof...

    Kind of like an e-Moji on chocolate ... Reckon I will now call him e-Chicki!! Now there would be an idea if only I had more hours in the day!!
    And now it is time to say Happy Easter & Goodbye from me... and Hello & Springtime Welcome to the lovely Uma... just click on the arrow below to go straight to her Springtime post... 
    And in case of any early link gremlins... or if you prefer to hop back and forth from a list... here you go...

    1.    Sarah-Jane Rae
    2.    Amanda Bates (YOU ARE HERE!)
    3.    Uma K
    4.    Karyn Davies
    5.    Lynn Smith
    6.    Julie Dix

    7.    Sarah Lavelle

    Saturday, 3 February 2018

    Celebrating Love with a Teeny Tiny Trio for the Jems Blog Hop

    Hello and welcome to the monthly Jems Blog Hop celebrating Love...
    For my share today... I decided to stay on my theme of cards for Valentines Day... as I always have to make a couple of card designs for my ladies to make in classes at this time of year... though I do usually make the cards ones that can be easily varied to make a Wedding or Wedding Anniversary card instead...

    I re-sized the very popular and much visited Pop Out Swing card... so I have a new mini Pop Out Swing card fold to share with you today... A7 card sized... too cute! And yes... I will be back with a Tutorial sometime soon...
    I used the Sure Do Love you stamps... along with the Lots to Love Box dies... which are available as a bundle with 10% off...in both clear mount and wood mount...

    But then I carried on creating for a few minutes... and made some small and simple cards that would be suitable for more bulk makes if you are on a mission to create cards for a large group...

    Another A7 sized card...
    And a small square aperture card... adding the small sentiment from the good old staple, Teeny Tiny Sentiments
    And so here is your Teeny Tiny Trio to celebrate love...
    And now it is time to say Goodbye... and to pass you onto the lovely Karen Watts. Just press on the arrow to hop along to see what lovely project she has made to share with you...

    Saturday, 6 January 2018

    Jems Blog Hop to celebrate lots of new Spring Summer & Sale A Bration products!!

    Hello and welcome to The Craft Spa in the UK... to 2018... and to the Jems Blog Hop to welcome the new Spring Summer Catalogue and Sale A Bration! 

    And for those of you that visited me yesterday... no it is not Groundhog Day... just my double Blog Hop for the first weekend in the month!
    So ... staying with one of my favourite suites in the new Spring Summer (aka Occasions) catalogue... Picture Perfect Party... 
    Picture Perfect Party
    This suite is light & bright with photographic images & co-ordinating photopolymer stamps & Stampin Spots to get the party going... and keep it going... definitely perfect for birthday makes... and for making you feel happy whilst you are making them!

    But 2 very different cards for you today... with some extra peeks of some non Picture Perfect Party Suite products!

    First up... a card for a special birthday event... I couldn't resist cutting out the 1 & 2 balloons on the one piece of paper... and instead of doing the more obvious 12... I went for a sparkly 21st birthday celebration instead...
    Couple of embossing folders used here... the Picture Perfect Party Suite Simple Stripes for the large mat... and the blink and you will miss it, Scattered Sequins from the Sweet Soiree Suite. Easy to miss as I have then covered the embossed sequins with the tiny hexagonal Gold Glitter Flakes from the Painted With Love Suite... 

    And a tip for you as these tiny flakes were really easy to apply! Little dot of Tombow on the blunt end of my pokey tool (aka Paper Piercing Tool)... followed by a teeny tiny dot on the embossed sequins... Pick up a flake on the blunt end of the pokey tool and place onto embossed sequin ... and voila! So easy I put a flake on nearly every embossed sequin!
    Mounted onto Gold Foil and Berry Burst cardstock... And finished off with glittery Gold Trim for the string ... also from the Painted With Love Suite...
    Second up... a simple DL sized card... with proof that the photographic images on the paper are really life-like and clear!! As I don't think you will spot why I made this card!!

    Well the central hat does not have a pom pom in the papers... so here is a perfect use of the Mini Gift Bows for you... giving a very 3D pom pom to finish it off... honest! Maybe you can spot it on the next photo...
    Greeting from the fabulous Picture Perfect Birthday stamp set in Bermuda Bay, paper and stamped white card mounted onto Lemon Lime Twist...and then onto my Whisper White DL card blank... and Gold 1/8" Ribbon to finish off as it is about the same width as the frill on the hat. 
    If you like what you see... and want to see more of this Suite... please pop back back a day's post for the other Blog Hop featuring more projects using the Picture Perfect Birthday suite... as once I started I just couldn't stop! But do remember to hop round this Blog Hop first!

    And if you are in the UK and want to see and touch your own papers, ribbons and embellishments from the Spring Summer catalogue without spending a fortune... then click here for details of my Product Shares and/or Paper Swatch books... current round closes this Tuesday, 9th Jan... 

    And if you need to know more about the Spring Summer catalogue and the Sale A Bration promotion... then just click here...

    And now it is time to pass you onto the creative talents of  the lovely Uma... Just click on the arrow below to get to the next stop... and see you tomorrow... or next time we hop...

    Saturday, 2 December 2017

    Honeycomb Bauble Ornamernt for Christmas Decorations Blog Hop...

    Hello and welcome to the Jems monthly Blog Hop from Amanda Bates at The Craft Spa ... featuring Christmas Decorations... so you are in for some lovely and inspiring projects when you hop around today...
    I for one have already shared my main Christmas Decorations class projects already... so I thought I would share a new and simpler project ... but also give you a quick recap of the larger class Christmas Decorations projects... which have duly filled my house with very large boxes of the component parts!!

    So first up...  I have a Merry Music honeycomb bauble or ornament to share... these are such fun to make!
    Visit the lovely and talented Kim Oliver here for a step by step to help you along your way... though I have done a couple of  things differently with mine... including punching my circles for speed....

    I coloured my Mini Ornament with the Dark Cherry Cobbler Stampin Blends pen as shown here... though crafter beware... as mine is lovely and solid... but my ladies ended up with a partially coloured ornament for some reason as it "split" (we reckoned maybe greasy hands on the ornament as it was an after lunch project!)
    And before final assembly... I also coloured the edges with the same pen... added Versamark...and chucked red glitter embossing powder (retired) all over and heated it... subtle enough to not show in these photos... but lovely and glittery...

    And I have to admit that I loved these so much I ended up with a list of about 20 other ideas to try... but sadly that list will have to carryover to next year!
    And here are my "Golden Balls" or "Red Balls" Topiary... and Christmas Lantern that are being made in classes this month... just click on the photo to go to the original post...
    Though I really must photograph and share my updated Christmas Lantern... I finally got the desired lights which changed a couple of things in the details... but more on that another day...
    Thank you for visiting me today... and now it is time to pass you onto the lovely Samantha... just click on the arrow pic below to go straight there...


    Saturday, 4 November 2017

    The Ways we Colour... for Jems Monthly Blog Hop

    Well hello and welcome to today's Jems Team Blog Hop .... featuring simply ... colouring... whichever way...
    Not being a "colouring because it is my creative therapy" kind of a girl... I opened my brand new Stampin' Blends alcohol based marker pens out and got to work... and I am very very impressed... but much more on that another day... Maybe there is even a colour-ista in me after all... though there will need to be lots of practice first!!!
    So my first "practice run" had to be simple... and had (of course) to involve architecture!! 

    Well that was easy... just open the Just Add Colour papers... and Stampin Blends in Night of Navy, Cherry Cobbler, Crumb Cake and Smoky Slate and get to work...

    Soon I had a little row of houses...all ready to go...
    And then a reason to chop my little row up... as some friends are off to live in sunny France...so I had an urgent need for a New Home card... or in this case New Beginnings... as the house they are moving to isn't new to them... but life in France certainly will be...
    So here is my very simple little card... greetings care of Happy Celebrations... and final dress up with Night of Navy 1/2" Gingham Ribbon. So quick & Simple...what's not to love...
    And an extra Bonus use of the Stampin' Blends too... I quickly added dark Cherry Cobbler to the hashed areas of the Happy word (which I had already 2 step stamped/filled in using Real Red)... not obvious (as I forgot to take a close-up shot) but made it all pop the more! Just remember to use your Memento Black ink to stamp Happy though!!

    Live in the UK? Want your own Stampin Blends? Then click here to see the various ways to purchase them and support The Craft Spa...

    Now what shall I do with these... 
    And now it is time to pass you on to the lovely Sarah Jane... who I know has something cute for you.... 

    Saturday, 7 October 2017

    Jems Monthly Blog Hop - Trick or Treat (but not for necessarily for Halloween!)

    Welcome to our Monthly Team Blog Hop featuring a lovely play on the words "Trick or Treat"... as suggested by the very clever Uma....
    Could be something for Halloween.. but could otherwise be a ...
    * Trick - an illusion, a fun fold, a surprise or something unexpected in the project...
    * Treat - so Treat Packaging or indeed a cake, chocolate, sweets...


    So I didn't intend to do a Halloween project at all... but here you have one!
    I absolutely LOVE the Detailed Gate die cut and so the Graveyard Gate bundle was beckoning me to play with it... and thus I made my (probably) first Halloween card ever! Keep watching this space for a few other non Halloween options as the weeks pass by!

    I will go back to calling this a U Fold Card (as it is a Bridge Fold card without the bridge across the front! The Gate does the job instead...)... and spookily the dimensions for my latest Bridge U Fold Card were perfect... click here for that Tutorial... I just cut the Smoky Slate card to 8.6cm (3/3/8" for my US readers) high instead of 10.5cm(4 1/8")
    As always the card does lay flat to go in an envelope... though I think I will have to write Scaredy Cat on the back ( or something) ... as this gate doesn't actually open!

    I plan to be back with an updated Tutorial for the card and all the decorative details for this one shortly... but in the meantime here is a shot of the simple little scene behind the gate! Though I would colour in the church windows if I did a re-make!
    Click here to go to my earlier post for more details on the Detailed Gate & Graveyard Gate products... 

    And so it is now time to pass you onto the lovely Tracy... till next time!