Showing posts with label NOEL. Show all posts

Wednesday, 21 October 2015

Making the large NOEL from your Hearth & Home Window Dies

As requested and promised... a brief series of pictorials for you to show you how I created my large alpha NOEL this year... hope these pictures are worth a 1000 words...

Just one thing to note - I now make bolder letters( see above) and do less cuts than when I first shared my NOEL Double Box Frame Card here.... you could say... practice makes perfect!!

But before I begin - don't forget to check out the new 3 Weekly Deals for this week scrolling off to the right....

Grab your Hearth & Home Framelit dies and some card....
Die cut windows as required - 2 required for N, E and L (with a wreath for the O as above) or 3 required for NOEL...

So to make your N...
 

To make your O...
 
And finally your E and your L
Ignore the fact that I have used Cherry Cobbler and Real Red for my examples here - it just happened that way!!!!

Back to the rest of the alphabet then!!! Really hope these dies carryover as I really love this size of letter for projects!


Friday, 11 September 2015

Double Square Box Frame Card Tutorial for Fancy Fold Friday

So it is Fancy Fold Friday time again... and I have a Double Square Box Frame Card  - with a tutorial - for you...
Showcasing the beginning of my new BIG alphabet - using - the Hearth & Home window die! Told you it wasn't just about windows.... Just a snip here - and a snip there... 
I am so happy to have had this idea - as an alphabet can never be too large.... especially for special projects at this time of year....
My NOEL is dressed care of the Festive Fireplace stamps and Festive Fireside dies... 

Although the wreath on the N is really making me giggle - it just reminds me of those moments when your knicker elastic snaps!!! And if that has never happened to you - you are very lucky!!! Embarrassing but hilarious memories are flooding back over here!
Sorry I digress... back to the card...

I do have a tutorial for you... but I feel like rather a fraud with this one!!

1. Make one of these - metric/centimetres version - or see below for the imperial (inches) version
2. Make another one!
3. Cut a 13 x 2cm (5 1/8" x 3/4") piece of card and score PORTRAIT in half at 1 cm (3/8")
4. Bone Fold this strip
5. Adhere Box Frames to either side of score line (mountain at front/facing you!)

And oops... an apology... I thought I had already re-done this project as an imperial (inches) tutorial as well ...but now I have just realised I hadn't.... so here it is... so sorry for delay.... but hey now... there is a proper tutorial after all!!

Shadow Box Frame Card Tutorial – 5 1/4" Square with 3/8" Box Sides and Top
Start off with a 8 1/4" square of Thick Whisper White cardstock 

Please note that my photos are from the original full A4 sheet tutorial posted here – just imagine all the next photos as squares of cardstock rather than the rectangles shown!!!

1. Score at 3/8", 3/4", 1 1/8" & 1 1/2" on all 4 sides.clip_image006
clip_image008
2. Make an “extra short score” at 1 7/8" & 6 3/8" from top to 2ndscore-line down. 
clip_image010
3. Turn 180 degrees and repeat (2)
clip_image012
4. Cut up these extra score lines and diagonally across to the 3rd score lineclip_image014
clip_image016
5. Cut out the “16-bit” squares at each cornerclip_image018
clip_image020

clip_image022
6. Bone fold all score-lines
clip_image024
8. Apply glue to folded side of outer-most sections on all 4 sides ( ** See NOTE below!)
clip_image026
9. Apply Tear & Tape OR Sticky Strip across back of 4 diagonal sections (or add a glue dot)
clip_image028
10. Assemble straight sides first. 
Recommend sticking any paper/photo in first before assembling if you want as an edge to edge back!
Remove part of red protective cover
clip_image032
11. Line up outer edge to inner score-line at that end & press down flat to stick. 
clip_image034
12. Line up outer edge to inner score line at other end & pull out rest of red protective cover to stick. Now your box section should pop up … nice and square and straight!!
clip_image036
13. Repeat for other straight edge
clip_image038
14. Now onto the 2 notched ends …. Repeat process for the 2 straight sides BUT…. 
... and this is the MOST important TIPRemove red protective cover on the 2 small diagonals and cover with some longer lengths of scrap red protective cover
clip_image040
15. Fold the straight edge down as before & glue into place
clip_image042
16. Then push the sides up & over the square/box side sections, get the mitres/diagonals in place & then pull the red protective cover out (concentrating on one side at a time!)
clip_image044
clip_image046
17. Repeat for the other notched side. 

** NOTE - I have to admit that I am still using my Tear & Tape (or Sticky Strip for those of you that have not seen the light…and converted…) on those diagonals  - but I now use my trusty Tombow on the straight sides – applying a bead onto the base of the frame next to the inner scoreline works a treat – no wet glue on my fingers as I roll the section around and over…

And there you have it…one 3/8" section Shadow Box Frame from an A4 Wide (ie 21cm/8 1/4") Square of card with perfect mitred corners!  Ends up as a 5 1/4" Square Box Frame 

Tuesday, 9 December 2014

Many Merry Stars REVISITED….

Many Merry Stars, NOEL,  Amanda Bates, The Craft Spa 035 (24)

Thought I had better quickly share my other Star makes from the fabulous Many Merry Stars Kit. Fancy your own kit to make the NOEL and stars…. please read on to the end of the post….

Yesterday I shared this version … using a smaller star for the O…

Many Merry Stars, NOEL,  Amanda Bates, The Craft Spa 035 (26)

And then I got to thinking…. these Noel ones are perfect as a gift for my postman (who is called Noel!)

But then there is my friend Len…

Many Merry Stars, NOEL,  Amanda Bates, The Craft Spa 035 (22)

And of course the lovely Nell… ( thanks for your L Karen!! Couldn’t have done this without it!!)

Many Merry Stars, NOEL,  Amanda Bates, The Craft Spa 035 (23)

Right silliness over and done with….. oh but there is Neil too!!!!

Bad photo but here is the kit as intended…. though lots of my other stars are still on the mantelpiece with NOEL or used in my other ideas! And I can’t wait to get the greenery down from the loft and display them properly on the mantelpiece…

Many Merry Stars, NOEL,  Amanda Bates, The Craft Spa 035 (14)

And here is a cute little tree….. this part of my display has really caught the eye of everyone... though he does look a bit wonky in this photo!!!

Many Merry Stars, NOEL,  Amanda Bates, The Craft Spa 035 (19)

And a Christmas tree decoration… the thick Bakers Twine even comes in the Many Merry Stars Kit

Many Merry Stars, Amanda Bates, The Craft Spa 006

And finally a tag….

Many Merry Stars, Amanda Bates, The Craft Spa 003

And I have to admit…. I loved this kit so much that I have ordered another. I will be making the NOEL small star arrangement for a few friends & family  - and reckon I will have enough stars left over for my tags too!

Here are the 3 essential items I used to create these projects – the boxes and the papers just being used for NOEL…


A Class To Go kit for these can be yours for £41.70 plus £4.95 postage as follows… 

Order these 3 items  through my Online Store quoting hostess code DJBN2STF where prompted (BUT PLEASE do not check out as a guest or I cannot contact you!!) They will be shipped straight to you from Stampin’ Up! within 4-6 days (subject to stock availability). The step by step instructions to make the letters will come from me separately – as well as a close up of all of my stars!!

Or email me & I can place the order for you...

I also used these stamps & basic items to dress a few up a little bit …. So add anything to your order that you feel essential!

Monday, 8 December 2014

Many Merry NOEL Stars & Creative Monday Blog Hop

Many Merry Stars, NOEL,  Amanda Bates, The Craft Spa 035 (26)

How exciting! I was nominated by fellow demo Rachel Chamberlain of Great Minds Ink Alike last week to participate in the Creative Monday Blog Hop. This is a blog hop about creativity and our love for creativity. Each Monday, a few bloggers post on their blogs sharing a little bit about their creativity and will also invite two other bloggers to join and post on the following Monday.

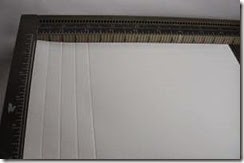
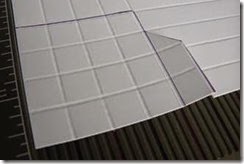
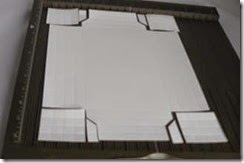
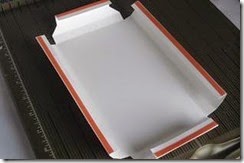
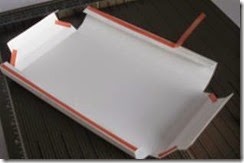
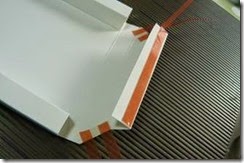
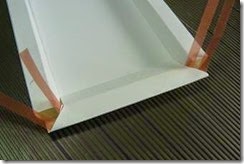
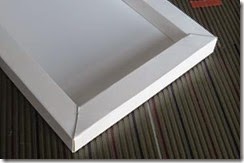
So first I will share my latest creative project… grab a Many Merry Stars kit, a bag of Tiny Treat Boxes and some co-ordinating Under The Tree speciality designer series paper . And you have a great mantelpiece decoration to brighten up any room….. More Merry Stars to follow tomorrow… and details of my Many Merry NOEL Stars Class Kit to Go too….

And here are my 4 questions & answers!

1.  What are you working on?

Quite a lot over the next week! (though it is a very quiet week compared to usual!) 

Prepping for my last class of the Year. Making some more of these NOELS for Christmas presents. Finalising some Class Kits to Go. Finishing off my Christmas cards to send…Writing up some blog posts & tutorials to share. Oh and hopefully a WWWU Team Challenge card too…

And then my big box will arrive from Stampin Up!… with new stamps & products from the Spring Summer Catalogue & Sale A Bration promotion that launch in January …. So I will finish off the week blissfully creating something new…..  well quite a few things probably….

2.  How does your work differ from others in your genre?

I like to keep my creative work Clean & Simple. Or as others have told me DOUBLE CAS…. Clean & Stylish and Classy & Simple….

But I love a Fancy Fold card to give immediate WOW too…. whether it is one I make up myself or one that I stumble upon on the web….

And then… as others keep telling me…  I have “unusual” ideas…now I don’t really know if that is code for weird …or wonderful!!!

And I don’t just do cards – though a lot of my class attendees want just cards! I get such a buzz from creating a mini book, a box, a bag, a treat holder,a home decor project or an altered item…. especially those that I create from scratch…

3.  Why do you create what you do?

Simply - I create to share… I share to inspire… The SU! mantra of Create Inspire Share sums it all up for me….

It started off with just sending friends & family something handmade & special ( I used to find it amazing to get Thank You cards or telephone calls for my Christmas cards!!!)

Then I realised friends were interested and that I could show them how to craft for themselves!

Then I started a blog – and lovely people gave me lovely comments about my work inspiring them when I shared a project.

And now… I create & share projects for the various classes I run, for customer purchases so they can see how to get more use out of their products, for Team Meetings & the Team Forum & occasionally just ‘cos!  All of which get shared on my blog & Pinterest too….

4.  How does your creative process work?  

Ah… lots of ways! I completely bombard myself actually…..

I have an “unusual” idea – and work out how to make it …OR more often…

I look at a Stampin’ Up! product – be it a die, punch or stamp set – and my brain goes into overdrive. I usually write a list of 12-20+ different ideas for that one item…. but I probably only get the time to create 4 or 5….! I then look at another product….and a new list forms….

I follow lots of blogs, I am very active on Pinterest, I am part of a great & sharing team… so I am constantly inspired by others too!!!! So my list of 20 ideas expands to about 30 or so….. often more!

I am also a great researcher – so when it is time to pick up a stamp set or punch….I will still get onto Google and get even more inspiration for that item…. yup list now approaching 50…

But it is probably a good job I am not into the videos on You Tube as well ( or my list would go up to 75!!)

And then I select a few ideas off my list – and I start to actually create something!! I make loads of mess… I agonise over colours and placement & which other products to use! … but I get there in the end….

But I have a new years resolution….. pick one product, use my own list and focus!!! LOL….

And as I love this sum up of my work as it appears to others…. I will also share what Rachel said about me as she nominated me last week ….

I first found Amanda through a Pinterest pin, and I am so glad I did.  She will take one stamp set and show so many different ways to use the same set or she will design one "wow" project and make several using different stamps.  She makes it easy to imagine a project and to see the possibilities in a particular stamp set or project.

Such lovely words Rachel. You highlighted what I try to do so perfectly….Thank YOU!!

And finally… my invites for continuing this blog hop next Monday 15th December ..… go to fellow team members Julie's Japes by Julie Kettlewell (aka my SU! mummy)  and Krafts by Kate Martin (aka SU! sister).

Both are such talented, charismatic and lovely ladies. We are all part of a Mutual Appreciation Society though …which means if you like my work… you will like theirs too… in fact they CASE me… I CASE them… lovely creative Stampin’ Up! circle….

So please don’t hesitate… pop over to their blogs straightaway for further inspiration…. I can’t wait to see what they share about their creative processes next Monday…