Showing posts with label Festive Fireside. Show all posts

Friday, 1 January 2016

A Christmas Year in Review

Well more like 5 months actually....

Warning - VERY picture heavy post...

Here is a round-up of my Top 10 Christmas makes during 2015... as determined by the number of blog page views... Just click on any of the photos to go to the original post...

At number 1...with well over 6000 blog page views... WOW! Introducing the New Autumn Winter catalogue... along with my first 4 makes using Hearth & Home...

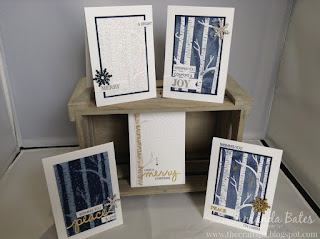
At Number 2... with nearly 3000 page views... my Quarterly Training Class To Go share of the Woodland embossing folder...along with inking up your embossing folder, Heat & Stick powder & lots of glitter...
At number 3... with nearly 2500 page views... albeit the majority being from Spain as this was featured in an on-line magazine over there... my Advent Calendar...

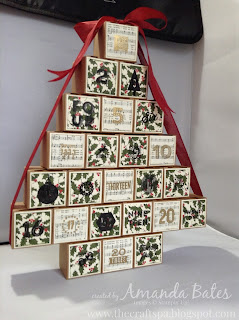
And here is another one I made for DH's work... but hadn't yet shared... bit more colour... with the use of Cherry Cobbler and Mossy Meadow mats - and Cherry Cobbler embossing powder...
And so onto number 4...also with nearly 2500 page views... the first Centre Step Easel Card tutorial...
And then at number 5... with over 2000 pageviews... oh not a Christmas one!! Back to that one another day... very soon...

So at the Christmas number 5... with just under 1500 pageviews... 3 versions of this one... and another Centre Step Easel card tutorial... tweaked for the Hearth & Home dies sizings..
Coming in at number 6... 1400 page views... Shut the Gate!!
And at number 7... it is the VERY glittery one...
At number 8...  the outside scene...
And at number 9... seen this one before!?.... so thought I should post the other more cozy version here too...
And rounding off at number 10... still with over 1200 page views...
Now... I could finish there...but looking at the next 10... quite a few are already featured in round up posts above...  so here are a few more... which takes us up to the Top 20 Christmas Makes... 
At number 12... 
At number 14...
And at number 15... a Round up post for the Wonderful Wondrous Wonderous Wreath!.. original posts linked up in the post...
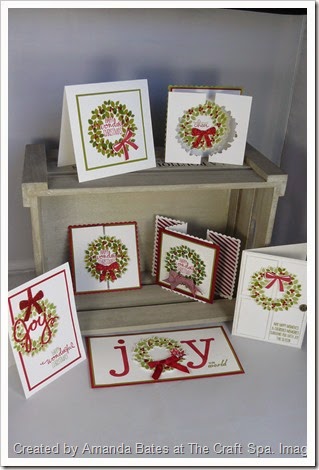
All is Calm, Double Display Card, Festival of Trees, Wonderful Wreath, by Amanda Bates, The Craft Spa (1)
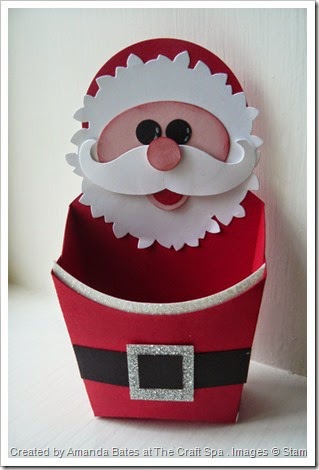
Wonderful Wreath, Santa, Punch Art Santa, by Amanda Bates, The Craft Spa  (2)
Wonderful Wondrous Wreath Group Photo, Amanda Bates, The Craft Spa, 071
12 Days of Christmas, All is Calm 3D House, Shadow Box, Amanda Bates, The Craft Spa,  (1)
8" Gatefold Card, Wonderful Wreath, White Christmas, Amanda Bates, The Craft Spa, 021
Wonderful Wondrous Wreath Concertina card, Amanda Bates, The Craft Spa, 014
 NOEL Quad Box Frame Card, Wonderful Wondrous Wreath
White Christmas & Wonderful Wreath Large Square Double Display card by Sam Wilson
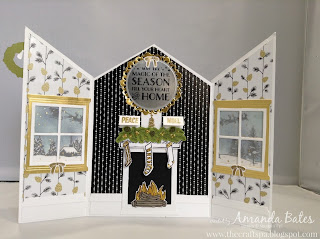
Coming in at number 17... the Wonderland Decorated House Scene Card... with its Tutorial...
At number 18... A little Wonderland Trio...
And finally... at Number 20... get the rubber gloves out... definitely the favourite technique of the season... Marbling...


Tuesday, 8 December 2015

Pop Up Festive Fireplace Tea-Light Card by Lisa Jackson

I had a very special moment today... I was emailed details and photos of a card inspired by my Decorated House scene card and tutorial... So I asked and I can share with you too!
The creator is Lisa Jackson - who doesn't have a blog or a Facebook page I can link to - but this is too fantastic a card not to share!
I absolutely love the addition of the pop up tea light fireplace... with the cards (and cat) on the mantelpiece... instead of just been stuck on the wall as my card.... Really nice job Lisa.... you have made my day!! It is an absolutely wonderful feeling to have inspired such a make....
And (as a reminder!) here is my Winter Wonderland that inspired Lisa's make...

Lisa says... and thanks so much for these tips and links Lisa...

Hi Amanda! Here's my version of your card, with a twist. 

When I started, I was just going to change the coloring to make it more 'rustic' colors. 

But I also liked the things I've seen using Tea Lights and what better than to light up a fireplace?!? 

Plus I like making pop-ups. So this is what I ended up with.

I saw a video on dawnsstampinthoughts.net which inspired the fireplace... here is the link to YouTube for it - https://youtu.be/Im3FjPw9WME. I mostly followed her measurements for the opening, where the fire goes, then went from there to figure out the rest, the way I wanted it. 
The mantel & the base came from Karen Burniston's technique for a floating floor. 

It's actually a 'manual' pop-up. It does all fold up to lay flat (with tea light removed) but you have to pull it down to make it stand out. 

Since the flaps are only 2 3/4" using your A4 card tutorial with our 8 1/2" x 11" card, and the window measures 2 3/4" wide too .... I did switch to 12"x12" cardstock and cut it to 12"x 9". Then you score at 3" & 9". You then have a paper border around the window.


Tuesday, 3 November 2015

Hearth & Home Tardis Tutorial

For all you Dr Who Loving fans... and as it is Tuesday Tips, Tricks & Tutorials today - a tutorial as promised a while ago! Knew I would get there eventually.... 

A simple enough little box & lid  - just dressed up with another version of my doors...
But before I start... here are the links to a couple more versions...

New 2016-18 In Colour Dapper Denim version made for On Stage Telford display in April 2016...
One with more authentic signage...

Recipe
Box - Night of Navy A4 Card (or 12" x 8 1/4")
Lid - Night of Navy 4 3/8" Square (11.3cm); Basic Black 2 1/2" x 3/8" (x4) [6.4 x 1cm]

Directions for Box
1. LANDSCAPE. Score 2 3/4", 5 1/2", 8 1/4" & 11" (7,14,21, 28cm)

2. PORTRAIT. Score 1 3/4" (4.5cm)

3. Dart base sections & adhere together as an open box

4. Die cut 8 Night of Navy windows. Snip and glue! Note - do retain your cut off parts...

This is just another version of my doors... This time the 2 windows are adhered together using just one thin section (rather than the thicker 3 sections on the original doors) and those final centre panes are not snipped to make the long inside panels ie the window panes are left as they are!

5. Pick up 9 Whisper White window panes ( know you have lots of these lying around by now!)

I sponged 8 of them using Soft Sky and then used my Night of Navy marker pens to draw in the lines.

As I was doing a few...I drew on my grid paper to aide my lining up... on the centimetres side... my 2 vertical lines are at 0.8 and 1.6cm ( about 1/3" & 2/3") - and my 1 horizontal line is at 1.5cm ( almost 5/8")

And the 9th was stamped with the Celebrate the Season stamp from the Happy Scenes stamp set - one word at a time...

Directions for Lid
1. Score 3/4" (2cm) on all 4 sides

2. Dart 2 lines on 2 opposing sections & adhere together using the tabs

3. Die cut 4 Night of Navy planters

4. Pick up 4 x 3-section Night of Navy window cut offs - adhere to planters

5. Ink up & stamp Whisper White POLICE BOX using your Rotary Stamp Alphabet (x4) on the 4 black panels...

6. Die cut 2 x Night of Navy Small Festive Fireside Tags & adhere together

7. Die cut 2 x Night of Navy Perfect Pines plant pots. Score & bone fold at 1/8" (3mm) from straight edge. Adhere notched edges to either side of your double tags and use the scored sections to adhere to your lid.  Add a large Iced Rhinestone embellishment to finish
8. Decorate with boughs and stockings for the season! My stockings are just coloured using Old Olive and Real Red marker pens. And the boughs are stamped on Old Olive - using Mossy Meadow ink pad plus over-colouring of Early Espresso marker on the cones - stamped - and then the cones coloured in with my Tip Top Taupe marker . And Cherry Cobbler Dazzling Details for the berries...


Built for Free Using: My Stampin Blog

Monday, 2 November 2015

Special New Home Congratulations Card

A break from Christmas makes again today...

Though you may think this seems familiar...
A very special friend of mine moved house recently... so it was time for a special card...

And this format sprang to mind - for which the tutorial is posted here... 
Though I had a few extra challenges...
(1) time was not on my side.. I had an hour before we needed to be in the car and on the way to their new house...luckily I had a few strategic makes left over from my Christmas card making!
(2) I don't have any New Home wording stamps...so my brain had to get inventive...
(3) I did plan a long banner going across the whole card...but reason (1) stopped that!
So how did I get round the lack of New Home wording...
(1) the slim wide Congratulations is from Bravo...
(2) the NEW banner is using the Back to Basics alphabet - just punched out with the Banner Punch - simples!
(3) the HOME is from the Homemade for You... I just put a post it note over the MADE and kitchen utensils - inked up - removed the Post It note - and stamped & embossed...
I also used the FOR YOU WITH LOVE from the Homemade for You to dress up the mirror... though I have now spotted that I didn't stamp it centrally spot on in my haste! Aargh....
And a more summery scene behind the windows this time.... Soft Sky sponged sky - and Mossy Meadow & Aquapainter pen for the grass and trees...

Anyway... the card was very well received... I do love the fact that I can make something that brings such happiness to others! I just never own up as to how long it may have taken me!!
And finished off on the front with the larger Wonderful Wondrous wreath this time...

Now I just have to remember in a month or so's time that she is not having the matching Christmas card!!
Built for Free Using: My Stampin Blog