Showing posts with label Baby Bear. Show all posts

Monday, 3 June 2019

Miss You Monday!?

And there's more... I had a few people reach out yesterday and thank me for the round up posts over the past couple of days... as it had prompted them to buy something they did not realise was going!!  And/Or to see a really cool card fold with a tutorial they wanted to try out for themselves!
So seeing as this is the very last day you can buy retiring items from the catalogue... I have decided to keep with the theme... these products now only available for 16 hours... 
The ordering systems are turned off tonight at 10.50pm UK time... and will be back up at 8am tomorrow with the new 2019-2020 Catalogue products ... 
So we've already had projects using the reduced Hanging Garden (Greenhouse card) ... Half Full (Wine for all Seasons!) ...  and Vertical Greetings (Topiary notecards)... 

Baby Bear.... gosh! Oh what fun we had!!!

Then  Mediterranean Moments retiring...though Beautiful You pictured not retiring...
Foxy Friends is off...
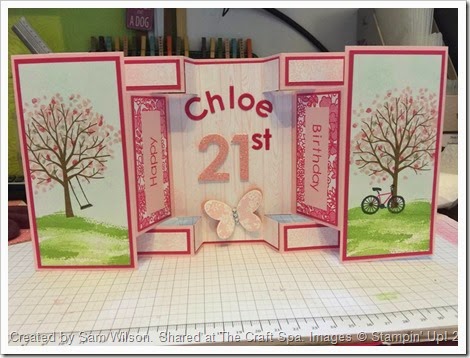
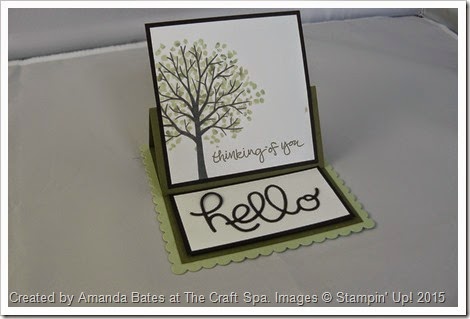
Sheltering Tree... forgotten how much I used this one... 
Amanda Bates at The Craft Spa 028
clip_image002
Easter Treats Amanda Bates at The Craft Spa 022
Bella & Friends... oops all gone! But I had to share this card as it still so cute!
And also remember ... that this is the VERY Last Chance to buy those 2018-2019 and Spring Summer bundles with the 10% off... though these all carryover to the new catalogue tomorrow... but without that discount....
WoW! What a(nother) trip down Memory Lane... 

Amanda's Quick Links
Just click on the relevant pictures below for On Line Store, Catalogues and/or more information... 
If you are ordering today... please add the Host Code shown below to earn yourself a gift and help support The Craft Spa at the same time... For orders over £150 you should claim your own Stampin Host Rewards when ordering... you will still get a separate gift from me... 
Please note that this host code is relevant to today's blog post date... it does expire and change over the months... but the current code is always shown at the top right hand side of my blog...

Current Catalogues & Products
Paper Pumpkin The Shelli Card KIT... Such good value... Available only while supplies last... £20 for 12 cards including stamps & ink spot! 


Sunday, 17 July 2016

Baby Bear Pop of Pink Card


This is the card that Nicola made... a Large Square Double Pop Up Z Fold Card... but she needed a Baby Girl card to send in the post that week...so a quick change was in order... So cute!
Nice job Nicola....

Sunday, 26 June 2016

Baby Bear Dress Up in a Shadowbox Frame

Don't fancy a Small Square Pop Up Z Fold card to display your dressed up bears... well here is an alternative for you...
Pop them in a Shadow Box Frame instead... card or home decor...you decide...
Now the eagle eyed amongst you will have realised that I am re-purposing previous projects here.... 

And that the following two don't work so well!!!
But sorry... time was not on my side to re-make these 2 box frames.... but you can have a laugh...!

Want a go at this shadowbox frame yourself... Here are the tutorials... Metric here ... Imperial(inches) here

And a groupshot... 


Monday, 6 June 2016

Project Life All Year Long & and an update on Baby Bear!

Just thought I would share some more of my early-product-in-the-hands care of Stampin' Up! for my On Stage UK Display Stamper work.... Oh I am loving this collection... and not just for Project Life.... watch this space as the months progress.....

I took this photo of the All Year Long Project Life set at On Stage...
I have to admit that as I had approached the board this collection had actually taken my breath away... it is SO STUNNING... and the graphics in the catalogue -  well they are not... it looks  - well - cough... yuk!!!! Well look again....

Here is a series of photos showing you all the cards in the collection... the accessories should be turning up later today...

 These cards are just perfect for telling your story throughout the year... as the seasons come and go...
And I have to laugh as there a few cards there perfect for adding a little Tardis to!!! Which I know some of you will appreciate!!

Sorry my photos aren't the best.... think I must have been too excited!!! But I am sure you will get the idea...
And oh my word... I have just spotted something unbelievable.... look who has just hit number 10 in My Most Popular Posts down the left hand side of the blog!!! Having got over 2500 blog hits already..... Click on the photo to go to the original post & see him rise further!!! I reckon he might quickly move up a few more positions yet...
Well I never.... That is in less than 60 hours.... I SO SO hope Stampin' Up are on 24 hour Baby Bear production..... he is definitely feeling the LOVE out there on this little ol' blog!!!! #bringingbackthebear ...

Sunday, 5 June 2016

Tutorial for Small Square Pop Up Z Fold Card

I had so many messages and comments asking me how to make the smaller version of the Square Double/Pop Up Z Fold card  I posted yesterday with my collection of Bears playing new In Colour Dress Up... that I thought I had better post the Tutorial straightaway....
But if you are looking for the Large Square Double/Pop Up Z Fold Card...then go here for the Tutorial... 
I love that these cards are so quick and easy to do... definitely a staple card in my card making arsenal... and I get to make 2 at a time... 

Edited to Add:- If you only want to make one at a time ... then start off with a 13 x 21cm piece of card instead of the full A4... or 8 1/2" x 5 1/4" US instead of the full 8 1/2 x 11". Scores the same... cut the first section 10.5cm or 4 1/4". Done!

So for those of you using A4 card first... followed by the US standard 8 1/2" x 11" card in blue text afterwards...

1. Grab a piece of A4 card
2. PORTRAIT. Score at 5.25cm & 10.5cm.

3. LANDSCAPE. Cut one card blank off at at 10.5cm, then push your piece of card along the Top Bar and cut another at 10.5 cm again

4. Still LANDSCAPE. Cut 2 sections at 2.5cm  (and you will have another 2.5cm left for another card too)
And a Quick Top Tip for you that don't know it... it is much easier to line up and cut those narrow 2.5cm strips on the right hand side of your trimmer... 
5. Add 10 cm Square papers to the back section 

6. Concertina fold your card and strip (stamp that right hand side of the strip first mind!)
7. Adhere right hand side of the floating strip to the back right hand side 
8. Adhere left hand side of the floating strip to the front left of the card (TIP - think about where you do not want your glue!!! I found that there was a feint line produced from the bone folding so easy to spot the half way point to not go over with the glue!)

9. Adhere Card (or Paper etc) 4.75cm wide x 10cm high to the front Left Hand side


And for those of you using 8 1/2" x 11" card... (note the photos are using A4card/centimetres!) 


1. Grab a piece of 8 1/2 x 11" card

2. PORTRAIT. Score at 2 1/8" & 4 1/4" 

3. LANDSCAPE. Cut one card blank off at at 4 1/4", then push your piece of card along the Top Bar and cut another off at 4 1/4" again

4. Still LANDSCAPE. Cut 2 sections at 1"  (and you will just have a 1/2" strip leftover - rather than the extra arm plus a bit with the A4 card pictured...)
And a Quick Top Tip for you that don't know it... it is much easier to line up and cut those narrow 1" strips on the right hand side of your trimmer... 
5. Add 4" Square papers to the back section 

6. Concertina fold your card and strip(stamp that right hand side of the strip first mind!)
7. Adhere right hand side of the floating strip to the back right hand side 
8. Adhere left hand side of the floating strip to the front left of the card (TIP - think about where you do not want your glue!!! I found that there was a feint line produced from the bone folding so easy to spot the half way point to not go over with the glue!)

9. Adhere Card (or Paper etc) 1 7/8" wide x 4" high to the front Left Hand side

Right I am off to make a load of these as Thank You cards going out with the next orders....