Showing posts with label Shadowbox. Show all posts

Thursday, 3 October 2019

3D Thursday - Brightly Gleaming Shadow Box Frame

Sharing the last of the Quarterly Team Training projects using the Brightly Gleaming suite of products...

And this one was definitely not the least!
Designed by Monica ...

Something very special and 3D for our Christmas home decor this year...
Click here for more details on the Suite... or here for the products in the Online Store

And scroll back to Monday and Tuesday this week for the Brightly Gleaming cards we also made at Training...

Tuesday, 25 December 2018

Merry Christmas to You and Yours...

I hope that you all have the loveliest of days... spent with the people most precious to you... doing things special to you all...

We for one will be "en famille complete"... brother over from the US... son back from university... and all of us over at my mum and dads...where I have to pretend that I do know how to operate their oven properly!!
Though I did learn years ago... to take everything for the meal over on trays and in pans etc so I don't need to spend hours searching amongst every cupboard in the house!!!

And I am REALLY hoping to be organised enough this year... and the timings right... for us younger ones to go out and get a lot of fresh air around the Harewood estate!!
So this is the Farmhouse Christmas Box Frame variant I have made for my mother... as she does prefer her neutrals...

Papers flipped to the Grey Granite stars side... And the addition of lots of red gemstones onto the large christmas fir tree at the front... wish I had thought of this detail for the rest... but hey better late than never...
Recipe and more information on the Tutorial for this make can be found here... 


Thursday, 20 September 2018

Bike Ride Shadow Box Frames for 3D Thursday

Had to share these Bike Ride Shadow Box Frames as they are just stunning... but Kate does not have a blog set up to share with you... so I am honoured she is letting me do so ....
These are a set and match to this birthday card I was sent by the lovely Kate...  the first one is in a large 12" or so Box Frame... whereas the second one for Amelia is in a smaller 9" one.
Which I am sharing again so you can see the close up picture that I took later of the lovely glittery Pattern Party Mask wall Kate created using Dazzling Diamonds glitter in the Embossing Paste... as well as a little Sahara Sand re-inker... 
Thanks for letting me share these Kate...

And I love the use of the Playful Pennants banner... quick but magic finishing touch...

Wednesday, 14 February 2018

Anyone for chocolate? And Happy Valentines Day...

To you and yours...

And here is a little something I sent down to my son at university to let him know that we are thinking about him today... and missing him... as indeed we always are...

Filled with a few chocolate hearts for my young choc-aholic to warm his heart... caramel centred as they are his favourite!
And for you... the 6" square shadow box frame tutorial is here... The front panel is just a 6" x 6 1/2" piece of Thick Whisper White card scored LANDSCAPE (aka 6 1/2" length across the top) at 6" to produce the 6" square front and a 1/2" glue tab for the left hand side...

And I had to laugh... as I thought I didn't have any red papers to use... but that Tutti Frutti paper pack came up as a life saver yet again... the front panel being the cut out left from the inner panel when the centre of the 6" square of paper was cut out at 1" all the way round... aka (1) line up at 1"... (2) cut from 1" to 5"... (3) turn 90 degrees... repeat 1-3... repeat 1-3... & repeat 1-2...
Interestingly.. this is actually my 4th most visited blog post... but by some strange trickery of Blogger... it doesn't even appear on my Top 10 list... no idea why not! 

Have to admit that I am still most proud of the shadowbox frame project amongst all of the  projects I have ever designed... as it must be a project that has inspired more project variants world wide than any other over the last 4 years... be it cards, frames, boxes, gift & treats packaging, jewellery presentation... etc etc etc... As we say... Create... Share...Inspire... and so the wonderful creative cycle circles...

But I also have to admit that I was not alone in designing these... months later I chanced upon a Pin of a Shadowbox Frame project display photo taken and uploaded from a Stampin Up On Stage event from a presentation by an Australian demonstrator called Pat Carr ... and strangely (spookily) the date of that event was exactly the same date as I had spent all day with pieces of paper working out how to make one! Shame I hadn't been at the event that day Pat... you would have saved me hours of frustration!
Stampin Up Products used
Card & Papers  - Tutti Frutti papers, 12x12" Whisper White, A4 Thick Whisper White, Real Red
Dies - Sweet & Sassy, Sunshine Wishes, Lots to Love Box, Celebrate You
Stamps - Sure Do Love You

Friday, 7 July 2017

Colorful Seasons Small Square Shadow Box Frame card

Gosh it is years since I made one of my Box Frame cards but I was asked to "show and tell" in one of last month's classes... and even though the class was all prepped and ready to go ... I was very happy to oblige with a simple additional make...

Really simply decorated as can be... using Colorful Seasons and Big on Birthdays
And as it is Fancy Fold Friday... and because I used 1/2" instead of 1cm. for the scoring of the sections... here is a tutorial for you... Note that the steps/photos in this tutorial show I now glue these projects...

And click here for the centimetre version that ends up at a larger 13cm square with 1cm sections... or here for the inches version at 5 1/4" square with 3/8" sections ... with my older method of gluing showing!!
Shadow Box Frame Card Tutorial – 11 cm (approx 4 1/4" Square) with 1/2" Box Sides and Top

Craft Spa Recipe
Box Frame - Thick Whisper White cardstock 21cm (8 1/4") square 
Front Cover - Thick Whisper White cardstock 12.2 x 10.8 cm (4 13/16" x 4 1/4") 
Mats - Cardstock 8 cm Square; Paper 7.5cm Square

Craft Spa Directions
1. Score at 1/2", 1", 1 1/2" and 2" on all 4 sidesclip_image006
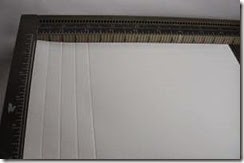
2. Make an “extra short score” at 2 1/2" & 5 3/4" from top to 2nd score-line down. (note my photo is only from the bottom up to the 2nd scoreline as that way you can see the score line!!!)
 clip_image010
3. Turn 180 degrees (so you are working on the opposing side) and repeat (2)

4. Cut up the extra short score lines and diagonally across to the 3rd score line at each corner
clip_image014
clip_image016
5. Cut out the “16-part” squares at each cornerclip_image018
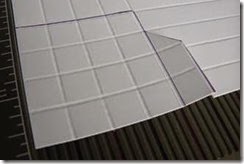
clip_image020

6. Bone fold all score-lines
7. Recommend sticking any paper/photo in first before assembling if you want as an edge to edge back!

Assemble straight sides first.  

8. Apply glue onto outer sections. (I use Tombow multi purpose glue and have only used Sticky Strip so you can see glue placement in the photos!) 
9. Line up outer edge to inner score-line at that side & press down flat to stick.
clip_image034
10. Now your box section should pop up … nice and square and straight!!
clip_image036
11. Repeat for other straight edge

Now onto the 2 notched ends ….

12. Apply Glue Dot (or Tear & Tape) onto back of 4 diagonal sections
13. Repeat process for the 2 straight sides BUT…. apply your Tombow to the base not the outer section you are about to roll up...less messy that way! 
14. Fold the outer edge down as before & glue into place with the diagonal sides up & over the square/box side sections to get the mitres/diagonals 
15. Repeat for the other notched side. 

And there you have it…one 1/2" section Shadow Box Frame from an A4 Wide (ie 21cm - 8 1/4") Square of card with perfect mitred corners!

Ends up as a 11cm (c. 4 1/4") Square  box frame card.

And to finish it off as a card with a front cover so that it opens and closes  – add the 12.2 x 10.8 cm (4 13/16" x 4 1/4")  Whisper White panel scored at 1/2" LANDSCAPE (ie with long side at top) - to the left hand side.

Sunday, 26 June 2016

Baby Bear Dress Up in a Shadowbox Frame

Don't fancy a Small Square Pop Up Z Fold card to display your dressed up bears... well here is an alternative for you...
Pop them in a Shadow Box Frame instead... card or home decor...you decide...
Now the eagle eyed amongst you will have realised that I am re-purposing previous projects here.... 

And that the following two don't work so well!!!
But sorry... time was not on my side to re-make these 2 box frames.... but you can have a laugh...!

Want a go at this shadowbox frame yourself... Here are the tutorials... Metric here ... Imperial(inches) here

And a groupshot... 


Friday, 27 November 2015

Covered Box Frame Card Tutorial for Fancy Fold Friday

I just had to make another Box Frame card with my Sleigh Ride dies...

This one has a few more layers...so again a depth that just works so well set in a Box Frame...
And this one was ripe for extra frontage... so it has a cover too...

And seeing as it is Friday...
Here is the Tutorial for a Covered Box Frame Card for you...
1. Make one Box Frame
2. Cut a piece of matching cardstock to 27.2 x 13cm (11" x 5 1/4")
3. Score LANDSCAPE piece at 13cm (5 1/4") from each side
4. Bone Fold
5. Adhere back of Box Frame to inside back (do not glue down the spine!)

Thursday, 15 October 2015

Large Square Box Frame Card for Teens....

A change from Christmas for today.... 
A year on... and a post in order to answer a question I was asked about my 2 versions....

Remember this...
The annual red card post for my son's 16th birthday back in May... along with the tutorial for my Large Square Box Frame card... (as well as the tutorial for the 3/4" deep box which allows for Large Letter postage here in the UK...)

Well we are now in a new school year.... which means that the age has changed...but the card for his friends didn't need to
But spot the other change.... 
As long time followers of my blog will now... I changed my favourite version of the card a while back to include a scallop square die cut from a 5 3/4" square of paper...
So here is the photo of the cards with the 2 fronts so you can compare them side-by-side... and make your own decision!
So which one do you prefer? 

I personally prefer the scallop square... not only because I do still like a scallop square...! But mainly because it is so much quicker to produce the card...! Though the mitred version does use less paper!

Note these cards both use a retired Real Red polka dot paper...for which the Brights paper stack £19.50 is listed - however the new Brights Designer Paper Stack £20 is also listed as that is the one that is now available - this also includes a polka dot pattern....


Built for Free Using: My Stampin Blog