Showing posts with label Family Party. Show all posts

Thursday, 8 August 2019

Nested Label (Flat) Pop Up Front Step Panel Card

 
Warned you there were a few of these... this one being tailormade to the Nested Labels dies... again using the lovely Noble Peacock foiled papers... with Everything Amazing ... 
Main card as per this tutorial but the front panel is slightly different... and I apologise if I don't get back to this card this week to add the details for that front part... but as I said... life is not my own this week... so I am pre-writing with short and sweet creative shares for a change...
I particularly love the usage of the Family Party stamp set to tell any family person that they are amazing! Thank you to our Jane for spotting that... brilliant idea!


Thursday, 1 August 2019

Noble Peacock Mini Gift Bag

So I was asked for something small, simple, shiny and perfectly formed for slipping a note (cash!) in... This little bag ends up 1 3/4" wide x 1" high x 1" deep when finished... And as you can get 6 of these from one piece of 12x12 card or paper... they are very cost effective too!

So here you are... with a few crafty tips and the Recipe and a Tutorial along the way for you...
But before I start! A quick round up of news for August...

Get £25 more for free if you sign up with Stampin' Up! now... and an extra £8 to spend in September when you place your order... Click on the picture below to find out more...
But now back to today's creative share...  the Noble Peacock Speciality foiled papers and Foil Sheets are perfect for the job requested... as they are simply decorative with the perfect shine!
And suitable colour-wise & pattern-wise for those "difficult to craft for" men folk and teens in our lives too... which just keeps life simples!

Craft Spa Recipe
Cardor Paper 6"x 4"
Foil - 3.4cm Square
Dies - Stitched Shapes dies - 3cm Square die
Stamps - Itty Bitty Birthdays, Family Party
Ribbon - White Metallic Ribbon (3"), Navy Bakers Twine(7")

Craft Spa Tutorial
1. With panel PORTRAIT. Score at 1" (2.5cm)
2. With panel LANDSCAPE. Score at 1", 2 3/4", 3 3/4" & 5 1/2" (2.5, 7.5, 9.5 & 14cm)
3. With panel LANDSCAPE... with short section/bag base to the bottom... score from top (0) to about 2" (5cm) at 1/2" and 3 1/4".
4. Bone Fold all score lines
5. Cut out small end tab
6. Fold and adhere to close at side (folds flat nicely to do this)
7. Close off top as required (punch a small hole(s) if you want to close off with ribbon)
8. Decorate as required

Note that you definitely need to do those half score lines (pt.3) at the sides of the bags as these Noble Peacock papers are so lovely and thick!! But you can get away without doing these with thinner papers... as the bag will just push in at the sides without the aid of a score line! But I would still recommend these extra scores as then the sides are much neater!

And some extra tips for you...
(1) Clips are the easy way ( and by far the quickest) to close these off...

The new Mini Library Clips being amazingly perfect! But I only had one of these to use (which I yanked off a swap to be able to show you! Thanks Anne...I have put it back now!!!)
So everyone coloured the retired Gold Library Clips instead... and no-one used the ribbon and twine method (as per the SON version!) Far too Fiddly Faddly!

(2) The Stampin Blends are great for coloring your clips or ribbons to close these little bags... I used Dark Old Olive for both the ribbon and clips in these shots... though I highly recommend using the Granny Apple Green for your ribbons instead as they keep things much lighter and brighter! And still co-ordinating...

(3) The Noble Peacock papers are white on one side... and patterned/foiled on the other... so any edges facing you show up! Quickly resolved by a quick swipe of your Stampin Blends along the edge... Yes ... I did that!!! I assembled mine the wrong way round!
So then ... after explaining at length to stick the decoration on the front side - and so not reveal that white edge where the bag is stuck together (so the back side!) - and so this step not being required... in my haste to demo/assemble...  I did it again!!

Luckily no-one else did! But maybe you can tell now!!! How annoyed am I with myself!! Better make another one then...

Friday, 12 July 2019

Fancy Fold Friday Tutorial - A6 (ish) Pop Up Front Step Panel Card

 
And so finally the Pop Up Front Step Panel Card Tutorial... This is the first variant I re-sized for specific purposes... which was to size for a Stitched Rectangle die cut front panel (as for this card).... so A6(ish) in size... (or A2 from US Letter card) 

And a size I have used a few times over the past few months... Click here for another Pressed Petals card - and the links to 3 other cards at the end of that post.... 
And this card is easier with step by step photos the first time around.. 

As although really easy once you know what you are doing... there are a few key steps that can easily go wrong! 

So... think FLAT WHEN STICKING... and think GO IN ENVELOPE!


Craft Spa Recipe 
Main Card - A4 Card Mossy Meadow 10.5cm x A4L (US Letter 4 1/4" x 11")
Front Panel - A4 Card Crumb Cake 14 x 6.5cm (US Letter 5 5/8" x 2 3/4")

Card Back - Floral Paper 10 x 8.5cm  (US 4" x 3 1/4")
Card Base – Text Paper 10 x 7cm (then cut LANDSCAPE to Top 2.5cm & 4.5cm Front/Bottom)  (US 4" x 2 3/4" - cut 1" Top & 1 3/4" Bottom)
Front Panel –Music Paper 6 x 11.5cm (then cut LANDSCAPE to Top 2.5cm & Front 9cm)  (US 2 1/2" x 4 3/4"- cut Top 1" & Bottom 3 3/4")
Craft Spa Tutorial
1.     Score Mossy Meadow panel LANDSCAPE at 14, 17*, 22 and 25cm (US Letter 5 1/2", 6 3/4", 8 3/4" & 10")
*TIP - 17cm is not to be found on the European SU! trimmer top bar! So score at 14, 22 and 25cm... then turn the panel around 180 degrees (ie so that the right hand side becomes the left hand side!) and score LANDSCAPE at 12.7cm (or 5") 


2.  Score Crumb Cake panel LANDSCAPE at 1 & 4cm (US Letter 3/8" & 1 5/8")
TIP - easiest to score LANDSCAPE at 1cm (US 3/8") to right hand side (RHS) on Top Bar...
Then turn 180 degrees (ie so that the RHS becomes the LHS!) and score LANDSCAPE at 4cm (US 1 5/8")

3.     Mountain bone fold all score lines

NOW... I highly recommend that you do a dry run of the following steps 4-6 then 8-12 then 13-16... before applying glue... as it is (usually) obvious once you do it...


4    Fold up the base of the Mossy Meadow card to create the front step (like a box section) 


5     Apply glue to last/end section (ie on the back!)
6     Fold up flat to stick  ie TIP - height of card should be smallest option so it will fit in a standard envelope!

TIP- the last "glued" section does not fold all the way down to the bottom/back score line - concentrate on folding all the card completely flat and sticking... NOT trying to fold that score line where it doesn't want to go!
7.      Adhere papers as necessary
Note that you are better inking up & stamping the greeting onto the front panel paper before sticking the paper panel!!! Especially when embossing like I have here...
8.   Fold over the top 2 sections of the scored Crumb Cake panel so that they are to the back... 
9.     Apply glue to last/thin "glue tab" section
10. Fold up card base/step so that height is smallest option!

Line up 2nd score line to top of back of main card (ie you have 2 sections folded to the back - not one as would [normally] be more logical!!)

And so that front panel is central to left and to right...

11. Stick
12. Apply pressure along the glue tab to adhere firmly...

13. Fold up card base/step so that height is smallest option!

14. Work out where you need your glue on the front panel at the bottom of the card!

15. Apply glue where needed (ie under the line of the bone folder!)
... or more importantly not where it it is not needed! (ie above the line of the bone folder!)

16. Fold front panel down flat to stick...
17. Decorate as necessary.

Notes 

(1) Don't stick anything that will go underneath the bottom of the card... It needs to be flat to stand up...
(2) I recommend that you have an envelope to hand to make sure everything is stuck on so that the card fits in your envelope. Especially if you are using a US medium (A2) envelope as you have less height than we do with our C6 envelope... With particular attention to the daisy to the top right... I believe that will have to be dropped down compared to mine...
And I thought I had better add the word MOTHER... as we have finally been given a date for her operation today! So I am organised for that next Tuesday now... well at least with a card! Label finished off on a small piece of Gold Foil... 


Stampin Up! products used  
Stamp Sets - Daisy Lane (flowers), Healing Hugs (greeting); Painted Harvest (leaves); Family Party (Mother)
Punches - Medium Daisy, Leaf
Papers - Pressed Petals
Card - Mossy Meadow, Crumb Cake, Thick Whisper White, Gold Foil
Inks - Crumb Cake, Daffodil Delight, Mossy Meadow, Soft Sea Foam, Pumpkin Pie, Versamark & White Embossing Powder
Tools - Heat Gun

And sorry! I can't tell you how many times this tutorial has been attempted over the past few months... but I was scuppered every time... such is the time (and concentration!) it takes to make, photo and write a step by step tutorial... and my hospital visiting hours for the last 3 months have meant that I just haven't had those hours in a day! 
Amanda's Quick Links
Just click on the relevant pictures below for On Line Store, Catalogues and/or more information... 
If you are ordering today... please add the Host Code shown below to earn yourself a gift... For orders over £150 you should claim your own Stampin Host Rewards... you will still get a separate gift from me... 

Current Catalogues & Extra Products


Friday, 7 June 2019

Friday Favourites... My Top Picks...

I have been asked to share my favourite stamps etc... which actually equates to my Top 12 of Suites, Bundles and Stamps... as  I do tend to love the whole bundle or suite if I love the stamp set OR dies OR papers...

So here they are... not in any particular order... as that would have been many more hours of decision time!! And everyone of these are either in my hands... almost here... or soon on their way...

Click on the product name or pictures for all the details in the Online Store...

Family Party
This will be the most used set in classes... and therefore at home too... been a while since I have had new family names and numbers to use! Hooray!

Butterfly Wishes
Simply gorgeous! And look what punch it co-ordinates with!


Praiseworthy Prose bundle
With these dies we can name anything!
 And I love the definitions in the stamp set too


Everything Amazing
Almost didn't spot this little gem! So glad I did...


Very Versailles
Ooh la la! Simply beautiful... classically elegant!


Bloom & Grow bundle
You can never have too many flowers... And spot the scallop border dies in this bundle!


Genuine Gems
For those moments when you really don't know what to say!


Garden Shed
This will be a marmite set! Very me (architectural!)... but very not me too (lots of colouring!)
But just look at these stunning samples by the concept artists... not too much colouring here after all!


Sailaway suite
A firm favourite of mine with an enthusiastic sailor in the house, lots of sailing holidays over the years and many a sailing friend...


More information on this suite here...

Magnolia Lane suite
Now this is a BIG suite....

More information on this blog here... and here...

Noble Peacock suite
And this is the suite that has caused the most WOWs amongst my ladies!!

And I guess around the world... as it has shot onto back order status within minutes of launch! So this is one I will tell you to back order whilst you can... as I think it will just go unorderable sometime soon...
 Just stunning Foil Papers and Sheets...

Bird Ballad suite
Wouldn't suit all the bird haters I have had coming to my classes over the years... but I have a particular fondness for this suite... just yum all round!
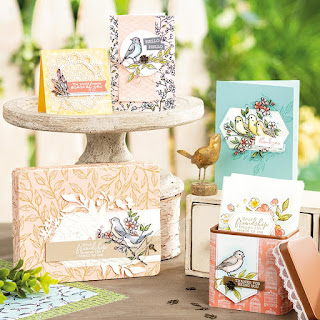
Look at these stunning Stitched Nested Labels dies... cutting on the inside and outside of "the aperture" at the same time ie producing a frame and aperture at the same time.... which gives you infinite possibilities... and what a lovely shape...
  And just look at these beautiful papers!!
So so pretty...


Oh how exciting! All this new stuff to create with!! Just need to pack 48 hours into every day!

And yes... I will be back with another Favourites round up sometime soon... as there are a lot of smaller faves to tell you about!!