Showing posts with label Gift Card Holder. Show all posts

Tuesday, 17 December 2024

Season of Green & Gold Multi Panel Pop Up Card

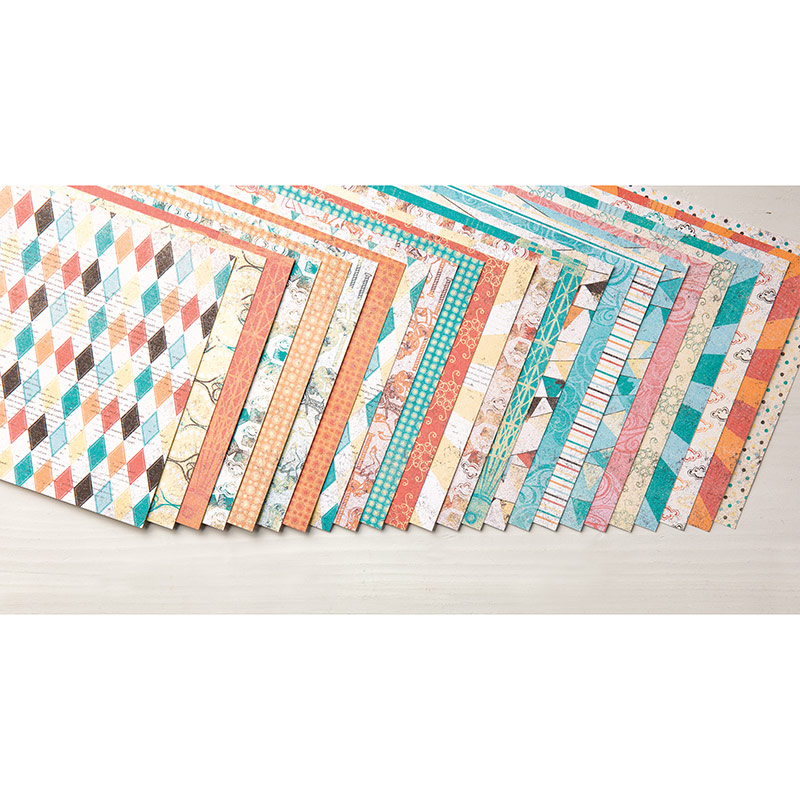
A more special card using the Season of Green and Gold beautiful foiled papers... and the  Greetings of the Season set  ... a multi panel pop up card... aka a Five Panel Pop Up Card...

I altered to suit A6 card dimensions.... but the card was based on another of Sam at Mixed Up Crafts' clever designs... 


Monday, 16 December 2024

Season of Green & Gold papers....


Love these Season of Green and Gold beautiful foiled papers... so quite a few different designs made... starting with this set of 5... 4 cards and a Book Treat Box for the christmas table...

I do have lots more photos of these cards to share... however technology is not on my side today... the watermarks being larger than the cards!!! So (somewhat annoyingly) I will have to come back to them another day....

Thursday, 14 December 2017

Merry Little Christmas Memories & More Foiled Gift Bags

Made some more of the Striped Treat Bags shared here earlier...
Again using the Memories & More Merry Little Christmas pack and the Foil Snowflakes for a very quick & easy ... but stunning in the flesh... make... 
So much better than popping gift cards and small gifts in an envelope... and 10 days ahead of time! That's a first!
    
Love all of them... even used a few of the stickers in the card pack too...

All finished off with the Quilted 1/4" Ribbon... as I realised that it co-ordinated with them all for an extra pop of colour,...

Sunday, 26 November 2017

Memories & More Merry Little Christmas Gift Card Holder

So when I made these using Petal Garden and the Striped Treat Bags... I decided that they would make for a great quick wrapping idea for all the gift cards I send this year... but using the Merry Little Christmas Memories & More Card pack instead... further details in the earlier post...

So more to follow using other cards in the pack... but I thought I would share the first as no doubt it will be very last minute when I get to do the others...
And before I leave... remember that Free Shipping on ALL orders starts at 11pm tonight, Sun 26 November GMT for us in the UK... any order value... direct ship by UPS to your door within 4-8 days... Ends Monday 27 November 10.59pm...
Click here for my Online Store... and don't forget to enter this month's Stampin Rewards Host Code 392YRRXW for a free gift and the new mini catalogue(s) from me to arrive in December...
Or a few hours left if you still have your eye on a reduced item in the Online Extravaganza Sale... ends 10.59pm GMT tonight! But do bear in mind that if the overall saving is less than £4.95... you would be better to wait a minute for Free Shipping from 11pm...

Thursday, 2 March 2017

Cupcakes & Carousels White Gift Box Gift Card Holder

Another quick easy make using the Large White Gift Boxes.... making up the box as described here

But this time I have turned the box into a Gift Card Holder by adding a simple insert... using the method described here (in points 13-20) but with a 10.5 x 6cm (4 1/8" x 2 3/8") piece of card onto a 7.4cm (2 7/8") square base piece

Using the lovely Cupcakes & Carousels 6x6 Paper Stack... and a few bits from the Cupcakes & Carousels embellishment pack. Both of which I highly recommend. This was a paper stack that grew on me very quickly as I used it as the colours are lovely, bright & fresh .... and the embellishments make life (and decoration) easy! In fact I have just bought some more.....
 Cupcakes & Carousels Embellishment Kit
And the Sale A Bration promotional stamps Any Occasion (Yours for free with a £45 order) came in very useful for decorating my banners on the back and insert.... 
Image result for stampin up any occasion image
I just needed to "straighten" my stamps slightly to make them work as I wanted... easiest way to do that being to lay them on the paper as required and then quickly stick the clear block on top
Also used... 
2" Circle Punch


Sunday, 12 February 2017

Back to my First Creative Share

Something different for today.... I have lots of lovely new projects to share with you but it is late at night... and I haven't got any photos!  So I thought I would give you a blast from the past.... this was my first blog post/on line creative share about 8 years ago!! Back in the days when I posted about 20 projects a year... 

The colours may have changed... the iPods (do they still even exist!?) may have changed... but I still love this simple gift card holder (which was demonstrated by Louise at my first Stampin' Up! workshop about 9 years ago [you know the workshop... I was the hostess... and then I signed up afterwards!])

Ah... creative memories... this little group still makes me smile! 

But I think only 5 of these colours still exist... most being part of the Bold Brights collection as they were called in those days...

And what was that stamp set called... Pocket Silhouettes maybe?? And wonder if I still have it in my retired collection!!

Sunday, 29 May 2016

Beautiful Ride Beetle Gift Card Holder in A Box!

So here is the other version of the explosion box with its tutorial posted yesterday... 
Half my ladies did the boat...and the other half did the Beetle Gift Card Holder....
Everything was the same apart from that centre square... so go here for the main box tutorial (ignoring the For the Boat parts) - and here is the Gift Card holder bit...

1. Cut a piece of 13.2 x 6cm Bermuda Bay cardstock (5 1/4" x 2 1/4")
2. Score PORTRAIT every 1 cm (ie 54321) ( 3/8", 3/4", 1 1/8", 1 1/2", 1 7/8")
3. Concertina fold ( note-valleys on outer and central section)
4 Adhere outer sections on the back .... and about 1.5 cm (1/2") on inside from either side of central section
5. Cut squiggly paper square diagonally
6. Adhere diagonal to outer sections of the gift card holder
7. Trim at ends
8. Adhere to Bermuda Bay Square

Friday, 29 April 2016

Emerald Envy Gift Card Holder Explosion Box Tutorial

Told you I would be back soon with this project... and seeing as it is Friday here is a Tutorial for you. And here is the link to the It's My Party version posted nearly 2 weeks ago...
But before all that detail.... this is another project made for the Stampers Showcase at On Stage in Telford, UK showcasing the new 2016-18 In Color Emerald Envy and the Swirly Bird stamp set....

I also used the greetings in the Balloon Builders stamp set and the 1" circle punch... and oops the matching scallop circle punch too... which is unfortunately retiring come 1st June... bit of a misunderstanding between SU! and myself over being able to use that one.... as we were supposed to only use items that would carryover to the new 2016-17 catalogue... oops!
And spot the kite which is in the new and coming Swirly Bird stamp set... and a funny story about it for you... The kite is made by stamping 2 triangular stamps... one solid... and 1 striped... and voila... 

But I didn't see it... so I kept looking at these triangles wondering what they were for... thought that maybe they went together... tried them both out... rubbish! Very weird shape... Tried again in a different orientation... and then laughed at myself as I looked at an easily made and great kite!! 

Metric Recipe for Base 
Card Emerald Envy 21cm Square
Card Whisper White 6.5cm Square (x4)
Card Pool Party 6.5cm Square (x3)
Paper 6cm Square - Polka Dots (x4); Script (x2);
Card Pool Party 9.2 x 6cm
DSP Stripe 5.9cm (x1)

Metric Recipe for Tag/Sides
Sides - Card White 6.4cm Square (x2); Paper Polka Dots 5.5cm Square (x2)
Tags - Card Pool Party 6 x 6.5cm (x2); Paper Flowers 5.5 x 6cm (x2)

Metric Instructions for Base
1. Score large (21cm Square) card panel at 7 & 14cm
2. Turn 90 degrees and score at 7 & 14cm
3. Cut diagonally across each corner from each outer tip to corresponding corner of square in the middle...
4. Bone Fold

5. Fold side/diagonal flaps in & completely adhere on 2 opposing sides

 For other 2 sides...
6. Place thin "Sticky Strip" along outer edge, remove protective layer, fold 1 flap over and adhere
7. Fold and glue other flap... but take care where you put your glue!! You only want it to stick on the first flap and not onto the box side... or you won't be able to pop your tag in the pocket!!!

8. Cut 2 white mats in half diagonally
9. Cut 2 smaller (5.5cm) polka dot papers in half diagonally
10. Adhere your 4 card/paper triangles together and adhere to Tag/Pocket Sides
11. Adhere your 2 tags together... trapping a short piece of ribbon between the card and paper
12. Insert tags into pockets

13. Score PORTRAIT 9.2 x 6cm Pool Party panel at 1, 2, 3, 4, 5cm
14. Concertina fold Valley, Mountain, Valley, Mountain, Valley

15. Adhere 2nd and 3rd sections from each side together

16. Adhere doubled middle sections together at the sides using thin "Sticky Strip"
17. Adhere the whole thing diagonally across the card mat and trim overhang at each corner

18. Cut paper in half diagonally
19. Adhere to card mat... which will in turn cover the gift card holder "gubbins"
20. Adhere to the centre/bottom section

Gosh that was so so much easier to talk and show in a class than it was to write it!!!

Metric Recipe for Lid
Card Emerald Envy 11.4cm Square
Card Whisper White 6.9cm Square
Paper Stripe 6.4cm Square
Card Pool Party 1.5cm x 7.3cm
Ruched Ribbon Emerald Envy x 60cm (24")

Metric Instructions For Lid
1. Score at 2 cm on all 4 sides
2. Bone Fold
3. Dart on 2 score lines... on 2 opposing sides... and stick together using tabs...
Note  - as a general rule when making box lids I advise you to stick your lid together whilst it is in place on the box! This isn't essential with this project though as there is enough "wiggle room" to stick it as tight as possible (though I may come to regret those words!!! But it has been tested quite a few times.... and no-ones didn't fit!)

And for my US followers... the imperial (inches) version for the main part is as follows.... as 21cm is 8 1/4" ...so...

Please note that this project has been made from A4 card/Metric measurements... There was a lot of fine-tuning in the decoration down to a millimetre ( about 1/24" of an inch!) so I am unable to just quickly convert to an inches version and produce an accurate recipe and tutorial without a total re-make... which is just not on the cards I am afraid... so I have to admit defeat with all the recipe/detail...! Hence a few ?s...

So I suggest that you make the main box and lid and then mat/layer as you see fit ( I allow the old 1/4" variation) ... and if anyone wants to feedback and give me real measurements... then I would be eternally grateful... and I can update this as necessary! Sorry...

Imperial Recipe for Base 
Card Emerald Envy 8 1/4" Square
Card Whisper White 2 1/2" Square (x4)
Card Pool Party 2 1/2" Square (x3)
Paper 2 1/4" Square - Polka Dots (x4); Script (x2);
Card Pool Party 3 5/8" x 2 1/4" (any smaller than 3 5/8" and the gift card will not fit in! So allow overhang as necessary!)
DSP Stripe 2 3/16"? (x1)

Imperial Recipe for Tag/Sides
Sides - Card White 2 7/16"? Square (x2); Paper Polka Dots 2 3/16"? Square (x2)
Tags - Card Pool Party 2 3/8"? x 2 1/2"? (x2); Paper Flowers 2 1/8"? x 2 1/4"? (x2)

Imperial Instructions for Base
1. Score large (8 1/4" Square) card panel at 2 3/4" and 5 1/2"
2. Turn 90 degrees and score at 2 3/4" & 5 1/2"
3. Cut diagonally across each corner from each outer tip to corresponding corner of square in the middle...
4. Bone Fold

5. Fold side/diagonal flaps in & completely adhere on 2 opposing sides

 For other 2 sides...
6. Place thin "Sticky Strip" along outer edge, remove protective layer, fold 1 flap over and adhere
7. Fold and glue other flap... but take care where you put your glue!! You only want it to stick on the first flap and not onto the box side... or you won't be able to pop your tag in the pocket!!!

8. Cut 2 white mats in half diagonally
9. Cut 2 smaller (2 3/16"?) polka dot papers in half diagonally
10. Adhere your 4 card/paper triangles together and adhere to Tag/Pocket Sides
11. Adhere your 2 tags together... trapping a short piece of ribbon between the card and paper
12. Insert tags into pockets

13. Score PORTRAIT 3 5/8"? x 2 1/4" Pool Party panel at 3/8", 3/4", 1 1/8", 1 1/2" & 1 7/8"
14. Concertina fold Valley, Mountain, Valley, Mountain, Valley

15. Adhere 2nd and 3rd sections from each side together

16. Adhere doubled middle sections together at the sides using thin "Sticky Strip"
17. Adhere the whole thing diagonally across the card mat and trim overhang at each corner

18. Cut paper in half diagonally
19. Adhere to card mat... which will in turn cover the gift card holder "gubbins"
20. Adhere to the centre/bottom section

Gosh that was so so much easier to talk and show in a class than it was to write it!!!

Imperial Recipe for Lid
Card Emerald Envy 4 1/2"? Square
Card Whisper White 2 3/4"? Square
Paper Stripe 2 1/2"? Square
Card Pool Party 5/8"? x 2 7/8"?
Ruched Ribbon Emerald Envy x 24"

Imperial Instructions For Lid
1. Score at 3/4" on all 4 sides
2. Bone Fold
3. Dart on 2 score lines... on 2 opposing sides... and stick together using tabs...
Note  - as a general rule when making box lids I advise you to stick your lid together whilst it is in place on the box! This isn't essential with this project though as there is enough "wiggle room" to stick it as tight as possible (though I may come to regret those words!!! But it has been tested quite a few times.... and no-ones didn't fit!)


Saturday, 16 April 2016

It's My Party Gift Card Holder Box

Another quick share... back to normal service next week...honest!
Is it a box... Or is it a Gift Card holder... you choose!
More on this explosion box project another day... but I just had to share another of the projects we have been making at classes this week....

Edited to Add - Link to Gift Card Holder Explosion Box Tutorial here. The only differences for this one compared to the recipe in the Tutorial being ...
  • the decoration around the Lid.  I wrapped washi tape all the way round. Then I put washi tape onto a piece of white card, punched 2 bow sides and centre piece from the stiffened washi tape. Then trimmed off the white card showing at the top and bottom... Does a great job... love it!
  • a few card/colour mat quantities in the Recipe are different as I simplified the other one to just 2 colours.... This one uses 6 x 6.5cm Crushed Curry, 1 x 6.5cm Basic Black and 2 x 6.4cm Melon Mambo (and 1 x 6.9cm Crushed Curry for the lid)
  • the decoration for the diagonal/tag pocket flaps. I stuck the paper onto the card mat first and then the matted triangles onto the triangular side sections

And don't forget to check out the fantastic Weekly Deals this week... too good not to miss... and remember 8 pm next Monday for the Retiring List....

And finally... the gift card pictured caused a few laughs! Not only did we think of what co-ordinated black gift cards we could buy....  ( tee Hee...Pizza Express for tonight for our Jems Stampin Up! Team meet up!)  but then I said.. What can you buy from Cotton Traders!? No idea where I got the card from!... Sorry Cotton Traders.... But hey then I looked it up... clothing, footwear and rugby apparel.... And 4 of us in the room are rugby mums! Then we remembered!!! Oops! Don't tell the boys!


Monday, 21 December 2015

Gift Card Holders

This year seems to be the year of most of the teenagers wanting Gift Cards... all different one though interestingly!
And as life has been so busy recently... I was so happy to oblige!!
So then I had to think up something quick and simple to wrap them up in...
So here you have it...
Smoky Slate Cozy Christmas Santa ( a keeper for me!)
Archival Basic Black greeting ( another keeper - love this one!)
And then at the last minute of making these... my Stampin' Up! pre-order box turned up...
So my clear Wink of Stella brush was pulled out...activated..and put into immediate service...
And oh wow... you will have to have the Wink of Stellas... my Santas then all came to life with a wonderful shimmer... hope you can kind of see in the photo...

Saturday, 2 April 2011

Blog Hop - SU! UK Demos celebrate the new Mini

For those of you already hopping around..... Hello and welcome to Amanda's little blog aka The Craft Spa. You should have come here from Jane's Blog- Cheshire Design House - aren't her projects just wonderful!!

And for those of you starting here...... Hello and welcome to our Blog Hop to showcase the wonderful new products in the Stampin' Up 2011 Mini Catalogue. A number of us have got ourselves organised via the fantastic UK stampin enthusiasts web site - inlovewithstamping- and so here are a feast of projects as you go from one blog to another..... so thanks Erika for getting us organised!!!

So here a  few projects I have made during March using some of the new products...  First up is a card using the new Manhattan Flowers embossing folder perfect for weddings, anniversaries, birthdays - or indeed anything..... not only is this very "classy" but the embossing is so deep...it is just amazing.... I hope that you can get an idea of the effect in this photo.

I have kept this simple... so as not to overshadow the embossing pattern. So just a simple colour palette of Whisper White, Baja Breeze and Basic Black and use of the Ornate Flowers and Heard from the Heart stamp sets.

My second project is a Gift Card Holder Explosion Box showcasing the Fun Flowers die. Oh this die is a LOT of fun as it produces some fabulous flowers.... more of which are to come another day! The thread through the button is actually just a sliver of cardstock threaded through and tied into a knot.... I have seen this done by many in blogland....but it works a lot better than I thought it would!!!


This is a project we made as part of my Nursery Suite papers and Quick Accents classes run during March.  I have designed a number of explosion boxes and mini books during February and March - and got the idea in my head that a resizing and an extra insert would enable me to put a gift card in.... and it worked like a dream......

And that is it from me.... so thank you for visiting and..... next you are going to Sandra's Wonderful Blog  - check out these fantastic projects......