Showing posts with label Ripon. Show all posts

Monday, 30 April 2018

Share What I Love Papers #2

Another beautiful piece of pearlised flowery paper from the Share What You Love paper pack... though my photos don't show the sheen off quite as well as my previous one...

And a new velvety Rich Razzleberry ribbon that will be available in the early release bundles come 1st May... I thought that this may be a bit "thick" to use for bows... but seemed to work fine... so I guess you can say that it looks thicker than it actually is...

Rest of the card details as per this card here...
And remember not long to wait for those early release Share What You Love bundles... and the new In Color ink pads... ordering starts tomorrow, 1st May... 

Monday, 25 May 2015

Wood Store Adventure Bound Card

057

Now this is a card I made especially with my own husband in mind… he became a tad passionate about planning and building his own wood store this year – and now it is finished he is very proud of it!!

So I didn’t think this card would necessarily appeal to any of my ladies – but guess what – most of their husbands have a thing about building wood stores or stacking up their logs too! We did have a laugh!!!

056

And for those with husbands/dads that don’t store & stack… guess what – they are into their fires in any case…so this alternative version appealed to them too….

062

Papers all from the Adventure Bound paper stack & fire from The Great Outdoors stamp set– only available till 2nd June. Oh Baked Brown Sugar Thick Twine too…

Greetings from Hello Life and Guy Greetings in the Spring Summer Catalogue – which both carryover into the new Annual Catalogue – hooray!! Very happy to see these 2 carryover….

Saturday, 23 May 2015

Happy Birthday Everyone and Butterfly Basics

046

Here is a little trio of simple cards for you…. lots of new products to spot!

035

Still continuing using one of my favourite In Colors – Tip Top Taupe… but also introducing my other favourite… MINT MACARON….

034

Spot the gorgeous new ribbon in Tip Top Taupe… Just wish I had also bought the new Mint Macaron ribbon in my pre-order box too!!

044

Spot the fabulous Happy Birthday greeting…. I LOVE it!! Think this is my favourite greeting ever!

This is in a new Hostess stamp set  - called Happy Birthday Everyone – that you can earn with a qualifying order for free come 2nd June.

038

Spot the new In Color embellishment here too – one gorgeous little flower in Mint Macaron…

Also spot all my banners…. all made using the new Triple Banner Punch coming your way…

Though I have to admit… I wasn’t going to buy it…after all I can make banners myself….but SO glad I did… never been out of my hands!! Definitely recommended…but a lot more on that another day!

039

Loving the combination of Tip Top Taupe and Mint Macaron with the existing colours of Soft Sky and Lost Lagoon. This is a combination you will now see quite a lot from me!!

042

And here are the 3 cards all together again…

049

These will be 3 of the cards available to make during my June classes – they have already caused quite a stir over here!!

Tuesday, 19 May 2015

More Video Techniques for Technique Tuesday

Decided to make a series of technique tutorials that I will post on Tuesdays…starting off with some more of the videos produced by Stampin’ Up!

Each one of these is a little gem – showcasing a simple and effective technique with minimal supplies needed. These include some of my favourite, most used techniques – whether as a beginner all those years ago – or as a more advanced stamper as now! And I loved to share these techniques with my new stampers – always get a WoW!!

Marker to Stamp Technique – use daily! Wouldn’t be without my big box of marker pens! One of my first Stampin’ Up! purchases – one of my best – one of my most used - and still going strong. Not got the fabulous box of Many Marvellous Markers yet? Treat yourself now – don’t leave till June!!

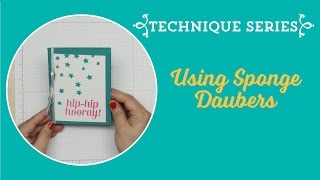
Using Sponge Daubers – use my daubers daily – do you?

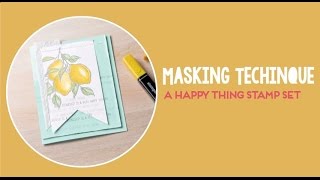
Masking Technique. I do some masking every week…

Note that the stamp set featured in this video is a promotional Sale A Bration item that is no longer available. However I do have one left as a gift for an order over £50 (excl P&P). Only one available!

Friday, 15 May 2015

More Technique Video Tutorials–Watercolouring

Well seeing as you loved the Stampin Up! Video Technique  I shared yesterday... I have just had a look and here are a few more I have found to  to share…

Most of these are just 2 minutes to WOW! Simple but effective techniques that you will want to try too….

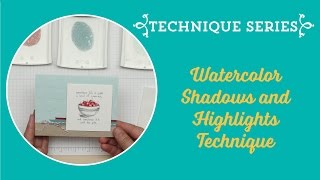
Watercolour Shadows & Highlights Techniques. Just posted. Guess what I will be trying out next!!

Now still on watercolouring.

The next few use stamps that were featured in the Sale A Bration promotion – so you will have to concentrate on the techniques rather than the images!! Though I do have a few spares if you would like to order £50+ product through me this month!

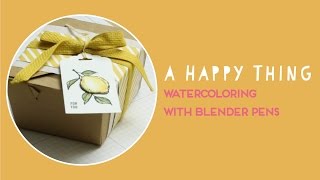
Watercolour with Blender Pens ( a must do technique as far as I am concerned!!)

Watercolour Wash Technique ( So Simple, Such Fun & So Effective!)

So there you have it – one technique for each day this weekend!! Enjoy!

I’ll be looking for more of these next week for you. Thank you for filming these Stampin’ Up!

Thursday, 14 May 2015

Technique Video Tutorial

Quick share of a video produced by Stampin’ Up! entitled Rock n’ Roll Stamping.

This was one of my first new-to-me  techniques when I first joined Stampin’ Up! nearly 7 years ago.

And one that I regularly use still…. A real good ‘un as they say in Yorkshire!


Enjoy!

Monday, 11 May 2015

Butterfly Basics Shadow Box Frame Card

Created by Amanda Bates at The Craft Spa 010

Here is another Shadow Box Frame Card I made.

This time I have completely and unashamedly CASED my upline, Julie Kettlewell’s stunning card… Well you trying looking at this one and not wanting to make it!

Created by Amanda Bates at The Craft Spa 009

And oh…  I can now confirm that the Butterflies Framelits have finally landed back in the UK!! So you can now buy the Bundles again…. 

But do also remember that these fabulous Something Borrowed papers are only available until 2nd June! These have definitely been an all-time favourite of mine – time to stock up!

Created by Amanda Bates at The Craft Spa 006

Just 3 differences to Julie’s…. 

Firstly I used Blackberry Bliss & Sahara Sand (whereas Julie used Early Espresso & Sahara Sand).

Created by Amanda Bates at The Craft Spa 005

Secondly – I used my Box Frame method which means it is “boxed/sealed” all the way round. I have definitely got into the groove with these….

And thirdly – a Rich Razzleberry button from the Brights Collection button pot to give an extra pop of colour

Created by Amanda Bates at The Craft Spa 007

And here it is – ready in a box for handing over….

This is a 1” deep box – but I realised that a 3/4” deep box means that it can be used for the large letter postage scale in the UK – whereas the deeper box (which does look better!!) has to be hand delivered – or pay the price for a small parcel…

Created by Amanda Bates at The Craft Spa 015

Go to Julie’s blog here for the 1” deep box instructions . Or here for my 3/4” deep instructions.

Created by Amanda Bates at The Craft Spa 003

So I just have to say… Thank you Julie – me and my ladies love this card! In fact I liked this card so much I made another for a special occasion.So pop back tomorrow for another version…

Stampin᾿ Up! Supplies

Table built by craftingbecky.com

Friday, 8 May 2015

Shadow Box Frame Card Tutorial for Fancy Fold Friday

Shadow Box Frame Card - Joe 16 - by Amanda Bates at The Craft Spa (4)
Today I have something for you that I have been meaning to do for a while… a Fancy Fold Friday post – including the Tutorial for my favourite card format at the moment! I hope that this is the first of many! Fancy Fold Friday posts that is!!
Shadow Box Frame Card - Joe 16 - by Amanda Bates at The Craft Spa (7)
When we made these Shadow Box Frames a month or so ago… I promised my ladies a card using the same concept… so here is one version of what I came up with. A very solid chunky card – perfect for special occasions…
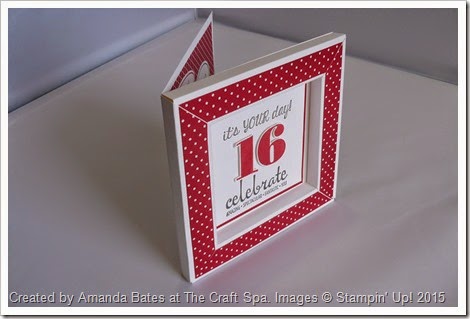
Shadow Box Frame Card - Joe 16 - by Amanda Bates at The Craft Spa (9)
It seemed appropriate to share it now as it is my son’s 16th Birthday today… so Happy Birthday Joe! And as long standing readers of my blog will know –  today is the day to share my annual Real Red card  - no guesses as to his favourite colour!
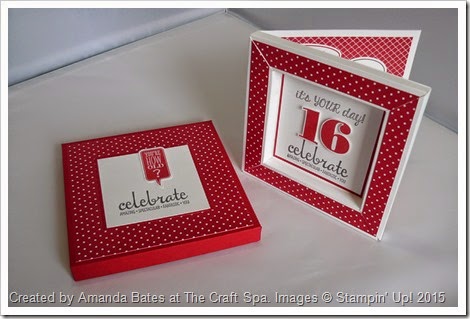
Shadow Box Frame Card - Joe 16 - by Amanda Bates at The Craft Spa (17)
But before I share the tutorial – these details should be read in conjunction with my original tutorial which has  pictures of each step for you. Edited to add Jan 2016- some key photos added on this post too!

In fact I strongly recommend that you make up one of the shadow boxes as per my original tutorial first… call it a practice run! The adhering of the sides (steps 6&7)  is harder in this version – so it is better that you know what to do before you do it!!!

And I have to admit that I use Tombow on the straight sides for this version – as having a bit of wiggle time is very useful with this one! Still use Sticky Strip on those diagonals though…..

You will need
Whisper White Card 12”x12”; 12” x 6”
Real Red Card 4” Square
Whisper White Card 3 3/4” Square
Designer Series Paper 5 3/4” x 3/4” (x4)

Tutorial
1. Score Whisper White 12x12 card at 1”, 1 ½”, 2 ½” and 3” on all 4 sides.
2. Score extra score-lines across just 2 score lines at 4” and 8” on 2 opposing sides
3. Cut up these extra score lines & diagonally across to the 3rd score-line intersection
4. Cut off “16-square” section at each corner
 This is the "16 Square bit" cut out!
 With all 4 corners cut out...

5. Bone Fold
6. Adhere 2 straight sections
7. Adhere 2 notched side sections
8. Score LANDSCAPE 12” x 6” Whisper White card in half at 6”
9. Bone Fold
10. Adhere to back of box frame
11. Cut mitres in paper strips. ( this is a fab tip I picked up from my fantastic SU! mummy – Julie Kettlewell…)
- Place 2 strips on top of each other at 90degrees
- Snip across from inside to outside intersection
And my extra TIP- do one corner at a time & place each of the cut pieces down around your frame before you pick up the next 2 strips and cut. Then you have the matching mitres in position…
12. Decorate as required.
I just kept it classic & simple on the front – just greetings from the Fabulous Four set and numbers from my favourite Larger Than Life set.
And then some of the Speech Bubbles from the retiring Just Sayin set on the inside
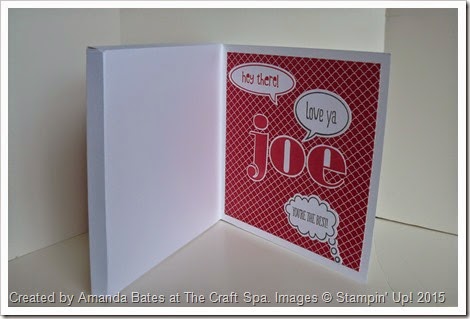
Shadow Box Frame Card - Joe 16 - by Amanda Bates at The Craft Spa (1)
And the 3/4” deep box to wrap – and/or post it in – nice and simple…
  1. Cut 2 pieces of card. One to  7 7/8” Square and the other to 7 3/4” Square
  2. Score in at 3/4” on each side.
  3. Dart score lines on 2 opposing sides.
  4. Punch a 3/4” semicircle on 2 sides of the lid
  5. Apply glue to tabs and assemble
    TIP assemble the base first – then assemble the lid whilst it is on the base – that way you know the lid is going to fit on the base!!
  6. Decorate as required
Shadow Box Frame Card - Joe 16 - by Amanda Bates at The Craft Spa (17)
Stampin᾿ Up! Supplies
Table built by craftingbecky.com