Showing posts with label Centre Easel Card. Show all posts

Friday, 30 October 2015

Tutorial for Hearth & Home Centre Step Easel Card

Seeing as this card is still getting a huge amount of daily hits.... think it is time for its tutorial! Which I have just realised didn't get posted quite when I thought.... oops...sorry!

I have posted a few more cards using this design.... press on the photo to go to the original posting... and I think there will be some more pretty soon as this is still definitely a favourite card at my classes....


First up...the Metric version from A4 card ... and then the Imperial (inches) version from 12x12 card. 

Go here for another Centre Step Easel Card variant and/or if you would like photos to accompany the step by steps... 

Centre Step Easel Card Tutorial (Metric from A4)
Whisper White Cardstock  14.8 x 29.7cm (ie A4L) OR 14.8 x 28.9cm if you want to tuck the base up into the card for mailing in a C6 envelope

1.       PORTRAIT at 4cm on Top Bar 
2.       Cut 2.5 to 13cm
3.       PORTRAIT at 10.8cm on Top Bar LHS
4.       Cut 2.5 to 13cm

5.       LANDSCAPE. With cuts to Left Hand Side…
6.       2.5 cm on Top Bar (LHS) Score  outside sections (ie 0-4cm; LIFT; 10.8 to 14.8cm)
7.       5cm on Top Bar (LHS)  Score  outside sections
8.       13cm on Top Bar (LHS)  Score  outside sections

9.       LANDSCAPE. With cuts to Left Hand Side…
10.     10.5cm on Top Bar (LHS) Score across middle section. (ie 4 to 10.8cm)
11.     21cm on Top Bar (LHS) Score across whole card drop (ie 0 to 14.8cm)

12. Fold lightly…
Outer Sections – 2.5cm Mountain, 5cm Valley, 13cm Mountain
Middle Section at 10.5cm – Mountain
Whole Section at 21cm – Mountain


And here is the Imperial (inches) version from 12x12 card
I don't think this card would work from the standard US 8 1/2 x 11" cardstock...as there wouldn't be enough of a lip at the front to mount a greeting/stop for the easel card format. 


Centre Step Easel Card Tutorial (Imperial from 12x12)
1.      Cut 12x12 cardstock to 6” wide (ie 6 x 12”)

2.      PORTRAIT at 1 5/8” on Top Bar 
3.      Cut 1” to 5 1/8”
4.      PORTRAIT at 4 3/8" on Top Bar 
5.      Cut 1” to 5 1/8”

6.      LANDSCAPE. With cuts to Left Hand Side…
7.      1” on Top Bar (LHS) Score  outside sections ( ie 0-1 5/8”; LIFT; 4 3/8"-6”)
8.      2” on Top Bar (LHS)  Score  outside sections
9.      5 1/8” on Top Bar (LHS)  Score  outside sections

10.   LANDSCAPE. With cuts to Left Hand Side…
11.    4 1/8” on Top Bar (LHS) Score across middle section. ( ie 1 5/8"- 4 3/8")
12.   8 ¼” on Top Bar (LHS) Score across whole card drop ( ie 0 to 6”)
13.   Fold lightly…
Outer Sections – 1” Mountain, 2” Valley, 5 1/8”Mountain
Middle Section at 4 1/8” – Mountain
Whole Section at 8 ¼” – Mountain


Friday, 28 August 2015

Centre Step Easel Card Tutorial for Fancy Fold Friday

Remember this from last week? The Centre Step Card that doesn't flop down on the mantelpiece!

I meant to have another couple of examples made for you by today...but ...being honest... Christmas crafting with my new goodies turned my head!!

Which is code for lots of new samples made and... AN Other version of this card coming up soon.... I decided not to confuse you with the new variant yet..... maybe next week!

Well here is how to make it... both the Metric (centimetres) version from A4 and the Imperial (inches) from 12x12

Centre Step Easel Card Tutorial ( Metric Version from A4 card)
1.      Cut A4 cardstock to 14.8cm wide ( xA4L ie 29.7cm long)

2.      PORTRAIT at 2.5cm on Top Bar RHS ( ie to Right Hand Side)
3.      Cut 2.5 to 13cm
4.      PORTRAIT at 2.5cm on Top Bar LHS ( ie to Left Hand Side)
5.      Cut 2.5 to 13cm
So you end up with cuts as so...

6.      LANDSCAPE. With cuts to Left Hand Side… Score as per dotted lines...
7.      2.5 cm on Top Bar (LHS) Score outside sections ( ie 0-2.5cm; LIFT; 13.3 to 14.8cm)
8.      5cm on Top Bar (LHS)  Score outside sections
9.      13cm on Top Bar (LHS)  Score  outside sections

10.   LANDSCAPE. With cuts to Left Hand Side…
11.   10.5cm on Top Bar (LHS) Score across middle section. ( ie 2.5 to 12.3cm)
12.   21cm on Top Bar (LHS) Score across whole card drop ( ie 0 to 14.8cm)

13.   Fold lightly… 
      Outer Sections – 2.5 cm Mountain, 5cm Valley, 13cm Mountain
Middle Section at 10.5cm – Mountain
Whole Section at 21cm – Mountain
Ends up as so...


14.  Decorate as necessary. My papers and mats etc were as follows…

Base - Paper Polka Dots 14.3 x 8.1cm
Front - Paper Plaid 14.3 x 2cm
Sides - Paper Plaid 2 x 7.3cm (x2)
Front - Card Mossy Meadow 9.5 x 9cm
Front - Card Whisper White 9 x 8.5cm

And apologies for my US readers... 

I don't think this card would work from your standard 8 1/2 x 11" cardstock...as there wouldn't be enough of a lip at the front to mount a greeting/stop for the easel card format. 

It would work with 12" card however... In which case you would need to do as follows...
Please note that your papers and mats etc would have to be re-sized to suit...


Centre Step Easel Card Tutorial (Imperial from 12x12)
1.      Cut 12x12 cardstock to 6” wide (ie 6 x 12”)

2.      PORTRAIT at 1” on Top Bar RHS ( ie to Right Hand Side)
3.      Cut 1” to 5 1/8”
4.      PORTRAIT at 1” on Top Bar LHS ( ie to Left Hand Side)
5.      Cut 1” to 5 1/8”

6.      LANDSCAPE. With cuts to Left Hand Side…
7.       1” on Top Bar (LHS) Score  outside sections ( ie 0-1”; LIFT; 5-6”)
8.      2” on Top Bar (LHS)  Score  outside sections
9.      5 1/8” on Top Bar (LHS)  Score  outside sections

10.   LANDSCAPE. With cuts to Left Hand Side…
11.    4 1/8” on Top Bar (LHS) Score across middle section. ( ie 1-5”)
12.   8 ¼” on Top Bar (LHS) Score across whole card drop ( ie 0 to 6”)

13.   Fold lightly…
Outer Sections – 1” Mountain, 2” Valley, 5 1/8”Mountain
Middle Section at 4 1/8” – Mountain
Whole Section at 8 ¼” – Mountain

Decorate as necessary.

Friday, 31 July 2015

Fancy Fold Friday - Tutorial for Swing Easel Card

 Remember this Timeless Elegance card shared a couple of weeks ago. 
Well a remake was in order for this week's classes using the Pretty Petals papers (which - did I tell you - are on Bonus Deals this week - just over £5 for 48 sheets!! Nice papers... Nice price!!)
And it went down very well.... apart from me not saying LIFT loud enough!!! Oops...but we got there in the end....

Couple of closed views

And here you go - a cut and score tutorial to make one of these for yourself from 12 x 12 card... Please feel free to share any make using this tutorial with me - you can decide whether you would like me to feature here on The Craft Spa blog!! Or not!

Supplies Needed
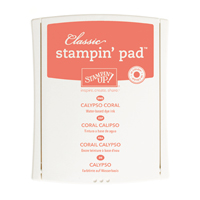
12x12 Cardstock  Calypso Coral - 12" x 6"
Paper 5 3/4" Square x 2 patterns
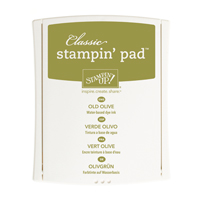
Cardstock Old Olive 3 3/4" Square
Cardstock Very Vanilla 3 1/2" Square
Scallop Square Framelits die

1. Die cut Scallop Square aperture out of centre of 1 piece of paper ( I eyeball but you can draw diagonals on back to make eyeballing MUCH easier!)
2. Score LANDSCAPE Calypso Coral panel in half at 6"
3. Bone Fold (mountain fold)
4. With card blank in tent fold direction ( ie centre fold at top) adhere die cut paper to card blank

5. Place card blank LANDSCAPE on trimmer with papers to right hand side
6. LANDSCAPE. Line up on Top Bar at 7", cut 1" to 5" (2.5 to 12.7 cm)
7. LANDSCAPE. Line up at 11", cut 1" to 5" (2.5 to 12.7 cm)

8. LANDSCAPE. Line up at 8 3/4", score 0 to 1", LIFT, score 5" to 6" (score 0 to 2.5, LIFT,score 12.7 to 15.2cm)
9. LANDSCAPE. Line up at 9 1/4", score 0 to 1", LIFT, score 5" to 6" (score 0 to 2.5, LIFT,score 12.7 to 15.2cm)
10. LANDSCAPE. Line up at 9 3/4", score 0 to 1", LIFT, score 5" to 6" (score 0 to 2.5, LIFT,score 12.7 to 15.2cm)

11. Place card blank PORTRAIT on trimmer with papers/cut sections to top.
12. PORTRAIT. Line up at 1". Cut 1" to 2 3/4", LIFT, cut 3 1/4" to 5" (cut 2.5 to 7cm, LIFT, cut 8.2 to 12.7cm)
13. PORTRAIT. Line up at 5". Cut 1" to 2 3/4", LIFT, cut 3 1/4" to 5" (cut 2.5 to 7cm, LIFT, cut 8.2 to 12.7cm)

14. With mountain centre fold, fold outer scorelines as muntain fold, valley fold , mountain fold
15. Decorate as you desire.


Stampin᾿ Up! Supplies
Table built by craftingbecky.com