Showing posts with label Scallop Square. Show all posts

Saturday, 16 January 2016

Birthday Bouquet Swing Easel Card

 
Back to my Swing Easel card... a new fresh look!
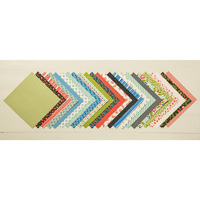
Loving these Birthday Bouquet papers... think these are proving to be my favourite papers... ever!
Very versatile... but more on that another day...
12x12 card version of the tutorial here

Oh ... I have to laugh... have you spotted that bit of Sticky Strip red layer on the card!! Proving that stuff gets everywhere... thank goodness for the Tear n Tape nowadays!! Might have to retake and replace all these photos at some point tomorrow!!!


Built for Free Using: My Stampin Blog

Tuesday, 22 December 2015

Holly Box Frame Card

Another Simple Box Frame card....
Card details as before...
But this time...
Dressed with punched Mossy Meadow holly leaves care of the Reason for the Season stamps & Festive Flower punch nibbled around the edges with the 1/2" circle punch...
Topped off with Real Red 1/2" berries...


Sunday, 20 December 2015

Poinsettia Reason For The Season Box Frame Card

Simple ..but stunning...
Make one Box Frame card...
Cut out a Poinsettia from Home For Christmas paper
Die cut a Home For Christmas paper Scallop square with a large square centre at the same time!
Stamp a simple Reason For the Season greeting... Sponge Crumb Cake around the edges...
Stick it all together

Monday, 19 October 2015

Winter Wonderland Scallop Square Matchbook Album Tutorial

Something you haven't seen for a while a The Craft Spa - a mini album... a Scallop Square Matchbook Album... and the tutorial for it too....
Or is it a mini album?
It also makes a great gift card holder... or even for cash...
I also dressed a great one for my husband's birthday...covered in rugby balls and pictures of posts & Twickenham... along with the tickets for a international match at Twickenham... even he thought the dress-up was great! Result!!

So here is the recipe for this Scallop Square Matchbook Album...

Cardstock 
Thick Whisper White 4" x 8 1/4" ( ie A4/21cm wide for us Europeans)
Scallop Square - Gold Foil 4 3/4" Square
First Page - Gold Foil 4" x  2 1/8"
Second Page - Basic Black 4" x 3 1/8"

Papers  
Front Top - 3 3/4" x 3"
Front Bottom - 3 3/4" x 3/4"
First Page - 3 3/4" x 1 5/8"
Second Page - 3 3/4" x 2 5/8"
Third Page - 3 3/4" x 3 3/8"
Back of Scallop Square - 4" Square

And the instructions... This is a really simple one... so one that can be made in  flash... just when you need one...
1. Score LANDSCAPE Thick Whisper White panel at 1" & 5"
2. Score PORTRAIT Gold Foil panel at 1/4" ( or 1 7/8" if you find that easier!)
3. Score PORTRAIT Basic Black  panel at 1/4" ( or 2 7/8" if you find that easier!)
4. Bone Fold panels
5. Adhere 2 pages (using the 1/4" section) just above the bottom score line - gold one just sticks on top of black one!
6. Stick your papers on...
7. Punch a 2" Whisper White Circle...adhere to top panel on book front - but DO NOT GLUE ALL OVER THE BACK... mine is glued to about half way down from the top - as the bottom unglued bit acts as the closure... that bottom flap just tucking behind it nicely to close the book of..
Though I will admit - I should not have stuck the Glad Tidings greeting where I did... it adds a layer where it would have been better without....
And the greetings/tags are from the hostess set, Antique Tags...


Built for Free Using: My Stampin Blog

Thursday, 15 October 2015

Large Square Box Frame Card for Teens....

A change from Christmas for today.... 
A year on... and a post in order to answer a question I was asked about my 2 versions....

Remember this...
The annual red card post for my son's 16th birthday back in May... along with the tutorial for my Large Square Box Frame card... (as well as the tutorial for the 3/4" deep box which allows for Large Letter postage here in the UK...)

Well we are now in a new school year.... which means that the age has changed...but the card for his friends didn't need to
But spot the other change.... 
As long time followers of my blog will now... I changed my favourite version of the card a while back to include a scallop square die cut from a 5 3/4" square of paper...
So here is the photo of the cards with the 2 fronts so you can compare them side-by-side... and make your own decision!
So which one do you prefer? 

I personally prefer the scallop square... not only because I do still like a scallop square...! But mainly because it is so much quicker to produce the card...! Though the mitred version does use less paper!

Note these cards both use a retired Real Red polka dot paper...for which the Brights paper stack £19.50 is listed - however the new Brights Designer Paper Stack £20 is also listed as that is the one that is now available - this also includes a polka dot pattern....


Built for Free Using: My Stampin Blog

Thursday, 13 August 2015

Timeless Elegance Shadow Box Frame Card

 
Well I couldn't do a Fancy Folds Class without a Shadow Box Frame Card could I...!? Actually it is the Box Frame card that the ladies particularly want to learn to do....

Tutorial for this version here... And incredibly that tutorial blog post has just hit my Top 10 posts of all time! In just 3 months...

Back to the cards... Two options for the ladies to choose from... mute or vivid!! Actually - I lie - there are 3 versions in the room they can choose from! 3rd one already shared here...

So first the vivid version! I didn't know when I selected the Timeless Elegance for this class... but the ladies have a particular passion and love for poppies!! So I just had to oblige....
Well Timeless Elegance certainly delivered those in abundance! So I really hope they like this colourful version! These flowers are all cut out from the one sheet of paper.... love that sheet! Equally stunning with no colour... but more on that another day!
I kept the colours mainly within the In Color collections - so Watermelon Wonder/Basic Black for the Poppies, Mint Macaron for the leaves and Lost Lagoon and Delightful Dijon for the small flowers. All coloured in using my trusty Aquapainter.

I have also used Tip Top Taupe for the mat & background stamping and Early Espresso for the greeting.
But the coolest bit...well this is a true 3D card - 3 layers of flowers and leaves - don't know if you can see this in the photo!
And then there is the Mute version... clean and simple in a box!
Same background stamping... but a Watercolor Wings large Butterfly behind a Tip Top Taupe die cut Butterfly Basics butterfly... 

But just realised... I need to quickly add some pearls to the butterfly! Has to be finished off...

And the inside of the card is just kept simple... Mint Macaron fern leaves from Butterfly Basics...inked, stamped, stamped again. Tip Top Taupe postmark. And Early Espresso greeting from my favourite hostess set of all time - Happy Birthday Everyone...
So there you have it. Loving these Timeless Elegance papers - right up my Craft Spa street!!!
Fancy making these cards for yourself...? And finding the tutorials a bit too much!! Well - if you are fairly local to Yorkshire - I hold Private Classes as well as my regular monthly classes  - here in Great Ouseburn (between Harrogate and York) - just get yourself and some friends together to visit me and create cards like this.... just contact me to arrange a date. 

Stampin Up! Supplies
Stamps - Butterfly Basics, Watercolor Wings, Happy Birthday Everyone
Papers - Timeless Elegance
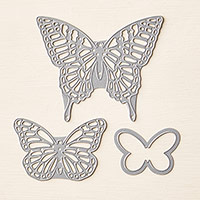
Dies - Butterflies, Bold Butterflies, Squares
Tools - Simply Scored scoreboard

Friday, 31 July 2015

Fancy Fold Friday - Tutorial for Swing Easel Card

 Remember this Timeless Elegance card shared a couple of weeks ago. 
Well a remake was in order for this week's classes using the Pretty Petals papers (which - did I tell you - are on Bonus Deals this week - just over £5 for 48 sheets!! Nice papers... Nice price!!)
And it went down very well.... apart from me not saying LIFT loud enough!!! Oops...but we got there in the end....

Couple of closed views

And here you go - a cut and score tutorial to make one of these for yourself from 12 x 12 card... Please feel free to share any make using this tutorial with me - you can decide whether you would like me to feature here on The Craft Spa blog!! Or not!

Supplies Needed
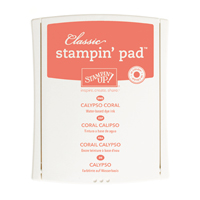
12x12 Cardstock  Calypso Coral - 12" x 6"
Paper 5 3/4" Square x 2 patterns
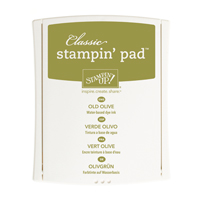
Cardstock Old Olive 3 3/4" Square
Cardstock Very Vanilla 3 1/2" Square
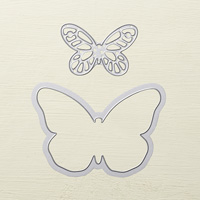
Scallop Square Framelits die

1. Die cut Scallop Square aperture out of centre of 1 piece of paper ( I eyeball but you can draw diagonals on back to make eyeballing MUCH easier!)
2. Score LANDSCAPE Calypso Coral panel in half at 6"
3. Bone Fold (mountain fold)
4. With card blank in tent fold direction ( ie centre fold at top) adhere die cut paper to card blank

5. Place card blank LANDSCAPE on trimmer with papers to right hand side
6. LANDSCAPE. Line up on Top Bar at 7", cut 1" to 5" (2.5 to 12.7 cm)
7. LANDSCAPE. Line up at 11", cut 1" to 5" (2.5 to 12.7 cm)

8. LANDSCAPE. Line up at 8 3/4", score 0 to 1", LIFT, score 5" to 6" (score 0 to 2.5, LIFT,score 12.7 to 15.2cm)
9. LANDSCAPE. Line up at 9 1/4", score 0 to 1", LIFT, score 5" to 6" (score 0 to 2.5, LIFT,score 12.7 to 15.2cm)
10. LANDSCAPE. Line up at 9 3/4", score 0 to 1", LIFT, score 5" to 6" (score 0 to 2.5, LIFT,score 12.7 to 15.2cm)

11. Place card blank PORTRAIT on trimmer with papers/cut sections to top.
12. PORTRAIT. Line up at 1". Cut 1" to 2 3/4", LIFT, cut 3 1/4" to 5" (cut 2.5 to 7cm, LIFT, cut 8.2 to 12.7cm)
13. PORTRAIT. Line up at 5". Cut 1" to 2 3/4", LIFT, cut 3 1/4" to 5" (cut 2.5 to 7cm, LIFT, cut 8.2 to 12.7cm)

14. With mountain centre fold, fold outer scorelines as muntain fold, valley fold , mountain fold
15. Decorate as you desire.


Stampin᾿ Up! Supplies
Table built by craftingbecky.com