Showing posts with label Pretty Petals. Show all posts

Monday, 3 August 2015

Another Swing Easel - or Easel Flip - Card

Just clearing away from my classes this week and found a half completed demo card and decorative piece...

So in the true Yorkshire spirit of not letting anything go to waste! 
A couple of different and simpler variants of the Swing Easel card for you... or is it an Easel Flip card? 

I think I have called it both so far... though it is "Swing Easel Card" that is now stuck in my memory cells.... 

To me it does swing rather than flip... though that gives me another idea!!!
My tutorial posted last Friday is already proving popular and delighted to hear that quite a few of you have been making one for yourself (or a friend!) this weekend. 

Can't wait to see some of your versions....
I said a couple of variants... as there is in these photos...although really they are the same card!!
The only difference being the paper added to the base section - so which do you prefer???

With or without? I rather like the without.... but that may be my old dislike of butterflies coming through...
And spot my gold "Thanks"...well more on that tomorrow in my Tuesday Tips, Techniques & Tutorials post..... loving my Wooden Expressions Natural Elements!

Sunday, 2 August 2015

Pretty Petals Faceted Gift Box


Been meaning to try one of these for ages.... and I was not disappointed. 

Great self closing box with faceted sides... great for treats!

Seen quite a few of these over the past few months...and I hope I have managed to track back to the originator... 

So here is the tutorial by Keren Howell that I used... I just used the Pretty Petals paper Stack and changed from using the retired Labels Framelits to using the Deco Labels which are still current in the catalogue. Thanks for sharing your awesome talent Keren...such a great box....

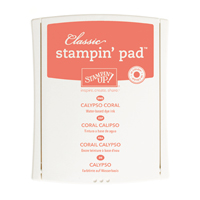
A quick dress up with a gold embossed banner and image from Birthday Bash and a piece of Calypso Coral Seam Binding ribbon...simples!

Saturday, 1 August 2015

Wild About Flowers Amazing Birthday Gift Bag Punch Board Small Box Card #2

Seeing as this little Box Card with the poppies has proven to be very popular... I made a birthday version for everyone to make at this week's class....

Good job I know that they are happy with fussy cutting - and homework!
Apart from using Very Vanilla instead of Old Olive card and Amazing Birthday for the sentiments - I also flipped the papers for the sides and flaps around...so this time - the paper was not turned upside down for step 2 in Cutting the Paper in my tutorial post 
Lighter and brighter...and a card for happier times.....

And here is everything I used...

Friday, 31 July 2015

Fancy Fold Friday - Tutorial for Swing Easel Card

 Remember this Timeless Elegance card shared a couple of weeks ago. 
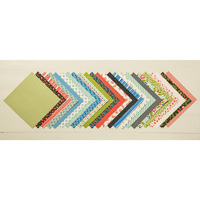
Well a remake was in order for this week's classes using the Pretty Petals papers (which - did I tell you - are on Bonus Deals this week - just over £5 for 48 sheets!! Nice papers... Nice price!!)
And it went down very well.... apart from me not saying LIFT loud enough!!! Oops...but we got there in the end....

Couple of closed views

And here you go - a cut and score tutorial to make one of these for yourself from 12 x 12 card... Please feel free to share any make using this tutorial with me - you can decide whether you would like me to feature here on The Craft Spa blog!! Or not!

Supplies Needed
12x12 Cardstock  Calypso Coral - 12" x 6"
Paper 5 3/4" Square x 2 patterns
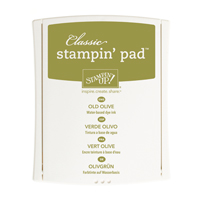
Cardstock Old Olive 3 3/4" Square
Cardstock Very Vanilla 3 1/2" Square
Scallop Square Framelits die

1. Die cut Scallop Square aperture out of centre of 1 piece of paper ( I eyeball but you can draw diagonals on back to make eyeballing MUCH easier!)
2. Score LANDSCAPE Calypso Coral panel in half at 6"
3. Bone Fold (mountain fold)
4. With card blank in tent fold direction ( ie centre fold at top) adhere die cut paper to card blank

5. Place card blank LANDSCAPE on trimmer with papers to right hand side
6. LANDSCAPE. Line up on Top Bar at 7", cut 1" to 5" (2.5 to 12.7 cm)
7. LANDSCAPE. Line up at 11", cut 1" to 5" (2.5 to 12.7 cm)

8. LANDSCAPE. Line up at 8 3/4", score 0 to 1", LIFT, score 5" to 6" (score 0 to 2.5, LIFT,score 12.7 to 15.2cm)
9. LANDSCAPE. Line up at 9 1/4", score 0 to 1", LIFT, score 5" to 6" (score 0 to 2.5, LIFT,score 12.7 to 15.2cm)
10. LANDSCAPE. Line up at 9 3/4", score 0 to 1", LIFT, score 5" to 6" (score 0 to 2.5, LIFT,score 12.7 to 15.2cm)

11. Place card blank PORTRAIT on trimmer with papers/cut sections to top.
12. PORTRAIT. Line up at 1". Cut 1" to 2 3/4", LIFT, cut 3 1/4" to 5" (cut 2.5 to 7cm, LIFT, cut 8.2 to 12.7cm)
13. PORTRAIT. Line up at 5". Cut 1" to 2 3/4", LIFT, cut 3 1/4" to 5" (cut 2.5 to 7cm, LIFT, cut 8.2 to 12.7cm)

14. With mountain centre fold, fold outer scorelines as muntain fold, valley fold , mountain fold
15. Decorate as you desire.


Stampin᾿ Up! Supplies
Table built by craftingbecky.com