Showing posts with label Ferrero Rocher. Show all posts

Thursday, 28 November 2019

Mini Curvy Snowman...

So my catalogue case using the Let It Snow embellishment kit (as shown below...with more details here)
Inspired another make... or even two...
As I suddenly remembered one of my first Stampin' Up! stamp sets was still in my possession... even though it retired many years ago...
Thank you, Cold Play...  LOVING having this set out to play again...

Note that the eyes on the last one... are just inking up 2 out of the 3 dots that form the mouth...


Sunday, 10 November 2019

Golden Frosted Foliage Snowflakes Mini Curvy Keepsake Treat Holder

So my gold Delicata ink pad has finally turned up after being in back order for a while...
So I put it to immediate use...
For a very quick and simple christmas table treat holder made with a simple pass of the new Mini Curvy Keepsake holder die... and finished off with golden Frosted Foliage snowflakes & Cheers to That greeting...
Though I think I may treat myself to the new 1/4" Gold Shimmer Ribbon to finish them off "properly"....

Perfect for our Lindor and Ferrero Rocher balls this year! Especially for my Boxing Day group meet up plans.... as I have always provided a small  - but perfectly formed - christmas chocolatey treat.... and this one is as simple, fast but still striking as you can make!

Thursday, 26 July 2018

Chocolate Treat Holder Cube Tutorial for 3D Thursday

A re-make of this very popular Ferrero Rocher or Lindor ball treat holder (in Foil Frenzy papers)... as requested by my lovely ladies! Re-made in the Share What You Love papers this time round...

And... as a result ... I realised that I didn't share the Tutorial at the time... so now there is a Tutorial for you all.... a simple little cube box with lid... be it for chocolate treats... or rings... or even earrings...
Recipe
Base - A4 card- 10.5cm (4 1/8") Square ( I used Berry Burst here)
Lid - Paper (or Card!) 3" (7.6cm) Square

Tutorial
1. Base cardstock panel. Score at 3.5cm (1 3/8") on all 4 sides 
2. Lid paper panel. Score at 2 cm (3/4") on all 4 sides (Note that I used 2 cm which is actually a generous 3/4" for those of you in the US that have no choice with your equipment...)

3. Dart 2 score lines on 2 opposing sides.
Tip - for neatness - I cut straight up the inside of the score lines on either side of the central section... but then with a slight diagonal dart on the narrow/outside sections...

4. Assemble and stick Base
5. Assemble and stick Lid (using your Base to stick it on... so you know your lid fits!!!)
6. Decorate as necessary.
I used a Stitched Shapes die cut small square, with Cake Soiree greeting and a few fussy cut flowers from the same Share What You Love paper
Oh and if you are using stripes or a paper with a particular pattern orientation... click here to check out how to get the pattern the same all the way round the lid! Simple but effective!

Thursday, 12 April 2018

3D Thursday... Chocolate Makes Everything Better Treat Boxes

Little box with lid designed by yours truly to hold my favourite ball off chocolate!! Whether in Red, Gold, Black or Copper... But a box that would also fit the other ol' golden ball itself...
Made for 20 special ladies.... that spent time with me and each other on the Saturday night after On Stage 2018 in Telford... These were the table gifts that greeted them at our favourite On Stage team outing at Zizzis! And we all had a lovely collection... thank you for my other treats friends!  I felt truly spoilt... it is so wonderful to move in such creative circles with such clever people!!

I will come back to this little box another day... but I will point one thing out... as it is something that I hadn't ever though to do before... until it came to the lid...

I wanted the stripes to all be vertical... on all 4 sides around the lid... which isn't possible when you glue the flaps of a stripy paper on the inside of the lid as you would do normally!! So I went "out of the box"... and just stuck the flaps to the outside instead (on the sides)... perfect stripes all vertical...
Decoration care of Lemon Lime Twist & Tangerine Tango Foil Frenzy stripy Papers for the lid... 

Along with a stamped Stitched Shapes die cut small square using a More Than Chocolate greeting ... and finished off with a stamped and 3/8" circle (retired but still going strong!) punched chocolate... and a gemstone...

And here are the 20 together... actually 19... as the 20th had already gone off on an adventure of its own elsewhere...
And here we all are at Zizzis...
 What a great team of girls!!
And with special mention and thanks to Pip our waiter... who knows how to take care of a large group having a great meal out!!! Still can't believe he remembered us from last time!!


Wednesday, 22 November 2017

Curled Paper Chocolate Topiary

You have no idea how many years this project has been in my head... but has never made it to to the drawing board so to speak...

But this year was the time... and after some lengthy sourcing escapades for the non Stampin' Up! parts... and a disaster or two along the way... it finally all came together... a lovely centrepiece for the christmas table....

Though photographing it was SO hard... and really really does not do it justice!
So this is one of my special Christmas class projects for this year... coming to you at a Craft Spa Class through December... a Merry Little Christmas curly paper Topiary sweet tree... add Ferrero Rocher or Lindor balls... both work as well! Half Day Class... just £25 including 16 treat balls... or come for a Full Day £45 and make the Christmas Lantern too...

And I am so happy with this project... as I know a few people that are really going to LOVE my handmade christmas gift this year.... just hope they are not sneaking a peek here today!!!
Stampin Up! Products Used
Merry Little Christmas papers
Black & White 7/8" Striped Ribbon
Washi Tape Basics Pack 2
Green Sprigs
Year of Cheer Embellishments
Jute Twine

Thursday, 12 January 2017

Sending Ferrero Rocher Sealed with Love...

How about this for a quick & simple Valentine make... full of yummy Ferrero Rochers with a heart!

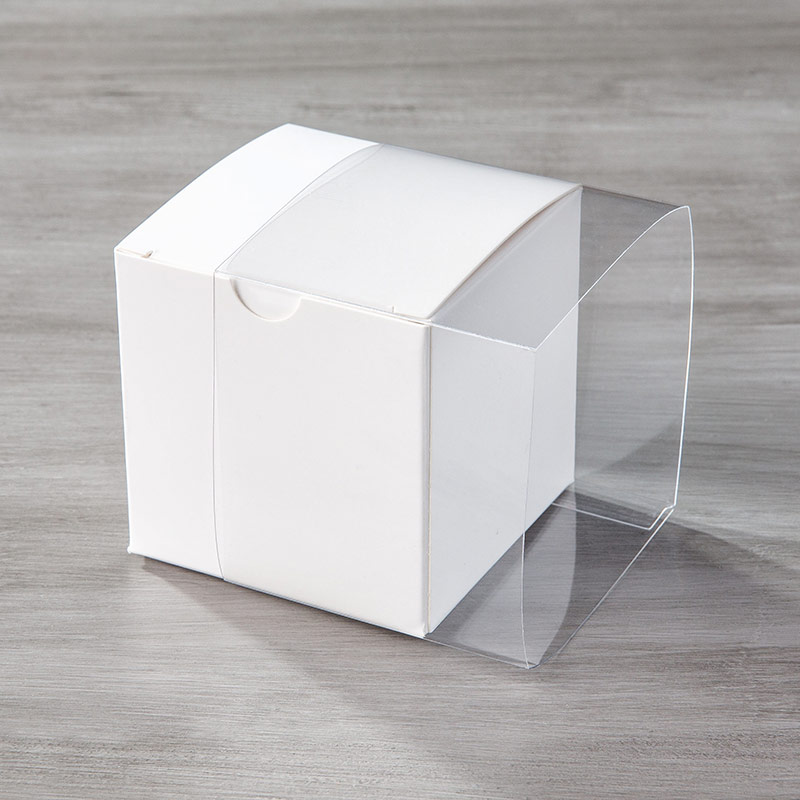
Take a White Gift Box... 
Apply strong Tear & Tape to the 3 top flaps (lid and 2 box sides) and fold down/in (Note I have only used Red Line/Sticky Strip so you can see where I mean to put the glue!)
Decorate front and side faces with four 2 3/4" Squares of Sending Love paper and a Whisper White Sunshine Wishes heart

Die cut 2 each of Whisper White Stitched Shapes circles (coming back in stock very soon btw!!) & Scalloped Layering circles. Stamp with Real Red greeting and Blushing Bride lips from the Sealed With Love stamp set

Punch two Real Red 2" circles. Assemble the 2 discs...
Wrap & adhere Whisper White ribbon round from centre front, round back and to front centre. Add the front disc. Add a bow.
Decorate the back with 2 3/4" x 5 3/4" Real Red mat plus 2 1/2" x 5 1/2" paper. Plus the other disc (this disc adds strength too)
Cut a 2 7/8" Square piece of Thick Whisper White to form an in-box shelf... mine is just stamped simply with a Real Red greeting and Blushing Bride lips...
Ink up and stamp 8 Real Red square frame images plus a greeting for the heart... cut out by hand... adhere to 8 Fererro Rocher using Glue Dots...  

Hard to spot -but note that the heart frames are also over-stamped with Blushing Bride diagonal lines...
Slip the clear sleeve onto the box from the front...great way to seal in those treats!
Thank you ( again) to Ginny Musgrove Smith for sharing this fabulous idea with these boxes. I just had to use the concept straightaway...


Monday, 5 December 2016

Candy Cane Lane Treat Holders

Needing something even simpler and quicker for your Ferrero Rocher or Lindor ball treats for your christmas table...
Cut a few Gingerbread Houses out from your Candy Cane Lane papers... make simple box holders and stick together! The box holding the treat is just a 2 3/4" square piece of Early Espresso card scored at 3/4" on all 4 sides...
Pop them in a dome for instant decoration...
And here is the village... too cute!

Wednesday, 30 November 2016

Snow Globes

 
Carrying on with small Treat Holders for the christmas table... here is another one for your Ferrero Rocher or Lindor Balls... 

But before I start... I have news for you... Stampin' Up! are releasing Year End Closeout Deals very soon... coming 1st December... lots more discounted items so more on that tomorrow... but if you happen to be online after 11pm tonight... check out my Online Store to see the details.... many items only while supplies last!

These very simple little Snow Globes will go down well amongst my skiing mad family & friends. And actually... I may use these for the New Year table
Used Mountain Adventure for decoration and greeting, Stitched Shapes Framelits for the circle, Jar of Love for the lid and Christmas Pines for the snowflakes. Finished off with Dazzling Diamonds glitter on the trees and snowflakes

And the box behind is just a 3 3/4" Square piece of Whisper White card, Scored at 1 1/4" on all 4 sides. Perfect for hiding the treat in...

Friday, 25 November 2016

Christmas "Chocolate Ball" Treat Holder Jar


Quick share of one of the christmas treat holders that will be adorning some tables around here...

These were inspired by this swap at the On Stage Telford event... but unfortunately there is no name on it to credit the maker! So please let me know if it was you.... and thank you so much for your clever and gorgeous swap (and the chocolate eclair... my favourite!)
Couple of Jar of Love jars stamped & white embossed and then die cut. Greetings care of the Candy Cane stamp set - perfect for the job...

Stuck front and back to a little box holding the Ferrero Rocher or Lindor ball... finished off with a holly & berry spray (from Hang Your Stocking stamps and Christmas Stockings dies - both really well reduced this month!) and a bit of candy cane ribbon
The box holding the treat is just a 2 3/4" square piece of card scored at 3/4" on all 4 sides...

Quick & simples...
And front and reverse...
But I have to admit... mine is going to have a Lindor Ball in!! So I think it will be red for Lindors... and green for Ferrero Rocher on my table...

Saturday, 19 December 2015

Ferrero Rocher Christmas Pud

A remake of an oldie - but a goodie!
Perfectly sized to hold a single Ferrero Rocher...
Perfectly sized to add a subtle christmas treat to your christmas table
The box is just a simple 1 1/4" cube...

Cut a 3 3/4" square of card - score at 1 1/4" then 2 1/2". Then turn 90 degrees and repeat. Dart up 2 scorelines on 2 opposing sides and adhere together!
More details on the punch art pud here...
But this time I used the Sheltering Tree large leaves stamp to stamp the currants etc