Showing posts with label UK crafty blog. Show all posts

Tuesday, 22 August 2017

WOW! 8 year Blog-A-Versary of The Craft Spa...

Another Anniversary! Must be a week for them....

I really can't believe that I have been scrawling away and sharing my creative soul on this blog for 8 years now... though the first 4 years or so were a bit more ad-hoc!

Hopefully I have brought you all some inspiration, some new ideas, a few tutorials you have used... and a laugh or two... usually at my expense!

And I just want to say a big thank you for your support and encouragement of my crafty endeavours - without you none of this would get written and shared!

Though I will admit to life being very busy at present as the household prepares for my son's cruciate ligament knee operation this week , 7-14 days of crutch mobility... and then university in 4 weeks time... so I will apologise in advance should my daily scheduling not happen quite as you are used to!!

But do bear with me... as once he is gone... I will have more time to spend on creating and sharing! I might even start to do some extra things you wouldn't expect!! Could be a new chapter if all goes to plan...


Monday, 10 April 2017

In the Meadow Part 3

Another quick card I made whilst In the Meadow and the Watercolor Pencils were out...

But before I start on the card... don't forget that the Retiring List publishes at 8pm UK tonight... I will be back to publish the link as soon as it posts!
Background just Wet-Aquapainted (ie scribble pencil on plastic, add a drop of water and colour across the watercolor card using the AquaPainter) & then very quickly dabbed with a tissue to add a bit of extra texture/clouds...

Corn at the front with the Damp & Stamp Technique... click here for directions on that... 

And here is the trio of In The Meadow using the Watercolor Pencils cards together...
Hope to "see you" later... 8pm for the Retiring List! Please remember to just go and order online... quoting this month's Host/Stampin Rewards Code JU9WH4MV. Yes you can email or ring me for my Tuesday night order but then I can't promise to get you everything you want at first view! And I will be very busy oohing and aahing over the new catalogue that is released to we demos at 8pm - so you may find me a bit distracted!!!


Friday, 24 March 2017

Watercolor Pencils # 11 - Damp & Stamp Technique Parts 2 & 3

Another card made with the Watercolor Pencils Damp & Stamp Technique (as shared earlier here)... but a little more controlled this time... 

First the background... Pacific Point and White pencils scribbled onto plastic (Stamp A Ma Jig sheet perfect! Clear blocks not...)  Spritzed (or added drop of water from the Aqua painter) and then Aqua painter washed the sky on the Watercolor Paper. Same but with Old Olive pencil for the grass... left to dry...
Then onto the Damp & Stamp technique Part 2... I used the Aquapainter to cover the leafy areas of the stamp with water... then coloured those areas with the Old Olive pencil... then I went back with the Aquapainter and applied the water to the trunk and branch areas... then coloured those areas with the Early Espresso pencil. Then spritzed and then stamped... (Note to self for a remake! Don't add water to those long grass bits in the centre of the trees!!)

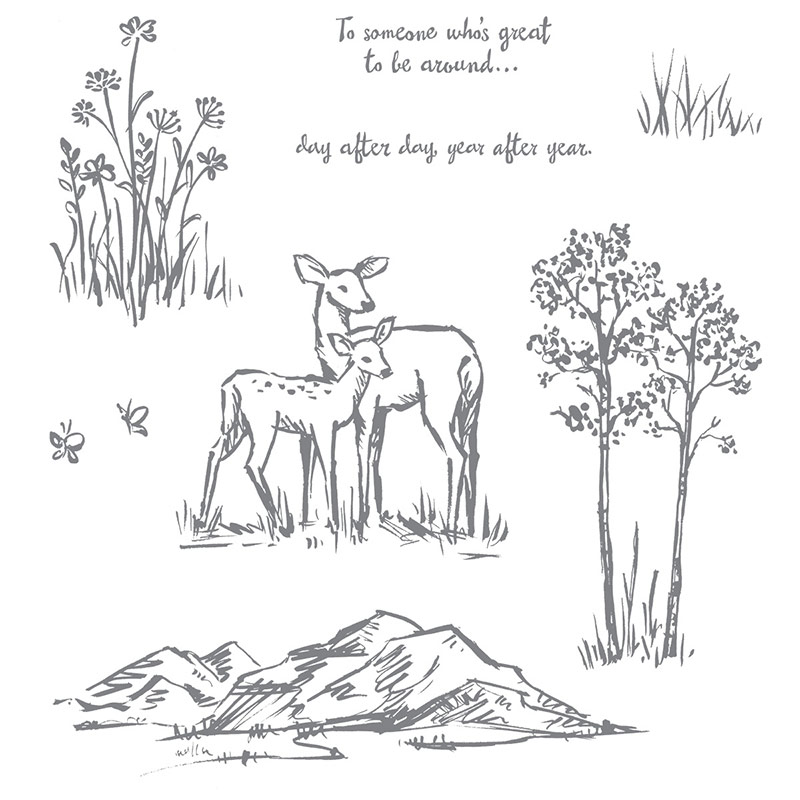
And then onto the Damp & Stamp Technique Part 3... using the grass stamp in the In the Meadow set... wet just the bottom of the grass stamp (see image top right).... add Old Olive pencil... Spritz and stamp upside down... perfect grass length!
In the Meadow Clear-Mount Stamp Set


Thursday, 23 February 2017

Falling In Love & Dragonfly Dreams - The Blues one!

Quick share of today's card...

This is a card made "kind of" from scraps!!! - as the paper panel is the gutted centre from my Heart Wreath card shared here... (gutted at 1 1/4" from all sides fyi) ... and the greeting banner is the scrap from cutting out the two Very Vanilla panels used here... kind of neat!
Falling in Love papers meets Dragonfly Dreams stamps & dies and introducing the other BIG word in Happy Celebrations.... how much do I love this "celebrate" greeting!!

And I have to admit that these papers have really proven to be versatile... and are not just in the pinks!!
Oh and here is the inside... thought it worthy of decorating too...
Love the softer look of the just the dragonfly wings and body...

And a little tip... I have used clear embossing powder on the Very Vanilla cardstock so that the cream card colour can shine through... and the colouring is done using Pool Party and Mint Macaron markers over the embossed and die-cut dragonfly (ie Emboss Resist... remembering to wipe off the excess ink with tissue paper afterwards)

Tuesday, 7 February 2017

Urban Underground & Nailed It #2

Second in the series of Team Training Urban Underground & Nailed It makes... this was definitely my favourite Julie!! No surprises there hey!
Lovely little "pull out pop up slider easel type" card of which I first saw samples made by my lovely teammate Chris Guile at a training session last year (and yes I was excited wasn't I Chris!) Sorry but I forget the name... Pop Up Slider Card maybe!? But more on that another day as I already have an adjustment to make it easier to make ... 
Folds flat to put in the envelope and post... 
Love it!

More details on the stamps and dies and what else was used on the first post of the series here...

And a great cardmaking day today! 3 new cards made... with a couple of new designs I have come up with... but I forgot to photo! Oops... Back with them someday soon....

Monday, 5 December 2016

Candy Cane Lane Treat Holders

Needing something even simpler and quicker for your Ferrero Rocher or Lindor ball treats for your christmas table...
Cut a few Gingerbread Houses out from your Candy Cane Lane papers... make simple box holders and stick together! The box holding the treat is just a 2 3/4" square piece of Early Espresso card scored at 3/4" on all 4 sides...
Pop them in a dome for instant decoration...
And here is the village... too cute!

Tuesday, 8 November 2016

Lovely as A Tree & Father Christmas

Another quick share today... Once I had used the Christmas Magic trees with the Father Christmas greeting frame stamps for yesterday's card... I was reminded of one of my favourite all time cards - so I had to quickly go upstairs and grab my Lovely as A Tree set...

About half an hour later and 4 cards were made... but this was my favourite...
Top part of frame white embossed for the Emboss Resist Technique. Trees and bottom frame part stamped in black. Snow line masked and Dapper Denim sponge brayered over the top. And a sprinkling of Dazzling Diamonds over Fine Tip Glue to finish it off...

Stamped panel then layered onto Whisper White and finally onto a 5 1/2" Square Dapper Denim card blank...


Wednesday, 14 September 2016

Detailed Santa - The Red One!

One of my favourites from the Autumn Winter catalogue... stunning die cut and a fabulous co-ordinating stamp set,  Greetings From Santa... all wrapped in a bundle with 10% off...
Stamp set here ...look  at those lovely greetings! Available in wood and clear...

Greetings from Santa Clear-Mount Stamp Set

Dies here... cuts like a dream! And yes I used my Precision Plate (why would I not! Job so much easier with no faffing...) - but a quick test confirmed that I don't need to if my PP is not out....
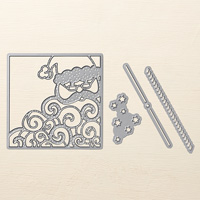
Detailed Santa Thinlits Dies
Bundle here... again available in wood and clear

Can't wait to share my other Santa makes with you!!! I have had some fun....

Thursday, 25 August 2016

And the Winner is....


It is time to announce the winner of my 7 year Blog-A-Versary candy...

Note that this is my second post today... scroll down if you just want to see today's creative post...

So drum roll please... the draw said... D'Ann in the USA
D' Ann said.... Happy Blog-aversary! I am in the US and follow your blog by email for about a year now. Your cards always have the wow factor and are so gorgeous & always inspiring! I love that you provide measurements in imperial. I would love to see you create holiday treat bags or boxes. 

So D'Ann... you have won the 2 tutorials for the Handled Cantilever Box and the Suitcase Mini Album...
Retro Fresh Man Bag, Briefcase, Make Note, AmandaBates,CraftSpa 029
But wait... I have not finished... I double dipped!!!!

I then decided to do a UK only draw too as the SU! goodies were sitting there all forlorn and in need of a better home....
So another drum roll please..... the 2nd draw said ...
Ali in the UK...
Ali said ... Happy anniversary, I am in the UK and follow your blog daily you are a must go to blog, I love your makes and find them very inspiring

So yes Alison... you have won the booty (although you can still choose to have the 2 tutorials as an alternative)

If D'Ann and Alison would like to click here and email me ... then your blog candy will be on its way to you both very soon.... congratulations! And thank you for your really lovely comments... blush!

Thank you so much to everyone that left a comment... your feedback was so useful to me when thinking about what to post in the future... and I have a few new ideas to try now.... Though some of the other comments made me blush too!! You are all so kind and so lovely.... I will be back to you with a reply to your comments... my other life just completely took over after I posted my blog candy post.... maybe end of next week!

I am glad to see that I am still posting a lot of crafty inspiration for so many of you.... and that many of you are learning from me and getting use of the tutorials I post. It makes it all worthwhile - as well as enjoyable!

Tuesday, 23 August 2016

Wonderful Year & Embossed Pine Boughs Part 3

Two for one today... and note there is a group shot at the end of this post...

So back to my intended use of the BIG wording in the Wonderful Year stamp set... 2 to choose from...
As the greetings are so large ... a larger white mat was required...and then I realised I am getting already low on my Copper Foil Sheet stash... really should have just pre-ordered 3 packs!

So instead I wiped the Versamark pad thickly along each edge of the embossed Pine Boughs panel, added copper embossing powder, tapped off and heated to melt...
Not a neat edge on either card for my taste... as I couldn't wipe exactly (maybe not patient enough!)... but could be a way round whilst you are waiting for your Copper Foil sheets ... so I thought I would share in any case...
And as I know you like these... here is a group shot for you... so far!
Another in this series tomorrow as I thought of something else after the group photo...

And then still loving this stamp set... which is code for more coming...

Sunday, 14 August 2016

Thoughtful Branches Holly

And here is the last of my topiary trio... a holly bush dressed for Christmas...

Spot the details...
You probably won't be able to see this detail... but the leaf canopy is domed... adding real texture to the card. 

Really easy to do... after you have used your Big Shot Die Brush to remove all the die cut scraps... turn the leaf canopy over on the mat and give it another brush (or 3)... everything all pops up ( well down actually!)  to form the dome shape... 

It is also easy to glue down that way - just Tombow or Precision Tip Glue around the edges and be careful to leave the dome shape in the centre as you stick it down...

A double spoiler alert now... a red glitter-embossed Holly Berry Happiness punched bow... yes glitter embossing powders are coming your way... My initial glitter-embossing wasn't so deep in colour ( I think my Versamark needed a re-ink!)... so  - rather than go upstairs to get the Versamark refill - I cheated! I stamped the bow in Real Red, then I stamped over in Versamark, applied the Red glitter-embossing powder and heated to melt...worked a treat! Lovely and glittery

And 1/8" hand punched circle red glimmer paper berries...
Another Seasonal Bells punched and trimmer plant pot - a different bell this time! And banner again from Seasonal Bells...

And a tree trunk from a Soft Suede sliver stamped with the woodgrain effect stamp in Soft Suede from Timeless Textures...

And if this is the first of the Topiary Trio you have come across - and some of the new Autumn Winter/Holiday product names are new to you! Please feel free to go back a few days worth of blog posts when more is revealed...


Thursday, 28 July 2016

Foxy Suite #8 - The Round Up Picture....

I bet you thought I was never going to end sharing my Foxy Suite Training makes... If you have missed any... just scroll back a few days!

We made 6 at Training... I had to really concentrate!!! Plus the 3 swap projects making my lovely display complete with 9 projects...

Saturday, 11 June 2016

Keeping it Simple and Floral...

I have to admit that the Detailed Floral Thinlits dies were right at the top of my New Catalogue Wish List... as they are just stunning... Along with their co-ordinating stamp set, Floral Phrases. And available in a Bundle with 10% off... in Wood mount and Clear mount

I have been working hard with them today!!! Which means a few makes to come... and some tips in using them too...
But my first share is pretty much as intended... and pretty much as the sample on the catalogue page/on line store... just a night of navy card base instead of white and no random sequins....

Oh and I have flipped the thinner part to the bottom... just suits my eye more!!

Friday, 10 June 2016

Helping Me Grow Notecards

Love these... so simple... so quick and so effective... so I had to share... But hold on... I didn't actually make the first one pictured....

This was the gorgeous thank you card from Kelly in the Stampin' Up! UK office... that I picked up at registration at On Stage Telford... and then rushed immediately over to Kelly to say thank you! Now admittedly Kelly didn't make this herself either!!!

Which reminds me of the days I first started cardmaking... I used to find that many friends and relatives rang me up to thank me for their hand made christmas card... used to tickle me pink... got to love this creative world and the special feelings it gives to us and the recipients of our makes... Sorry I digress....
But I did make the second one... and so did my ladies at classes last month... can you spot the difference!! The Washi Label punch used on the first had retired and all stocks had gone!

So I used the Decorative Label punch instead... we stamped on a narrow strip of Sahara Sand card... and then punched using the central part of the punch... works a treat and will be used again this way... As they say ... from adversity... comes a great idea!!

And then I had a play with a Crumb Cake note card... embossing the flowers in white this time - and Aqua-Winking with my Gold Wink of Stella again
 
Though (oops) I have only just spotted that I grabbed the washi punch for this one.... Silly me... And BTW... the 1/2 " Circle Punch punches that notch on the left hand side... 
And finally an admittance... this is not what I was planning on posting today... I had rushed around with new stash... made a few lovely projects... took the photos... was eager to share... and then yes... you guessed it... technology decided to do its own thing... and I can't access the photos on my PC for now.... hey ho!! Manana...