And the final card of my Celebratory Trio... thanks to Kate (another of my lovely Stampin' Up! sisters)...
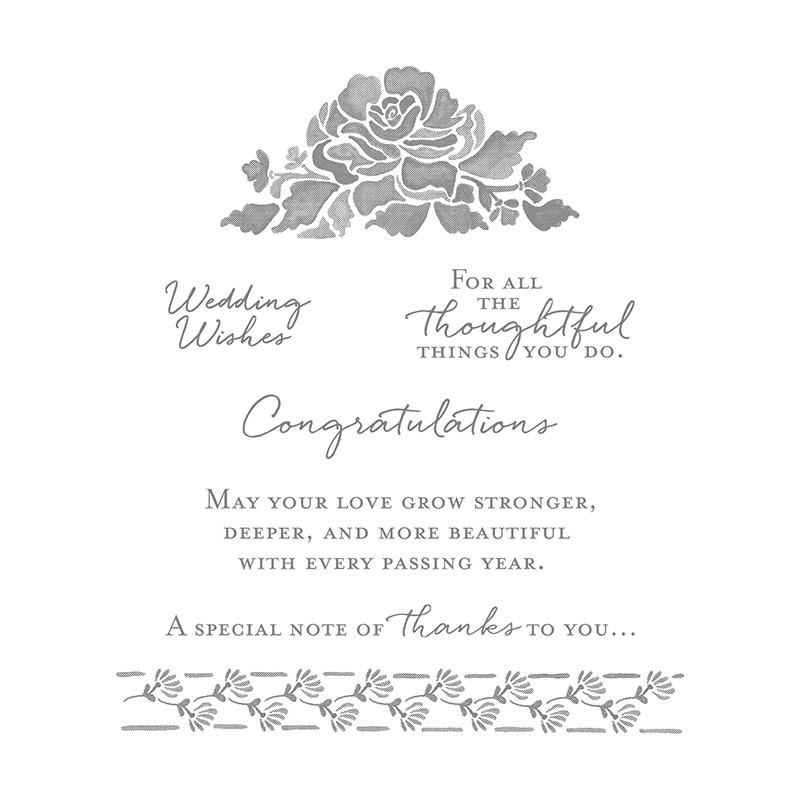
Kate used Floral Phrases and the Flourish dies to create this beautiful Berry Burst & White card...
Thank you so much for your lovely cards Julie, Kate and Julie... you really know how to make someone feel special & even happier!
Showing posts with label Floral Phrases. Show all posts
Friday, 1 December 2017
Friday, 30 June 2017
Fresh Florals & Phrases Double Z Joy Fold Card
Quick share of another A6 Double Z Joy Fold card today... as well... have to admit this week is one of those weeks! Particularly with son and heir having just finished his A levels... Lots of things not been to my plan... but hey... it is his time to have a great week celebrating!
So moving onto the Powder Pink papers in the Fresh Florals papers that co-ordinate with our new lovely In Colors... and using the also co-ordinating Floral Phrases stamp set...

Simply decorated card... with the ease of the final dressing using the Itty Bitty Bow and the Black Mini Sequin trim to the bottom left... I would highly recommend both of these!
And here is a link to the Tutorial for this actual card.... though the eagle eyed may spot that I actually made a mistake... as it was supposed to be the fully opening version for which the tutorial was shared here... I recommend the latter....
And for my US readers... never fear... the US card version tutorials are coming very very soon... I can only blame my son's somewhat unexpected daily celebrations (and resultant mum taxi service!! Disadvantage of living in the countryside!)
Friday, 1 July 2016
Fancy Fold Friday - Double Z Joy Fold Card
You didn't think I would leave a series without having a Fun Fold card to show you did you!!?
So my Butterfly Basics class this week was a re-run of my June Beginners Class. But this time we had some experienced stampers... so I had a great excuse to carrying on making some more cards!! And to start to use my pack of Serene Scenery papers too...
And I had a couple of people who were missing form my last class so I thought I had better show them how to make my new Double Z Joy Fold card before they spotted them all around the room!! Go here if you wish to make one for yourself... and don't fancy the trip to sunny Yorkshire in the UK!!!
Spot the add of the postmark to the circular patterned paper in the middle... and the copper embossed butterfly and wording... oh and the butterfly antenna are just done by hand...
And for tomorrow... something completely different to butterflies!! And the monthly Blog Hop too... See you then...
So my Butterfly Basics class this week was a re-run of my June Beginners Class. But this time we had some experienced stampers... so I had a great excuse to carrying on making some more cards!! And to start to use my pack of Serene Scenery papers too...
And I had a couple of people who were missing form my last class so I thought I had better show them how to make my new Double Z Joy Fold card before they spotted them all around the room!! Go here if you wish to make one for yourself... and don't fancy the trip to sunny Yorkshire in the UK!!!
Spot the add of the postmark to the circular patterned paper in the middle... and the copper embossed butterfly and wording... oh and the butterfly antenna are just done by hand...
Greetings from a variety of stamp sets!! Congratulations and Wedding Wishes from Floral Phrases. On Your from hostess Time of Year and Happy Day from Perfectly Wrapped
And for tomorrow... something completely different to butterflies!! And the monthly Blog Hop too... See you then...
Friday, 24 June 2016
Scallop Tag Topper Concertina Card Tutorial
Another couple of versions of the Tag Topper Concertina Card for you today...and seeing as it is Fancy Fold Friday... the recipe and metric/imperial (inches) tutorial(s) for you...
Metric Recipe
Paper 12x12 Floral Bouquet x 1 piece
Card Sahara Sand 5.5 x 9cm (x10)
Card Whisper White 5 x 8.5cm (x10)
Ribbon x 24"
Imperial (inches) Recipe
Mmm...2 ways to do this.... Firstly the exact same dimensions (so scoring every 2 9/16") ... and then the easier version!! (every 2 1/2") Oh I am going for the easier version! It will look more or less the same!!
Paper 12x12 Floral Bouquet x 1 piece
Card Sahara Sand 2 1/4" x 3 3/4" (x10)
Card Whisper White 2" x 3 1/2"(x10)
Ribbon x 24"
Tutorial
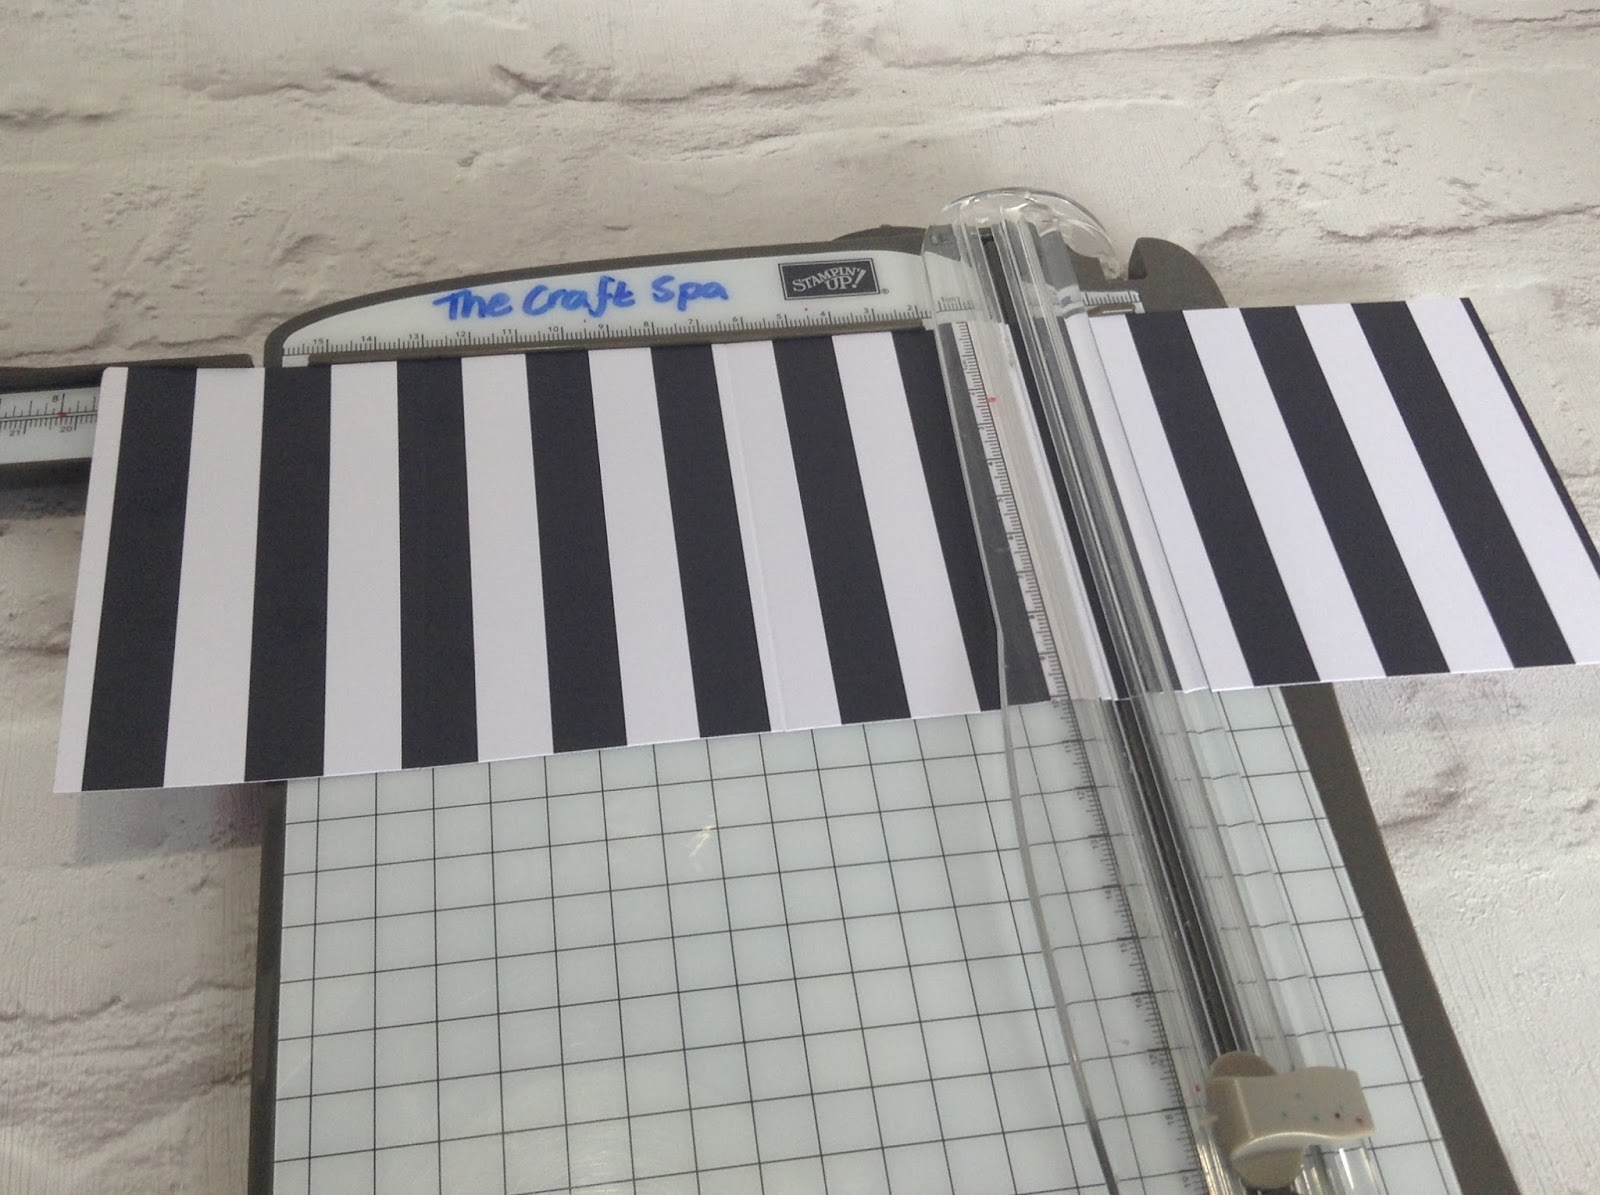
1. Cut 12x12 paper into 3 x 4" strips
TIP - easiest if you use paper with no pattern match/directional pattern!!
But otherwise... think about the pattern direction you want to show on the front & back of your finished card eg for stripes ending up vertical on my finished project - I need to cut the 4" strips looking at horizontal stripes!)
2. Score 2 strips LIGHTLY every 6 1/2cm ( ie 6.5, 13, 19.5 and 26cm)
OR every 2 1/2" ( ie 2 1/2", 5", 7 1/2" & 10")
4. Trim off the last short section on ONE of the strips
5 Pick up the 3rd strip and turn 180degrees (so any pattern direction is facing the other way up) and score LIGHTLY every 6 1/2cm ( ie 6.5, 13, 19.5 and 26cm) OR every 2 1/2" ( ie 2 1/2", 5", 7 1/2" & 10") Sorry - no obvious pattern direction to see here!!!! But if you look closely to right and left of the strip you will see that it has been turned 180degrees.... so that the left has become the right...
4. Pick up the 2 longer strips & place 2 short sections together
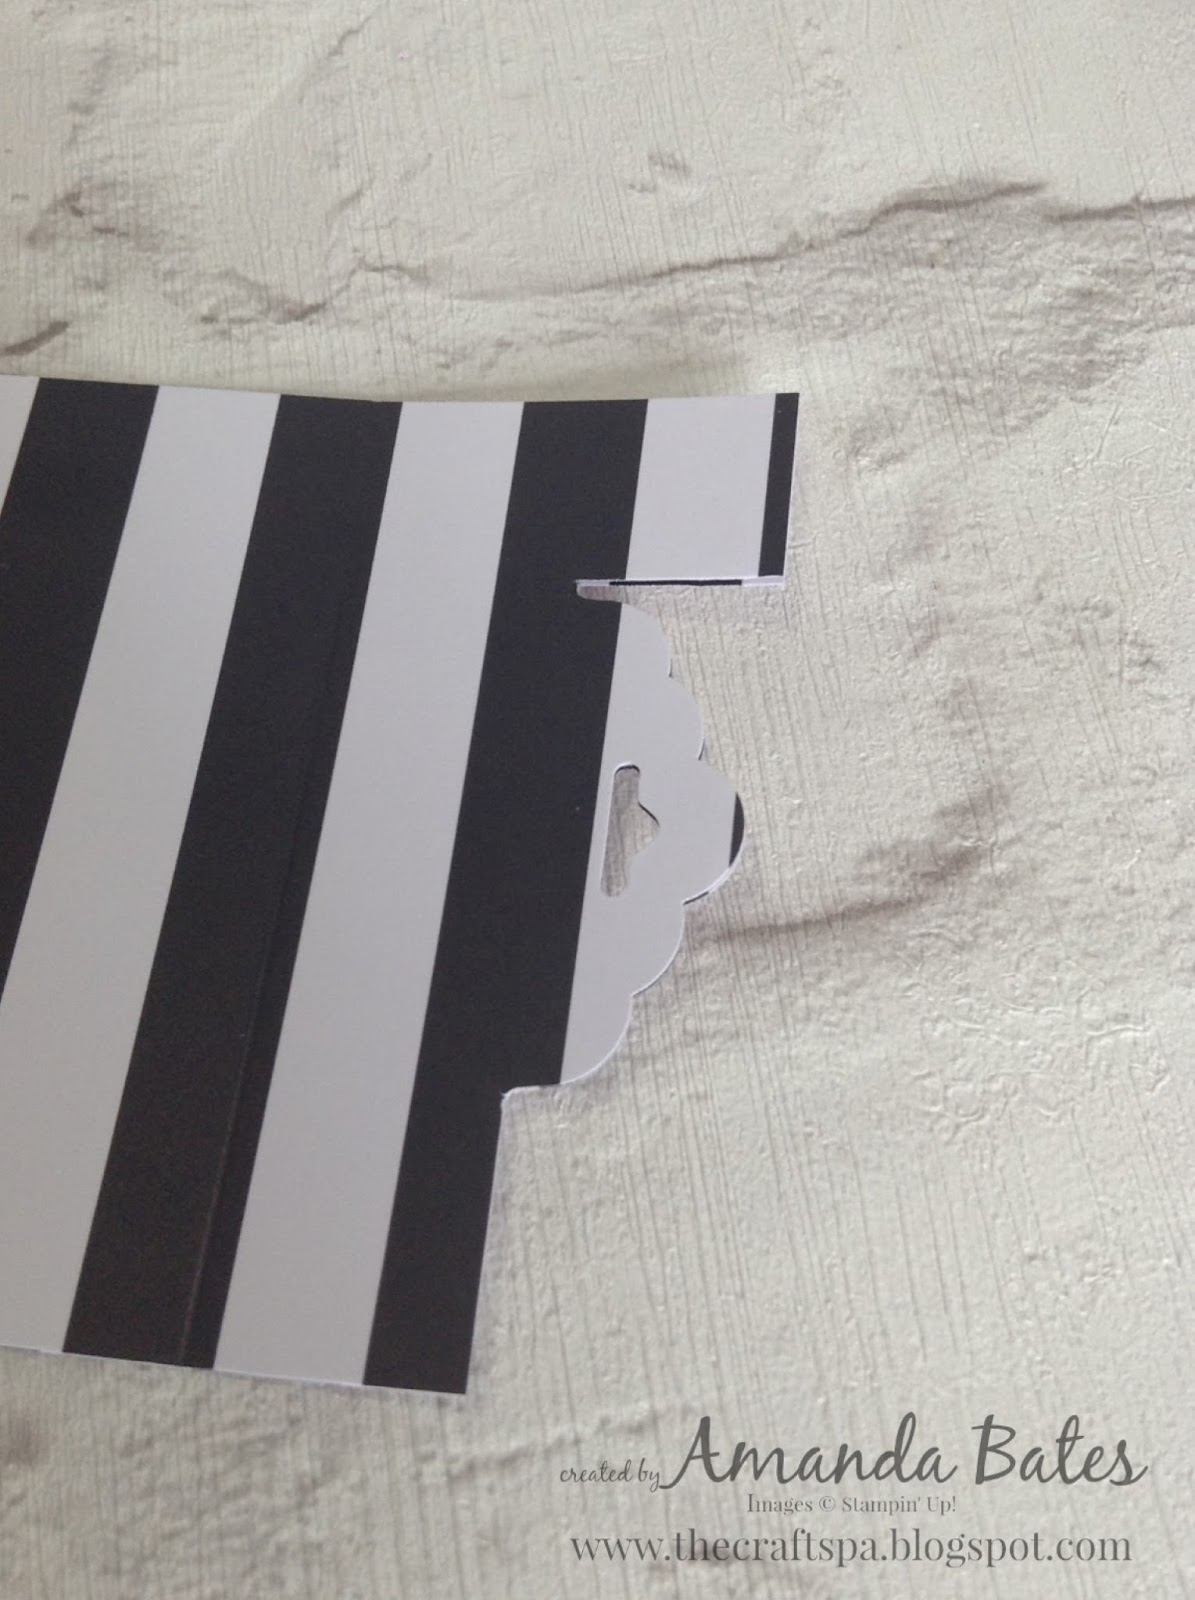
5. Scallop Tag Topper punch those short sections
6. Trim off the "shoulders" (trimmer or scissors will do the job!)
7. Concertina fold shorter strip (mountain, valley, mountain with front pattern facing you) & place standing up in front of you!
8. Concertina fold other 2 strips from short punched section end (mountain, valley, mountain,valley with front pattern facing you)
9. Place standing up in front of you with shorter punched sections to outsides. One to left and other to right of the smaller (central) piece
10. Adhere longer pieces to shorter/central
11. Decorate as necessary. But don't stick your decorative front on yet!!
See this alternative to the birthday greeting version I showed here... I love the add of the 2U.... Nicky was inspired with her solution to having stuck her lettered mats down (cough) differently!!! And thank you to Heidi for the Retirement version...
Die cut Letters decoration tutorial here...
Night of Navy circle mat is 1 3/4" circle punched
White greeting circle is 1 5/8" circle from Layering Circles dies
Floral frame is Floral Phrases rose spray stamped above and below along the straight line & then handcut...
12. Place ribbon up through the punched hole on the left hand side, pull through over to the right and lay across the front. ( Tip - NOT through the right hand side punched hole)
13. Lay the LHS of the remaining ribbon across to the left, down & around the back and across to the right. Size as necessary (with bow allowance)
TIP - I personally find it easier to have the front & back ribbon lengths to be the same size off to the right... and then tie the bow and trim off as necessary... but you do cut off a few inches...
14. Adhere your decorative front (TIP - you only want glue to the left!!!)
15. Decide how you want to have the final fold of your card... I usually leave as a double fold as shown here... but you can have as a single fold too (example here ) ... and then tie off to close & make a bow with your ribbon. Trim ribbon as necessary...
16. Pop in an envelope (Double Fold fits nice and snugly/protectively into a Stampin' Up! medium envelope or a standard C6 envelope is great if your ribbon bow has gone off to the side!) or make an envelope box (Tutorial here) for a Single Fold version
If you prefer a video tutorial to the Metric Tag Topper Concertina Card... Julie has kindly already shared one here...
This is a remake of a fabulous card produced by Julie Kettlewell for our Quarterly Training over 2 years ago... but one that I have re-made a few times... as it is such a fabulous and special card and always causes a real WOW... Though I have to admit they do always look better in the flesh than on a photo... a card this long is difficult to photo!!
Metric Recipe
Paper 12x12 Floral Bouquet x 1 piece
Card Sahara Sand 5.5 x 9cm (x10)
Card Whisper White 5 x 8.5cm (x10)
Ribbon x 24"
Imperial (inches) Recipe
Mmm...2 ways to do this.... Firstly the exact same dimensions (so scoring every 2 9/16") ... and then the easier version!! (every 2 1/2") Oh I am going for the easier version! It will look more or less the same!!
Paper 12x12 Floral Bouquet x 1 piece
Card Sahara Sand 2 1/4" x 3 3/4" (x10)
Card Whisper White 2" x 3 1/2"(x10)
Ribbon x 24"
Tutorial
1. Cut 12x12 paper into 3 x 4" strips
TIP - easiest if you use paper with no pattern match/directional pattern!!
But otherwise... think about the pattern direction you want to show on the front & back of your finished card eg for stripes ending up vertical on my finished project - I need to cut the 4" strips looking at horizontal stripes!)
2. Score 2 strips LIGHTLY every 6 1/2cm ( ie 6.5, 13, 19.5 and 26cm)
OR every 2 1/2" ( ie 2 1/2", 5", 7 1/2" & 10")
4. Trim off the last short section on ONE of the strips
5 Pick up the 3rd strip and turn 180degrees (so any pattern direction is facing the other way up) and score LIGHTLY every 6 1/2cm ( ie 6.5, 13, 19.5 and 26cm) OR every 2 1/2" ( ie 2 1/2", 5", 7 1/2" & 10") Sorry - no obvious pattern direction to see here!!!! But if you look closely to right and left of the strip you will see that it has been turned 180degrees.... so that the left has become the right...
4. Pick up the 2 longer strips & place 2 short sections together
5. Scallop Tag Topper punch those short sections
7. Concertina fold shorter strip (mountain, valley, mountain with front pattern facing you) & place standing up in front of you!
8. Concertina fold other 2 strips from short punched section end (mountain, valley, mountain,valley with front pattern facing you)
10. Adhere longer pieces to shorter/central
11. Decorate as necessary. But don't stick your decorative front on yet!!
See this alternative to the birthday greeting version I showed here... I love the add of the 2U.... Nicky was inspired with her solution to having stuck her lettered mats down (cough) differently!!! And thank you to Heidi for the Retirement version...
Die cut Letters decoration tutorial here...
Night of Navy circle mat is 1 3/4" circle punched
White greeting circle is 1 5/8" circle from Layering Circles dies
Floral frame is Floral Phrases rose spray stamped above and below along the straight line & then handcut...
12. Place ribbon up through the punched hole on the left hand side, pull through over to the right and lay across the front. ( Tip - NOT through the right hand side punched hole)
13. Lay the LHS of the remaining ribbon across to the left, down & around the back and across to the right. Size as necessary (with bow allowance)
TIP - I personally find it easier to have the front & back ribbon lengths to be the same size off to the right... and then tie the bow and trim off as necessary... but you do cut off a few inches...
14. Adhere your decorative front (TIP - you only want glue to the left!!!)
15. Decide how you want to have the final fold of your card... I usually leave as a double fold as shown here... but you can have as a single fold too (example here ) ... and then tie off to close & make a bow with your ribbon. Trim ribbon as necessary...
16. Pop in an envelope (Double Fold fits nice and snugly/protectively into a Stampin' Up! medium envelope or a standard C6 envelope is great if your ribbon bow has gone off to the side!) or make an envelope box (Tutorial here) for a Single Fold version
If you prefer a video tutorial to the Metric Tag Topper Concertina Card... Julie has kindly already shared one here...
Wednesday, 22 June 2016
Birthday Floral Boutique Concertina Card
Another version of the Wedding Card posted earlier in the week... same card, different Floral Boutique paper pattern and the addition of the Floral Phrases rose sprays at either end as Birthday only 8 letters whilst Wedding Day is 10...
The Recipe and Tutorial will be for my Fancy Fold Friday post this week (as it is now late at night and I have a few photos to take!!) ... but for today... as quite a few of you have asked... how I did the letters...
1 Die cut your letters or numbers
2. Place your numbers or letters on a piece of scratch paper...
3. Grab your Night of Navy ink pad and the rose spray stamp from your Floral Phrases set
4. Ink up and stamp centrally...
5. Re re-stamp without inking above and below... adds a bit of extra dimension...
The Recipe and Tutorial will be for my Fancy Fold Friday post this week (as it is now late at night and I have a few photos to take!!) ... but for today... as quite a few of you have asked... how I did the letters...
1 Die cut your letters or numbers
2. Place your numbers or letters on a piece of scratch paper...
3. Grab your Night of Navy ink pad and the rose spray stamp from your Floral Phrases set
4. Ink up and stamp centrally...
5. Re re-stamp without inking above and below... adds a bit of extra dimension...
6. Repeat for each letter...
And an extra tip for you... Some letters (such as I) can be stamped in one.... as per my O example below... but have your pokey/piercing tool or tweezers or something to hand... as those letters will stick to the stamp... and you don't want inky fingers!!!
7. And there you have it... easy and subtly decorated die cut letters and numbers... pretty too!!
And in preparation for my Friday post... have your Scalloped Tag Topper punch and a piece of 12x12 paper ready to go... as well as your alphabet dies, Floral Phrases stamps, Night of Navy ink and Sahara Sand and Whisper White card...and co-ordinating ribbon......
Monday, 20 June 2016
Floral Boutique Wedding Concertina Card
Haven't made one of these for ages... but the Floral Boutique papers are SO lovely - it had to be done...
I had been asked to do a special card for a Wedding...so here it is...
We ended up with a few variants as the classes went on over the week...so I have more to share... with some tips too...
But in the meantime... guess you could say we are loving the Large Letters dies!! And the Floral Phrases stamps...
Wednesday, 15 June 2016
Super CAS Thinking of You Floral Phrases Cards
I don't think you can get much simpler than these... but they say what you need to say when you need to say it!!! Using Floral Phrases and hostess Time of Year stamp sets
Added 3D'd roses on the first one for a bit of extra dimension...

Night of Navy Rose sprays second stampings... so wording more vibrant...
Monday, 13 June 2016
Detailed Floral Phrases Roses - and a few tips....
Love the rose image in the Floral Phrases set... Armed with scissors you can have a gorgeous individual rose image in about 30 seconds... or about a minute will result in a couple of leaf sprays which come in handy too...
And I have to admit that the rose & leaves image detracted from my liking of the stamp set at first... In fact I wasn't going to buy the bundle... but then I realised I could get the clear mount bundle for free from Stampin' Up! with some of my earned rewards... and so I did... phew... as I love the greetings... and this image after all....
So back to the card... it started off life as the super CAS panel... but I noticed that there was a mark on my panel so I couldn't stamp a Floral Phrases greeting as intended... so my Hostess Time of Year stamp set was still out... and the banner made for a great cover up job...
So first tip for you here (of 3) ... the mark was because a piece of die cut scrap was on my Precision Plate when I went to cut the next panel...so when the pressure was applied through the Big Shot... there was a small dent left behind... so make sure you don't have any scraps lying around on your plate!!
Back to the card... I thought it was a bit... plain... so I faffed around with a few ideas and then realised that that rose would make a great add on... these are second stampings ( ie ink ued in Night of Navy, stamped off onto a scrap of paper, and then stamped on Thin Whisper White card) And yes I had to use the leaves too... I do like my fussy cutting!!
And a second tip for you (of 3) ...for the rose... you can cut it out at different sizes... really easy as there are the lines there for you to cut round... so my top left rose is full size...whereas my bottom right rose is smaller....
And a third tip(s) for you... for the die-cutting of the Detailed Floral dies... which I am finding really straightforward!! After a bit of playing around initially... Which is incredible with this amount of detail....
For me the recommended Precision Plate is key... with the multipurpose platform with both tabs...
I roll the die and card through twice... I also then flip the die and card over and roll it through again (so for a 3rd time)... so this time the die is cutting through onto the plastic plate... and suddenly some extra magic happens....
Then the bits are just falling off... a tap or two of the die resulting in most of the bits dropping out... if not... a quick brush with the die cut brush and everything is out.... I think I have only had to poke out 2-3 of the tiniest bits on a few cuts...
Subscribe to:
Posts (Atom)