Showing posts with label So Very Grateful. Show all posts

Tuesday, 3 June 2014

So Very Grateful – A Round Up!

Here are a few more Clean & Simple cards made using the So Very Grateful set in the Spring Summer catalogue… it is a real shame this set won’t be in the new Annual Catalogue – it has been lovely for colouring ….. So only available until 30th June….

So Very Grateful, Amanda Bates, The Craft Spa, 2014_05 (8)So Very Grateful, Amanda Bates, The Craft Spa, 2014_05 (5)So Very Grateful, Amanda Bates, The Craft Spa, 2014_05 (7)

And …as this is a round up on this stamp set… here  some more projects using the set that I have shared before…. just press on the photo to go to the original blog post…the first 3 have tutorials ….

2014_03_SO Grateful_Scallop Tag Topper Punch_Box Card_ Amanda Bates_The Craft Spa (3)Tag Topper Punch Card, Ampersand, So Very Grateful, Fresh Prints, Amanda Bates, The Craft Spa ,  (2)

Large Easter Basket Tutorial_2014_04_Tag Punch_So Very Grateful 009So Very Grateful, Amanda Bates, The Craft Spa, 2014_05 (1)

Friday, 16 May 2014

So Very Grateful Four You

2014_05_Flowers 020

There are just times where something really simple just says it all….

Though I have to laugh… this is a “concept card” ie a card where I play at a new technique or with a new stamp set…or just because!

2014_05_Flowers 022

Just setting off on my travels to the Stampin’ Up! event at Telford tomorrow now… going down to Kate’s and hitching a ride from Carol & Kate from there. A gang of us joining up for a meal at the hotel tonight. And then trying to grab enough tables first thing in the morning – so the team can all share our excitement together!!! New catty from 1st July… So lots of new products tomorrow… so much excitement amongst friends… Can’t wait!!

Thursday, 17 April 2014

Large Easter Basket Tutorial

Large Easter Basket Tutorial_2014_04_Tag Punch_So Very Grateful 009

Following on from my tutorial for the Small Easter Basket yesterday. Here are the details for the large Basket I first posted here.
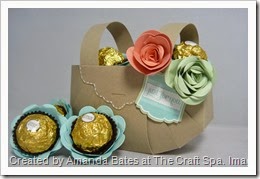
Mothers Day Basket_Ferrero Rocher_Spiral Flower_Tag Punch_2014_03_ Amanda Bates_The Craft Spa Photo of the previous one!

Some of you asked me for a tutorial so here it is!

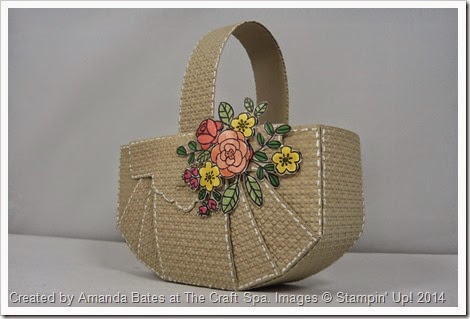
But as some of you will notice  - I have now made a new & stepped up version. I love it when a basket looks like it has been woven !! And the SU! square lattice embossing folder is just so good to add that texture… So I faux stitched, embossed & stuck a few extra panels on! And now it really does look like a basket! And it is pretty strong too….

Cardstock Sizes

Crumb Cake – Basket 8"x10"; Scallop Flaps 4"x4 1/4"(x2) and Handle 11"x 1".

Plus for this version….some more Crumb Cake panels for embossing with the Square Lattice die to give you the basket weave….Side Weave panels 2” x 3” (x6); 1” x 3” (x8); Base Weave panel 1” x 10 1/4”

So here is how to make the Large Basket….. (note photos of the make-up of the basket are of the small basket as the process is the same!)

1. With large panel PORTRAIT on trimmer... Score at 3" & 5". 

2. Bone Fold

3. With panel LANDSCAPE on trimmer... cut the top & bottom sections using the Cut Bar … at 2", 3", 4", 6", 7" & 8" along the Top Ruler Bar

4. Score 2 smaller panels LANDSCAPE at 1 3/4” ( ie with 4 1/4” along the Top Ruler Bar)

5. Scallop Tag Topper “over the top” punch  the narrower sections to form the 2 flaps .

6. Corner Round bottom corners of sides.

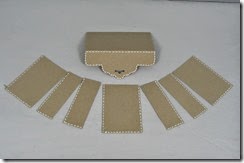
7. Faux stitch the 2 Scalloped Flaps & 14 Side Weave panels using a white Signo gel pen  . Tip –  focus on just doing 3 faux stitches at a time – lot neater – and faster too!
Large Easter Basket Tutorial_2014_04_Tag Punch_So Very Grateful 002
Note  - just panels for one side in the photo. You need double!

8. Faux stitch the Base Weave panel and handle too ( oops forgot to put those in my camera shot!!)

9. Emboss the Side & Base Weave panels, the handle & the Scallop flaps with the Square Lattice embossing folder

10. Adhere the Side Weave panels to the basket panels

11. Pull the LH & RH sections upwards & towards each other to form the top of the basket
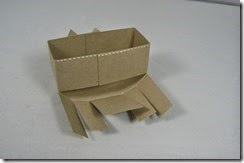
Tag Punch_Small Easter Basket_ Petite Petals_Craft Spa_2014_04_ (2)

12. Adhere on about 1cm of overlap

13. Pull up next LH & RH sections & line up so that bottom corners meet & adhere
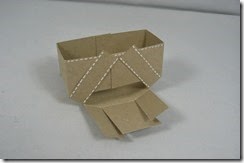
Tag Punch_Small Easter Basket_ Petite Petals_Craft Spa_2014_04_ (3)

14. Pull up next LH & RH sections & line up top corners on top edge of basket & adhere

Tag Punch_Small Easter Basket_ Petite Petals_Craft Spa_2014_04_ (4)

15. Fold up central section & adhere

Tag Punch_Small Easter Basket_ Petite Petals_Craft Spa_2014_04_ (5)

16. Trim off top edge of basket

Tag Punch_Small Easter Basket_ Petite Petals_Craft Spa_2014_04_ (6) 

17. Adhere scalloped flaps onto sides

Tag Punch_Small Easter Basket_ Petite Petals_Craft Spa_2014_04_ (8) 

18. Adhere the Base Weave panel around the bottom of the basket

19. Adhere handle to inside ( I actually added another piece of Crumb Cake cardstock behind the embossed handle just to make it more robust)

Large Easter Basket Tutorial_2014_04_Tag Punch_So Very Grateful 008

20. Ink up & stamp flowers with black Staz on ink & colour in with marker pens. ( Yes different colour choice for me – but it does match with what I am putting inside!!)

21. Fussy cut flowers.
And no… I am not the neatest fussy cutter in the world… I just cheated a bit…. I added some Crumb Cake ink around the white edges of the flowers & leaves – so you can’t see any white parts!! You may be able to see that in this photo…. does the trick nicely… you don’t need to worry about being quite as precise in your cutting!!! Why have I never thought of doing that before!!

Large Easter Basket Tutorial_2014_04_Tag Punch_So Very Grateful 011

22.Fill your large basket with chocolate and/or stuff!!! It ends up about 5 1/2” wide, 2” deep and 3” high so it does hold a fair amount…

And here is a quick picture of the Small & the Large……
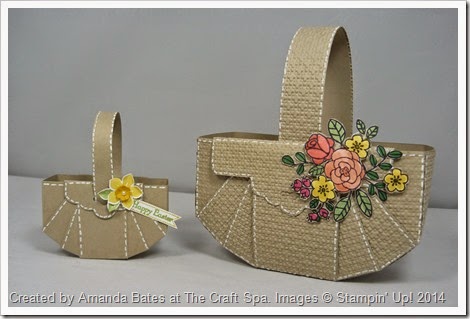
Easter Baskets_Little & Large_ScallopTag Topper Punch_Amanda Bates_The Craft Spa

SU! Products Used for Easter Basket

Stamps – So Very Grateful

Punches- Scalloped Tag  Topper, Corner Rounder

Embossing Folder – Square Lattice

Cardstock – Crumb Cake

Inks – Staz On Black

Markers – Signo White gel pen, Daffodil Delight, Crisp Canteloupe, Calypso Coral Strawberry Slush, Wild Wasabi, Garden Green


SU! Products Used for Mothers Day Basket

Stamps – Label Love

Punches- Scalloped Tag  Topper, Artisan Label, Corner Rounder

Dies – Spiral Flower

Cardstock – Crumb Cake, Pool Party, Pistachio Pudding, Crisp Canteloupe

Inks – Pool Party, Signo White Gel Pen

Tuesday, 4 March 2014

Another Tag Topper Box Card – and the Decoration–and another WWWU Card

2014_03_SO Grateful_Scallop Tag Topper Punch_Box Card_ Amanda Bates_The Craft Spa (3)

Here is another version of the Box Card using the So Very Grateful stamp set this time… but for all of you that don’t like fussy cutting…. don’t attempt the final decorating of this one!! Go back to this one instead!This was one of my submissions to the Team WWWU challenge last week – the colours being Coastal Cabana, Real Red, Crumb Cake & Bermuda Bay.

I prefer the slightly deeper layering that I have  on this ….so the measurements for the papers shared here will produce paper decoration that looks like this!!

So here are some quick tips for decorating a Tag Topper Box Card for which I shared a tutorial yesterday. Hopefully this will save you the time I first spent fiddling about somewhat unsuccessfully with small pieces of paper!! Poor little box card sat there for 2 weeks on my craft desk before I had a re-think and returned to finish decorating it with more success….

So first the box base sides. Easy enough….

Cut your paper into a 5.9cm strip,then cut into three 4 1/2cm pieces & stick! (Imperial- 2 1/4” strip & cut into three 1 3/4” pieces)

Next the box flaps.

This is where I came unstuck…. I first tried punching  4 1/2 cm square pieces of paper…too hard! I then tried popping  the pieces of paper onto a post it note so that I had something to hold onto to put the paper into the punch….mixed success! And then the Eureka moment…..

2014_03_Tag Topper Punch Box Card, Amanda BAtes, The Craft Spa 003

1. Cut your paper into 2 pieces 9cm long x 4 1/2 cm wide. (Imperial– 3 1/2” long x 1 3/4” wide)

2. Pop each end into the Punch, centre and punch.

3. Fold the paper  in half

4. Sand the top outer scallops to curve & match those scallop edge to the flaps of your box. This is a fabulous little trick to create matching layers that I picked up from the wonderful Connie Stewart here . She has a video there for you too….

5. Open up & cut along the score line

6. (OPTIONAL) Push ribbon through slot in paper & card flap now or add ribbon bows later

7. Adhere your 4 paper pieces to the flaps.

And finally the back of the Box Card.

Outer coloured mat is 4.5 x 9.3cm. Inner White panel is 4 x 8.8cm (Imperial… Coloured mat. 1 3/4” x 3 5/8”. White panel 1 1/2” x 3 3/8”)

And some more views of this version….

2014_03_SO Grateful_Scallop Tag Topper Punch_Box Card_ Amanda Bates_The Craft Spa (5)

2014_03_SO Grateful_Scallop Tag Topper Punch_Box Card_ Amanda Bates_The Craft Spa (4)2014_03_SO Grateful_Scallop Tag Topper Punch_Box Card_ Amanda Bates_The Craft Spa (1)

SU! Supplies Used

Stamps – So Very Grateful; Perfect Banners;Petite Pairs

Punches – Scalloped Tag Topper Punch; 1” Circle; 1 1/4 Scallop Circle

Papers – Fresh Prints DSP Stack

Card & Inks – Crumb Cake; Coastal Cabana; Real Red; Bermuda Bay

Embellishments – Stitched 1/4” Grosgrain Real Red