Saturday, 24 March 2018

Waterfront Trees...

Quickest of shares today... as I am off out on a MacMillan Who Dunnit night... and have just realised that I am a day behind where I thought I was...
So Waterfront Tranquil Tide "thumped" trees... on a Sahara Sand land mass... with Soft Sky second-stamping sky... and Heartfelt Blooms greeting in Tranquil Tide too... on a small square card blank (10.5cm/4 1/4" US) as per the rest of the series...

Right off to get dressed up for a night on the Titanic (or something!!) I need to be ready in 10 minutes...

Friday, 23 March 2018

Fancy Fold Friday - Small Square Pop Out Swing Card with Tutorial

Gosh I have had so many emails and messages about this card fold... so it has taken priority amongst all the other eagerly awaited card folds!

So here you have the Tutorial for the Small Square Swing Fold (aka Lever) Card
Craft Spa Recipe
For my US Readers... Note that I have done a literal conversion from the Metric (Centimetres) version... as it works so well with a 6" wide piece of Springtime Foils papers for the insert panel... so it will be a little bit of a trim down for you from US Letter sized card... and also beware... as I have not done a test run with the inches version... I am sure it will work but you might be a micron out from a fully opening card...

Card Blank - Cardstock Night of Navy 21 x 10.5cm (8 1/4" x 4 1/8")

Insert - Papers Springtime Foils Stripe 15.25 x 10cm (6" x 3 7/8")
Tabs - CS Night of Navy 2 x 10.2cm (x2) (3/4" x 4") 
Paper - Front of Card 10cm Square (3 7/8")
Paper/Card for Inner Panel 4.7 x 10cm (1 7/8" x 3 7/8")(I used Thin Whisper White so as to not add bulk!)
Card for stamping/diecutting front centre panel - Thick Whisper White 7cm (2 3/4") Square 
Card for diecutting front centre frame - Night of Navy 7cm (2 3/4") Square 
Papers- Springtime Foils... Available exclusively and for free during the Sale A Bration promotion. Ends 31st March 2018.
Ribbon - Silver Metallic Edge x 9" 

Craft Spa Instructions
Excuse the old photos... using different card colours... but new photos would mean that there wouldn't be a tutorial!! There are only so many hours in a day after all...


1. Score LANDSCAPE larger (Night of Navy for this card) card blank panel at 10.5cm. (4 1/8") Bone Fold.
Tabbed Pop Out Swing Card Tutorial, Amanda Bates @ The Craft Spa 001
2. Score smaller (Striped Springtime Foils) insert panel at 5.1 & 10.2cm (2" & 4")
3. Bone Fold as concertina/Z-fold ( ie one as mountain & 1 as valley fold)
Tabbed Pop Out Swing Card Tutorial, Amanda Bates @ The Craft Spa 002
4. Score 2 smallest (Night of Navy) panels at 5.1cm (2")(for Tabs) and Bone Fold

5. Adhere paper to front of card blank...
6. Die cut Aperture in card blank front  … 2nd largest Square in the Stitched Shapes Framelit dies  used here...
Tabbed Pop Out Swing Card Tutorial, Amanda Bates @ The Craft Spa 004
7. Adhere Z folded panel to RHS of open card blank (note: valley fold of Z Fold panel to LHS when stuck)
Tabbed Pop Out Swing Card Tutorial, Amanda Bates @ The Craft Spa 008
8. Fold over front of card blank. (with Z folded panel folded inside)
9. Apply glue through aperture to top of Z fold panel (ie to RHS of aperture) Note I have used Sticky Strip just so you can see where the glue needs to be…..
Tabbed Pop Out Swing Card Tutorial, Amanda Bates @ The Craft Spa 009
10. Adhere stamped and die-cut Stitched Shapes square through the aperture (making sure it can swing through the aperture)
 Tabbed Pop Out Swing Card Tutorial, Amanda Bates @ The Craft Spa 010Tabbed Pop Out Swing Card Tutorial, Amanda Bates @ The Craft Spa 015
So now for the Tabs to attach it all together….. and allow it all to pop out and swing…

10.Open up Card blank. Open out Z folded panel to the right.
 Tabbed Pop Out Swing Card Tutorial, Amanda Bates @ The Craft Spa 016
11. Apply Glue to one side of the 2 Tabs
Tabbed Pop Out Swing Card Tutorial, Amanda Bates @ The Craft Spa 017
12. With folded edge of Tabs to outer/RH edge of Z panel - adhere one side of Tabs to top and bottom of Z fold insert panel  (ie above and below the die cut panel) ensuring that these tabs are clear ...
(a) above and below the aperture shape
and
(b) the Z fold insert panel LHS score line.
Trim if necessary
 Tabbed Pop Out Swing Card Tutorial, Amanda Bates @ The Craft Spa 018
13.Fold top layer of Z Fold panel back over & open the Tabs out towards the central score line of the card blank.
  Tabbed Pop Out Swing Card Tutorial, Amanda Bates @ The Craft Spa 019
Check that the Tabs will clear the central score line of the card blank.
Tabbed Pop Out Swing Card Tutorial, Amanda Bates @ The Craft Spa 020
Trim if necessary
Tabbed Pop Out Swing Card Tutorial, Amanda Bates @ The Craft Spa 021
14. With the Tabs opened out, apply glue to top side (ie facing you)
Tabbed Pop Out Swing Card Tutorial, Amanda Bates @ The Craft Spa 022
14. Fold front of card blank shut to close down onto tabs
Tabbed Pop Out Swing Card Tutorial, Amanda Bates @ The Craft Spa 023
And there you have it…one safely attached swing out card mechanism….
Tabbed Pop Out Swing Card Tutorial, Amanda Bates @ The Craft Spa 024Tabbed Pop Out Swing Card Tutorial, Amanda Bates @ The Craft Spa 025
Now... depending on the colours you have used for the card blank and the insert panel... some of you won’t like the fact that you can see the Tab on the back of the white Z folded panel…
Tabbed Pop Out Swing Card Tutorial, Amanda Bates @ The Craft Spa 026
3 ways to work round that …
(1) have the card blank and tabs in the same colour (as I have with this card) so that you can't see the colour difference when you open the card... 
(2) have the card blank and Z folded insert panel all in the same colour ... so no colour difference anywhere!
(3) cut two extra 2 x 5.1cm Tabs in the same colour as your Z Fold insert panel (so plain Whisper White would work for this one)…and just stick over the top!
Tabbed Pop Out Swing Card Tutorial, Amanda Bates @ The Craft Spa 030
Tabbed Pop Out Swing Card Tutorial, Amanda Bates @ The Craft Spa 031
Look vanished! 

So there you have it… finish off your decoration to the front section… and you have a simple looking card with a WOW on opening… and it is simple to make too… especially by a third run...

My final decoration is purposefully very quick and simple as over 50 Easter Treats plus a few cards amongst 5 ladies was a mean order!! But click here for another one with a bit more work...and colour!

So a Scalloped Night of Navy Frame (created by using the Layering Squares die and the same Stitched Shapes square die ... at the same time!!) 

Plus a flowery die cut from the Sweet Soiree Embellishments kit... not how I coloured the paler pink flowers with the Night of Navy Stampin Blends... great job to co-ordinate...
Finished off with a Night of Navy Stampin Blends coloured Pool Party sequin from the Tutti Frutti Adhesive Backed Sequins pack...

And a Dark Night of Navy Stampin Blends coloured Silver Metallic edge ribbon... which is particularly gorgeous!
Though I am now really sorry to say that Stampin Blends are NOW officially unorderable until May... 

Thursday, 22 March 2018

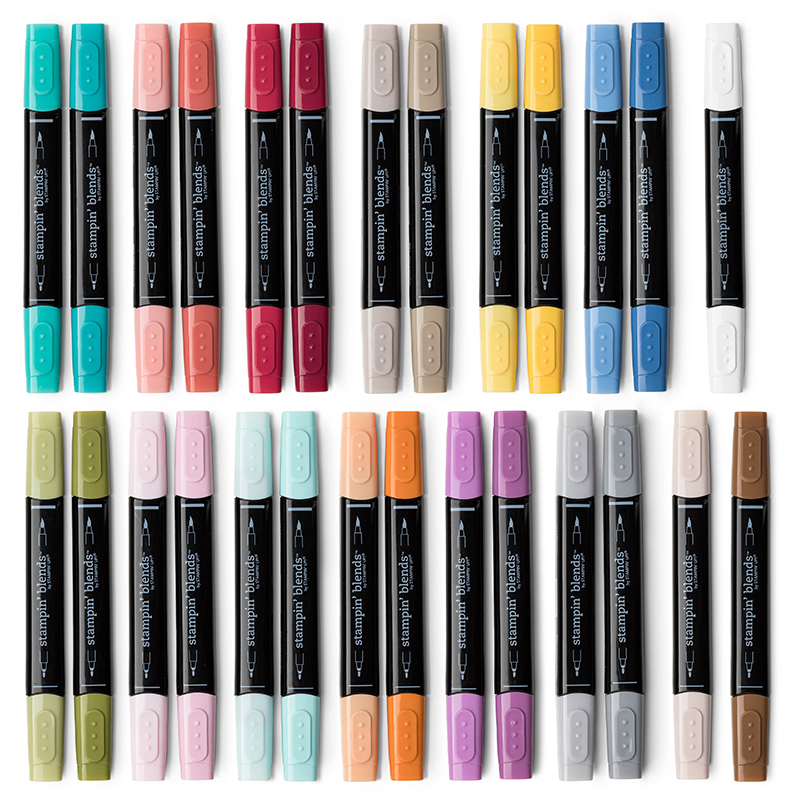
Want Stampin Blends alcohol markers? Act Fast...

Second post for today... with some important and urgent news...

Due to their popularity and long supply lead times....which has resulted in many back order situations over the past few weeks...

Stampin’ Blends alcohol based blending markers will be made unorderable beginning on Friday, 23 March, 6:00 p.m. (GMT) ... 

Which means that tomorrow (or today if you are reading this on Friday!) is the last day you will be able to order Stampin Blends until later on in May... for which more details will be released as and when available... 

Stampin' Blends Markers Collection
This affects all versions of the Stampin Blends... the whole Collection, the duos and the singles... A few colours are already out of stock... they will just follow direct to you later... as and when they come into stock...

So if you have been thinking about purchasing any of these wonderful alcohol blending marker pens... please do it now!! 

Want to maximise the value you get with the Collection RRP £108... then sign up with Stampin Up here... as you would get 2 extra free stamp sets as well as have another £22 of free product to select... more details/ideas on this option here... 

Or if you would prefer just to order... you would also get 2 free Sale A Bration items (or one Level-2er) with the whole collection RRP £108... though you can order one, two or however many you would like... all £4 each... so 12 would get you one free Sale A Bration item... 

Here is the direct link to the collection on my On Line Store... 

Or here is the direct link to all the options (singles, duos and collection) if you prefer to pick n mix at £4 each... 

Please remember to add this month's host code 6EVXZYDQ (if your order is under £150)... for an extra gift from me... PLUS a £4.95 postage refund cheque from me too... if your order is over £60. 

If your order if over £150... then please select your own Stampin Rewards... you will still get the gift and postage refund from me

Gift and postage refund cheques will follow in about a fortnights time...

Happy Blending!

Simple Embossed Waterfront #1

Another Waterfront card from the clean and simple stable... but one of the favourites of the majority of my ladies... quick, simple with a bit of personal artistry and a bit of shine!

Silver embossed trees & land... on Watercolor Paper... with Dapper Denim ink for sky and sea applied with an Aquapainter. Aqua Painter.. set on a Whisper White mat...and then onto a Dapper Denim small square card base...  sizes as per this card here...
And oops... so sorry... not only for my short post today.... but also that I got my days the wrong way round this week!!! As this should have been a Waterfront on Wednesday post yesterday really!! Thanks for the reminder Jill!!

Wednesday, 21 March 2018

Sweet & Sassy Team Thanks for Joining Us...

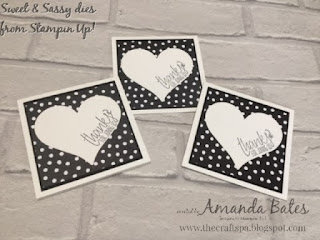
Very quick share today... of a trio of Sweet & Sassy heart die cut cards made to welcome some lovely new members to my Craft Therapists Stampin' Up! team last month...

The wording (care of All Things Thanks) says it all... and I can't wait to see where their journeys take them... in the months (& years) ahead!
Papers from Petal Passion... on an Basic Black mat... on a Thick Whisper White small square card blank (10.5cm or US Letter 4 1/4") and finished off with a little sparkle care of a Rhinestone Basics Jewel

If you are still thinking about signing up with Stampin' Up! ... and I would love to welcome you to our little (and part of a big!) team (s)...
Just Click here for more details... and/or contact me with any questions via email here... no obligation whatsoever... I just love talking Stampin Up! & crafting after all...

But do remember that you want to sign up by 31st March... during the best starter kit offer of the year ... £130 product for £99 PLUS 2 FREE STAMP SETS (any value) with free shipping too!

Or if you are ready to order your Starter Kit... then here is the quick link to the on-line sign up form... you just need your credit/debit card and a list of what you want to order!

Tuesday, 20 March 2018

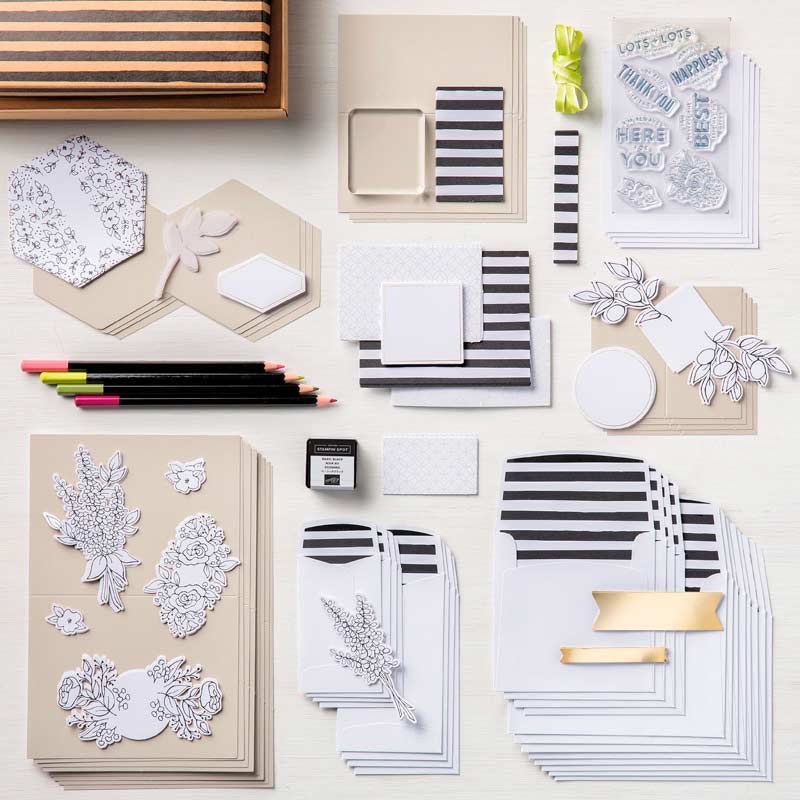
Tuesday Tip... Lots of Lavender & Lots of Happy Card Kit

Oh my... I can't believe that I forgot to post this tip weeks ago... as it is a really useful one for the ever-so-popular Lots of Happy card kit
But you will have to be fairly quick to get the Sale A Bration stamp set, Lots of Lavender I used to make this job easier... as the promotion ends 31st March... and items are on a "while supplies last" basis... so it could go out of stock before then...

So what is different... well I stamped the lavender images in Wisteria Wonder instead of spending 20-30 minutes or so colouring them in... 

The lavender filler stamp in the Lots of Lavender being pretty perfect for stamping the single lavender image... though a bit of partial inking and messing around needed for the double image... but still SO SO SO much quicker than colouring all those little petals...
Here are the 2 ways side by side... watercolor pencil hand colouring on the left... stamped on the right..

And the eagle eyed amongst you may have also noticed another difference... 

Yes I chopped up a stamp again... the greeting this time... as much as I love the overall shape of the Thank You greeting supplied in the Kit... it is just ... well... not something that would ever get used for a card in classes! 

And the parts can always be used together if ever there is a need for "a friend" sentiment...
Lots of Happy Card Kit
So if you have the Lots of Happy card kit.... and quite a lot of you do... as this has been my best selling card kit... ever! Seriously think about getting the Lots of Lavender stamp set sooner rather than later! Free with a £45 order... You can thank me later!!!

You could even invest in a couple of Kit Refills... RRP £19 each... and you would almost be there... 

Monday, 19 March 2018

Amazing You & Beautiful Peacock Thank You

A merger of 3 Sale A Bration freebies... Amazing You meets Beautiful Peacock meets Heartfelt Blooms... each of which can be yours for free with a £45 order until the end of March... so not long to go now...

Inspired by this beautiful card by Karolina Michna but simplified.... and set on a small square card blank... (10.5cm/ US Letter 4 1/4") 

Gold heat embossed flower & leaves main image and greeting... set on the largest of the Stitched Shapes die cut squares... which is mounted on a 7cm square Gold Foil Mat...

And the leaves from the Amazing You flower image and the flourish from Beautiful Peacock used to decorate around the frame...

All Gold heat embossed ...  
OR inked in Sahara Sand to simplify/speed up the job... 


Sunday, 18 March 2018

Sweet Sunday.. Box for 2 Chocolate Bars with Tutorial

So lots of these were made this week... as my ladies got their Easter Makes on! A box designed from one piece of A4 card... to hold 2 Milka or Cadburys Dairy Milk chocolate bars... or any of the more widely available "thinner taller chocolate bars" with the frilly bit at either end...

The ladies in this week's class all have big family gatherings for Easter... and so like to spend some time with me decorating lots of Easter Treats for the table...  So I have to keep things decorated simply... as they don't want to have to stay overnight!!!
This is a project I was determined to make this year... all of my friends and family Easter makes and sends in the past have been something lovely and decorative... and usually cute... but with... not a lot of chocolate!!

So this year I will send lots more chocolate... 2 Milka bars going in all mine... But something simpler and more stylish for presentation... as (apart from 2) they are all getting too old for cute Easter chicks and bunnies... Though I did have to laugh as... for once... I loved the pop of bright colour for the boxes... Lemon Lime Twist particularly doing it for me!! And everyone else as it happened...

I used the Petal Passion papers... as then everyone can colour as much or as little as they wished....
Craft Spa Recipe
A4 Card 25 x 21cm (ie A4 width)(9 3/4" x 8 1/8")
Papers - Top 10.5 x 14cm (4 1/8" x 5 1/2"); Bottom 5 x 10.5cm (US 4 1/8" x 2")

Craft Spa Instuctions
1. PORTRAIT(short edge at top). Score 1, 9, 11 & 19cm (3/8", 3 1/2", 4 1/4" & 7 3/8")
2. LANDSCAPE(long edge at top) with the narrow section at the bottom. Score 2, 4 & 23cm (3/4", 1 1/2" & 9")
3. Bone Fold all lines

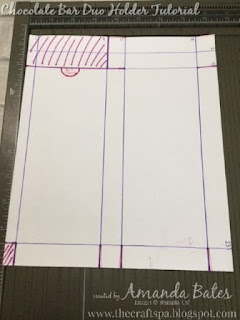
4. Cut as per Template (Note the thin red lines for sections you want to dart as you cut. Neater if you keep those wider bottom sections as straight as possible...)
5. 3/4" Circle Punch as per Template

6. Apply glue and adhere Box together as per Template in following order for ease/neatness.. we used Tear & Tape for all sections apart from the lid... where we used Tombow Multipurpose
(1) Lid sides first checking they fold in nicely! (TIP- partially doubling them up this way makes for a  stronger lid)
(2) Narrow side section (TIP- line up tape glue along the fold edge rather than in the centre or open edge)
(3) Small bottom side tabs
(4) Back bottom wide tab (TIP - use a ruler to go into box to bottom so you can apply some pressure up against the ruler to stick things together firmly...)
(5) Front bottom wide tab (TIP - again using your ruler)

7. Cut 1.5cm (1/2") from either side of the papers (when PORTRAIT ie short edge along top)
8. Adhere longer pieces
9. Adhere side shorter pieces
10. Adhere ribbon to wide shorter piece (TIP - colour first as required! Blends or Markers will do the job... but let marker coloured ones dry a bit!)
11. Adhere centre/wider paper piece

11. Decorate as required...
We used a die cut Stitched Shapes circle (2nd smallest) and then stamped using just the leaves from the Sale A Bration Amazing You flower stamp in Lemon Lime Twist... plus a silver embossed Easter greeting from the retired Springtime Blossom set... though some were made using Happy from Perennial Birthday and Easter from Teeny Tiny Sentiments ( but too much faff to actually use in a bulk making class!)

And here are about half of them all neatly assembled and ready to go... the rest were a little bit of homework after all!!
Please note that the inches (imperial) are a literal conversion of the project rather than one tweaked to US Letter card... so either can be used... but do cut & score in the same system!.... Though personally ... even though I am an inches girl... I just found this one easier in metric (centimetres)!