Showing posts with label Squares. Show all posts

Sunday, 24 April 2022

Simple on Sunday - Bouquet of Love embossed squares card

A simple stunner in the flesh! 

Love that you get a flat heart section on the panels surrounding the central raised die cut heart... though not sure how well that can be seen in the photo...

Directions

Simply embossing a 12cm square Whisper White panel with the Bouquet of Love embossing folder...

Cutting into 9 x 4cm squares... 

Sticking to the edges of a 12.5cm square Smoky Slate panel... starting at the 4 corners... This is the simplest accurate way of lining up square like these...

Then sticking that panel to a larger 13cm Smoky Slate square... then to a 14.cm square card blank... 

Die cutting a heart, flowers and leaves using the Bouquet of Love dies... and stamping a greeting with Smoky Slate...

And finishing off with a crinkly white ribbon bow

Saturday, 16 January 2016

Birthday Bouquet Swing Easel Card

 
Back to my Swing Easel card... a new fresh look!
Loving these Birthday Bouquet papers... think these are proving to be my favourite papers... ever!
Very versatile... but more on that another day...
12x12 card version of the tutorial here

Oh ... I have to laugh... have you spotted that bit of Sticky Strip red layer on the card!! Proving that stuff gets everywhere... thank goodness for the Tear n Tape nowadays!! Might have to retake and replace all these photos at some point tomorrow!!!


Built for Free Using: My Stampin Blog

Sunday, 3 January 2016

Before you recycle your Christmas cards! Determine your Style!?

Something a bit different today... but hopefully something that will be interesting (about me)... and thought provoking (for you)...

And for those of you that are not sure... maybe a way to define your crafting style(s)!? So I am throwing down a New Year challenge here for you...

So today was the day for clearing away my christmas decorations...and making my house look really bare...!  And then all the christmas cards we were sent were taken down...

And then I had a thought as I carried them to the recycling bin!

I sorted through them... allowing myself to pick just 12ish that I most liked... and here they are....
So what do these tell me about my crafting style... and there probably won't be any surprises here for my long term blog followers... I think these kind of some me up!

I like lots of white space!

I like a clean & simple style!

I like large square cards!

I like things to be fairly monotone - silver/gold/black with maybe a splash of red!

I like lots of glitter & shine on christmas cards!
I like trees!
I like wreaths!
I like houses & churches!
I like big words!
I like snowflakes and baubles!
Just one thing of my crafting style that isn't evident... no fancy folds!! But that is only as I wasn't sent any!

Though I have to admit that I purposely didn't select from my hand made cards... as that is just too hard... because (1) I would always select them to be in my Top 12 cards as they are always the best cards I receive! (2) I so appreciate the work that has gone into them so it would be impossible not to select them (3) Many are made with the sender knowing what I like in any case! (4) Many are from my blog followers!

Now I found this so fascinating that I allowed my self to choose another 12ish that hadn't made the original cut... and I learnt more....
I really like trees!! As long as they are covered in glitter!
I rather like cute Rudolphs! And reindeer in general! Even the stocking is covered in reindeer...
I rather like nordic/kraft & red
So I can hear you asking if there were any surprises!? I think the liking of the wreaths so much and the reindeer was probably the biggest surprise for me.... and that I didn't receive any cards with doors or windows on!!!

So hows about you??? What is your style...?? I would love to hear back from anyone that conducts this experiment for themselves.... or am I just too daft!!!


Monday, 20 April 2015

Small Square Double Display Card–and some Mass Production Tips

Before I share today – NEWSFLASH – THE ANNUAL RETIRING LIST IS PUBLISHED TOMORROW….. make sure you come back & check it out!!

Last Saturday was our Quarterly Team Training meet. A really great day with a great bunch of girls. Lots of inspiration from fellow demos – and lots of fabulous makes and swaps. I now have a great selection of men’s cards to inspire!

Mens Cards 046

So this was my swap card for our Men’s Theme… kept clean & simple in decoration as for a male … I am so loving this Balloon Bash set…. which is code for more coming…

I don’t normally do a Fancy Fold card for a team swap – but there were fewer of us than usual on Saturday so I grabbed the opportunity…and this card really is quite a quick card format once you know what you are doing!

Mens Cards 047

So … a few tips for you if you are making a few of any cut and fold type card….

Mark your trimmer cut bar with Sharpie pen dots where you need to cut from and to… speeds up the process 100 fold….

Mens Cards 067

If you are not using a scoreboard for quick scores – mark your trimmer again along the top bar to speed up that part of the process…

Mens Cards 068

Do all your long scores first – then go back and do those short scores at the top and bottom – less to remember at a time and again quicker…

Then you can just use your Staz On remover to remove the dots when you are done….

And before you have to ask… this small square version is made from A4 card rather than the 12x12 needed in the Large Square Tutorial posted here (Metric) and here (Imperial). So I will be back to share the details another day….

Sorry for going AWOL for a few days… interesting week with a few unexpected surprises for me!!

Tuesday, 7 April 2015

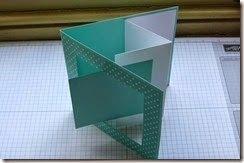
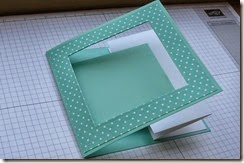
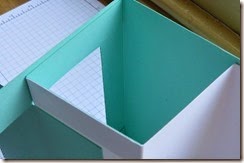
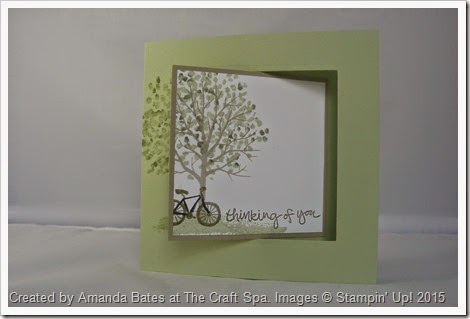
Tabbed Pop Out Swing Card or Square Simple Lever Card Tutorial

Easter Treats Amanda Bates at The Craft Spa 027

Still working on catching up with tutorials… I am now beginning to get there slowly….  So I am prioritising based on the numbers of emails/comments I have received about a particular project! Seemed logical to me….

Easter Treats Amanda Bates at The Craft Spa 044

So…. Remember this… this was the favourite card format made in last month’s classes.. the photos don’t really do the card justice – it is one of those that you maybe have to see in the flesh…and do the swing thing!!

As I am making a new card in the same format for next month’s classes… the photos/recipe in the tutorial are in a different colour way….

So you need….

Card Blank - Cardstock Coastal Cabana 11” x 5 ½” (28 x 14cm)

Inner Panel - CS Whisper White 7 ½” x 5 ¼” (19.5 x 13.5cm)

Tabs - CS Coastal Cabana 1.8cm (just less than 3/4”) x 5 ¼”(13.5cm) (x2)

Card Front Panel- CS Whisper White 3 ½” Square (8.8cm Square)

Instructions

1. Score wider coloured panel at 5 ½” (14cm). Bone Fold.
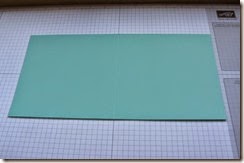
Tabbed Pop Out Swing Card Tutorial, Amanda Bates @ The Craft Spa 001

2. Score narrower coloured panel at 2 ½” & 5” (6.5 & 13cm)

3. Bone Fold as concertina/Z-fold ( ie one as mountain & 1 as valley fold)

Tabbed Pop Out Swing Card Tutorial, Amanda Bates @ The Craft Spa 002

4. Score 2 narrow Coastal Cabana panels at 2 ½” (6.5cm)

5. Die cut Square Aperture in card blank front  and keep the Square…
Oh! Remember that the Square Framelits are on WEEKLY DEALS until 11pm tonight Tues 7 April

Tabbed Pop Out Swing Card Tutorial, Amanda Bates @ The Craft Spa 004

OR this could be hand cut using your trimmer- go in ¾” /2cm from each side – aka line up at ¾” on the Top Bar and cut from ¾” to 4 ¾” … on all 4 sides

6. Adhere Z folded panel to RHS of open card blank (note: valley fold of Z Fold panel to LHS when stuck )

Tabbed Pop Out Swing Card Tutorial, Amanda Bates @ The Craft Spa 008

7. Fold over front of card blank. (with Z folded panel folded)

8. Apply glue through aperture to top of Z fold panel ( ie to RHS of aperture) Note I have used Sticky Strip just so you can see where the glue needs to be…..
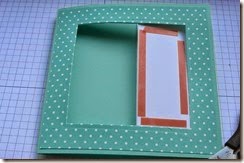
Tabbed Pop Out Swing Card Tutorial, Amanda Bates @ The Craft Spa 009

9. Adhere die-cut square (making sure the Square can swing through the aperture)

 Tabbed Pop Out Swing Card Tutorial, Amanda Bates @ The Craft Spa 010Tabbed Pop Out Swing Card Tutorial, Amanda Bates @ The Craft Spa 015Tabbed Pop Out Swing Card Tutorial, Amanda Bates @ The Craft Spa 011

But when you open this card…that Square section doesn’t pop out or swing… it just … well sits there!
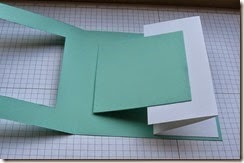
Tabbed Pop Out Swing Card Tutorial, Amanda Bates @ The Craft Spa 013 

So now for the Tabs to attach it all together….. and allow it all to pop out and swing…

10.Open up Card blank. Open out Z folded panel to the right.
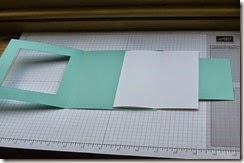
 Tabbed Pop Out Swing Card Tutorial, Amanda Bates @ The Craft Spa 016

11. Apply Glue to narrower side of the 2 Tabs
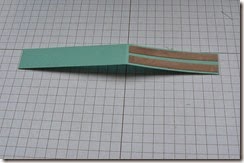
Tabbed Pop Out Swing Card Tutorial, Amanda Bates @ The Craft Spa 017

12. With folded edge of Tabs to outer/RH edge of Z panel - adhere narrower side of Tabs to top and bottom (ie above and below the square panel) ensuring that these tabs clear the square and Z folded panel LHS score line. (Trim if necessary)

 Tabbed Pop Out Swing Card Tutorial, Amanda Bates @ The Craft Spa 018

13.Fold top layer of Z Fold panel back over & open the Tabs out.

  Tabbed Pop Out Swing Card Tutorial, Amanda Bates @ The Craft Spa 019

Check that the Tabs will clear the central score line of the Card Blank.

Tabbed Pop Out Swing Card Tutorial, Amanda Bates @ The Craft Spa 020

Trim if necessary

Tabbed Pop Out Swing Card Tutorial, Amanda Bates @ The Craft Spa 021

14. With the Tabs opened out, apply glue to top side

Tabbed Pop Out Swing Card Tutorial, Amanda Bates @ The Craft Spa 022

14. Fold front of card blank shut to close down onto tabs

Tabbed Pop Out Swing Card Tutorial, Amanda Bates @ The Craft Spa 023

And there you have it…one safely attached swing out card mechanism….

Tabbed Pop Out Swing Card Tutorial, Amanda Bates @ The Craft Spa 024Tabbed Pop Out Swing Card Tutorial, Amanda Bates @ The Craft Spa 025

Now some of you won’t like the fact that you can see the Tab on the back of the white Z folded panel…

Tabbed Pop Out Swing Card Tutorial, Amanda Bates @ The Craft Spa 026

2 ways to work round that …

(1) make your card blank and Z folded panel all in the same colour as I did with the Pistachio Pudding version of the card

(2) cut 2 x  1.8 cm ( almost 3/4”) x 2 1/2” White Tabs…and just stick over the top!

Tabbed Pop Out Swing Card Tutorial, Amanda Bates @ The Craft Spa 030

Tabbed Pop Out Swing Card Tutorial, Amanda Bates @ The Craft Spa 031

Look vanished!

So there you have it… add a decorated panel to the front Square section… and you have a simple looking card with a WOW on opening… and it is simple to make too…

Tabbed Pop Out Swing Card Tutorial, Amanda Bates @ The Craft Spa 027

Right…. onto the Something Borrowed Tri Fold Mini Album Tutorial now…..

Wednesday, 1 April 2015

Framelits a go go on Weekly Deals at 25% off! And Gift Box Punch Board too

2015_04_01 Weekly Deals

WOW! Click on the picture to go straight to the Deals on my on line site….

4 Framelits on there this week… love all 4 … but most used…

  • The HAVE TO HAVE Squares (including my favourite die shape over my SU! life of nearly 7 years … the Scallop Square!!) These are always out in my Craft Room!
  • Word Bubbles – especially useful for Project Life… been using these such a lot recently….

And don’t miss that Gift Box Punch Board – I know there were plenty of you eyeing that up!

For those of you that have not know me for years – I was nicknamed the Scallop Square Queen by the Team and my customers … so I know there will be a few of you laughing at (with) me as I declare this as my favourite shape!!

I think there are about 40 or so projects posted on this blog using a Scallop Square die (admittedly many being the wider scalloped Bigz die shape we had a few years back – but the square size is the same – so most will still work. Only the projects with 3 or 4 layers of card being cut at the same time that won’t…)

Don’t know if this will work…but… Here is the Search list from my blog for Scallop Square… If not – just go to the Search box up at the top RHS – and type in Scallop Square. Loads of tutorials amongst that lot….

And just to prove that I do HAVE TO HAVE the Squares Framelits … here is another variant of a recent project that I had to have them for….

Amanda Bates at The Craft Spa 553Amanda Bates at The Craft Spa 556

These deals end Tuesday 7th April

And couldn’t resist signing off with this….. Ah…memories!!

Buy a Scallop Square Die by Amanda at The Craft Spa