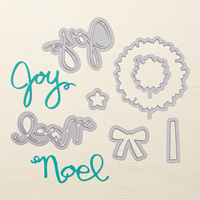
Thank you greeting a simple Thank You Thinlits Die die cut!
Thursday, 23 August 2018
Broadway Bound Peekaboo Gatefold Thursday Trio
Thank you greeting a simple Thank You Thinlits Die die cut!
Sunday, 23 October 2016
Star of Light Tunnel Fold Card Part 2
Saturday, 22 October 2016
Star of Light Tunnel Fold Card & Tutorial
(1) Score Island Indigo panel LANDSCAPE at 10.5cm ( ie standard A6 card blank!)
(2) Score Thick Whisper White panel LANDSCAPE at 5,10,15 cm (TIP-Don't Bone Fold yet!)
(3) Die cut largest Layering Oval centrally
(4) Stamp all over
(5) Bone Fold Valley, Mountain, Valley
(6) Stamp 3 large Island Indigo stars & die cut
(7) Score down the vertical centre axis of each star
TIP - these 2 steps are a lot easier/more accurate if you do them in reverse.... ie Score Whisper White strip LANDSCAPE at 5,13 & 21cm, then stamp the 3 stars centrally on the score lines, then die cut
(8) Valley bone fold each star
(9) Adhere right and left half-sides of 2 stars, then repeat for 3rd star
(10) Adhere right hand side of stamped white panel to inside right hand side of Island Indigo card blank
(11) Adhere 3D star to inside of card blank ( ie centre of star to centre line!)
(12) Fold flat & apply glue to top of left hand side of stamped white panel
(13) Close card over onto the glued panel
(14)Ink up and stamp front White panel - Soft Sky star spray, Island Indigo 8-prong star and greeting
(15) Die cut large Silver Foil & small Island Indigo fancy stars
(16) Adhere all parts
Sunday, 19 July 2015
500...think this calls for a celebration!!
Unbelievable...
OK... what is!?
Well...
Today is the... 500th blog post since the day I started blogging in 2009...
Wow!
So I think a special round up is in order to thank all of you that have kept me going, creating and blogging all of these years...
So I bring you the Top 20 Craft Spa blog posts of all time...
Some well tried & trusted projects here for you from over the years .... click on the picture to go to the original blog post.... some with tutorials....
Sorry for the different shape & size pictures... but that is blogging over the years for you!! And... cough... learning as you go!!!!
At no 20... over 4 years ago...but... I would still love to know who created this gorgeous project... that I just had to case... still SO stunning!
At no 19 ... Nursery Suite Mini Book... still loving this mini book format...maybe time to do another!
At no 14... the Newsprint Mini Book series... still love this Trio... might have to CASE myself.... using Typeset papers of course!!
At no 13... After Eights anyone... ? Remember our first UK Stampin' Up! Convention ladies!!!? What a fabulous Gifts & Treats swap we had!
At no 12.... now this one particularly takes me back!! Particularly chuffed and amazed to see this in my Top 20... as it was my third blog post back in 2009.... and actually my FIRST creative share.... sorry can't add link to picture...so here it is!
And at no 11.. the Metric Tutorial for the Large Square Double Display Card...but I thought I should add another version of the card at this point.... or you will be looking at the same card three times....
At no. 10.... to no 2.... well here is where I refer you to the POPULAR POSTS on the LHS of my blog... the Top 10 are always shown down there...
But at no 1... beyond a shadow of a doubt.... is this card ... which is a good card for today (though it obviously has the last zero missing!!!!) along with the Imperial Tutorial for the Large Square Double Display Card within that blog post...
Now should I do the next 20.....!!??
Saturday, 20 June 2015
Another stepped up CAS Watercolour Wings
Slightly more subtle this time....
Just inked direct with an ink pad around the mat and banner edges...and used the debossed butterflies side rather than the embossed side.
Tuesday, 9 June 2015
Corner Garden - and a Tip!
Well I was looking for something to quickly put on my trial of a 6" card using the NEW Whisper White Thick Cardstock... which I have to say has passed all of my tests so far!!!
Monday, 8 June 2015
CAS You've Got This!
And ...I have to laugh at myself... Finally I can leave some white in a watercolour effect...
Why can I not do that when armed with a Blender Pen or an Aquabrush! I know you should ...but I just can't!
And the details... large background stamp inked and used to "colour" the flower and leaves - as well as to give texture to the background panel before stamping the flowers
Saturday, 7 March 2015
Big but Clean & Simple LOVE card
More from my All Day Workshop…. you can’t get much more CAS than this… but there have been a lot of oohs, squeals and WOWs over this card! That being said it is a large card… an A5 long card… ie nearly 12” wide and just over 4” high for my imperial buddies!
Now having bought the Artisan Embellishments kit to get the flower ribbon to do one particular thing…. I had used something else to do that thing! So I looked at the stunning flowers ribbon and knew I had to come up with something else!
And so a matching card to go with yesterdays mini book came to mind…..
It particularly works as the class kit included a piece of the wonderful Canvas Creations… just gives the background a great texture… making this a card very special with incredible soft dimension…. so tactile! Both the flower letters & the background…
That being said… as a girl that is not into pinks….. I began to call this the Marmite card… I couldn’t work out whether I loved it or hated it!! Luckily everyone else LOVED it! So what do I know…..
So how are the letters done… Simples…. cut rose ribbon into following lengths, apply a glue dot to the back of each rose and arrange on the card! Lovely and quick…
4 roses x 3; 3 roses x 1; 2 roses x 3 and 1 rose x 1
L is 4 down & 2 across
V is 4 down the left and 3 up the right
E is 4 down. 2 across at top & bottom and the single in the middle
And the O is the gorgeous wreath from the Your Perfect Day stamp set. Hand-cut and 3Dd onto the card….
Think this will be my Parents Wedding Anniversary card this year….
Monday, 22 December 2014
Golden Ornamental Pines
Just a very quick share for today.
Here is a very simple card made using the Encore Gold ink, Ornamental Pines and a few splodges from Gorgeous Grunge!
I hope that you are all more ready for Christmas than I am….
I have ticked off quite a lot …but many left to do… Next step… tree decoration ( sorry Julie W – there would only have been a bare tree photo today!!) …then house decoration!! Only 2 weeks later than usual….Ooops…
Again sorry for the bad photos… I really need Santa to deliver my replacement lights set…. not long to wait now…..
Monday, 10 November 2014
Wonderful Wreath Santa
Sorry I have been AWOL…. half term hols during which I had a fabulous week at Club Adakoy in Turkey – followed by my Christmas All Day Class last Saturday ( more on that later in the week…) With a few other things thrown into the mix to just tip me over the edge & not be able to blog!
But I just had to quickly pop on to share my latest play! Imagine the scene…. Wonderful Wreath die cut in one hand, Moustache die cut in the other….. my 2 hands came together and what did I have!!!! Yay….Santa. It just had to be done….. and I LOVE it….my inner child is fulfilled!!!
Edited to add 2015- here is the 2015 version - using the Festive Flower Builder Punch instead of the retired moustache die. Punch Art crib sheet there too...
And here is a card using the Wonderful Wreath Santa.
Now I can’t take credit for the fabulous Santa belt Fry Box base… that was made by the very talented fellow Jem Kylie Henshaw as her swap at the last Quarterly Team Training. It was one of my favourite swaps…and it was a perfect base to show you my Wonderful Wreath Santa today……Thank you again Kylie…what a partnership…..
You should be seeing a few more ideas for this Santa as the next few weeks progress….. as well as for the Moustache die – which I love!!! Loads of ideas in my head for that….just need to find a few minutes to play……
And here is another view….
Hope this fills your inner child too….!?