Showing posts with label Special Card. Show all posts

Monday, 1 November 2021

Merriest Moments Monday #12-14


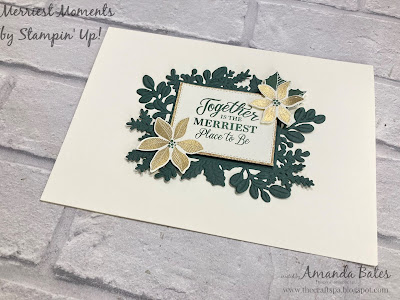
Adding more detail to my Merriest Moments cards... as the dies set has a large "mat die" which I have used with the gold Metallic Speciality paper...

Mounting up my embossed, die cut and stamped main feature panel with gold mat three ways...
So we have A5 card blanks in Evening Evergreen and then Very Vanilla... and finishing off with a large A5 Very Vanilla blank 

And a tip (and/or a bit of a laugh for you!) You can of course die cut flowers, leaves and even a gold matting panel from the large gold mat before you adhere it to the main feature panel....
But please think about the die placement! I cut lots out where I didn' t mean to!! Though luckily it didn't really show from the front...  In fact it made the gold mat a bit lighter....


Saturday, 16 October 2021

Simple for Saturday - Merriest Moments #4


Seeing as it is Saturday... here's one of the even simpler Merriest Moments creations...

Look no embossing... just set on a standard A6 card... but still gorgeous!

Click HERE for the embossed version... and/or HERE for more details on the products and colourway used...

Friday, 15 October 2021

Merriest Moments #3

Another Merriest Moments card... set on a standard A6 card again... 

Be sure to check out this gorgeous embossed Evening Evergreen card blank

Click HERE for more details on the products used...

Thursday, 14 October 2021

Merriest Moments #2

Next Merriest Moments card... 
All set on a standard A6 card this time... be sure to check out the embossed detail... it really is gorgeous!

Click HERE for more details on the products used...

Tuesday, 12 October 2021

Merriest Moments #1


Love love love this Merriest Moments bundle of dies, embossing folder and stamps... I really do! 

Which is of course... code for a long series coming your way... hope you enjoy these as much as I enjoyed making them...!

Starting off with a simple but stunning large A5 sized card... a real WOW for someone special... featuring gold embossed flowers... with Evening Evergreen and Very Vanilla... 

And seeing as this is the first post of the series...let me introduce you to the bundle...

Starting with the Merriest Frames dies... 

Along with the Hybrid Embossing Folder... emboss it... die cut it... add a die cut mat... mount it...  the options are vast!

As well as the Merriest Moments stamps... with such gorgeous greetings too... 

 You can get the stamps on their own... or the dies & folder... but they really do work so well together!


Friday, 8 May 2020

Triple Pop Up Cube card to say Happy 21st Birthday Joe

A special Triple Pop Up Cube card for a special young man on a special day!

And isn't it lovely that the whole nation has a special day's holiday to celebrate his 21st!!
Though he's busy finishing his final year dissertation off to "hand in" today... so not sure he's feeling the love for the event yet!

And for us... on the one hand we are celebrating Joe's birthday with special food and drinks planned throughout the day for him (and tomorrow too)... and on the other hand we are celebrating the 75th Anniversary of VE Day ... so I made a banner! Care of this and this downloads


Card made using Noble Peacock Speciality Papers and Foil Sheets... gorgeous So Sentimental greeting, co-ordinating Stitched So Sweetly dies and retired Large Numbers dies...

I was inspired by the card shared here by Laurence Mirman at Lolascrap et Compagnie... and (for the first time in ages!) I had to immediately make one... Luckily she shared a tutorial too... thank you so much Laurence... I love this card!
Though I did make up my own pop up mechanism for the greetings... so on the front and the back...
By punching 2 shapes (I used the Tailored Tag punch)... scoring centrally... bone folding... sticking either side of the central crease (with the folded edges face forward/to the centre crease/line) and then sticking the stamped die cut label to them... Bit fiddly in places... but worth it...

And yes it does fold flat...
Though it did confuse Joe!! It took a little while for him to fathom it out! But it was worth it... Happy 21st Birthday Joe...

Monday, 14 October 2019

Merry Monday Brightly Gleaming Pop Out Strip Card ... with Tutorial...

Love it when a few simple ideas come together and produce something a bit different but so simple to make... and so a quick tutorial for you too...

So over the past 5 years I have seen many a card fold with a strip popping out on the inside and 4 panels on each part of the strip...  even pinned a few along the way...
But this year is the year I remembered the concept... and just had to make one of my own...

So here you go...
And the pop out strip is so easy.... so I can't attribute to any tutorial out there as I didn't go and look! As I (usually) find it quicker that way... but for those of you that like the step by step details...

(1) Cut a narrow strip of card the same width as your card blank (mine is about 3/4" or 2 cm high)...

(2) Fold in half ...
(3) Fold each half in half again...
AKA for my A4L A6 card blank... Score LANDSCAPE at 7.4, 14.8 and 22.2cm

(4) Bone Fold as Valley, Mountain, Valley... so you get an M or W shape (depending on which way round you are holding it! But it ends up as a W in the card!)
(5) Stick right hand section to right hand side of card blank (right to the RH edge)
(6) Fold the strip up... apply glue to top section
(7) Fold left hand side of card blank down onto the glued section

And a final tip from me... I meant to stick my strip higher (about half way up my starry sky panel)... but I changed my mind at the last minute... and wish I hadn't... as you can't really see my lovely glittery snow banks! Which is a real shame!
But for those of you that like to see a bit more... just Google or You Tube one of the many names attributed to this card!!!

Such as "Pop Out Strip Card" (which I believe to be the original name back in 2014)...  and for which the earliest sample I saw was by Pia Gerhardt in Germany and that can be found here)

But also "Inside Banner Pop Out Card", "Inside Pop Out Card", Floating Pop Up Card", "W Fold Card", "M Fold Card", "Inside 4 Panel Card" or "4 Panel Pop Out card"
Stampin Up products used
Papers - Brightly Gleaming
Stamps - From Our House to Yours, Greatest Part of Christmas (H), Itty Bitty Christmas*, Lined Alphabet
Dies - Layering Alphabet
Embellishments - Copper Star Elements, Shimmery Crystal Effects & Ice Glitter
Card - Night of Navy, Very Vanilla
Ink Pads - Crumb Cake, Smoky Slate, Night of Navy, Real Red
Marker Pen - Night of Navy

(H) This is an exclusive Host stamp set... that can be earnt for free with orders from £150...

* I used the "From Our... to Yours"... stamp from the Itty Bitty Christmas set rather than the From Our House to Yours set as I had already used that one on another card... in another colourway... which was therefore at another class stamping station!! But I do also prefer the 2 lines of text instead of the one...


Friday, 11 October 2019

Concertina Box Card incorporating Stitched Stars

So there is a story behind this box card...

But before I start... Stock update!! The Feels Like Frost papers are back into stock to order!! I don't think they will be in stock to order for very long though...

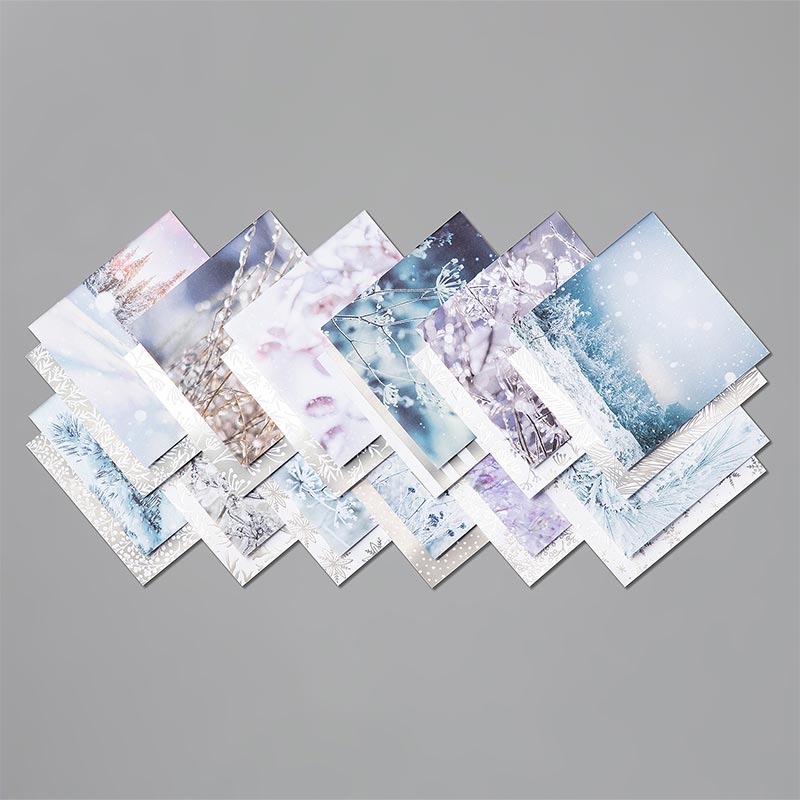
And when I ordered last night... the featured Brightly Gleaming papers were on back order... but orderable again! Which means they will just arrive separately in a few weeks time... unless they go unorderable before you get to order...
So back to today's post...

I was asked to create a "birthday card in a box" for classes as Nicola's younger daughter has complained for the last few years that her older sister has had one than one card in a box... and she hasn't had one!!
I realised that I have created many "card in a box " or "box card" versions over the years... but not one like this!

As I have combined the "old favourite" Tag Topper Punch Concertina Card  (albeit with a reduced number of panels) ... and the box for it to go in... so this is truly a card in a box... as the box is indeed an in-separable part of the card!
And the birthday card is yet to be shared... but we liked it so much we had to make a christmas one too! Featuring Brightly Gleaming, Stitched Stars and Merry Christmas To All...
So what do you think? Worthy of a tutorial at some point?  Edited to Add- click here for the Tutorial posted 22 October... 


Friday, 13 September 2019

Crafters Desk Bench Fold Card for Fancy Fold Friday...

Finally made the Crafters Desk card using the Follow Your Art papers that I have been mentioning for months...
And so here it is... a room I would be happy to live in myself!
Want the know how? 
Click HERE to go and order the tutorial (s)... 
And here is the link to the round up on the Follow Your Art suite
And yes... it is the same as my Student Desk card... a few more of those being made here very soon... 

Friday, 24 August 2018

Happy Greenfingered Birthday to my Dad!

Wonder if you can guess how old he is today!!?

So I had to make another of these Greenhouse Cards using the Hanging Garden stamp set... as my Dad loves to spend time in their conservatory and potter in the garden so this covered both angles... though I forgot to share this at the time it was made... I am not used to being so organised for family birthdays...
This time I used a Soft Sky card panel for the back to add some colour... though for some reason this colour backing made it very difficult to photo...

And please excuse me for - and ignore the fact that - the wonderful Hearth & Home window dies I used for the main feature are now retired (and no, before anyone asks - mine are definitely not for sale!) - as well as the Soft Sky card colour I used for the back!
Just click here for the Tutorial for the card...

And here are the two versions together... so you can compare and contrast... and do you have any particular preference???


Monday, 6 November 2017

Ellie's Good Luck at Durham University card

And finally here is the last of the Student Desk & Shelves card ... for Ellie... with an extra important detail that couldn't be on the boys cards...!

Ellie is at Durham University studying Psychology... and she has probably the plainest of all the base rooms our group of new students have... magnolia walls and wooden furniture all round!
But spot the heart lights... being a girl of course Ellie has a string of lights to decorate her room.... wicker hearts in fact... so I couldn't resist getting the Vertical Greetings out and a little heart punch (though oops I have forgotten which I used now! Could have even been a die!)

And a couple of little tips for you... I stamped the vertical Congrats twice and punched every other letter... and the string to join up the lights was just draw in by hand using the thin end of the black marker pen...
And now the 5 desk cards have gone off in the post... so hope they prove to be happy mail of happy times for the 5 young adults tomorrow!