Showing posts with label Pop Out Z Fold Card. Show all posts

Friday, 21 September 2018

Happy Birthday to me again... Frosted Floral Pop Out Z Fold Card

Here is another beautiful creation sent for my birthday that I can share with you... and don't miss last week's post for the other birthday love & greetings I received...

This gorgeous card using the NEW Frosted Floral papers has been created by my lovely friend, fellow demonstrator and teamie Kate Martin...
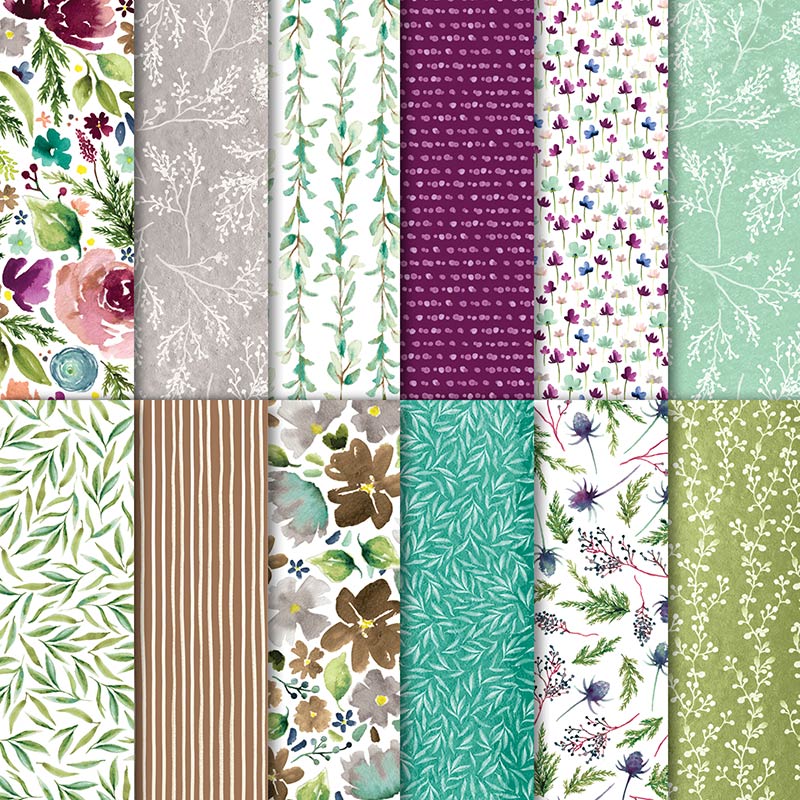
I should have put these papers in my Top 10 of Everything else post last week... as they are fantastic... but my brain was pre-occupied with Christmas makes at the time... so these slipped through the net... as they are all gorgeous and can be used all year round... and are particularly lovely as they have a soft sheen...
Frosted Floral 12" x 12" (30.5 x 30.5 cm) Specialty Designer Series Paper
Kate has also used the lovely Stitched Labels dies for the front feature...

And the Pop Out Z Fold card fold is one of my favourite folds over the years... for which I was originally inspired by a convention swap created by... yes you guessed it... Kate Martin...

You can find the tutorial for the 10.5cm Square version by clicking here... though this time Kate's is a larger 5" (12.5cm) Square version... so you need to cut your card 5" x 10" (12.5 x 25cm) and score when landscape at 1 5/8" (4.2cm) and 5" (12.5cm)

Again thank you so much Kate, Kate, Julie, Uma, Caroline & Cheryl ... I felt very special as I opened all the envelopes and revealed all these beauties...
And here are all my handmade cards together... though I do also have to thank everyone for the shop bought ones I received too...

Thursday, 25 January 2018

Love Island!

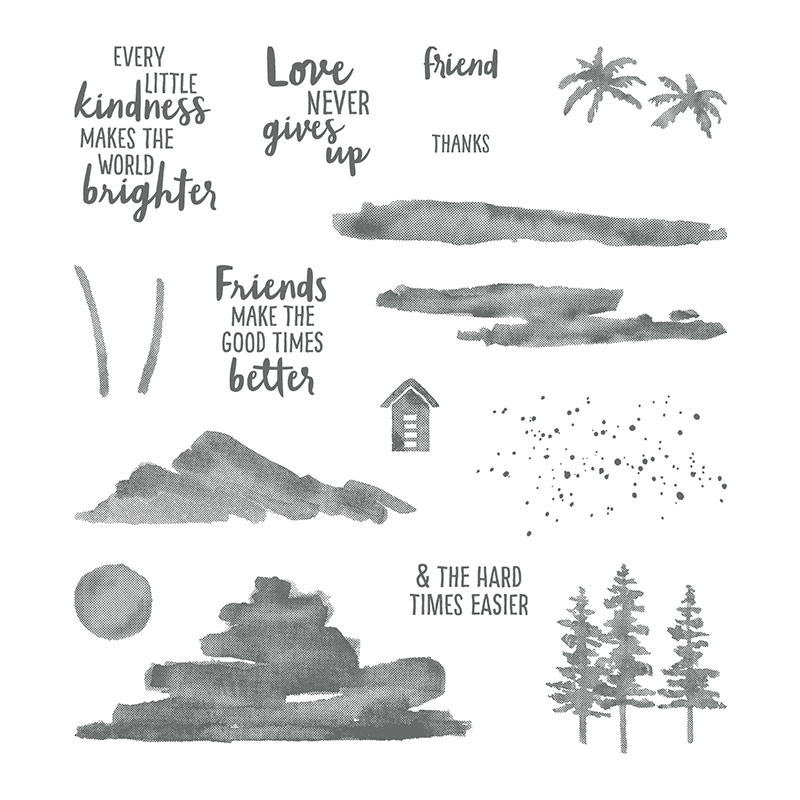
Bit of a play whilst I was designing this Waterfront stamp set card shared here... as I had to test out the palm trees as well... so here you go... a simple little scene...
Waterfront Photopolymer Stamp Set
An island in the middle of the sea somewhere... with a sole hut... made for just 2... or maybe Robinson Crusoe...

Simple stamped panel finished off on a Small Square Pop Out Z Fold card (Thanks again Kate!) for which the Tutorial was shared here... though I stuck down the central section on this one so the pop out is minimal!
Spot the details...

(1) shrunken hut ... I just inked the top half to get a shorter hut... (Soft Suede)

(2) shrunken palm trees off to the left... just inked part of the trunks stamp (Soft Suede)

(3) shoreline below the mountain created by just inking up one side of the long thin stamp ( Tranquil Tide)

(4) mountain stamped in Powder Pink at the top then Wisteria Wonder below...

(5) Greeting inked up using Wisteria Wonder ink pad and then the NEVER overinked using a Tranquil Tide marker...

Rest of detail as per the card shared here...
February classes here - or at your home (ie in the mail) - will be designed featuring this wonderful stamp set... so please contact me now to reserve a spot! I can't wait to really get going!

Monday, 30 January 2017

Let's look inside a card!

This is the final version of the Pop Out Z Fold cards I made for classes and my customer order-thank you cards this month - for which the tutorial is here

Have to admit that this is my favourite pinks version - the Sahara Sand card blank calms those pinks down well for me!!!

And thought I would share a little addition/tweak added on the spot! 
One of my class ladies was perturbed with writing her personal greeting on coloured cardstock... so I quickly added a 6.7 x 10cm (2 5/8" x 4" for my US readers) piece of Whisper White card on the back panel to "finish" off the card for her... easy!
Right - Blooms done and dusted!!! And a huge creative week ahead of me (which is code for no classes being run so I can create to my hearts content!! YAY!)

Wednesday, 25 January 2017

Avant Garden Palm Trees Duo

 
Couple more quick card ideas using the Avant Garden Palm Trees for which I posted the details for yesterday.

Edited to Add - but also click here  to see my favourite card using this concept...

First up a simple Small Square card with a panel trio... with wording from the Lift Me Up stamp set... seemed relevant!
The card is a 21cm (ie A4wide) x 10.5cm Thick Whisper White panel scored LANDSCAPE in half at 10.5cm to make the 10.5cm card blank... 

With a 9.3cm wide x 9.9cm high Soft Sky mat... which is stamped as yesterday's and then trimmed into 3 x 3.1cm wide panels. 
Unfortunately I had to drop this card format as my finished swap card as I realised the time!! Or rather lack of it... sorry girls! 

Second up... a Small Square Pop Out Z Fold card - for which the tutorial is posted here... though I stuck down the left hand side on this version....


Saturday, 21 January 2017

Blooms & Bliss Small Square Pop Out Z Fold Card Tutorial

Here is the rest of the batch of my January Blooms & Bliss Thank You cards... simple little Small Square Pop Out Z Fold cards which are really simple to make but that have really WOWed those that have seen or made them... 

You may notice that this Island Indigo and Mint Macaron batch is smaller than the pinks batch shared yesterday - no guesses as to which colour range has been favourite around here!! I can confirm that there are none of the Indigo/Mint papers left!

Here is the original format... with the same piece of paper used on the back faces - first shared here...
And so the tutorial for you... 

Edited to Add 30 Jan - see here for a useful addition & look inside the card

But before that... did I tell you that the Stitched Shape Framelits are now back in stock... I sincerely hope that they do not go out of stock again.... far too good!!
Metric Recipe - Small Square (10.5cm) Pop Out Z Fold Card 
Cardstock 21 x 10.5cm
Paper 10cm Square (or alternatively 6.7x10cm, 3.3x 10cm - and ignore step 4)
Paper 3x10cm 

Instructions
1. Place cardstock LANDSCAPE on trimmer
2. Score at 10.5cm & 3.5cm
3. Bone Fold into a Z Fold Card (Short as Mountain, Long/Centre as Valley)

4. Cut 10cm Square of paper at 6.7cm
5  Adhere 6.7cm (wider) paper to front left of card (TIP- right up to the RH score line) and narrower to inside back of card
6. Adhere 3 x 10cm paper to central section

7. Die cut the 2nd largest scalloped Layering Square
8. Die cut the largest Stitched Shapes square
9. Stamp & decorate as desired


10.Adhere all parts (TIP - think about where you want your glue  - I quickly put a line down centre, then a line either side - see visual!)

And an extra card for you - use the largest Scalloped Layering Square diagonally.... and then you have this version.... as first shared here... Perfect scalloped square size (for the metric version) Stamped Whisper White panel is 7cm (2 3/4")
Recipe (US readers) - Small Square 4 1/4" Pop Out Z Fold Card 
Cardstock 8 1/2 x 4 1/4"
Paper 4" Square (or alternatively 2 5/8" x 4", 1 3/8" x 4"- and ignore step 4)
Paper 1 1/4"x 4" 

US Readers Instructions
1. Place cardstock LANDSCAPE on trimmer
2. Score at 4 1/4" & 2 3/4" 
3. Bone Fold into a Z Fold Card (Short as Mountain, Long/Centre as Valley)

4. Cut 4" Square of paper at 2 5/8"
5  Adhere 2 5/8"(wider) paper to front left of card (TIP- right up to the RH score line) and narrower to inside back of card
6. Adhere 1 1/4"x 4" paper to central section
7-10 See above...

Friday, 20 January 2017

Blooms & Bliss Customer Thank You Cards in the Pinks!

Very quick share today as the photos have not all uploaded... so I need to search!  Luckily one came through so I can show you some of my endeavours today!

These are part of a batch that I have made to send to my customers with their January orders... along with a little something as a gift... I am feeling very organised with these this month!! A first time!!!

These are made in the same way as this one shared earlier... simple little card that has some WOW... Tutorial here...

Monday, 26 December 2016

Tuesday, 20 December 2016

Another Blooms & Bliss Pop Out Z Fold Card

Similar to the one shared here... but even simpler!

A "Square On" mat instead of diagonal... and flat stamped flower instead of fussy cut!
Simples!
Card tutorial here...


Wednesday, 14 December 2016

Blooms & Bliss Wishes Pop Out Z Fold Card

Quick little share today... featuring the lovely Blooms and Bliss papers and the Blooms & Wishes stamps

Inspired by my talented friend, teamie and fellow demonstrator, Kate Martin and her swap card from the On Stage Telford event in November... thank you again Kate!!
Mine is a slightly different size...but more on that another day... Edited to Add - my tutorial is here...

Great little card format....perfect for all those thank you cards you need to make for all those christmas thank yous!

Sunday, 16 October 2016

Staircase Card - The Tutorial - Making the Stairs and Card

Now I  know a lot of you have been patiently waiting for this one. So here it is... along with lots of photos to guide you on your way...

Like what I am providing... then please feel free to make a contribution via this link here . Any currency works... I prefer it this way rather than to have to charge for some of these more time consuming tutorials.... And it all goes towards new stamps etc so I can create and (hopefully) further inspire...

But before I share the steps... this is a slightly modified version of this one shared earlier. This is much more to my taste...

Much more subtle wallpaper this time using the Presents & Pinecones papers! (previous one just being masked and stencilled Cherry Cobbler cardstock) 

And the side/back wall papered too.... 

So here we go...

Metric (centimetres) Recipe from A4 card
Thick Whisper White x A4
Thick Whisper White 16.8 x 12.5cm
Paper Back 14.3cm Square
Paper Front Left 7.1 x 14.3cm (x2)  ( NOTE – this is wider than the 6.9cm wide that I would normally cut for this card type as I didn’t want a border to the RHS for neatness purposes through my staircase!)

US Imperial (inches) Recipe from 8 1/2 x 11" card
Thick Whisper White 8 1/2 x 11"
Thick Whisper White 6 1/2" x 5"
Paper Back 5 5/8" Square
Paper Front Left 2 5/8" x 5 5/8" (x2) ( NOTE – this is wider than the 2 1/2" wide that I would normally cut for this card type as I didn’t want a border to the RHS for neatness purposes through my staircase!)

And this is what you want to do....

1. Grab the piece of A4 card. (US 8 1/2" x 11")

2. LANDSCAPE. Score at 14.8 and 7.4cm. (US Score 5 1/2" and 2 3/4")
3. PORTRAIT. Cut at 14.8cm. (US Cut 5 1/2")


4. Pick up the thin strip.

5. Place PORTRAIT on trimmer with 2 score lines to top.

6. Line up at 2.5cm (US 1") to right hand side.
7. Cut from 14.8cm (US Cut 5 1/2") (ie central/2nd score line) to Top (ie 0). 
8. LANDSCAPE. 2 score lines/cut section to right hand side and thin (2.5cm/US 1") section to bottom

9. Line up at 14.8cm (US 5 1/2") (ie so central/1st score-line is on the groove!)
10. Cut from cut line (about 3.7cm/US about 1 1/2"?) to Top (ie 0)
11. Cut from Top of widest section to centre/top of 2.5cm (US 1") section (either with craft knife and ruler or with your trusty trimmer like I do!) 
Note – I have only drawn a line so you can see it! I wouldn’t actually do this myself…


12. Ink up and stamp greetings as required ( I recommend doing this now as a new section can be quickly re-made if your stamping is not as you want… you don’t want to be doing after you have stuck all you slats on!!!)

13. Grab your rectangular 16.8 x 12.5cm (US 6 1/2" x 5") white panel.
14. Cut diagonally.
Now my ladies have all been surprised at these next steps not being as difficult/time consuming as they first imagined…. Phew!!

15. Cut 12 x ¼” slats/risers (US - only 11 required) starting from the high side (TIP – make sure your orientation is in the same way as the card ie the top LHS will bethe same height as the highest slat on the left)

16. Grab your grid paper (inches) - or a ruler and pencil!

17. Turn wider/sloped section onto its back.
18. Mark every ¼” at top and bottom

19. Apply thin line of glue from top to bottom of highest ¼” section, miss a section, apply glue to next section etc… do as many or as few at a time as you like…
20. Stick longest slat/riser to highest ¼” section (Tip make sure your slope is in same direction as the base of your stairs!)
21. Continue until you have stuck all your 12 (US 11) slat/risers in place…. (TIP there is an an unequal sized gap at the end for the metric version!)

22. Stick papers. ( Tip I have lined up the front left to the centre as I don't want an ugly gap through my stairs!!!)

23. Concertina fold your base card and stairs strip (Note there should be a 2nd narrower piece of paper for that side wall in this photo shot!!!)
24. Adhere right hand side of the strip to the back right hand side

25. Adhere left hand side of the floating strip to the front left of the card (TIP - think about where you do NOT want your glue!!!)

22. Decorate as required.  As this is getting rather long and has so many photos…  I will do another post tomorrow with details on my decoration….