Sunday, 28 June 2015
Work of Art... Choo Choo Train!?
So here is something a bit different created with the Work of Art stamp set....
Seeing as the stamp set is on Weekly Deals this week... I just had to find this one to share with you... a true concept card... made a while ago... kept meaning to re-make as it was just created on a random piece of white card at the time... so today was the day to just add a couple of mats, photo and share! A true CAS card!
I keep telling you that my creative side works in the most mysterious of ways!
And I have just found another vehicle - inspired one too....! But that one one can be for tomorrow....
Remember that Work of Art has 25% off this week...but only till 10.30pm Tuesday night...
Sunday, 5 April 2015
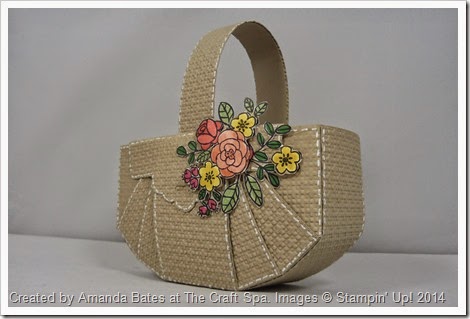
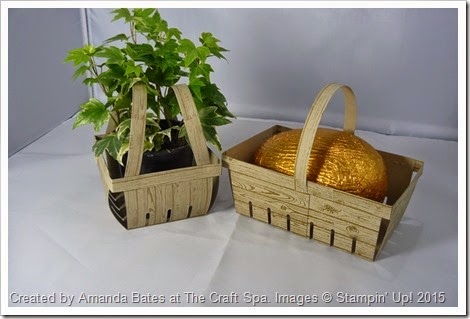
Garden Trugs using the Berry Basket die – and a Tutorial for an Extended Basket using less cardstock
Happy Easter to you all…I hope the Easter Bunny has been generous…
As my Easter Sunday Share - here is my Garden Trug range! With a tutorial for you too!
The extended double basket is slightly smaller than the previous double berry basket shared. I wanted the trug to fit my egg better so it wouldn’t roll around…but I kind of failed as the Egg is still slightly smaller than my trug! So much for my measurements!! But an oval aperture in an insert inside quickly fixes that!
But I did work out how to use less cardstock in the making of an extended basket! Details shared at the end of this blog post…
I also had a fail with the plant I bought for the single version too … the pot is slightly higher than the Berry Basket! So on the search for a lower pot….
So onto the extended Berry Basket…. see the link above for a video on a full Berry Basket…. but here are my tips…
Die Cut 2 Basket sides… Stamp as required…
Apply glue to one side of one Basket side ( I used Sticky Strip so you can see it!)
Adhere 2 Basket sides together… Note that I have positioned the sides so that all 6 slats are spaced apart equidistantly – which makes the basket narrower than the full Double Berry Basket version linked…
Cut 2 partial basket sides using 2 cardstock pieces of a minimum 3 1/2” Square size… I just used a scrap so it is slightly longer… Note I have just photoed one being cut so you can see what I am talking about…but you can easily do both at the same time (on top of each other or to each side of the die – or even cut one full side and then cut in half!)
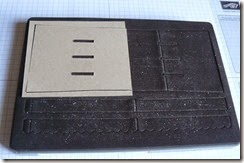
Apply glue to bottom side of partial bases
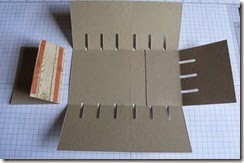
Adhere one to each short Basket side. You could then even cover this base with a card piece (mine would be a piece 3” x 5 1/2”)
And to finish off… you will need 3 of the die-cut straight basket tops in total ….
The long Basket sides of my extended Basket were 5 3/4”.
Add 1/2” to allow for the overage on either side of the Basket when assembled… Which makes 6 1/4”.
Trim one Basket top length so that it is 6 1/4” long plus the small end tab. ( see RH length in photo)
Adhere the other 2 (folded on the score-lines as the die intended) using the small tabs.
Trim the other long side as necessary as the last part of your assembly..
You will notice that I assembled the short sides first and then the long… easier for me to eyeball that way!
One other thing to note… this was another project rejected for my production-line Easter Baskets class… this time because of the stamping…. lining up the Hardwood slats in bulk would have proven far too hard!!
Saturday, 4 April 2015
MDS Berry Basket
Spotted this whilst spending some quality time on my favourite inspirational web site….yes you guessed it … Pinterest.
Jess Williams at The Paper Caper - a very clever demo in Australia has produced and shared this great template she produced using My Digital Studio (MDS) that you just print and then cut with the Berry Basket die…
But the template bunny was chopped into by the slats… So a quick stamp, colour and fussy cutting of my favourite Happy Easter Bunny…and there you have it… open top Easter Berry Basket made easy!
Thanks for sharing your genius Jess… this project is just FUN! And SO clever….
Wednesday, 25 March 2015
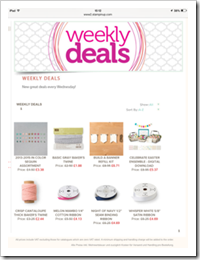
WOW! Great Weekly Deals this week….
Oh wow!! Great deals at 25% off this week… think this is the best overall selection so far!
Our favourite tool…. THE ENVELOPE PUNCH BOARD for just £13.46…I know some people that will be SO happy to see that on there…
3 very popular colour A4 cardstock packs (Pistachio Pudding, Crisp Canteloupe and Rich Razzleberry)… 24 pieces of card for just £4.69
The gorgeous Gold soiree papers…that co-ordinate SO well with the Pistachio Pudding & Crisp Canteloupe!! Oh and I have a lovely creative share using these papers…coming soon…
And the Rich Regals Designer Paper Stack and Wisteria Wonder Seam Binding Ribbon
Click on the picture to go straight to the page for full details….
I will next be ordering early Tuesday evening - so these deals will still be live then….
OR for those ordering on-line – remember to quote Hostess Code BHCXUM6C on your order… and a little gift will arrive separately in the post from me for any order over £20 (before P&P)
Tuesday, 24 March 2015
Sheer Perfection Vellum and last week of Sale A Bration….
Oh… am I glad I got my hands on some of the SAB promotion Sheer Perfection Vellum. It is gorgeous!
Now only available with a £45 order until next Tuesday, 31st March… Yes only 7 days left of Sale A Bration 2015… so… my last SAB order will be going in on 31st March
I spent a fabulous 2 hours at the weekend with my markers and embossing stylus – just playing around!
Oh and loving the twisted triple Thick Bakers Twine too…
If you look closely you will see about 10 different embossing patterns!!
So here are a few cards made with my endeavours….
I have 3 more sheets all coloured and ready to go… but I don’t think I will get to make any cards with those until the weekend…
If you are not sure how to colour vellum & the Sale A Bration Irresistibly Yours papers …here is a You Tube video just released from Stampin’ Up! to give you some techniques…. lots of other colouring videos there too… be sure to check a few out!!
Apart from the “yellow flowers” card…. notice the colours I have used… these are the In Colors that will soon be leaving us…. Coastal Cabana, Strawberry Slush & Pistachio Pudding on the butterflies…and Crisp Cantaloupe on the other flowers… Also Baked Brown Sugar to make up the five 2013-15 In Colors.
If you like these colours – stock up now. If you want the markers – buy them now… If you have the inkpads…make sure you buy the ink refills now.
Do not wait till 1st May when I post the Retiring List… they are usually out of stock by the early hours of 1st May!! Every year… I always have a disappointed customer... This year… I don’t want that to be you!
Friday, 20 March 2015
Double Berry Basket for Two! Keeping it Simple!
Sometimes things just have to be kept simple! And this really was for me… as I even had the wreath image from For The New Two left over and ready to go! But it was just SO perfect…
So here is a simple way to present 2 chocolate Easter eggs at one go… a double Berry Basket…
Want to make one for yourself… you just need the Berry Basket die and go to fellow US demonstrator, LeeAnn Greff’s blog here to see a video tutorial she has posted on how to double it up…
Loving my Berry Basket die… I have a long list of Things I Want to Make…wonder how far I will get down it! 3 made so far….
Wednesday, 18 March 2015
Free or reduced Embossing Folders anyone? Even more Sale A Bration items for you & Weekly Deals
This is my second post today – go straight here to see today's creative share …
Wow! Stampin’ Up have just released even more items that you can earn for free during the Sale A Bration promotion. Great items for those that love their embossing folders…
One free for every £45 ordered. But remember this promotion ends soon…31st March…only 2 weeks to go… and all these promotional items are now only available while stocks last…
Just click on the pictures to go straight to the “big” flyers
And so as to have all of the promotional SAB items in the one place … here are the new SAB items released at the beginning of the month….
And here are the original set released in January…. remember that the Blendabilities are no longer available.
And if that is not enough good news… here are the Weekly Deals released today…ending next Tuesday. Even more embossing folders to choose from … Again just click on the picture to go to the big screen version!
Sunday, 15 March 2015
Early Easter Sunday!? A round–up!
Looking at my blog hits recently…. you can tell that Easter is coming up and that us crafters are busy making our special treats for Easter.
So I thought I would do a quick round up post on previous Easter Project posts that have been proving popular on this blog at the moment!
Click on the project picture and you will be taken to the original blog post… many with tutorials… though please do bear in mind that some of the products used in these projects are no longer available to purchase from Stampin Up!
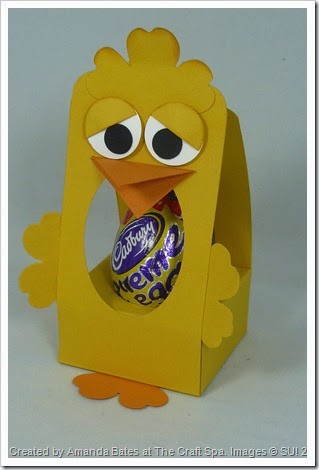
Tutorial for Tag Topper Punch Easter Chick
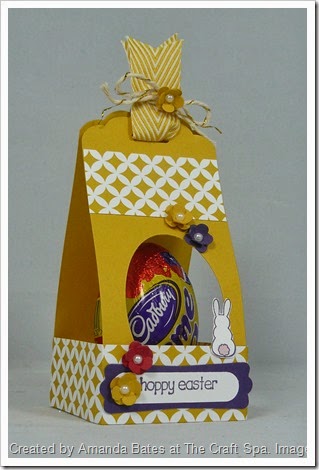
Giant Cadburys Creme Egg meets the tiny Easter Bunny!!
Small Tag Topper Punch Easter Basket Tutorial
Large Tag Topper Punch Easter Basket Tutorial
Easter Chick Fancy Favour Box with How To Pictorial
Easter Bunny Fancy Favour Box with a How To Pictorial
Easter Lindt Bunny Explosion Box
Top Note Die Easter Bunny Bag
Easter Lindor Chocolate Egg Butterfly
Nursery Suite & Easter Bunny Punch Art / Ferrero Rocher Holder
Tuesday, 10 March 2015
Many Marvellous Markers share
I have some customers interested in buying the markers but spreading the cost over 4 months. So would you care to join us?
Never be lost for a co-ordinating Stampin’ Up! colour again!
Quickest & cheapest way to build up your colour collection (apart from buying the full box at one go! )
Collect the full set of 38 colours over 4 months … and the fabulous Big Storage Box too.
Just £22.50 per month for 4 months. Includes P&P. Deliveries April-July 2015
OR add 10 In Color markers for an extra £5.50 monthly (ie £28 per month) – or for a 5th month at £22.50…
All 38 colour marker pens in our 4 colour collections in one sturdy carrying/storage case with extra space for 10 In Color markers.
RRP £89.95
* Dual tipped markers: 0.5 mm fine point and flexible brush
* Set of 38, packaged in rigid plastic case with handle
* Includes colours from all 4 colour collections (not Whisper White and Very Vanilla)
* Odorless, water-based dye ink
* Coordinate with Classic Stampin’ Pads and exclusive Stampin’ Up! Cardstock
8/10 markers will be posted to you monthly from April 2015. The big box will be delivered in the 4th month.
Just email me, Amanda Bates at thecraftspa@gmail.com - by 24th March - for more details.
Sunday, 1 March 2015
Large Painted Petals Wreath card
And here is the last card of the Painted Petals series we made this week. A large but straightforward 7 1/2” Square card for special ladies for Mothers Day or Birthday – or any occasion really!
So I used the fabulous – but often overlooked - “leaves image” in the Crazy About you stamp set. And as it is a solid image…yup you guessed it – we were all kissing again! This time with Wild Wasabi on the I Love Lace background stamp & Pistachio Pudding on the leaf.
8 leaves – and a bit of hand cutting & finger squeezing to give definition later – and you have a great wreath. The leaves were just arranged around a circle which was just drawn around the outside of the largest circle framelit.
Tip for you though – make sure you stick the end leaf over the narrow stem part. ( we all naturally arrange it the other way ie placing the narrow stem under the leaf – which is fine for a dry run… but do the sticking the other way – as it is a lot simpler and faster! This will mean nothing as you read this – but it does makes total sense when you are doing it!
And the flowers are again just hand cut & defined using a thick mat and embossing stylus– mainly just the trio from the 5 flower image as they are the easier part to cut out…. I did actually start with cutting out the full 5 part flower and leaves image – but then I realised there would be an hour of cutting instead of the 15 minutes of this version – looked great but that 3/4 hour had to be cut!
The Mothers day wording is also from the Crazy About You stamp set. I LOVE that you can place the HAPPY next to the separate MOTHERS Day on the block and just stamp away. Though I have to admit that I cut away a tiny bit of surrounding plastic to achieve the exact same spacing between the words…
And this is die cut using the great shape in the Project Life Framelits set – just perfect for the banner shape needed…
And all finished off with a bit of simple stamping inside the card…
Oh and I have a few other variants to share of this card tomorrow….
Wednesday, 25 February 2015
Another Painted Petals card to go in the box! Plus NEW Sale A Bration products…And Weekly Deals updated…
Well the Painted Petals cards & box shared yesterday went down very well at todays class…
My friend and fellow crafter, Zoe was particularly delighted to make all of her 4 Mothers Day cards plus a spare for any occasion as well as a box for chocolates and a special make for Mothers Day presents…. More on the extras another day!
But I had to pop onto share Zoe’s version of the “Amazingly Amazing heart card” – made so as to fit the HAPPY MOTHERS DAY greeting – love this version Zoe…. told you I had to share! Thanks for letting me….
Oh and before I go… here are this week’s Weekly Deals – I think I can see a “Happy Easter banner” being created here in March and a ribbon stock up too!
I will be ordering Sunday 1st March if you are after anything…. and do remember that you can earn a free Sale A Bration (SAB) item for every £45 you spend… and …even better… spend £50 + and you can have a free Craft Spa class in March too (worth £12.50)
And talking of Sale A Bration… I am delighted to tell you that there are 4 new items that you can earn for free during March. These are in addition to those previously published.
Little sneak peek pictures below… don’t know why the Coastal Cabana colour in the Thanks card etc looks like such a vivid green!! - but go here for full information…. I personally can’t wait to get my hands on those vellums and the large THANKS stamp!