Showing posts with label Simple Easel Card. Show all posts

Tuesday, 9 March 2021

Tuesday Trio - Geraniums....

So as I was kitting out the Welcoming Window Class in the Mail... I thought I should add a simple but fun fold card to the pack... just to say Thank You...

But time was of the essence... so a simple easel card with geraniums fit the bill... and so making a nice little trio of geranium cards for you...

Love how the planter makes the perfect "stop" and greeting label for the card... with those flowers strategically placed below the window...

Bricks stamped repeatedly in Sahara Sand using the brick stamp in the set... and then Sahara Sand ink brush blended (or sponged) over the top...

Missed out on the first round of the Welcoming Window Class in the Mail kit... 

Well never fear... second round requested and now on for the product bundle with the 10 card free class kit in the UK ... Close date 23rd March... though actually the card kits can be with you within 5 days (on a first come first served basis... as I prepped a few more as I was doing the first round)

Live elsewhere or already have your own Welcoming Windows.... you can just buy all the tutorials for not 8... not even 10.. or 14... but actually 15 cards... in a whopping 19 pages of step by step photo tutorials in PDF format...

PS this Simple Easel card is not included in the Tutorials... But just score a LANDSCAPE 21 x 10.5cm piece of card at 5.25 and 10.5cm (or for US Letter.. trim & score a LANDSCAPE 8 1/2" x 4 1/4" piece of card at 2 1/8" & 4 1/4") and mountain bone fold both score lines

Friday, 24 January 2020

Meant to Bee....

Or should I say... when is a "bee" not a "be"...

Short and sweet for today... as I am full of cold this week... so nothing has quite gone to plan! But I just had to pop on and share...
Easel Spinner card tutorial and more details here... and today's papers are just the reverse of the papers used in that card...

Bee fussy cut from the Golden Honey papers (from the centre of the die cut heart)
And extra "e" from the "Be" on the Meant To Be stamp - just the "e" inked up using a marker pen... and lined up using my tried and trusted (but sadly retired) Stamp A Ma Jig....

But do make sure your stamp is VERY clean before you do this...

Friday, 17 January 2020

Golden Honey Valentine Easel Spinner Card with Tutorial

I am always asked for a Valentine card and a treat holder in classes at this time of year... But I find it difficult to use all the red and pinks papers and accessories that Stampin' Up! spoil us with... such as From My Heart... 

As these cards are destined for husbands rather than for general circulation...  So "black", red and white is really the only way to go!
Well it is this year as we have the lovely Golden Honey papers (free with a £45 order during SaleABration)

I always find that the menfolk like a fairly monochrome card... though a Valentine card without red would seem strange! And a card that moves, pops or generally does something interesting!!
And so I had a brainwave... or so I thought! A spinning heart (nothing new there)... but in an easel card... as I hadn't seen one of those before...

Though I have just Googled "Easel Spinner Card" and found a few variants on a theme... so also called Suspension Easel Card, Spinning Easel Card and  Easel Suspension Spinning Card... But Easel Spinner Card has already got stuck in my head! And it easier to say!  Some of these posts also have tutorials and videos ... but note that these versions appear to be made in a couple of different ways...

Though looking at the photos you can't actually see the aperture... with the invisible thread! It looks more like a grey heart behind the red/white heart!
But rest assured there is an aperture for that heart to spin around madly as the card is opened up... just remember to "prime it" by twisting it around on the thread before inserting it in the envelope...

Craft Spa Recipe
Thick Whisper White 10.5cm x A4L (US* 4 1/4" x 10 1/2"
Papers 9.9 x 9.3cm (US * 4" x 3 1/4") 
Inks - Real Red, Gray Granite
Stamps - Meant To Be , Family Party
Dies - Sweet & Sassy (retired) (alternatively use Stitched Be Mine dies OR the new Heart Punch Pack in a differently shaped aperture)
Punch - Classic Label
Invisible Thread x 9cm
* Please note that the US dimensions are the nearest converted equivalent using US 8 1/2" x 11" cardstock... Please use cm measurements with A4 card)

Craft Spa Tutorial
1. Score LANDSCAPE White card panel at 9.9cm (US* 3 1/2") from either side
2. Mountain Fold both scorelines
3. Line top paper onto front/top face of card and die cut aperture through both layers at same time
4. Ink up, stamp  and die cut/punch greetings
5. Adhere thread above and below aperture on front (Tip- use your Grid paper to get things straight!)
6. Adhere papers to cover glue for thread
7. Turn front/top face of card over and place white heart (back face) under thread and stick in position with tape
8. Adhere red heart over back
9. Adhere all parts (Note that the HUSBAND is adhered using mini Stampin Dimensionals)


Friday, 27 July 2018

Fancy Fold Friday - Broadway Bound Swing Easel Card


A really quick share for you today... with the last of the Broadway Bound  & Broadway Birthday Swing Easel card series...
Sorry this is so quick a share... but sometimes things aren't as you think they will be and then they just get in the way of your To Do List!
But I had to share as I think this one ended up as my favourite!! Who would have thought...
Original Cut & Score card Tutorial here (which was used for this card) ... Simpler Die Cut & Score version Tutorial here!!! (which is how I will make it in the future!!)
This one is definitely worth a try!!

Friday, 13 July 2018

Fancy Fold Friday Tutorial for the Simple Swing Easel Card

So as I was busy creating Swing Easel cards for my July classes... a sudden "paper-engineering" thought came upon me... and the trial luckily proved VERY successful...

So put away my original cut and score method for the Swing Easel Card... and try this simple way instead! It is definitely a lot simpler...
But whilst I am in the process of converting all of the Swing Easel Card Tutorials to this Simple method... just click here for the A4 cardstock version...or here for the 12x12 cardstock version... and the same card size 5 1/2" (14cm) square one is here...

So this is another 5 1/2" (14cm) Square card size.... or as we say around here ... the one size fits all the world version!!
So without further ado... here are the Tutorials...

First up a pdf version of the Card Tutorial... for you to click...and download/save/print...
Second up ... the written version with an extra picture of the crosspiece position... and extra details of the final decoration... as well as the Shop links in the Recipe...


Craft Spa Recipe
Card Gray Granite 14 x 29 cm (5 ½” x 11⅜”*)
* With US Letter card… cut 5 ½” x 11”for card blank and separate 5 ½” x 3/8” for the crosspiece
Paper (Top) 13.5cm (5 ¼”) Square
Paper (Base) 13.5cm (5 ¼”) Square
Card Basic Black 9cm (3 ½“) Square
Card Gray Granite 8.5cm (3 ¼”) Square
Card Whisper White 8 cm (3”) Square
(D) Basic Black 5 x 10.5cm (2 x 4”) (for die-cutting WISH)
Papers – Broadway Bound
Stamps – Broadway Birthday
Punches - Classic Label
Dies – Broadway Lights, RETIRED Squares Collection OR Layering Squares with front aperture slightly smaller
Embellishments  - Metallic Pearls

Craft Spa Instructions
1.      LANDSCAPE. 28 cm (11”) on Trimmer Top Bar and cut across whole of card and retain the cut-off 1cm/3/8” sliver as a crosspiece…
* NOTE - With US Letter card… cut 5 ½” x 11”for card blank and  5 ½” x 3/8” for the crosspiece separately

2.      LANDSCAPE. 14cm (5 ½”) on Trimmer Top Bar. Score across whole card
3.      Mountain Bone Fold
4.      Place in a tent fold orientation (ie with score across top)
5.      Adhere Top and Bottom papers

6.      Cut out Top aperture with trimmer at 2.5cm ( 1”) all round
ie Line up at 2.5cm
( 1”) ; Cut 2.5 to 11.5cm ( 1-4 ½ “) ; Turn 90degrees, Cut 2.5 to 11.5cm( 1-4 ½ “) … and so on…
OR Die cut the Top central square aperture using the largest RETIRED Layering Squares die…  TIP – draw diagonal lines from tip to tip if you need help lining up centrally with a die)
 
7.        Place opened out card blank back on trimmer LANDSCAPE with aperture/top papers to the right hand side…
8.      Score top and bottom sections at 8”, 8 ½” and 9”
9.      Fold the 2 side sections as Mountain, Valley, Mountain. 

10.  Open out in tent fold orientation (ie with aperture to Top)
11.  Adhere the sliver to first/bottom (mountain) section

12.  Fold back over with card in tent fold orientation but closed
13.  Apply glue to front face of sliver
14.  Adhere largest square mat…lining up carefully with your card aperture!

15.  Decorate as necessary
I left it fairly simple for this one...
(a) Gray Granite stamped Hooray, with gold embossed Hooray dots over.. plus metallic pearls
(b) die cut hats from the papers
(c) Die cut Basic Black Wish... with another metallic pearl on the dot of the "i"
(d)  "MAKE A" stamped in Black and then punched with the 
Classic Label punch.. popped up with mini 3D foam dimensionals...  And you will be delighted to know that you can stamp the "MAKE A" image as it comes (ie with the line underneath) as the punch spacing just removes the line!

Sunday, 11 March 2018

Lets drink coffee... in a Charming Cafe...


I wanted to just make and send a card to a very good friend who has moved away...

We used to spend a lot of time catching up over an unplanned cup of coffee here (or a glass of wine depending on the time of the day) and I really miss that time with her!

So Charming Cafe and Balloon Celebration to the rescue... and a simple little card to say it all... will make a nice change from our usual texting service!
And a card when spotted .... now selected by some of my ladies for April classes...

And the details for the rest of you... as sadly you can't come to make it in class!

A small square simple (aka simplest!) easel card... 10.5cm x 21cm cardstock, scored in half LANDSCAPE at 10.5cm and in half again at 5.25cm (or with US Letter cardstock... 4 1/4" x 8 1/2" piece, scored at 4 1/4" & 2 1/8") Centre line valley folded, quarter line mountain/peak folded...
With an Old Olive 7cm (2 3/4") Square mat and a 10cm (4") square Delightful Daisy paper panel on the base...

A largest and smallest die cut Stitched Shapes square... stamped as required... and then some craft knife action to remove the window inside the frame!! Scary... not done that for a very long time...

And a couple more stampings of the window & canopy scene...
One in Memento Black on Whisper White card to hand cut the Stampin Blends Bermuda Bay & Old Olive coloured canopy...

One in Staz On Black on Window Sheet to colour with Dark Pool Party Stampin Blends and pop behind my hand cut aperture...

Plus a Memento Black stamping of the chairs and table on Whisper White for more Stampin Blends colouring in Bermuda Bay, Old Olive, Smoky Slate lights and dark Pink Pirouette
And the rest is just assembly and sticking... everything stuck with Stampin Dimensionals to add to the 3D effect... apart from the Window, Old Olive mat and the paper panel...

Monday, 9 May 2016

Gold & Vanilla Botanical Blooms Two Ways

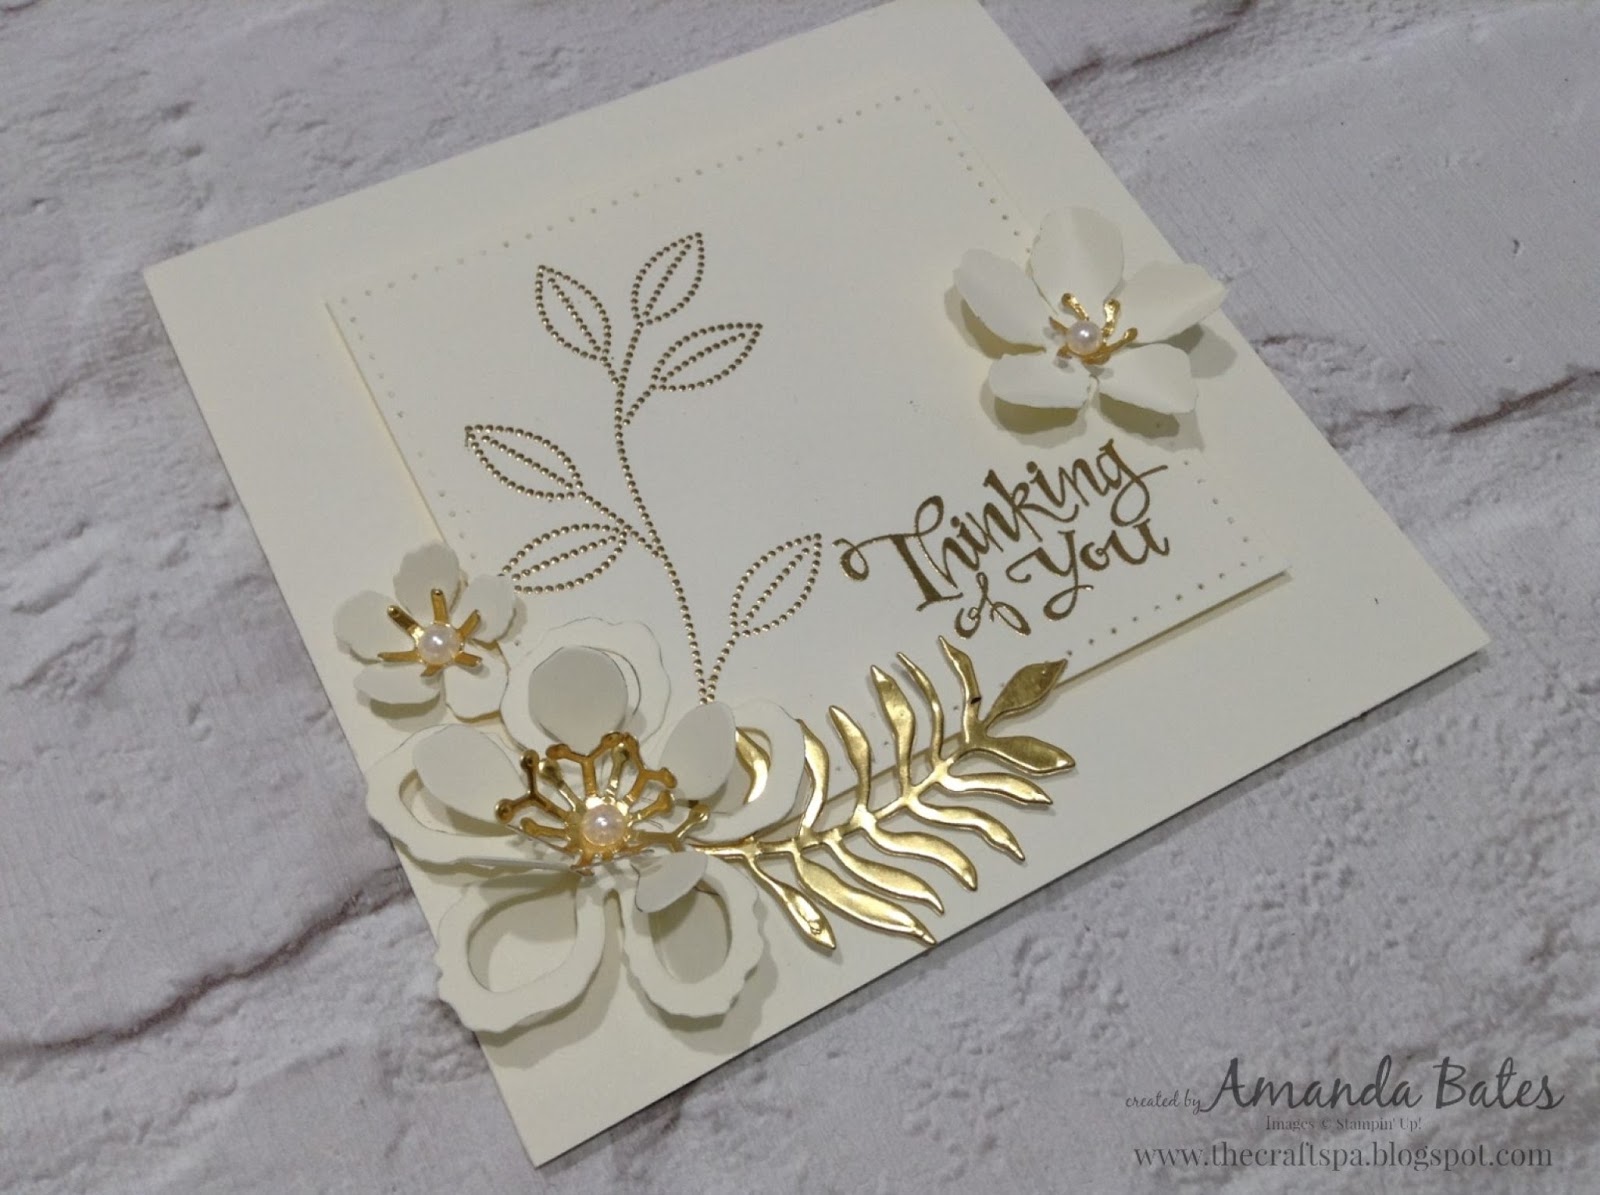
Can't get the Botanical Builders die-cut and used much simpler than this... Very Vanilla flowers with gold foil centres...finished off with pearls in the centre... and gold foil leaves...

The cards are both made from the same 12.5cm card blank... the right hand just as a standard card blank... the left hand as a Simple Easel Card...
So (as some of you asked for directions) cut a piece of card 12.5 x 25cm... (5x10")

For the standard card blank...  score your LANDSCAPE panel at 12.5cm (5")

For the Simple Easel card... score your LANDSCAPE panel at 6.25cm (2 1/2") and 12.5cm (5") 
The square panel is just a 9cm (3 1/2") Square - finished off with simple paper piercing using the (very sadly retiring - but reduced!) Essentials Paper Piercing pack on the right - with the addition of Faux Stitching on the left (I used a crafty stash gold metallic Sharpie pen)

The paper is from the Botanical Gardens paper stack (12 cm or 4 3/4") Square. It is used also used on the inside of the standard card  - but with an extra Very Vanilla panel with the inside greeting and gold embossed leaves... sorry no photo taken... 

The gold embossed stamped leaves are from Grateful Bunch and again I have used the retiring (but also reduced) Sassy Salutations for my gold embossed wording
Simple, elegant and suitable for any occasion... 


Saturday, 9 April 2016

Circle of Spring Simple Square Easel Card

So here is another version of the Simple Square Easel Card posted previously here and here...

Simple blender pen coloured Circle of Spring wreath on Shimmer card

Crumb Cake paper (from the Neutrals 12x12 paper stack) card & ribbon colours and Mint Macaron leaves and highlights so that any colours could be chosen in class for the flowers... I used Blushing Bride...

And have to laugh as this post was scheduled (incorrectly as it didn't work!) quite a while ago... as you can see from the greeting!! But wait all is not lost after all... isn't Mothers Day in US in May??

And apologies... yet again the Mum sentiment is from the retired For My Family stamp set... Fingers crossed Stampin' Up bring us a new updated variant of this set in the new Annual Catalogue... my toes are crossed too!!!

And finally... fellow UK demos... looking forward to seeing you at Telford... not long now!!! I would love to know if you are going and hope to meet many of you if so...

Friday, 4 March 2016

Balloon Celebration Dandelions Simple Easel Card

So this is the image potential that sold this set to me at first sight! Think you could say I have a thing about the blowing of dandelions in the wind!
I am delighted that the 2 little seed images can be used to produce this image... you will be seeing more of this in the future... including a  step by step photo tutorial when I re-create it later on in the week....
But for now... I will draw your attention to the most perfect papers for such an image.... 

They are to be found in the free Wild Flower Meadows Sale A Bration papers (choose a pack for free with every £45 ordered until 31st March. Many other items available!) I squealed when I saw these!

The paper used on the base is also in there... and just in case you are wondering where it is!!! I just got my blender pens and ink pads out and added a bit of colour to tie everything in...

Friday, 19 February 2016

Simplest Easel Card Tutorial

Remember this Simple Easel Card from earlier in the week... well I promised you the How To Make This Card... and here it is... although don't blink as you may miss the Tutorial...

1. Pick up a piece of A4 card
2. LANDSCAPE. Score at 10.5cm
3. LANDSCAPE. Score at 21cm
4. Bone Fold
5. Decorate as required and pop in a DL envelope!

Only taken me 12 years of papercrafting to think of this Simplest of Simple but a bit more special than a single score card!!! I think you may see a few variants pop up here over the next few weeks... my girls loved it for its simplicity!!

Apologies to my US readers... DL probably doesn't mean anything to you... (and I don't know if you have any equivalent) but it is a standard size envelope over here - commonly used for business purposes - but nice size for greeting cards too... 


Tuesday, 16 February 2016

Kissing Beetles Simple Easel Card AND New Sale-A-Bration Products

You have seen the Beetles  - and how to make them - before... post here
But they have been dressed up slightly for Valentine's Day...
And now reside on the simplest folded card ever... it is an Easel Card ... though not sure I can really call it a Fancy Fold... as it is just too simple.... maybe just Simple Easel Card... more details on Friday!
But for today... here are the 3 new Sale A Bration promotional items that have been added today... one free for every £45 ordered... Check out the product videos just released by Stampin' Up! too...


First off... Party Pants... fabulous for all our balloons! Balloons with greetings on certainly makes my day!
And here is the Party Pants video.....

Secondly... Metallics Glitter Tape... glitter washi tape springs to mind.... 
And here is the Glitter Tape video...

And last but not least... Pedal Pusher...lots of these images are going to work so well with my favourite Beautiful Ride Beetle car.......
But the tandem bike is rather cute too! Here is the video....
Can't wait for my next box to arrive with these new goodies in !!

Though I will miss the following 3 Sale A Bration promotional items - which are now officially no longer available... Sky's the Limit, Hello and Perfectly Artistic papers....